Iceberg Data Lake
On This Page
Edge Pipeline is currently available under Early Access. You can request access to evaluate and test its features.
Apache Iceberg is an open-source modern table format specification designed for managing large analytic datasets. It defines a metadata model that:
-
Decouples Metadata from Data Files, allowing compute engines to query smartly without scanning all files.
-
Supports Robust Schema and Partition Evolution by tracking changes over time and using stable identifiers, such as partition field IDs and column IDs.
-
Enables ACID Transactions and Time Travel with immutable snapshots that record every commit.
-
Supports Versioning, allowing tables to be rolled back to a previously stable state.
-
Scales to Very Large Datasets through the use of manifest lists and manifest files for efficient file management.
Structure of an Iceberg Table
The three main components of an Iceberg table are the:
-
Catalog: The Iceberg catalog is a centralized system responsible for managing and organizing table metadata. Query engines, such as Spark, Trino, and Hive, do not directly reference the metadata files. Instead, they interact with a catalog to discover, create, update, and drop tables. Currently, Hevo maintains your Iceberg catalog in an AWS Glue database.
-
Metadata: This layer stores structured information (metadata) about an Iceberg table in files in your S3 bucket. It contains the metadata files, manifest lists, and manifest files.
-
A metadata file, typically stored in JSON format, contains details such as the table’s schema, partitions, and snapshot history. A snapshot tracks all the files in an Iceberg table at a specific point in time.
-
A manifest is an immutable Avro file containing detailed metadata about a subset of data files in your Iceberg table. Each file includes information about file paths, partition values, and statistics, such as row counts and the min/max values. A manifest list acts as an index and points to a collection of manifest files.
-
-
Data: This layer comprises immutable files containing your actual data records. The data files can be written using columnar format, such as Parquet, or row-based format, such as Avro. At this time, Hevo loads the ingested data using the Append mode and writes them as compressed Parquet files into your S3 bucket.
You can configure Iceberg Data Lake as a Destination in your Hevo Edge Pipeline to leverage its reliable and efficient framework for handling extensive analytic datasets.
Prerequisites
-
You have an active AWS account and an IAM user in the account with permission to:
-
An Amazon S3 bucket is available. Refer to the Create an Amazon S3 bucket section for the steps if you do not have one.
-
An AWS Glue database is available. Refer to the Create a Glue Database section for the steps if you do not have one.
-
The IAM role-based credentials are available to enable Hevo to connect to the S3 bucket and Glue database.
Note: Your Glue database and Amazon S3 bucket must exist in the same AWS region.
Create an AWS Glue Database (Optional)
Note: The following steps must be performed by a Root user or a user with administrative access. In AWS, permissions and roles are managed through the IAM page.
-
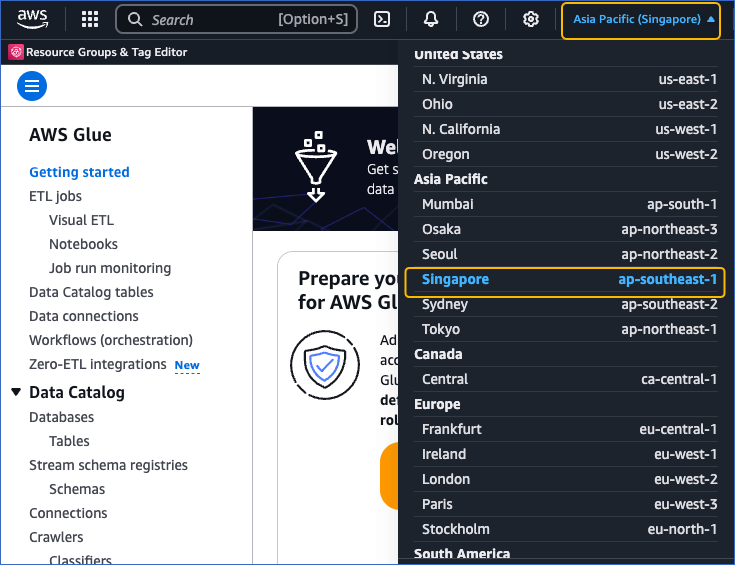
Log in to the AWS Glue Console, and at the top right corner of the page, click your current AWS region.
-
From the AWS region drop-down list, select the region that is the same as your S3 bucket. For example, Singapore. It is recommended that you co-locate your S3 bucket and Glue database in the same region as your Hevo account for faster access.
-
In the left navigation pane of your AWS Glue dashboard, click Data Catalog, and then click Databases.
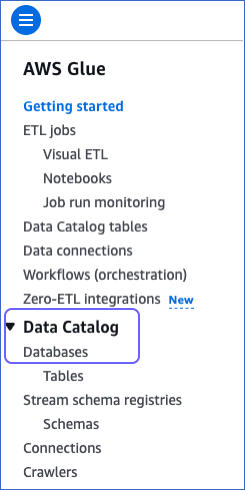
-
On the Databases page, click Add database.

-
On the Create a database page, in the Database details section, do the following:
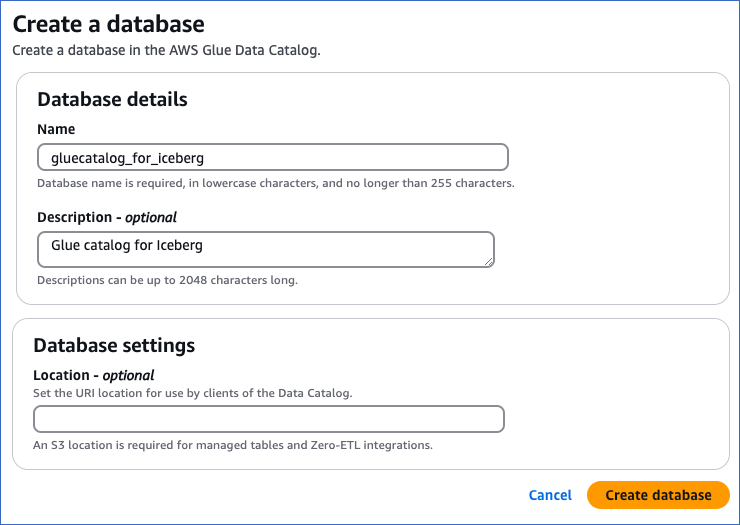
-
Specify a unique Name in lowercase for your database, not exceeding 255 characters.
Note: The database name must not contain hyphens.
-
(Optional) Provide a Description for the database.
-
-
Click Create database to add your AWS Glue data catalog. You can specify this database while configuring Iceberg Data Lake as a Destination in Edge.
Create an IAM Policy for the S3 bucket and Glue Database
To allow Hevo to access your S3 bucket and Glue database, you must create an IAM policy with the following permissions:
| Permission Name | Allows Hevo to |
|---|---|
| s3:GetObject | Retrieve the Iceberg metadata for a table from S3 |
| s3:PutObject | Write the Iceberg metadata and table data into S3. |
| glue:CreateTable | Create Iceberg tables when loading to a new table. |
| glue:DeleteTable | Delete Iceberg tables during truncate and load. |
| glue:GetTable | Append data to an existing table. |
| glue:GetTables | List all tables. |
| glue:UpdateTable | Alter a table during a schema change. |
| glue:GetDatabase | Retrieve the details, such as name and catalog ID, of the specified database. |
Perform the following steps to create the IAM policy:
-
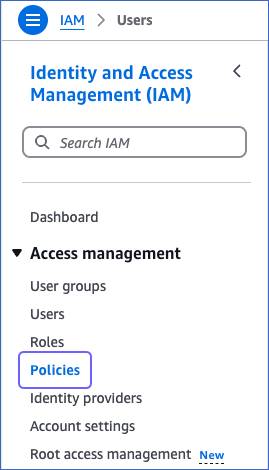
Log in to the AWS IAM Console.
-
In the left navigation pane, under Access management, click Policies.
-
On the Policies page, click Create policy.

-
On the Specify permissions page, click JSON.

-
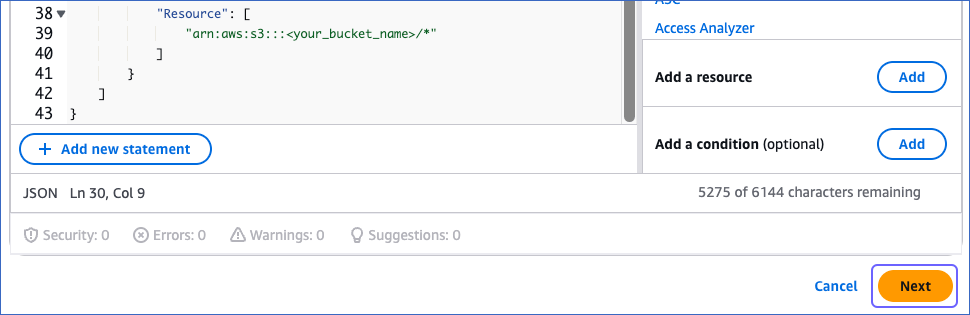
Paste the following JSON statements in the Policy editor:
{ "Version": "2012-10-17", "Statement": [ { "Sid": "GlueTable", "Effect": "Allow", "Action": [ "glue:CreateTable", "glue:DeleteTable", "glue:GetTable", "glue:GetTables", "glue:UpdateTable" ], "Resource": [ "arn:aws:glue:<aws_region>:<your_aws_account_id>:table/<your_glue_database>/*", "arn:aws:glue:<aws_region>:<your_aws_account_id>:catalog/<your_glue_database>", "arn:aws:glue:<aws_region>:<your_aws_account_id>:database/<your_glue_database>", "arn:aws:glue:<aws_region>:<your_aws_account_id>:catalog" ] }, { "Sid": "GlueDatabase", "Effect": "Allow", "Action": "glue:GetDatabase", "Resource": [ "arn:aws:glue:<aws_region>:<your_aws_account_id>:catalog/<your_glue_database>", "arn:aws:glue:<aws_region>:<your_aws_account_id>:database/<your_glue_database>", "arn:aws:glue:<aws_region>:<your_aws_account_id>:catalog" ] }, { "Sid": "S3Object", "Effect": "Allow", "Action": [ "s3:GetObject", "s3:PutObject" ], "Resource": [ "arn:aws:s3:::<your_bucket_name>/*" ] } ] }Note: Replace the placeholder values in the commands above with your own. For example, <your_glue_database> with gluecatalog_for_iceberg.
-
At the bottom of the page, click Next.
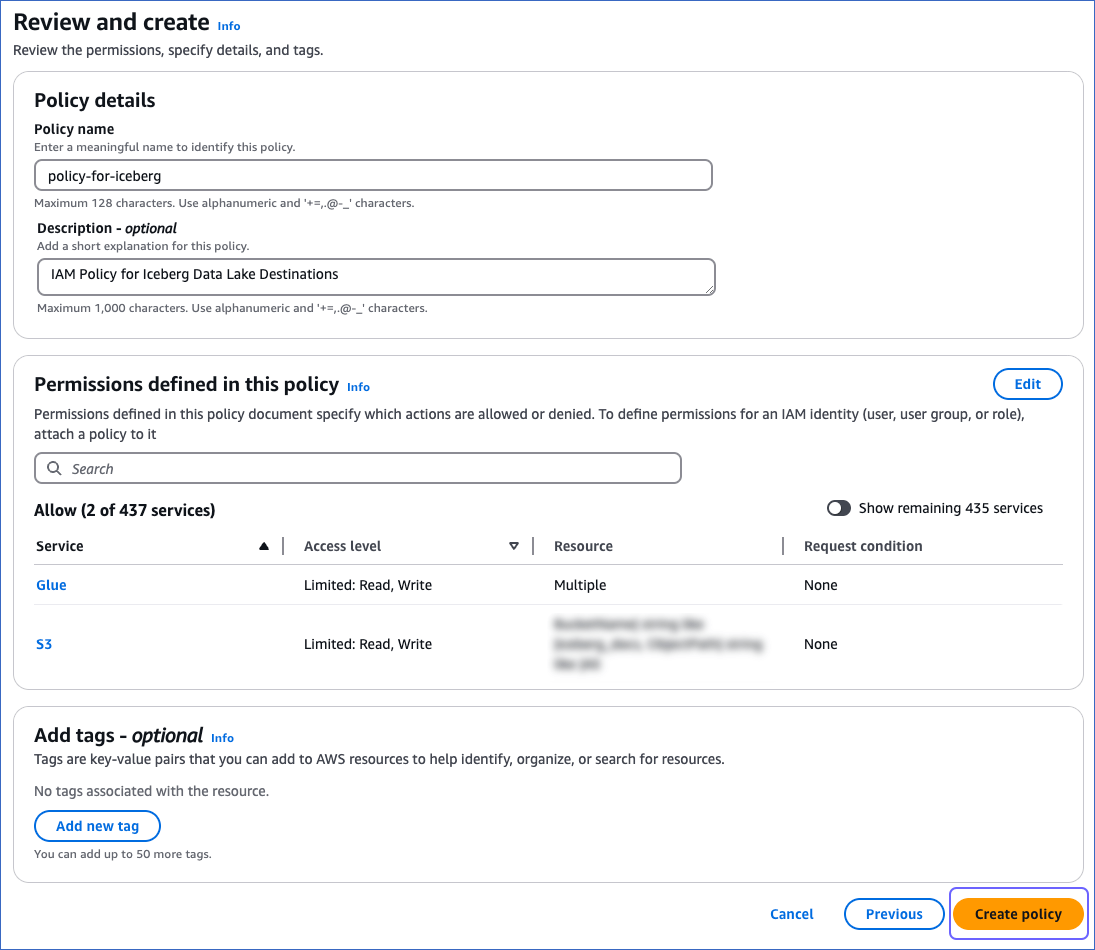
-
On the Review and create page, specify the Policy name and then click Create policy at the bottom of the page.
You must assign this policy to the IAM role that you create for Hevo so that it can access the required AWS resources.
Obtain the External ID for Iceberg Destinations
Hevo Edge auto-assigns an external ID to the Iceberg Destination type that remains unchanged for your team. You need to obtain the value for this ID from the Iceberg Destination configuration screen.
-
Log in to your Hevo account and select DESTINATIONS in the Navigation Bar.
-
Click the Edge tab in the Destinations List View and click + CREATE EDGE DESTINATION.
-
On the Create Destination page, click Iceberg Data Lake.
-
In the Connect to your Iceberg section of the displayed screen, click the copy (
 ) icon next to the value in the External ID field and save it securely.
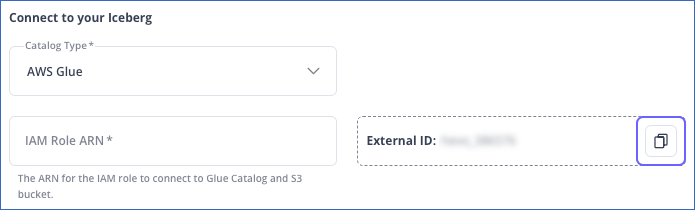
You must add this external ID to the trust policy of the IAM role that you create for Hevo.
Obtain IAM Role-Based Credentials
Hevo connects to the S3 bucket and Glue database specified in your Iceberg Data Lake Destination using IAM role-based credentials. For this, you need to:
-
Add an IAM role and assign to it the IAM policy created in Step 2.
-
Obtain the Amazon Resource Name (ARN) of your IAM role.
1. Create an IAM role and assign the IAM policy
-
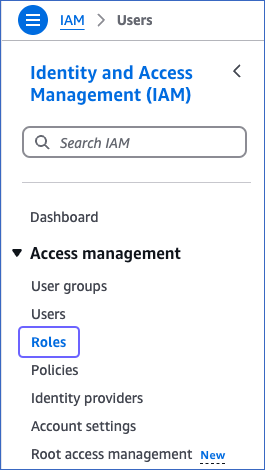
Log in to the AWS IAM Console.
-
In the left navigation pane, under Access management, click Roles.
-
On the Roles page, click Create role.

-
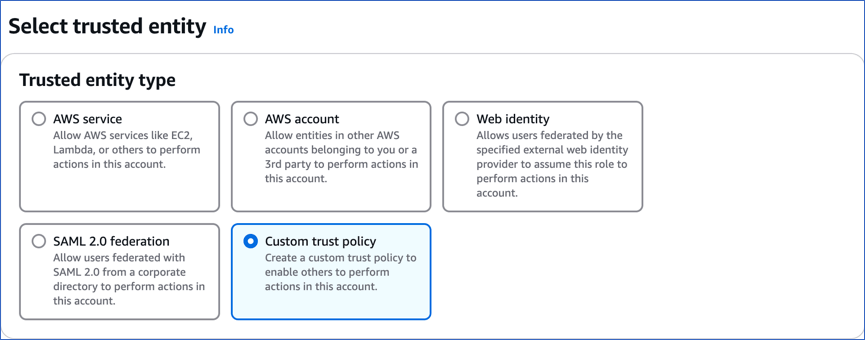
On the Select trusted entity page, do the following:
-
In the Trusted entity type section, select Custom trust policy.
-
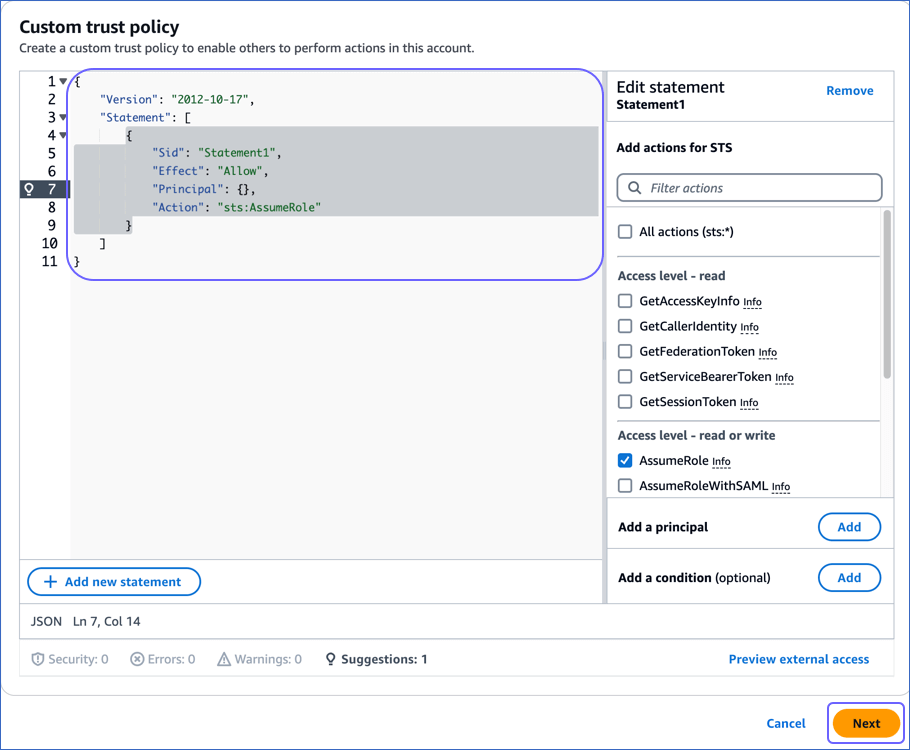
In the Custom trust policy section:
-
Copy the following JSON statements and paste them into the editor window:
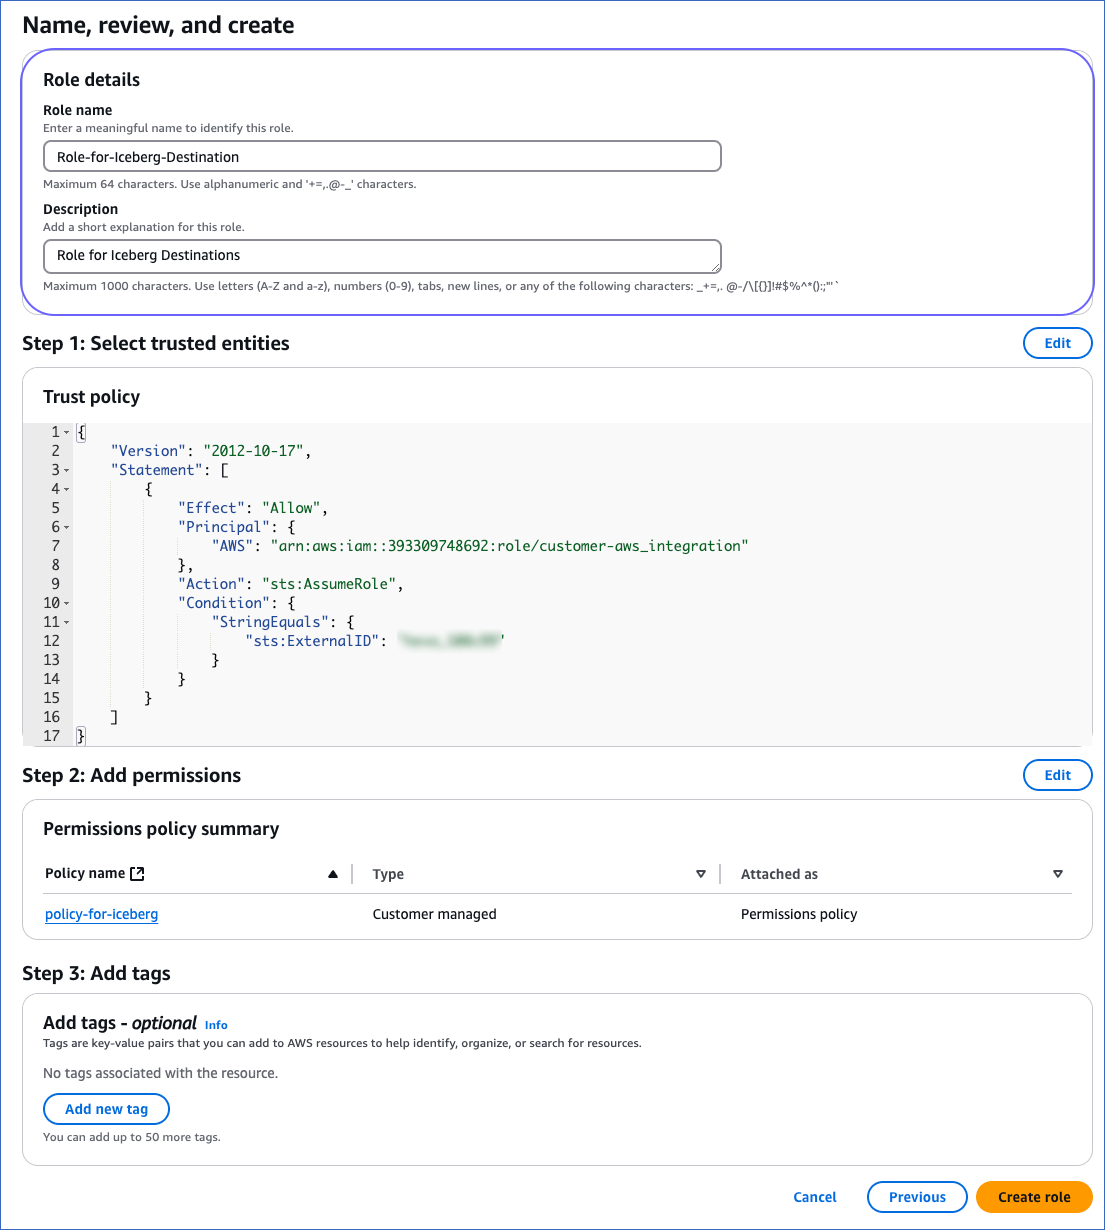
{ "Version": "2012-10-17", "Statement": [ { "Effect": "Allow", "Principal": { "AWS": "arn:aws:iam::393309748692:role/customer-aws_integration" }, "Action": "sts:AssumeRole", "Condition": { "StringEquals": { "sts:ExternalID": "External ID assigned by Hevo" } } } ] } -
Replace the External ID assigned by Hevo (in line 12) with the value that you obtained in Step 3, and then click Next.
-
-
-
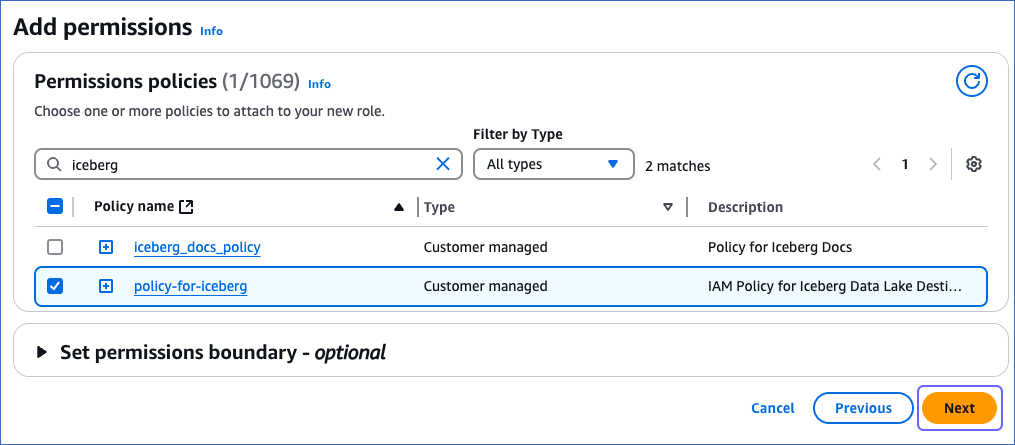
On the Add permissions page, in the Permissions policies section, search for and select the policy you created in Step 2, and then click Next at the bottom of the page.
-
On the Name, review, and create page, specify a Role name and a Description, and then click Create role at the bottom of the page.
Once the role is created, you are redirected to the Roles page.
2. Obtain the ARN
-
On the Roles page of your IAM console, search for and click the role that you created above.
-
On the <Role name> page, in the Summary section, click the copy icon below the ARN field and save it securely like any other password.
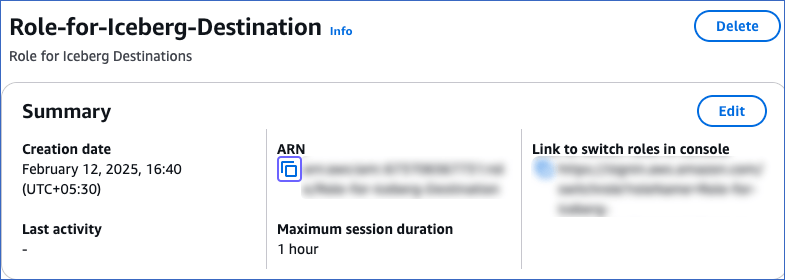
You can specify this ARN while configuring Iceberg Data Lake as a Destination in Edge.
Configure Iceberg Data Lake as a Destination in Edge
Perform the following steps to configure Iceberg Data Lake as a Destination in Edge:
-
Select DESTINATIONS in the Navigation Bar.
-
Click the Edge tab in the Destinations List View and click + CREATE EDGE DESTINATION.
-
On the Create Destination page, click Iceberg Data Lake.
-
In the screen that appears, specify the following:
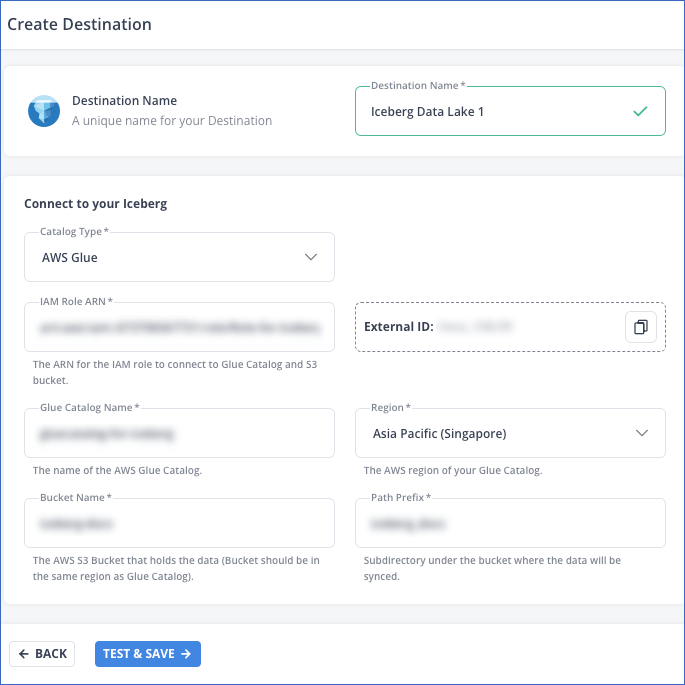
-
Destination Name: A unique name for your Destination, not exceeding 255 characters.
-
In the Connect to your Iceberg section:
-
From the Catalog Type drop-down, select a data catalog for your Iceberg tables. AWS Glue is selected by default.
Note: Currently, AWS Glue is the only supported data catalog.
-
IAM Role ARN: The globally unique identifier assigned by AWS to the IAM role you created for Hevo. For example, arn:aws:iam::393309748692:role/Iceberg-Role.
-
External ID: The unique identifier auto-assigned by Hevo for the Iceberg Data Lake Destination type. You must add the displayed value to the trust policy of your IAM role.
Note: This field is non-editable.
-
Glue Catalog Name: The name of the Glue database that you want to use as an Iceberg catalog. This can be the one that you created in Step 1.
-
Region: The AWS region where your Glue database and S3 bucket are located. For example, Asia Pacific (Singapore).
Note: Your Glue database and S3 bucket must be co-located.
-
Bucket Name: The name of the bucket where data is to be loaded. For example, iceberg-docs.
-
Path Prefix: A string value used by Hevo to create a folder structure in your S3 bucket. Your data and metadata files are stored in this directory.
-
-
-
Click TEST & SAVE to test the connection to your Glue database and S3 bucket. Once the test is successful, Hevo creates your Iceberg Data Lake Destination. You can configure this Destination in your Edge Pipeline.
Modifying Iceberg Data Lake Destination Configuration in Edge
You can modify some settings of your Iceberg Data Lake Destination after its creation. However, any configuration changes will affect all the Pipelines using that Destination.
To modify the configuration of your Iceberg Destination in Edge:
-
In the detailed view of your Destination, do one of the following:
-
Click the More (
 ) icon to access the Destination Actions menu, and then click Edit Destination.
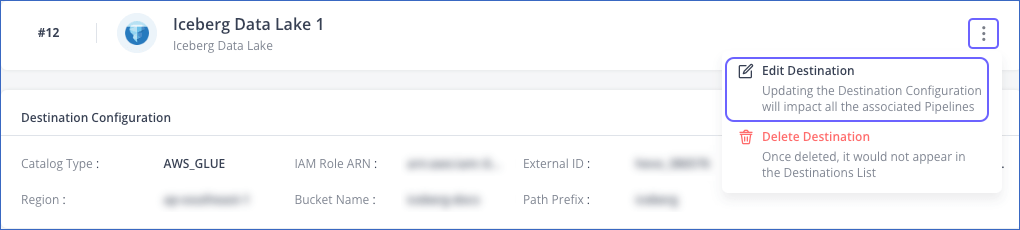
-
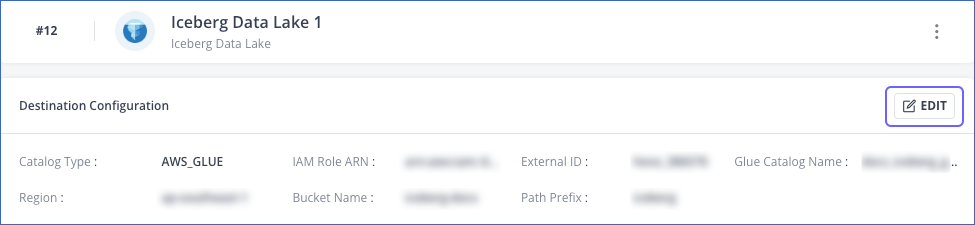
In the Destination Configuration section, click EDIT.
-
-
On the <Your Destination Name> editing page:
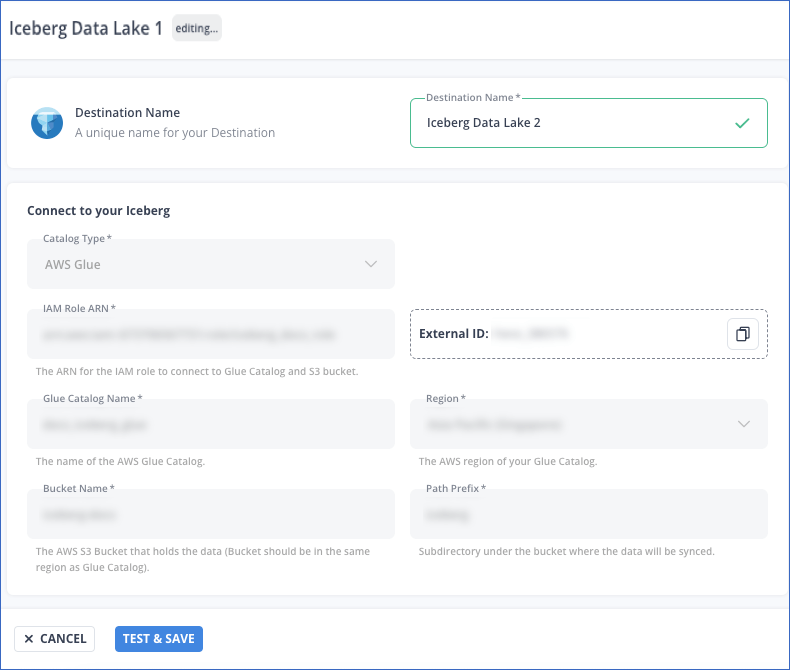
Note: The settings that cannot be changed are grayed out.
- You can specify a new name for your Destination, not exceeding 255 characters.
-
Click TEST & SAVE to check the connection to your Iceberg Data Lake Destination and then save the modified configuration.
Data Type Mapping
Hevo internally maps the Source data type to a unified data type, which is referred to as the Hevo Data Type in the table below. This data type represents the Source data from all supported data types in a lossless manner. The Hevo data types are then mapped to the corresponding data types that are supported in each Destination.
| Hevo Data Type | Iceberg Data Type |
|---|---|
| JSON | STRING |
| ARRAY | LIST |
| BOOLEAN | BOOLEAN |
| - BYTE - BYTE_ARRAY |
BINARY |
| DATE | DATE |
| DECIMAL | DECIMAL |
| DOUBLE | DOUBLE |
| FLOAT | FLOAT |
| INTEGER | INT |
| LONG | LONG |
| SHORT | INT |
| - TIME - TIME_TZ |
TIME |
| - TIMESTAMP - TIMESTAMP_TZ |
TIMESTAMP |
| VARCHAR | STRING |
At this time, the following Iceberg data types are not supported by Hevo:
-
MAP
-
STRUCT
-
Any other data type not listed in the table above.
Destination Considerations
-
Iceberg does not support the JSON data type. Hence, JSON data is written to the Iceberg table using the STRING data type.
-
When creating an AWS Glue database for your Iceberg Data Lake Destination, ensure that the database name does not contain hyphens, as they are not allowed in Iceberg namespaces.
Limitations
-
The STRUCT and MAP data types are not supported.
-
Hevo supports loading data only in the Append mode.
-
Currently, AWS Glue is the only supported data catalog.