Managing Objects in Pipelines
On This Page
Edge Pipeline is currently available under Early Access. You can request access to evaluate and test its features.
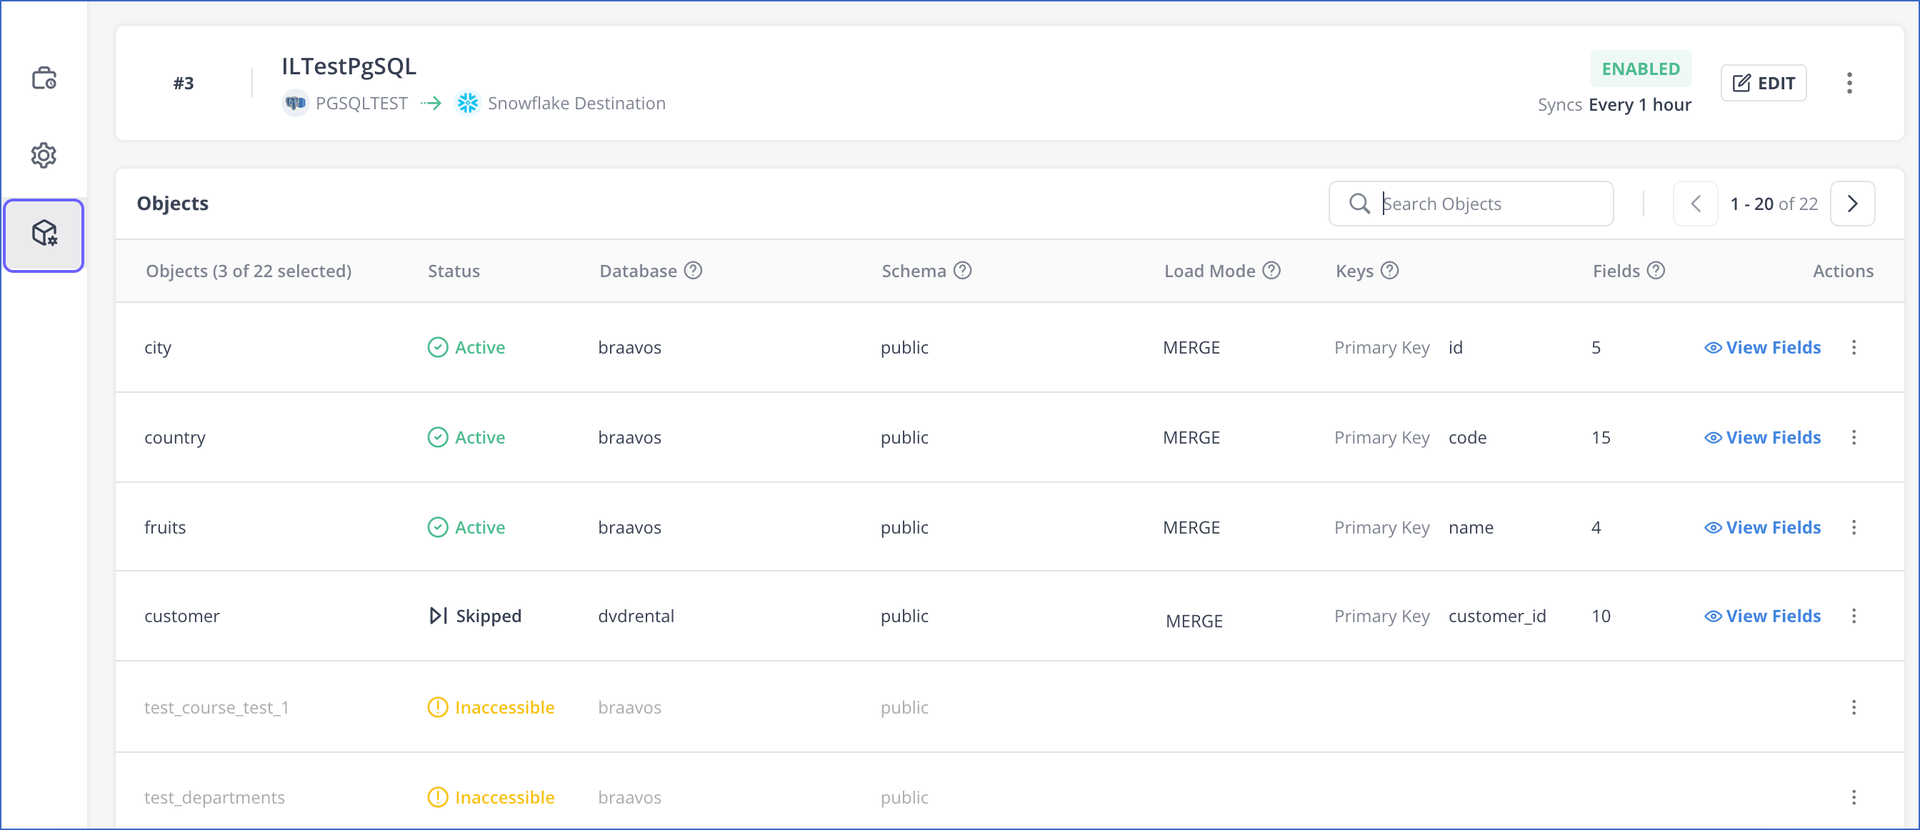
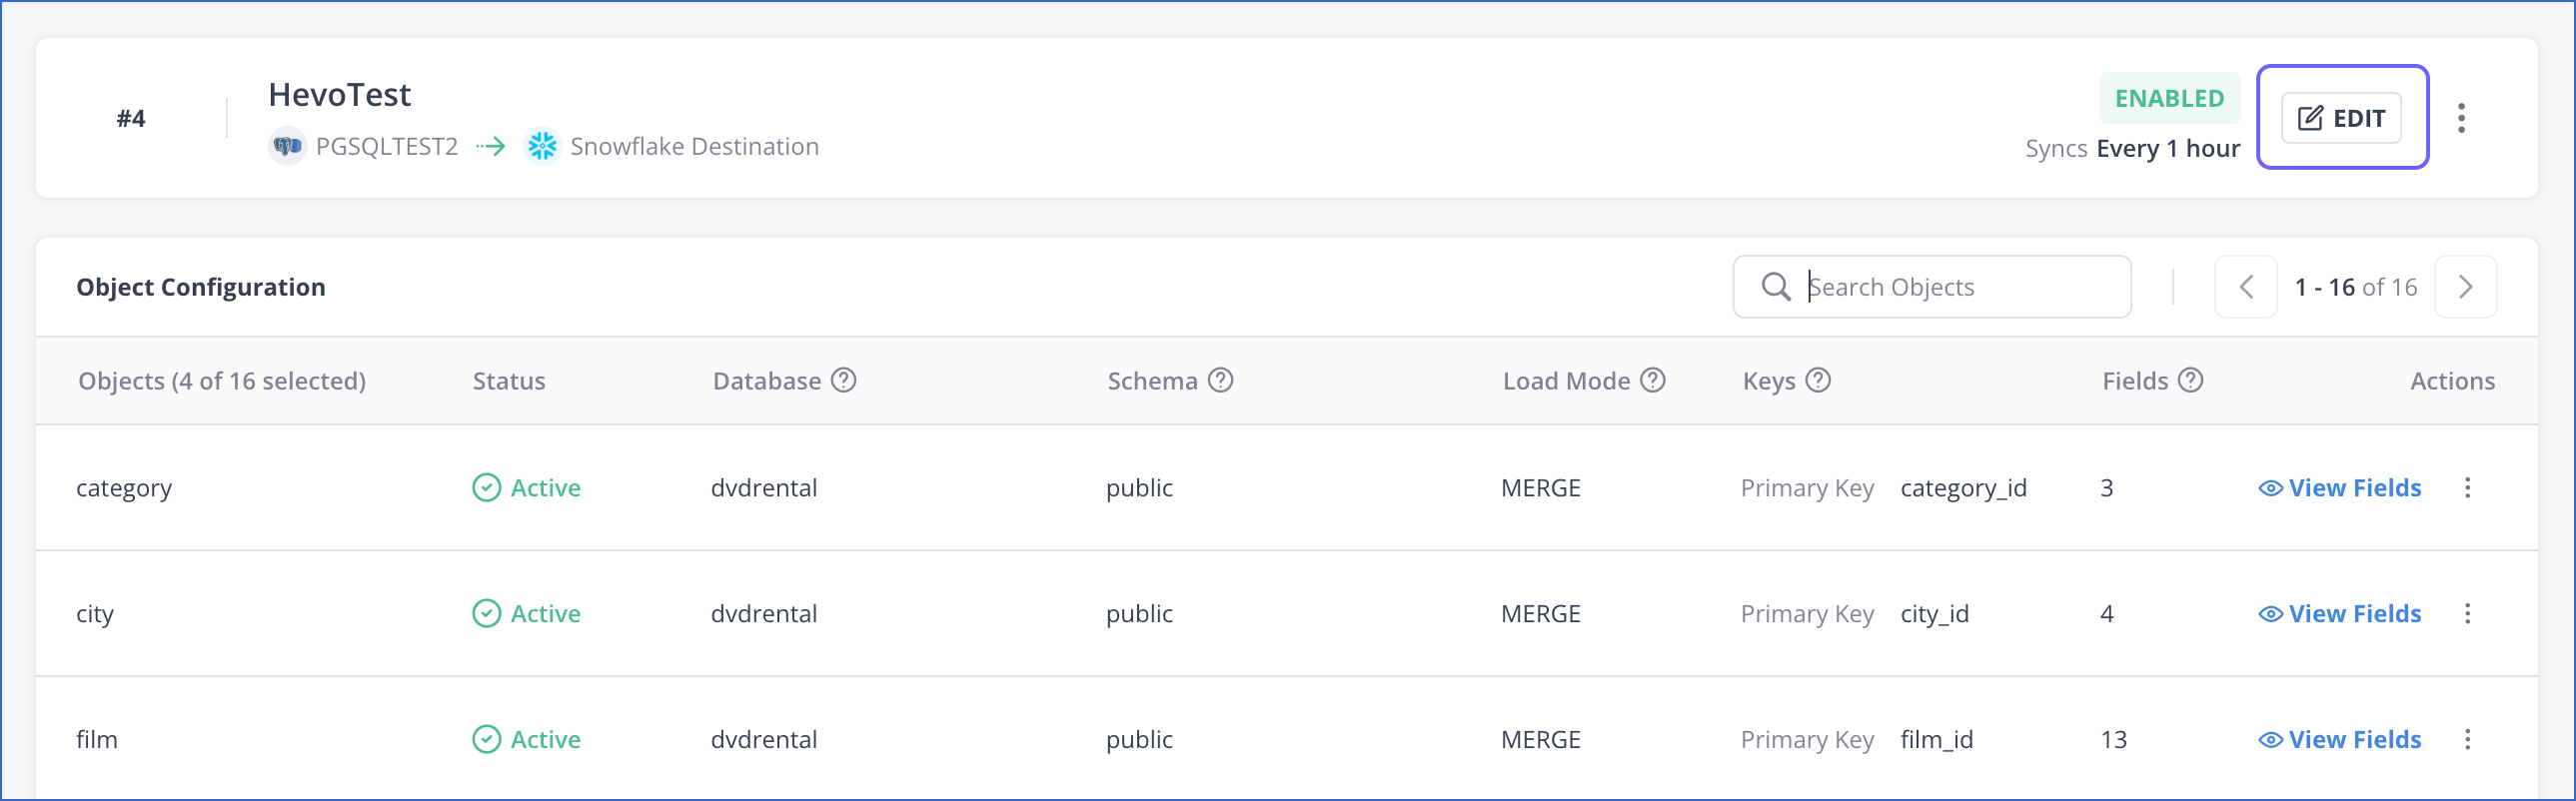
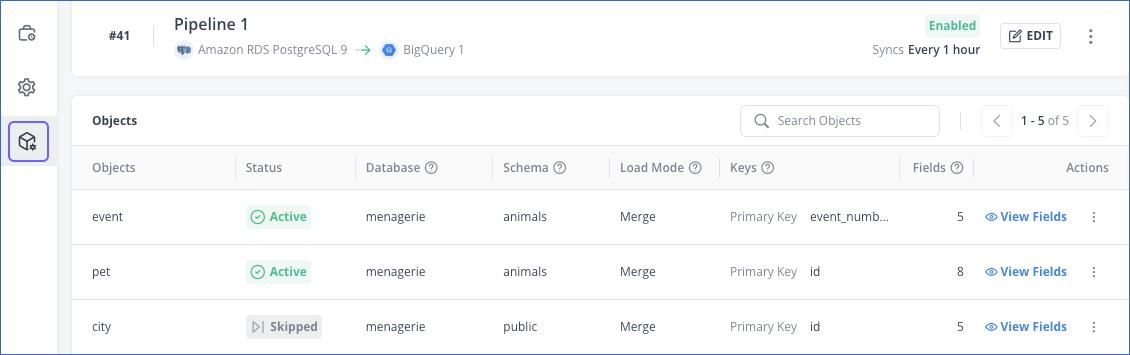
The Objects tab of your Pipeline displays the list of objects available in your Source database. The objects that you include for replication are shown as selected and the ones that Hevo is not able to access are marked as Inaccessible.
You can use the Objects tab or the edit Object Configuration page to do the following:
Refer to the respective sections for the steps to manage the objects as per your requirements.
Selecting and Deselecting Objects and Fields
During Pipeline creation, you can select and deselect the objects that you want Hevo to include or skip, respectively. For example, you may not want to load sensitive information such as your users’ personal details and financial records. Or, you may want to omit large text fields like descriptions, summaries, and comments. When you include an object, the historical data ingestion for it is started, followed by incremental data ingestion.
By default, Hevo ingests all fields for the included objects. However, you can change this selection. Unmapped fields are not loaded into the Destination tables.
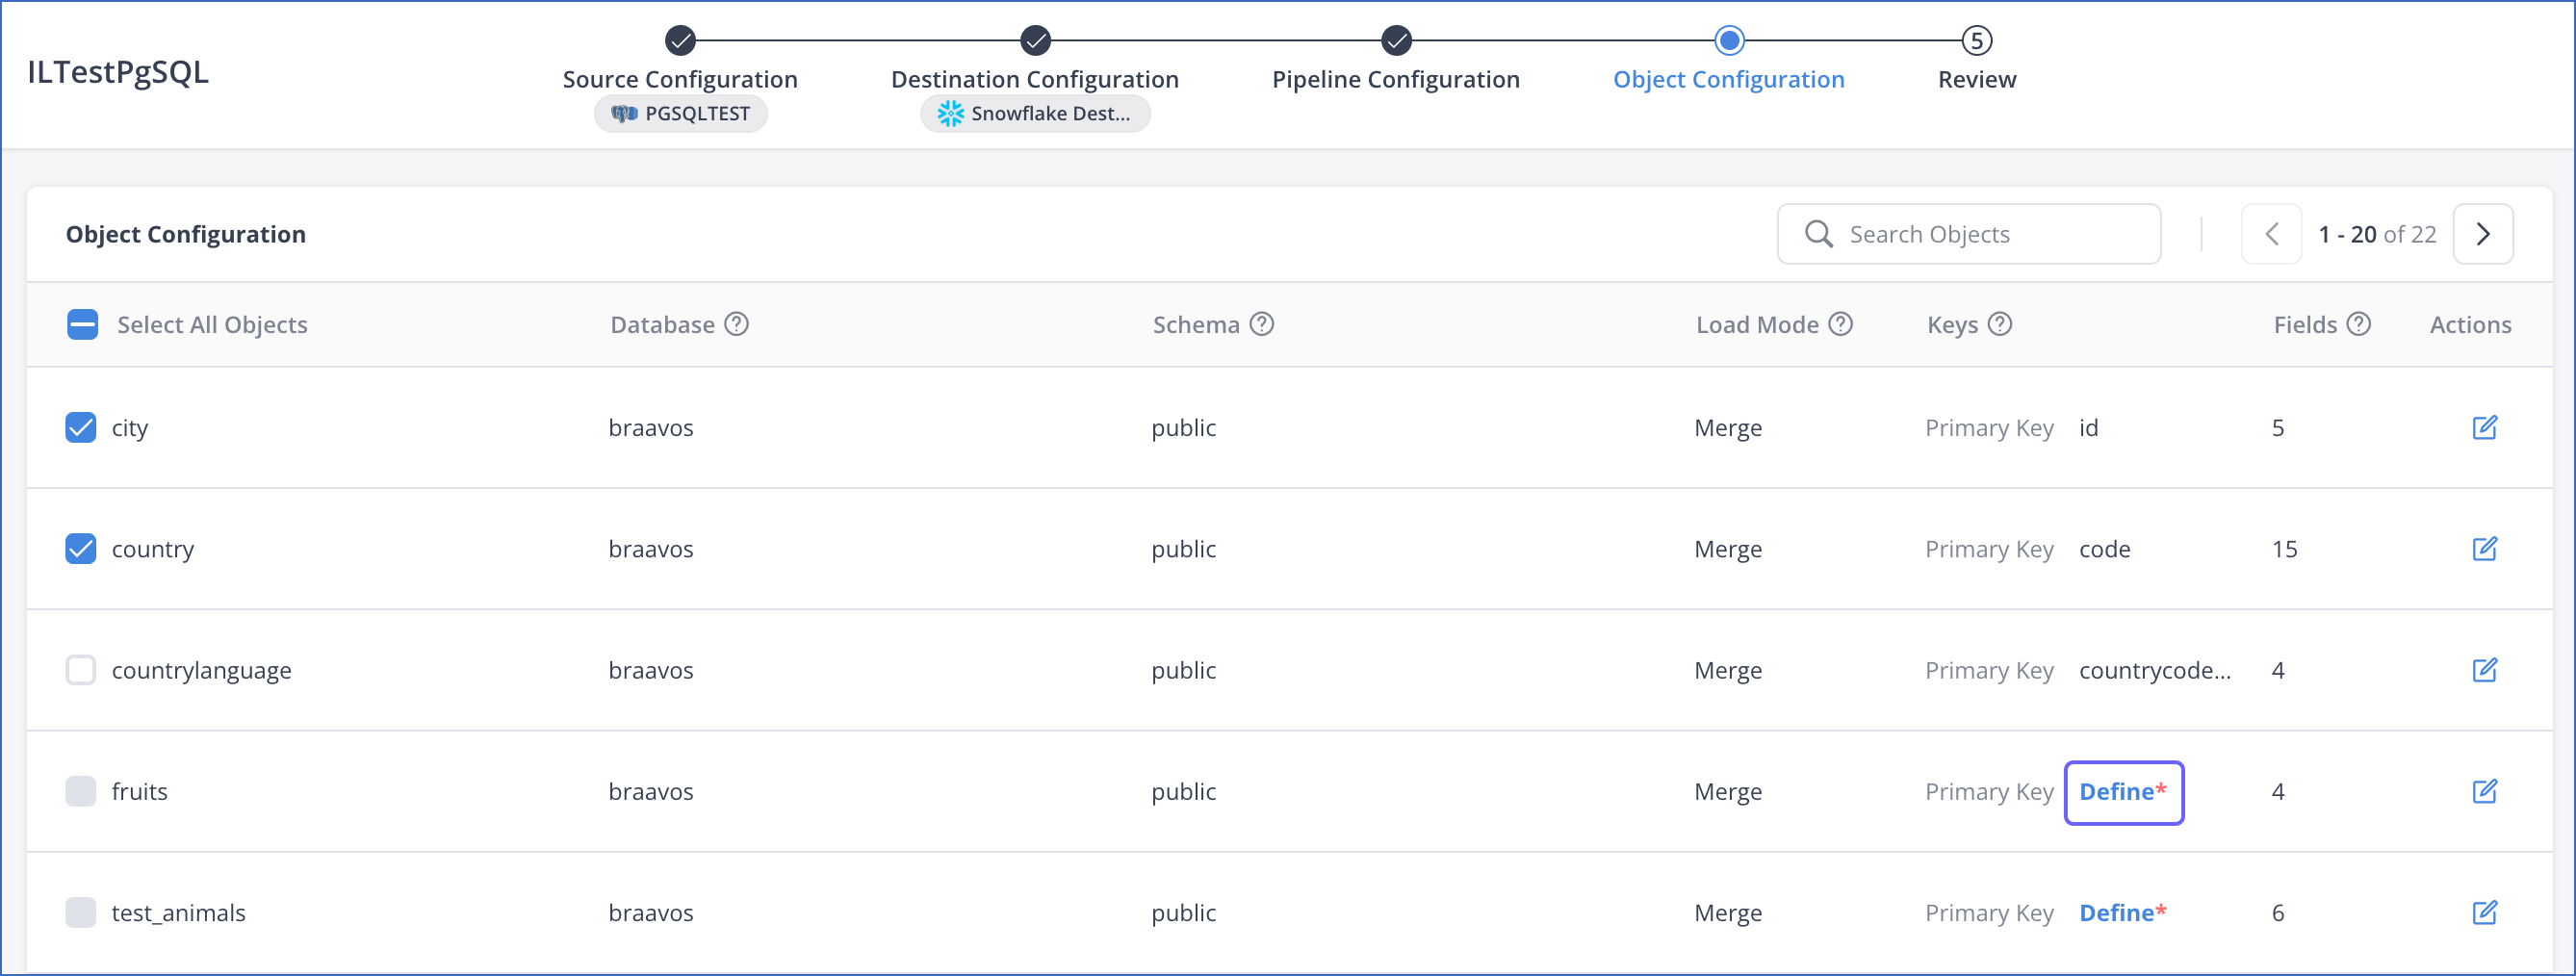
To include an object for replication:
-
In the Object Configuration section of the Pipeline creation flow, select the check box corresponding to the object. For the Merge load mode, if the object does not have a primary key, Hevo invites you to define one at this time.
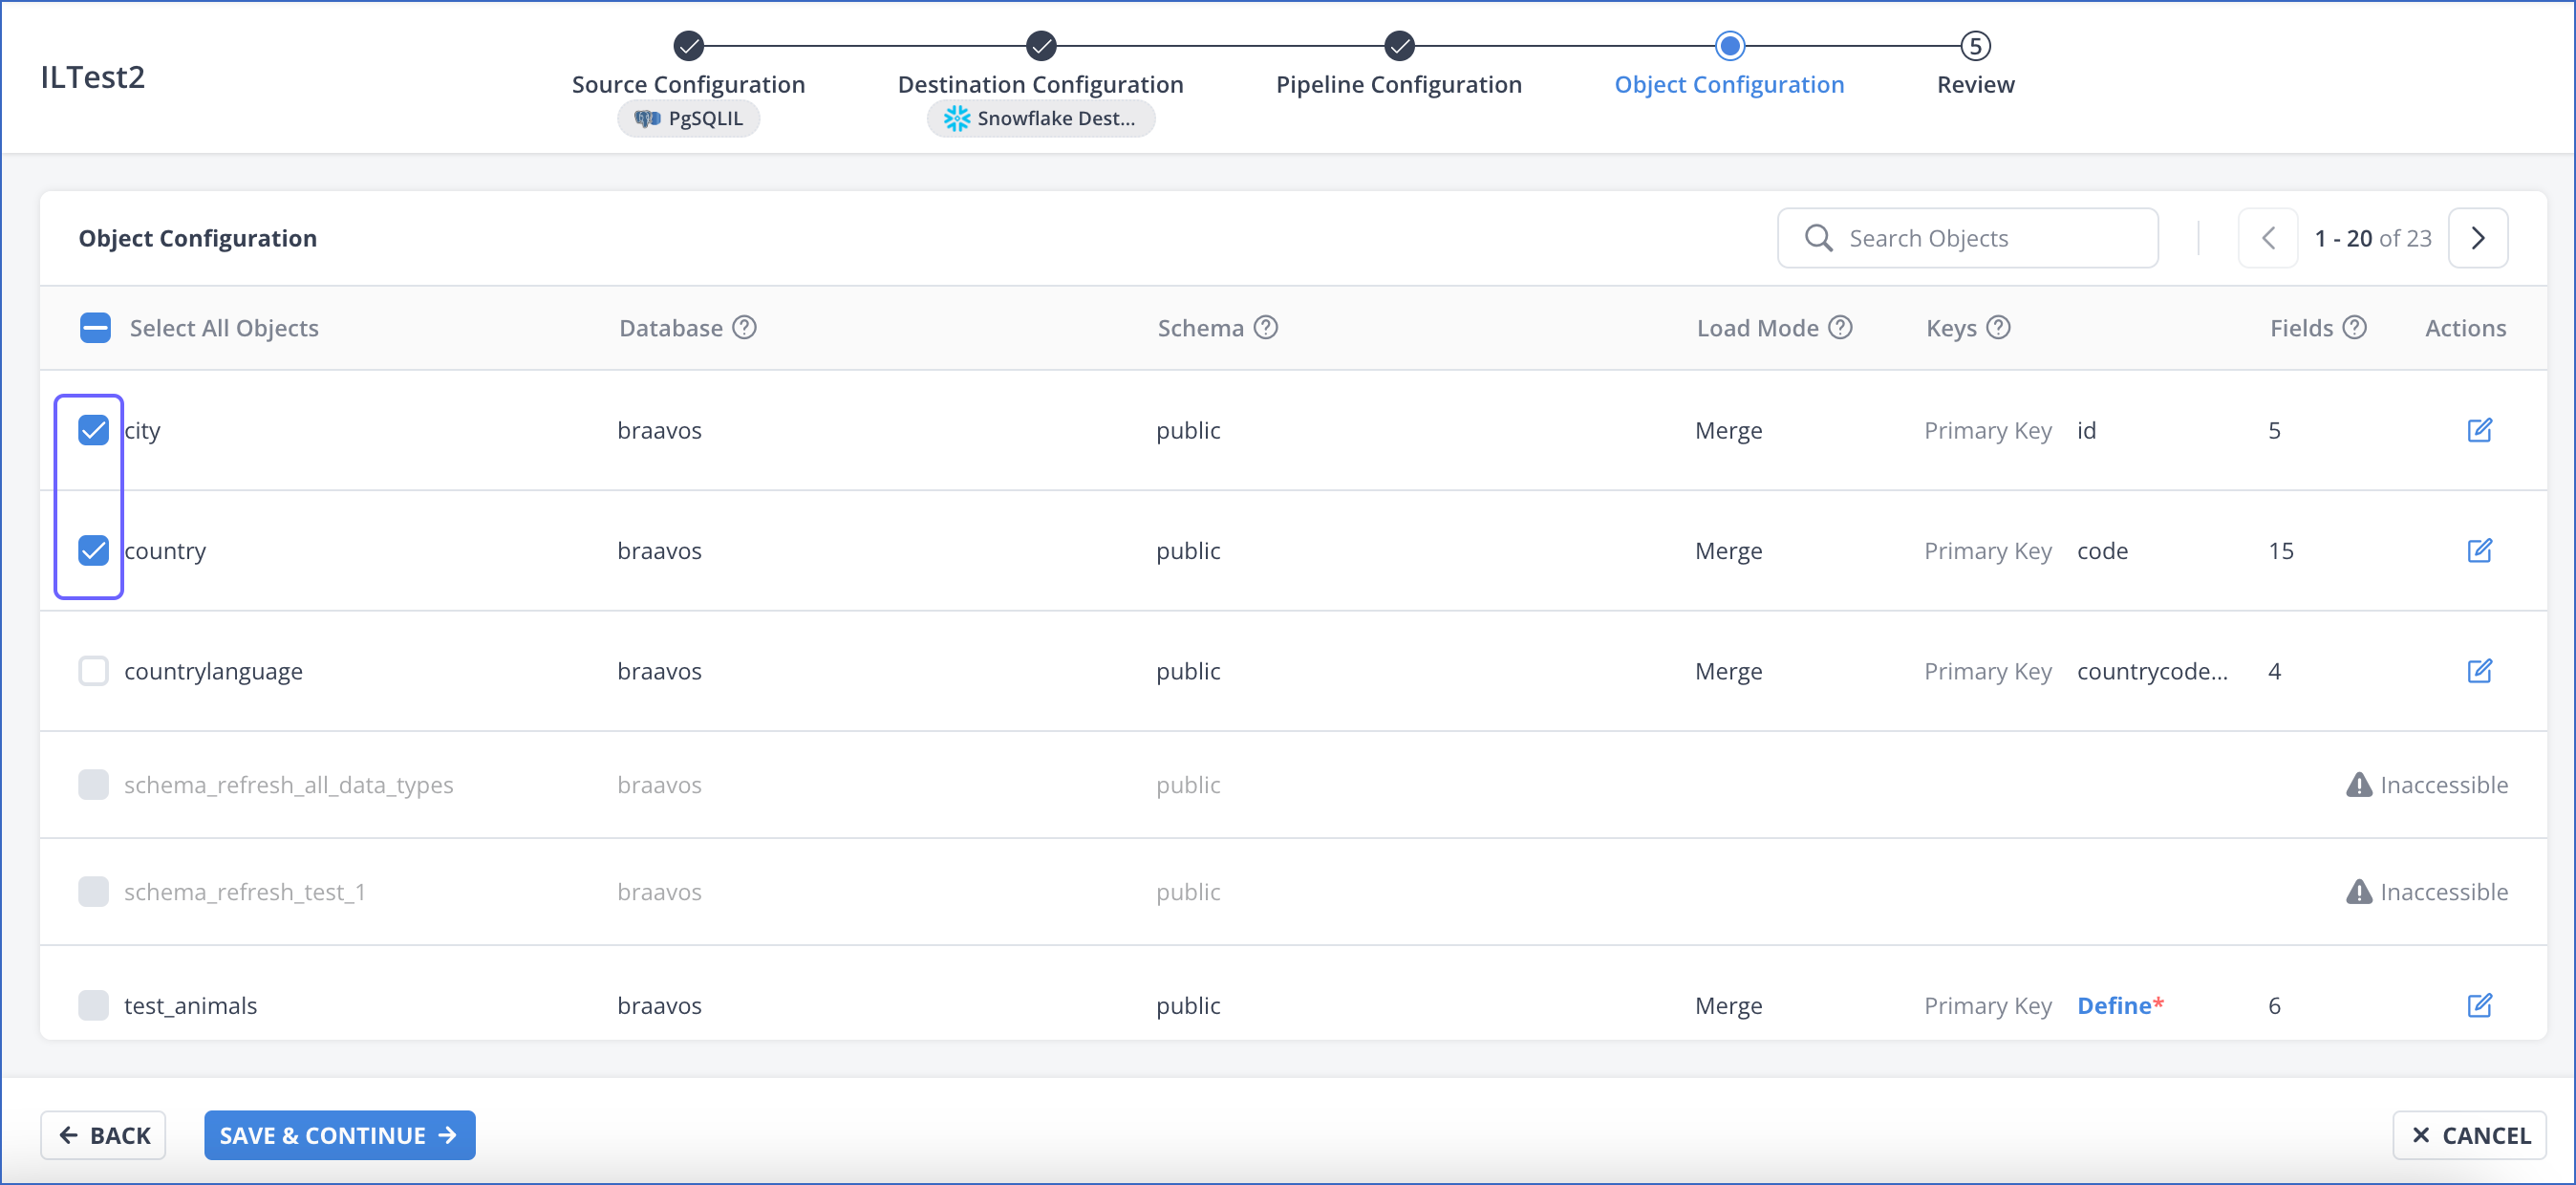
All the fields of the object are selected by default.
Note: The field(s) that you want to select as a primary key must be non-nullable.
-
Optionally, click the Edit (
 ) icon next to the object to modify its field selections.
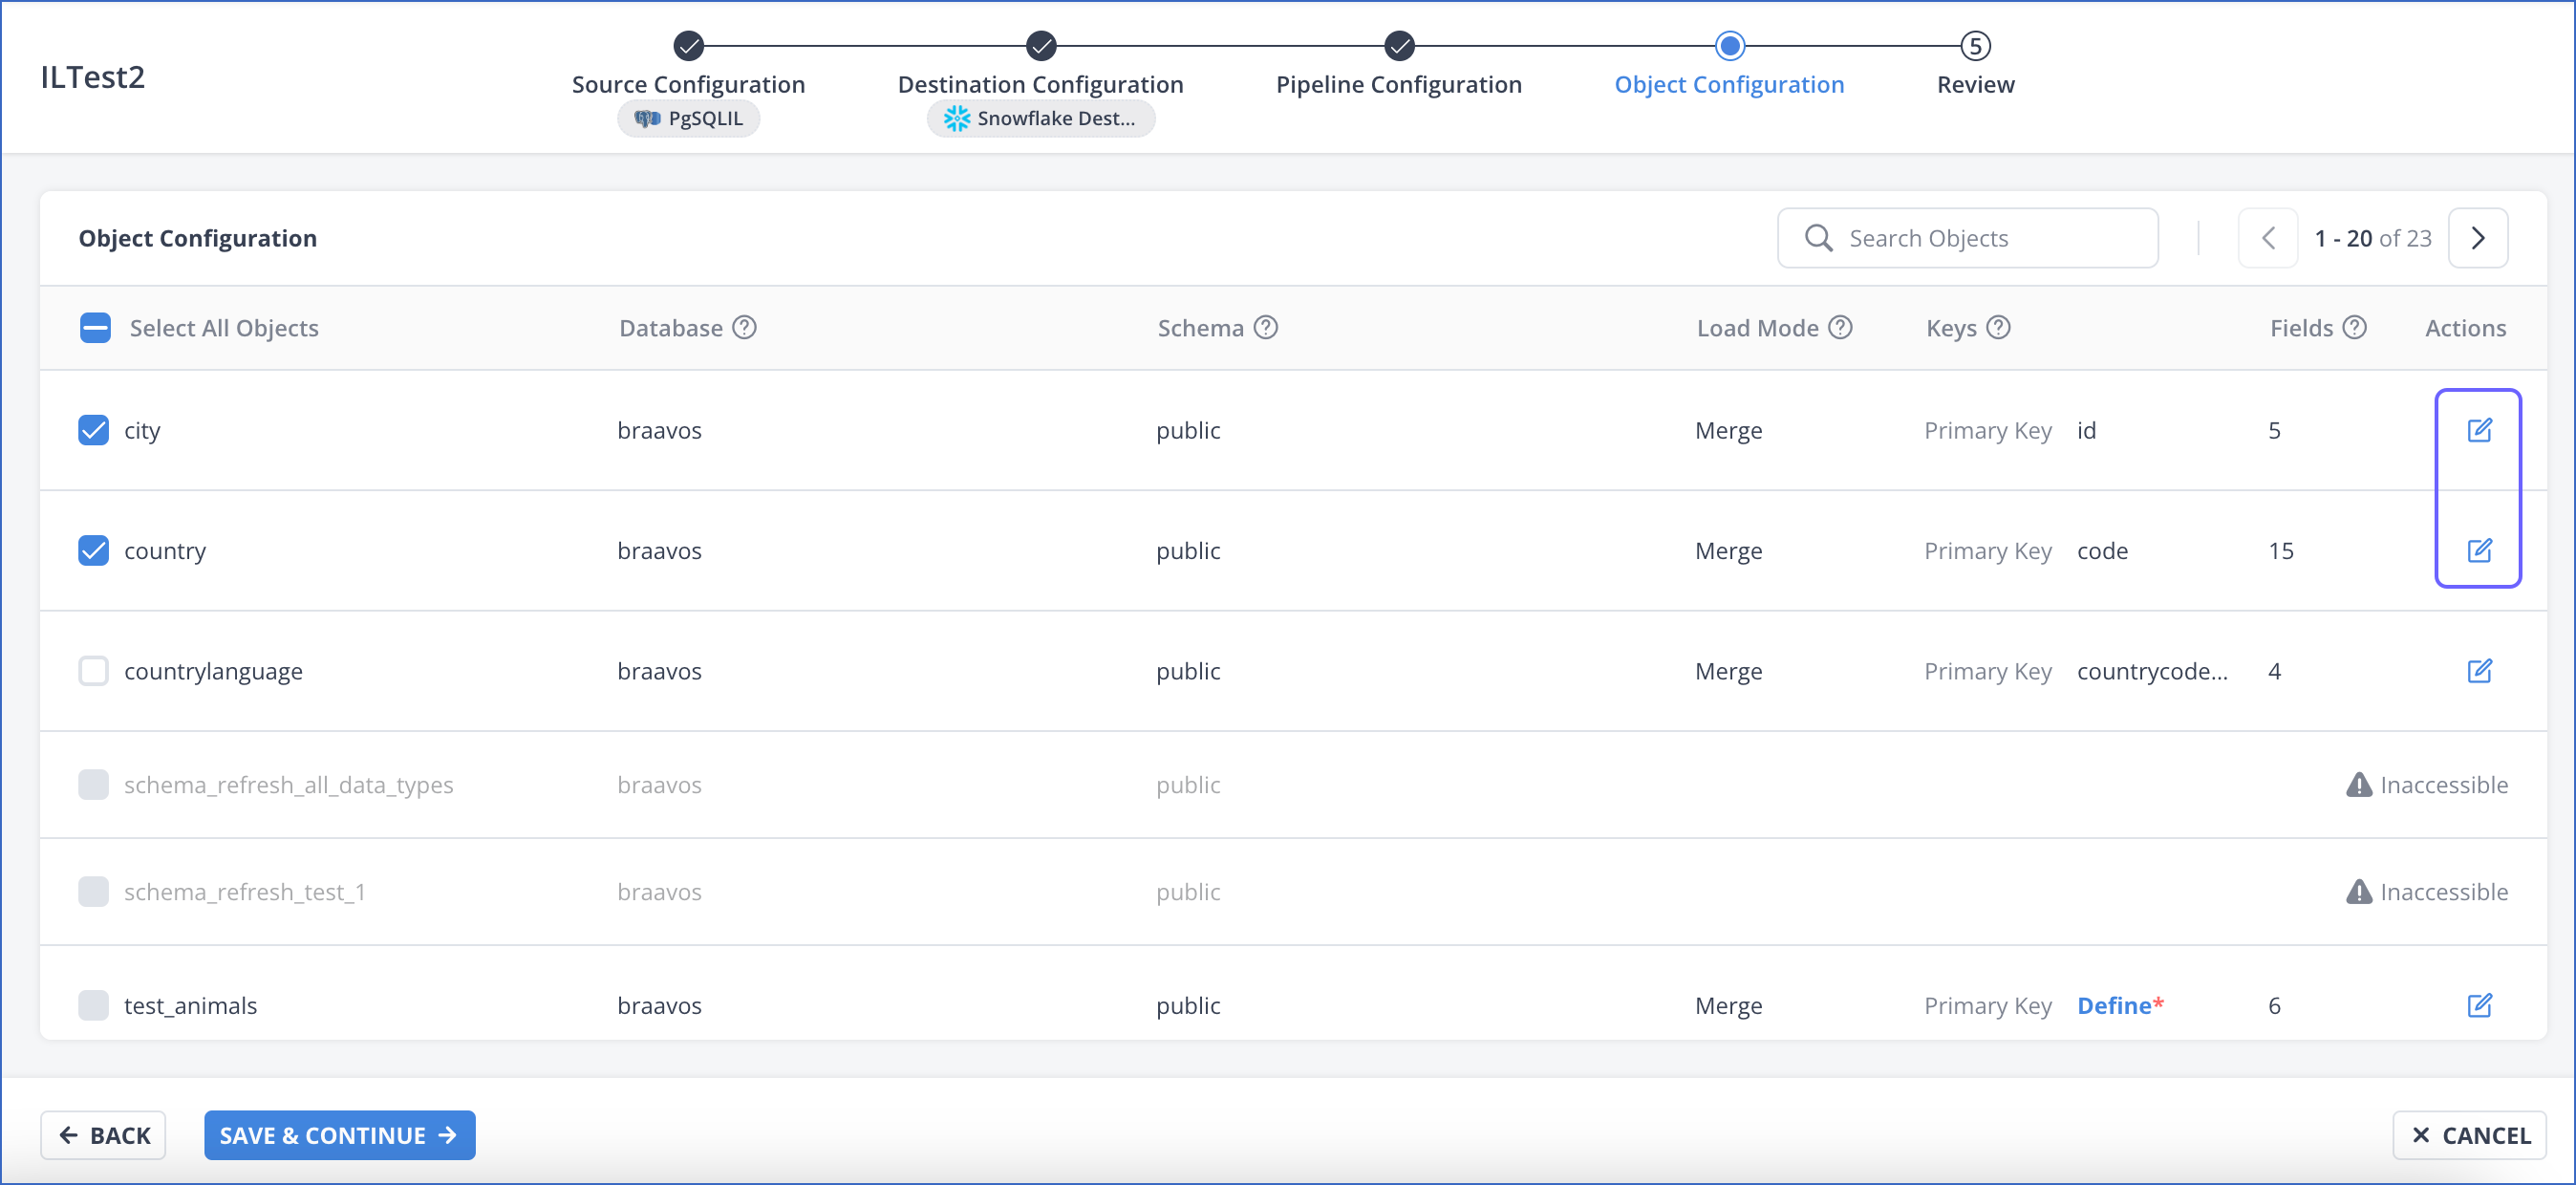
-
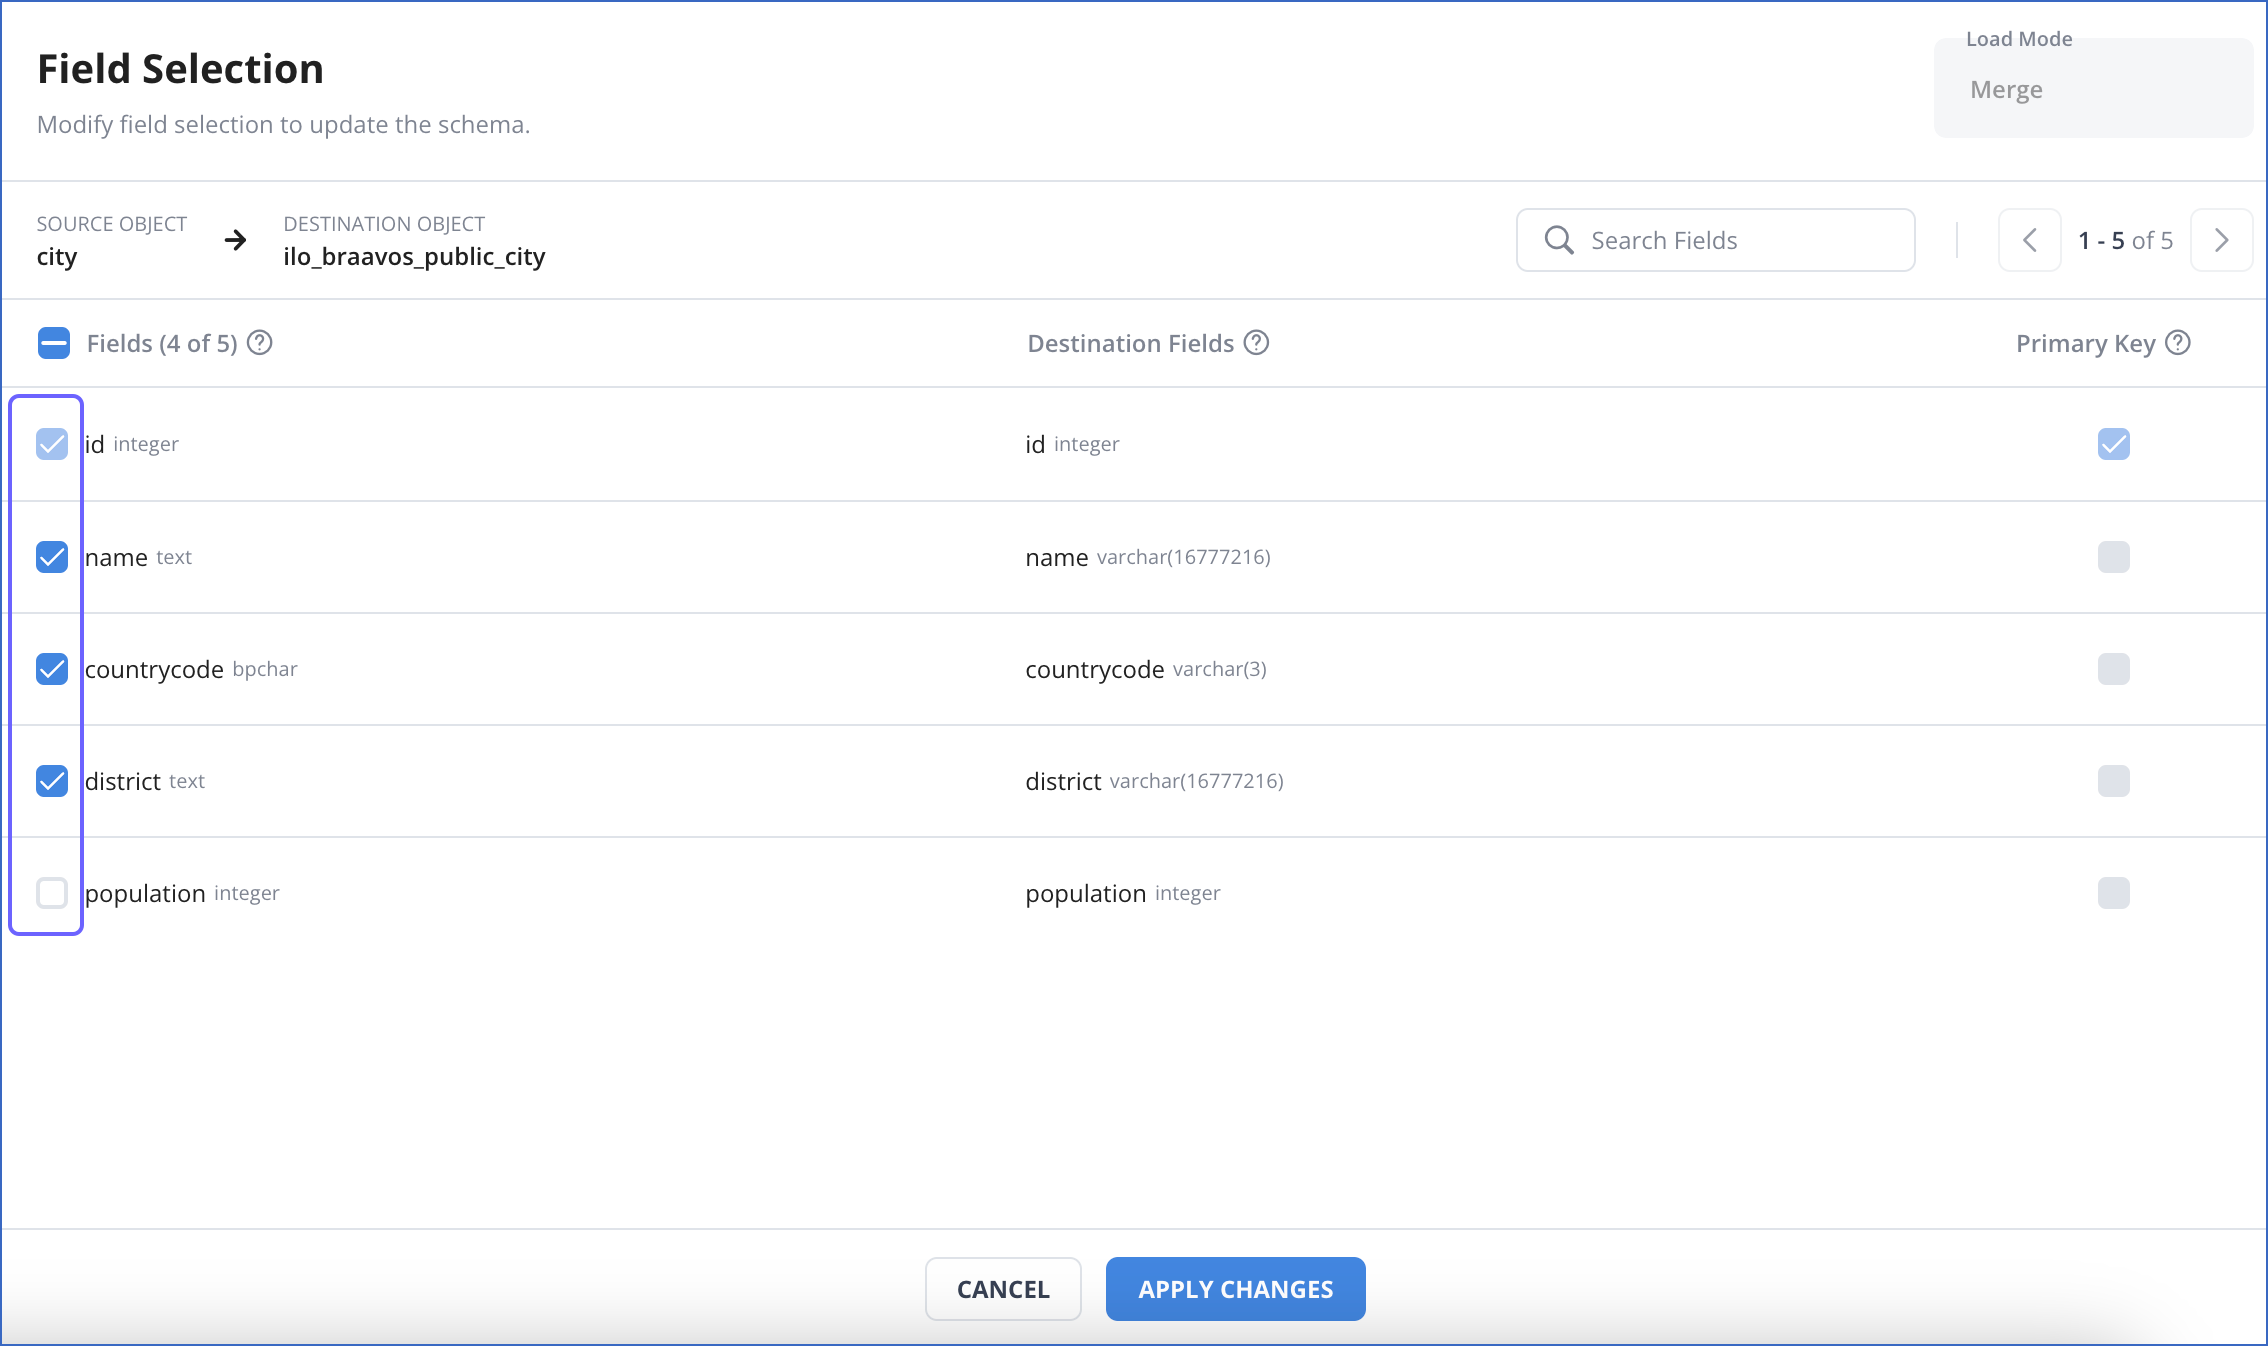
On the Field Selection page, select or deselect the check box next to the fields that you want to include or exclude, respectively. You cannot deselect or change the primary key field if it is already defined.
To skip an object for replication:
- Deselect the check box corresponding to the object on the Object Configurations tab. Hevo will no longer fetch data for the object. However, any existing data for the object in the Destination is not affected.
Defining the Primary Key for an Object
If a primary key is not already defined for an object, you can select the field(s) that Hevo must use as the primary key for deduplicating data in the Destination. This option is available and applicable only for the Merge load mode.
You can set the primary key only for the objects that do not have a pre-defined key. However, a primary key cannot be set for the object if it does not contain any non-nullable fields. Also, you cannot change the pre-defined primary key during or after the Pipeline creation.
To set a field as the primary key:
-
During Pipeline creation:
-
In the Object Configuration section, Keys column, click Define corresponding to the object for which you want to set the primary key.
-
In the Field Selection page, Primary Key column, select the check box corresponding to the field that you want to use as the primary key.
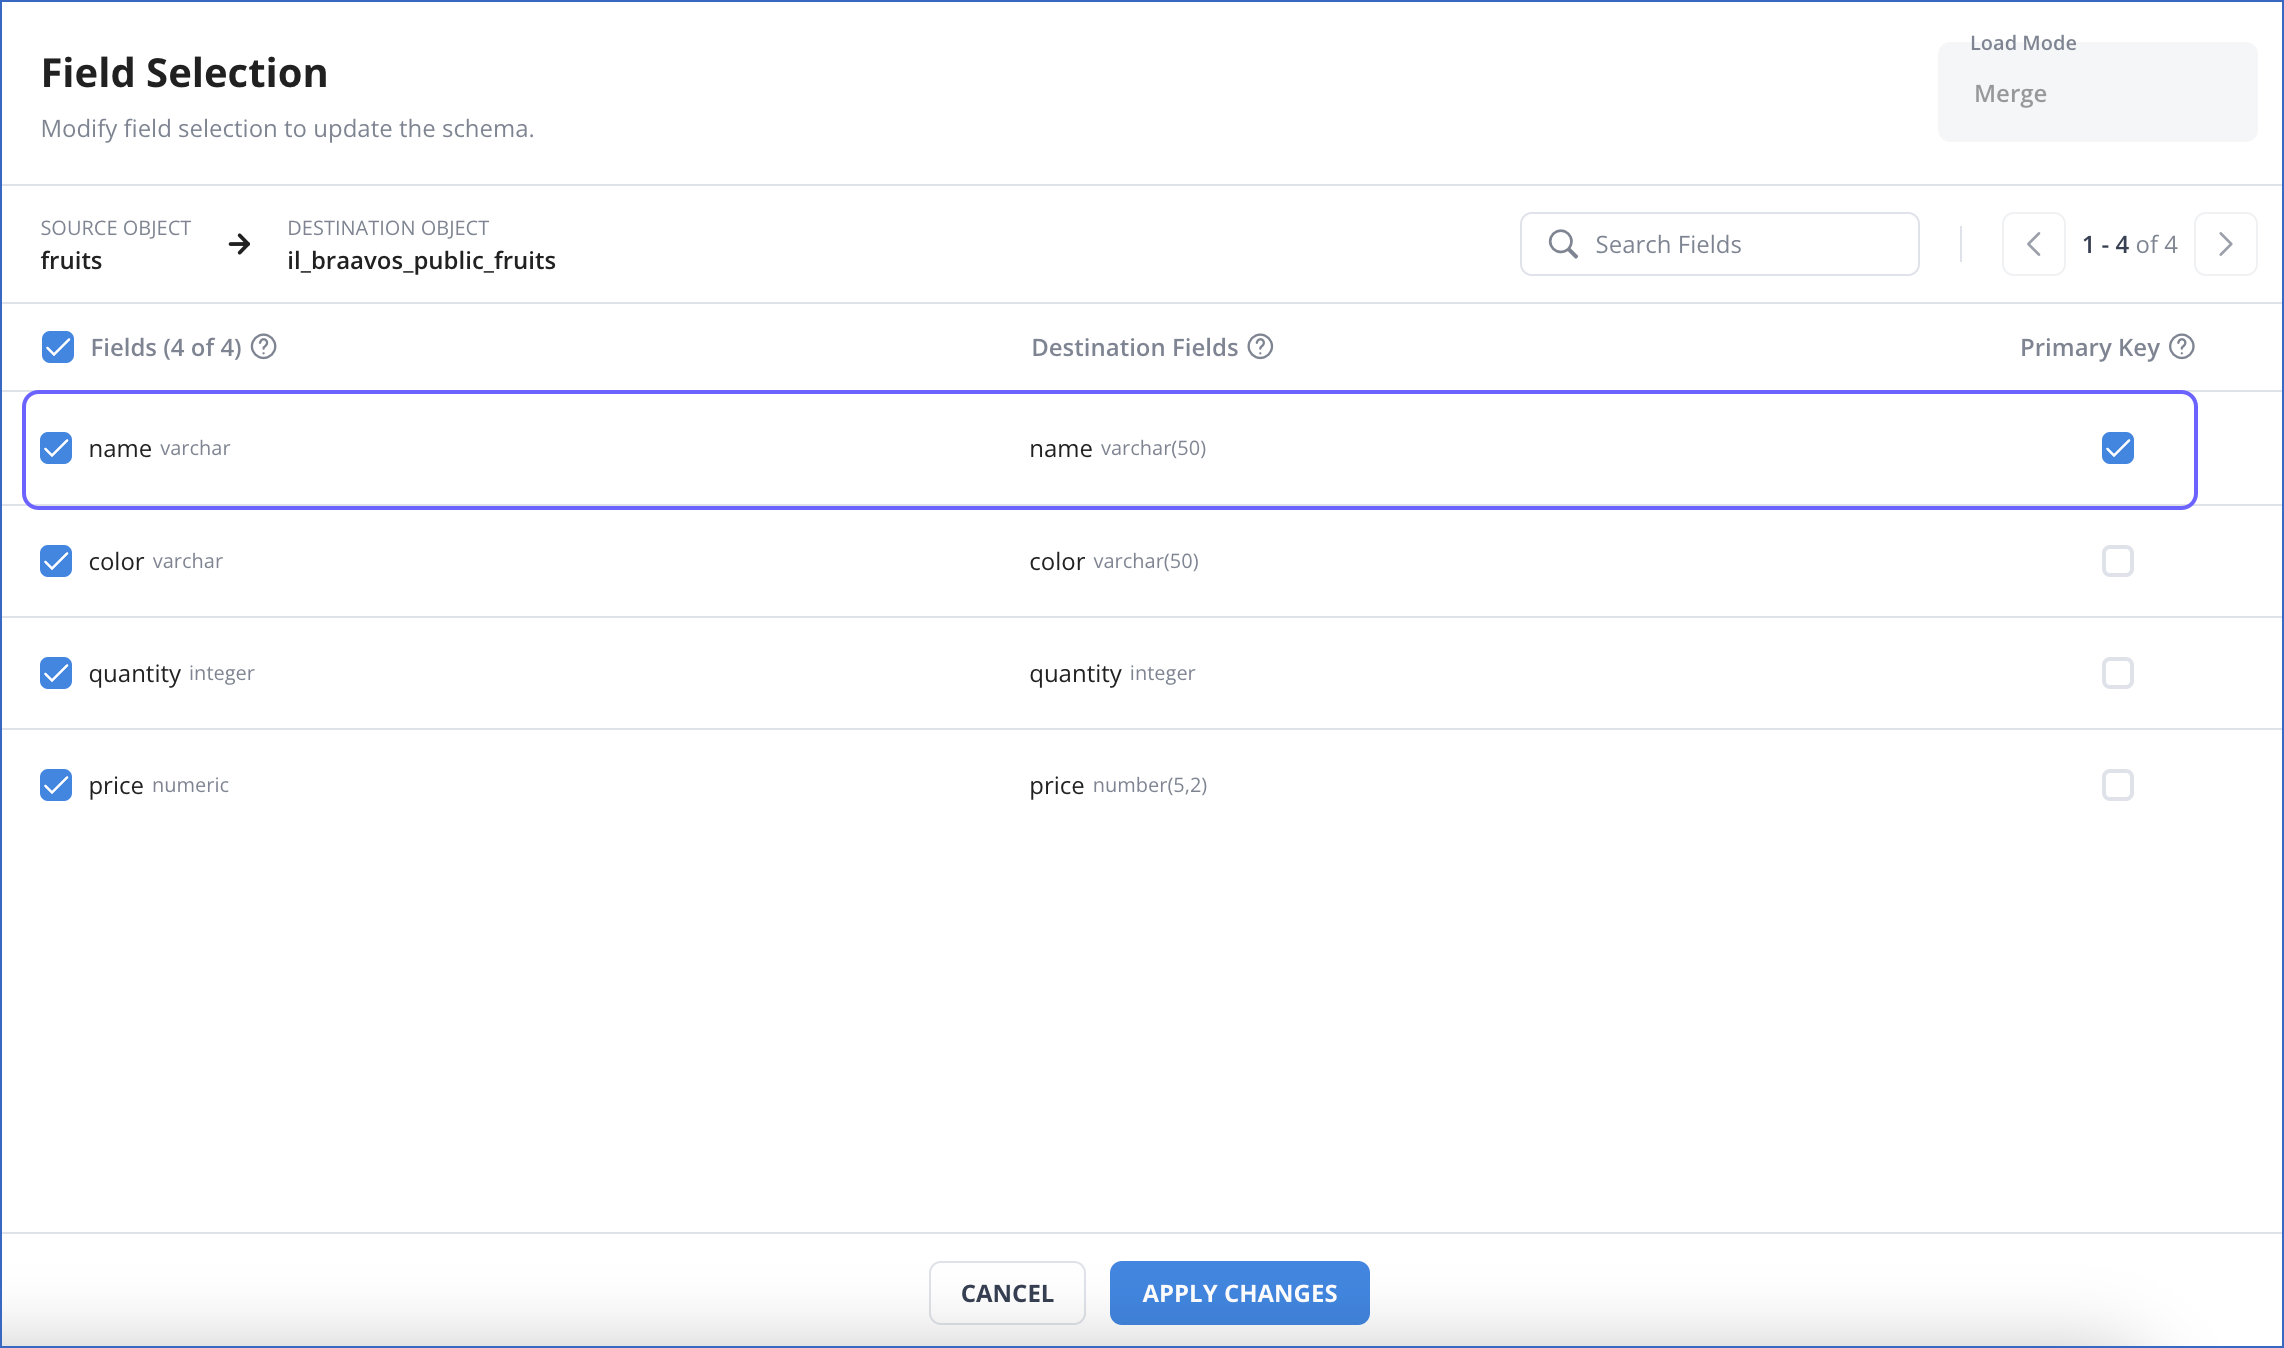
-
Click APPLY CHANGES.
-
-
Post-Pipeline creation:
-
Click EDIT in the Pipeline Detailed View.
-
On the Object Configuration page of the Edit Pipeline flow, in the Keys column, click Define corresponding to the object for which you want to set the primary key.

-
In the Field Selection page, Primary Key column, select the check box corresponding to the field that you want to use as the primary key.
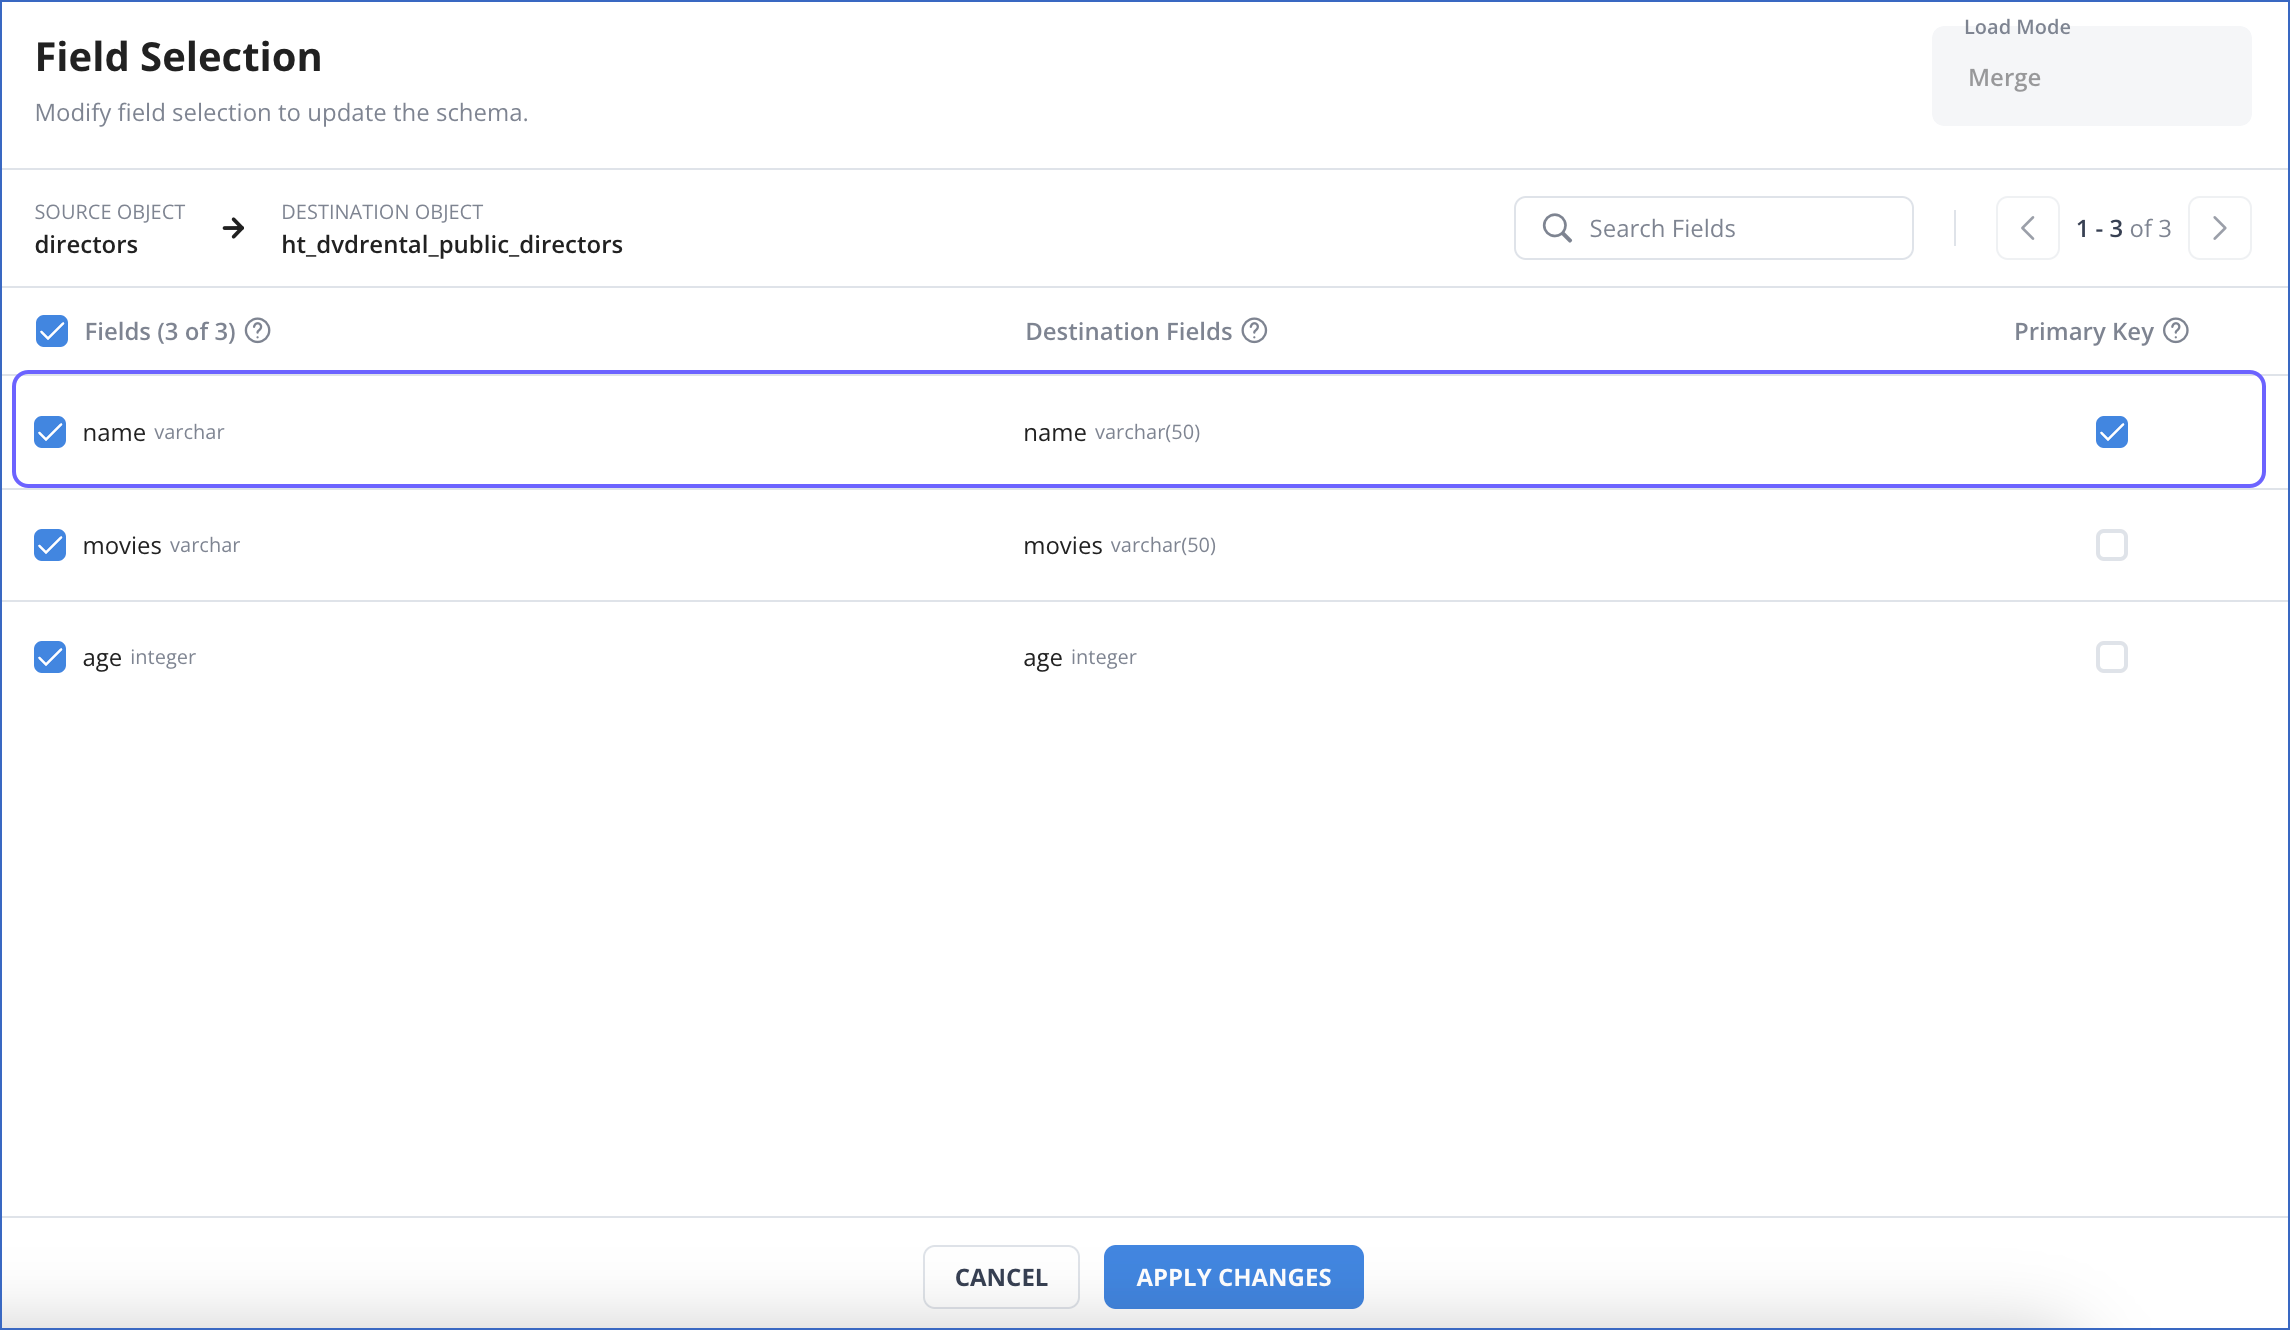
-
Click APPLY CHANGES.
-
Changing the Load Mode for an Object
During Pipeline creation, you can select a load mode on the Pipeline Configuration page. This mode is applied to all objects by default. However, you can change the load mode for individual objects on the Object Configuration page.
Note: If you change the load mode for any object from Append to Merge, a primary key must be defined for it. Refer to the section Defining the Primary Key for an Object for the steps to do this.
To change the load mode for an object:
-
During Pipeline creation:
-
On the Object Configuration page, in the Actions column, click the Edit (
) icon corresponding to the object for which you want to change the load mode.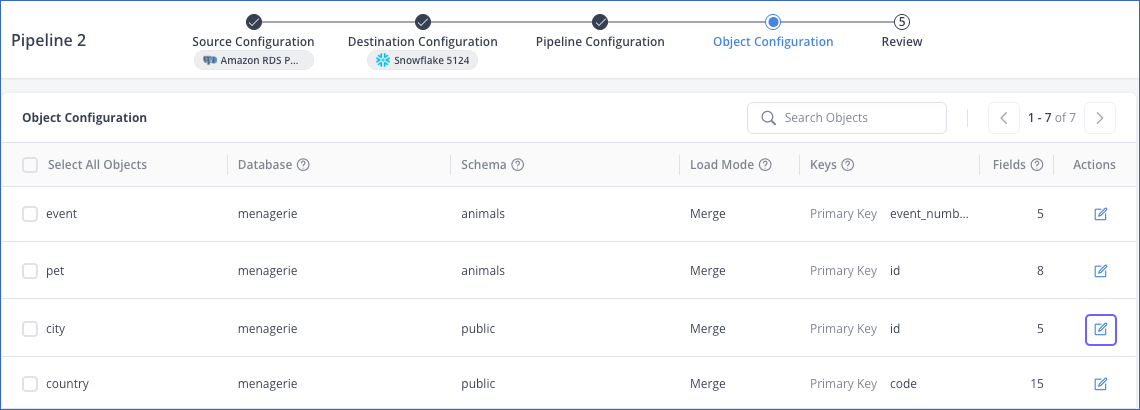
-
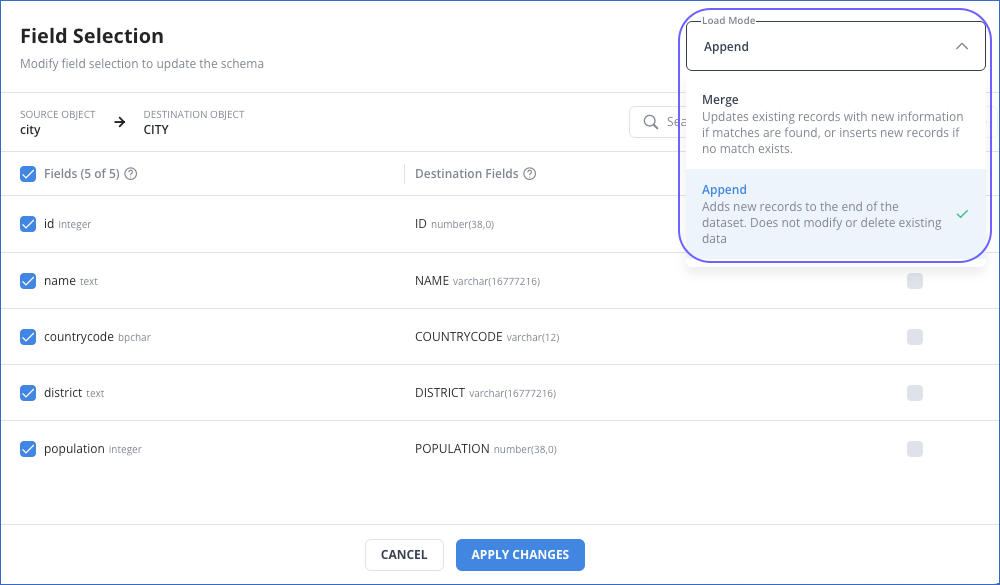
On the Field Selection slide-in page, select the Load Mode for your object from the drop-down menu at the top right corner. For example, the Append mode is selected in the image below.
-
Click APPLY CHANGES.
-
-
Post-Pipeline creation:
-
Click EDIT in the Pipeline Detailed View.

-
On the Pipeline Configuration page, click Next.
-
On the Object Configuration page, in the Actions column, click the Edit (
) icon corresponding to the object for which you want to change the load mode.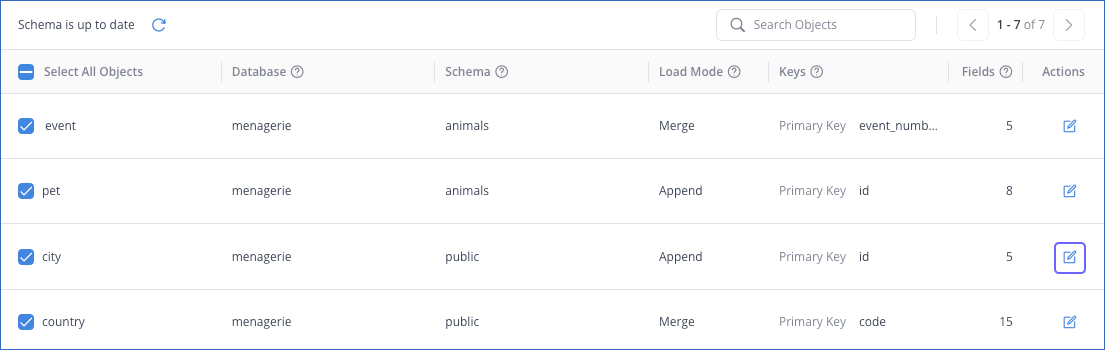
-
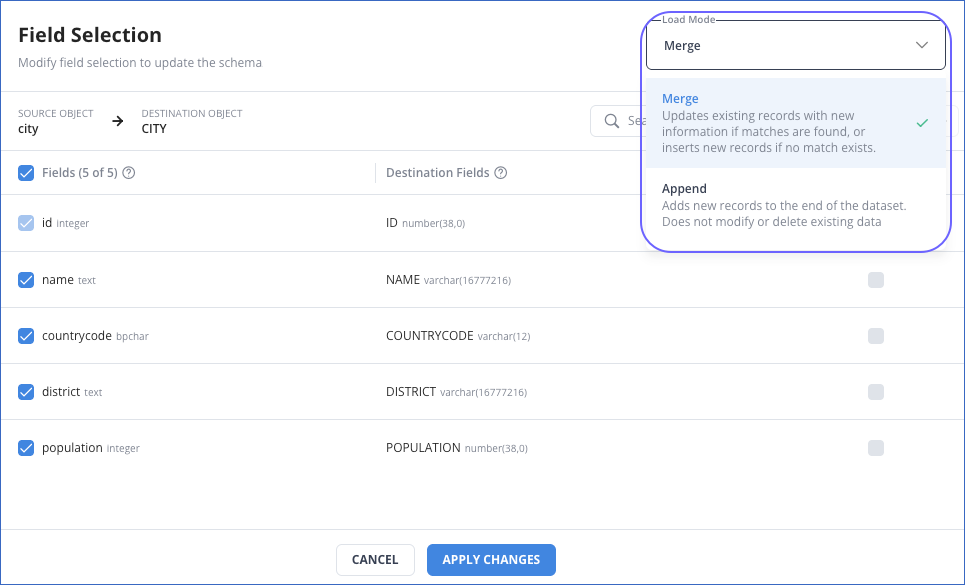
On the Field Selection slide-in page, select the desired Load Mode from the drop-down menu at the top right corner. For example, the Merge mode is selected in the image below.
-
Click APPLY CHANGES.
Note: When you change an object’s load mode from Append to Merge, a banner appears at the bottom of the Summary section on the Review page. It states that a drop and load operation will be performed during the resync for the changed object(s). This operation drops the existing Destination table(s), re-creates them, and loads the data ingested from the Source into the newly created table(s).

-
Resyncing an Object
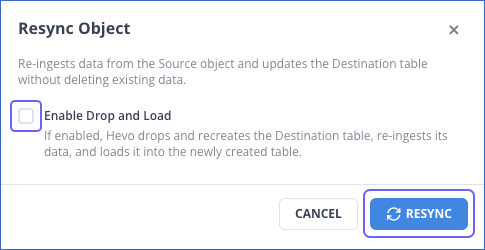
You can resync a Source object when you want to re-ingest the data for it. Only the updates and the additions from the re-ingested data are loaded into the Destination table. The existing data is not deleted. In this case, the schema of the Destination table is retained. With the Append load mode, a resync may result in duplicates if some of the Events were loaded in a previous run.
However, if your object has failed Events, is blocked due to column data type incompatibilities, or has data mismatches, you can choose to drop the Destination table during the resync operation. In this case, Hevo drops and re-creates the Destination table. Prior to dropping the Destination table, Hevo creates a backup of the existing table. Data from the Source object is re-ingested and loaded into the newly created table.
Note:
-
You can only resync objects that are in the Active state.
-
If the Drop and Load option is selected during the resync object operation, Hevo creates a backup of the existing table.
To resync an object:
-
Navigate to the Object Configuration tab of your Pipeline.
-
Click the More (
 ) icon next to the required object and click Resync Object.
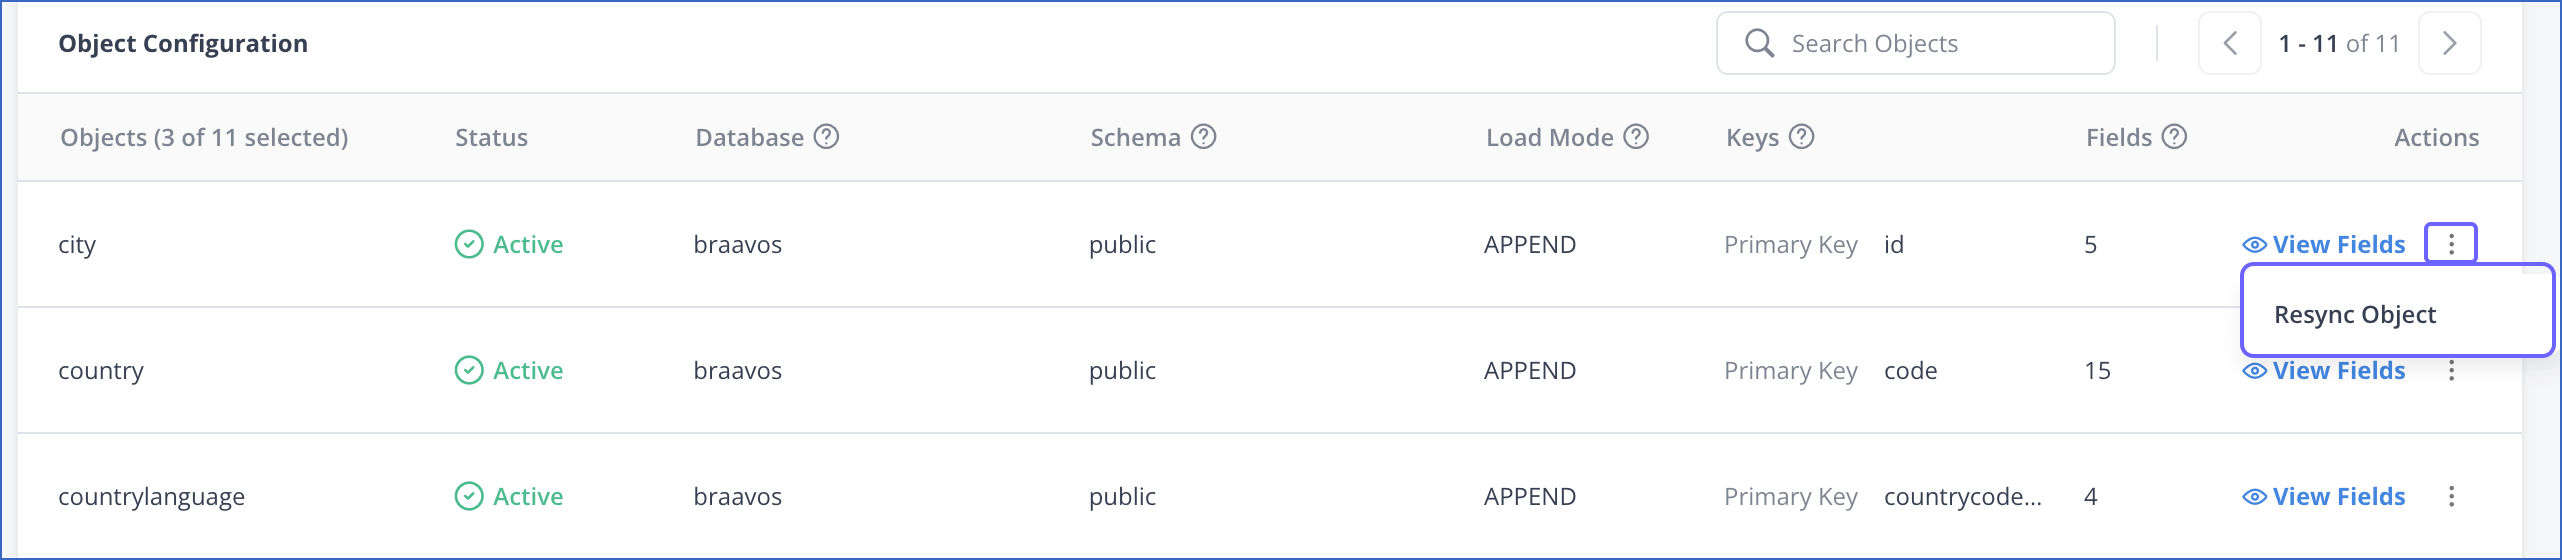
-
In the Resync Object pop-up window, do the following:
-
(Optional) Select the Enable Drop and Load check box if you want Hevo to re-create the Destination table during the resync operation
-
Click RESYNC to confirm the action.
-
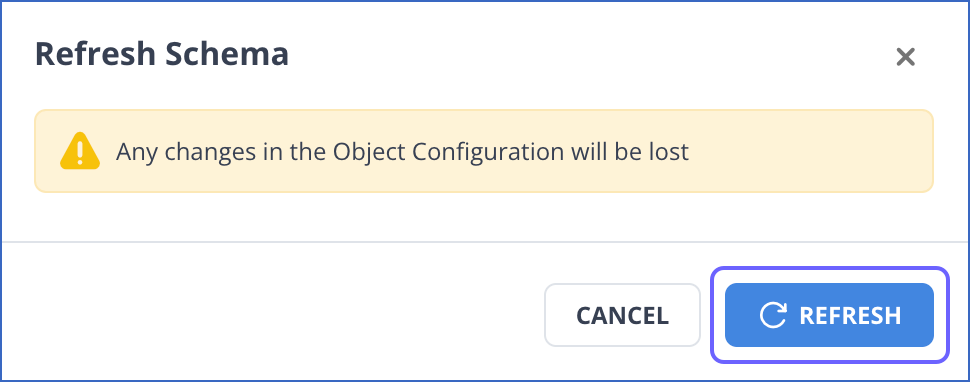
Refreshing Schema
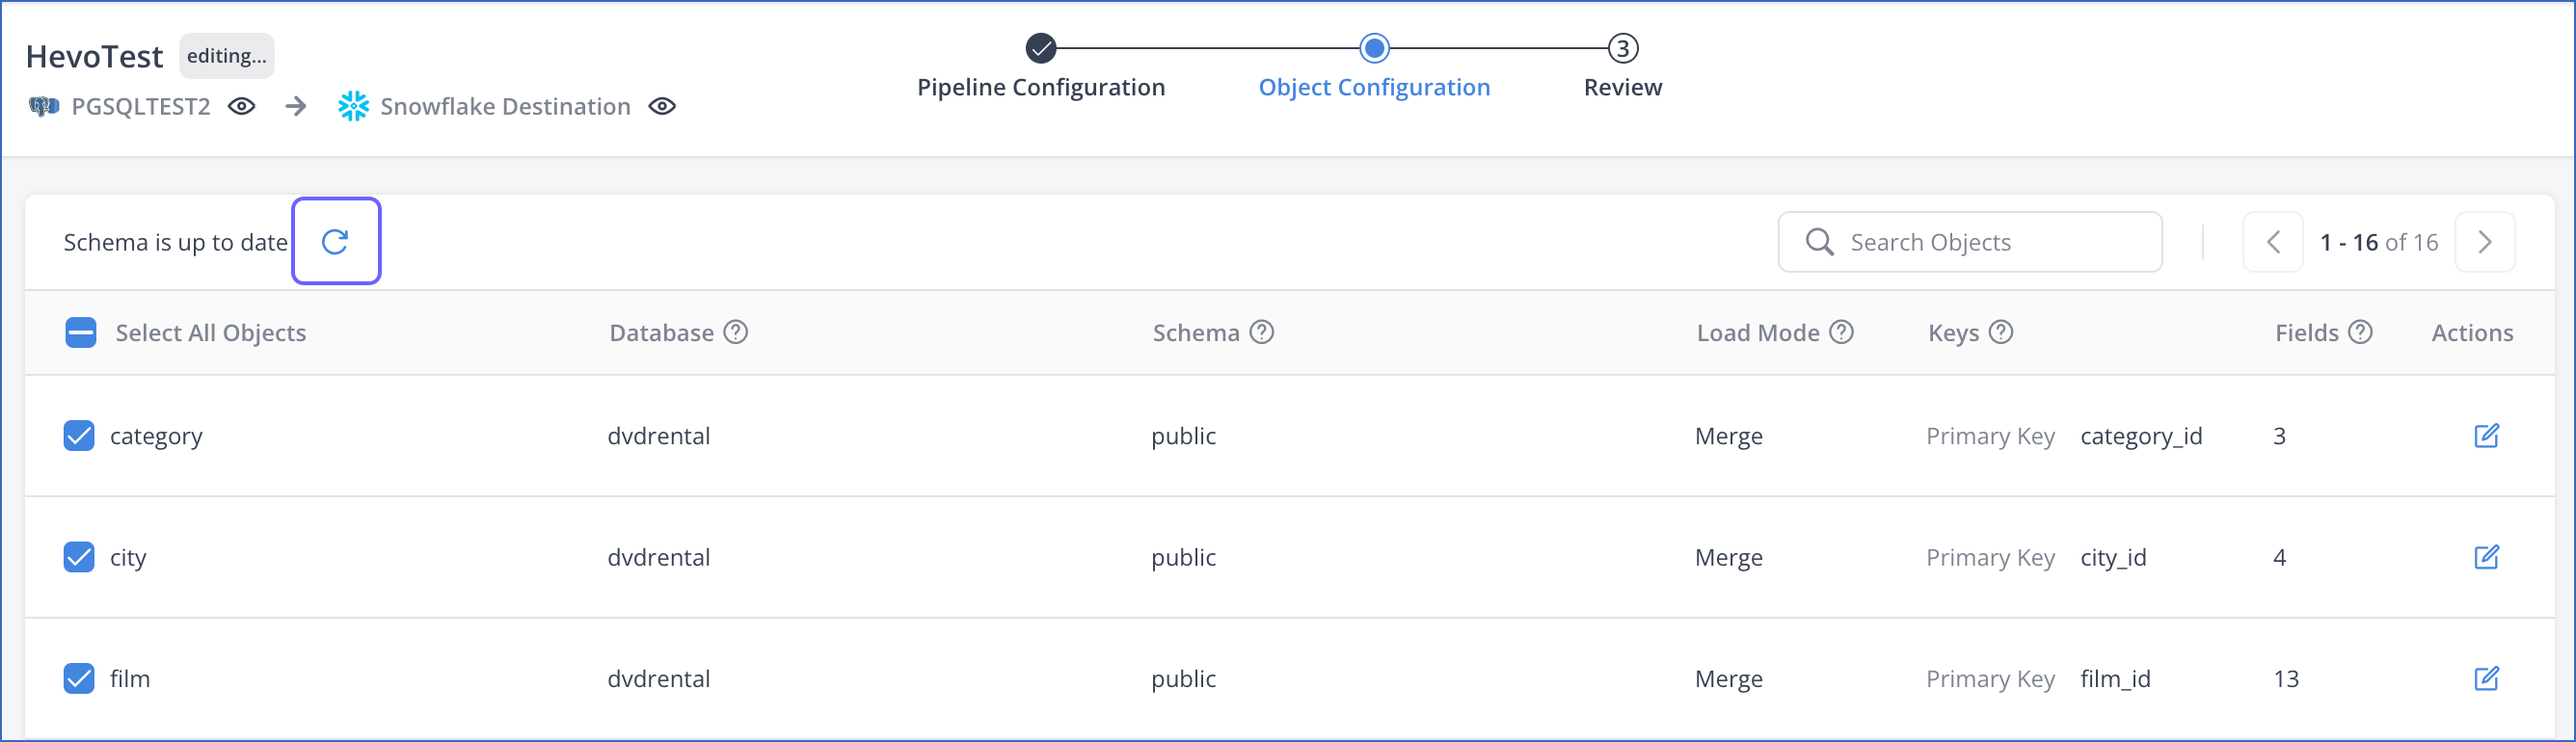
You can manually refresh the schema to update your Pipeline with changes from the Source schema before the next scheduled run. This allows newly added objects and fields to appear in the Object Configuration tab, so you can include them for ingestion and loading immediately if required. Read Pipeline Schema Management to know how Hevo handles any changes that occur in the Source data after the Pipeline is created.
To refresh the schema:
-
Click EDIT in the Pipeline Detailed View.
-
On the Object Configuration page of the Edit Pipeline flow, click the Refresh schema icon.
-
In the confirmation dialog, click REFRESH.
After a successful schema refresh, changes such as newly added, deleted, or renamed objects and fields will be reflected in the Object Configuration tab.