Enforcing SAML Single Sign On Across Your Team
On This Page
SAML (Security Assertion Markup Language) is the preferred industry standard for implementing single sign-on (SSO) for an enterprise’s multiple applications.
SAML SSO works on the principle of an Identity Provider (IdP), such as Okta, and a Service Provider (SP), such as Hevo. The Identity Provider is an entity providing the identity details of users, including the ability to authenticate them. The IdP typically also stores the user profile, which has additional information about the user such as the first name, last name, job code, phone number, and address. If SSO is enabled, all applications the user tries to log in to request the IdP for authentication and thus one credential (of IdP) works for the different applications.
The Service Provider is an entity providing the service, typically in the form of an application. For example, Hevo is a service provider.
The IdP maintains the identity details of the user. When the user tries to log in to the SP, SAML is used to send the assertion containing user’s information to the SP. The SP validates these against the team configurations stored with it to successfully authenticate the user.
SAML-SSO can be of two types:
-
IdP-initiated: This means that a user may log in to the SAML-enabled IdP and from there, access the app. For example, the user may log in to their IdP’s dashboard and click on the Hevo app to log in.

-
SP-initiated: This means that the user may connect directly to the service provider and is authenticated based on the identity configurations stored with the SP. For example, the user may try to log in directly to Hevo, whereby Hevo processes the SAML assertion received from the IdP to authenticate and log in the user.

To enable SAML-SSO for Hevo, you need to complete the following steps:
-
Set up Hevo as an App in a SAML-enabled IdP
-
Retrieve the app connection settings from Hevo. You need to provide these in the IdP to set up the Hevo app.
-
Configure Hevo as an application in your IdP org.
-
-
Set up SAML-SSO in Hevo
-
Copy the SAML settings from the IdP to configure in Hevo
-
The sections below explain these steps in detail.
Prerequisites
-
You are assigned the Team Administrator or Team Collaborator role in Hevo, to create a team.
-
You have created a team in Hevo.
Retrieving Hevo App Settings
You need to provide a few settings while configuring Hevo as an app in your IdP org. These settings are used to establish the users’ identity and determine the Hevo instance and team they belong to, when they try to connect to Hevo through their IdP dashboard.
To retrieve the settings:
-
Log in to Hevo.
-
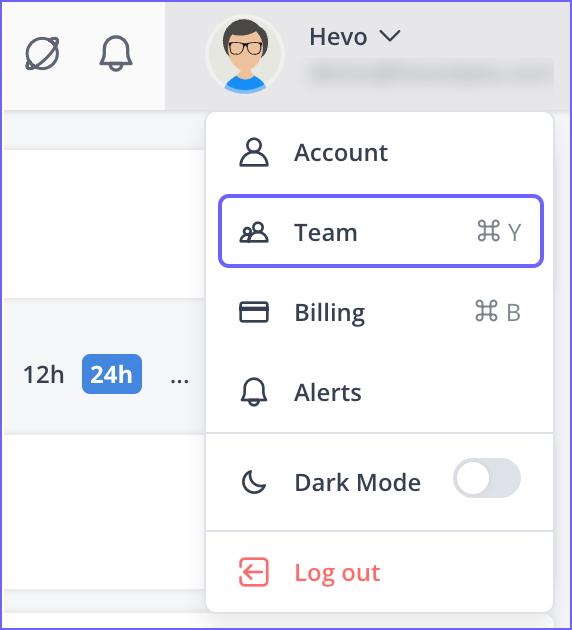
Click the drop-down next to your username in the User Info Panel.
-
Click Team.
-
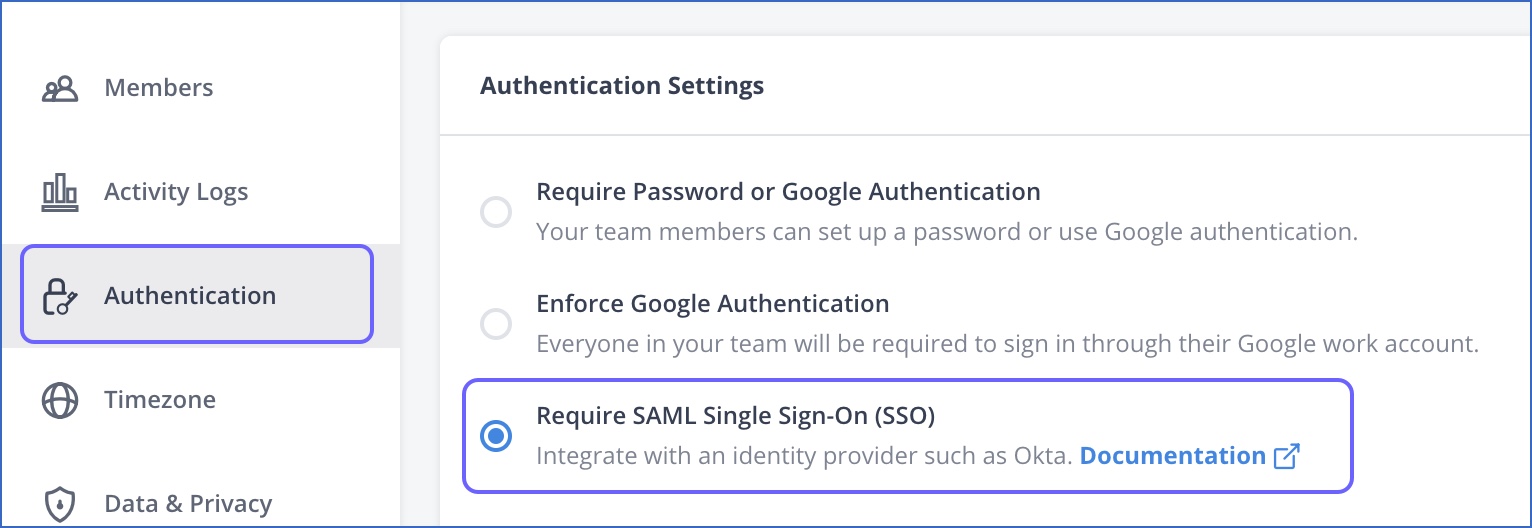
Click Authentication in the left navigation pane. This tab is visible only to Team Owners.
-
Select Require SAML Single Sign-On (SSO) option.
-
In the settings that are displayed, perform the following steps:

-
Click the Copy icon next to the Relay State field. The relay state includes details such as the team ID, Hevo environment, and the indicator that the login is occurring through the IdP.
Tip: You can decode the text using any online UTF-8 text decoder such as Base64 Decoder to view the details the relay state holds.
-
Click the Copy icon next to the SAML Meta Data field to copy the URL. Access the URL in a new browser window. You need to provide some of the Hevo metadata from the displayed XML file in your IdP settings.

-
Adding the Hevo App to Your SAML-Enabled IdP
In your IdP dashboard, you must add all the applications for which you want to enable single sign-on. Then, you must assign users to the app for it to appear on their IdP dashboard. The following sections describe the steps for doing this using:
However, the steps may be very similar for most of the popular IdPs.
Okta
1. Add the Hevo app
-
Log in to your SAML-enabled IdP such as Okta.
-
In the dashboard, click Add App.

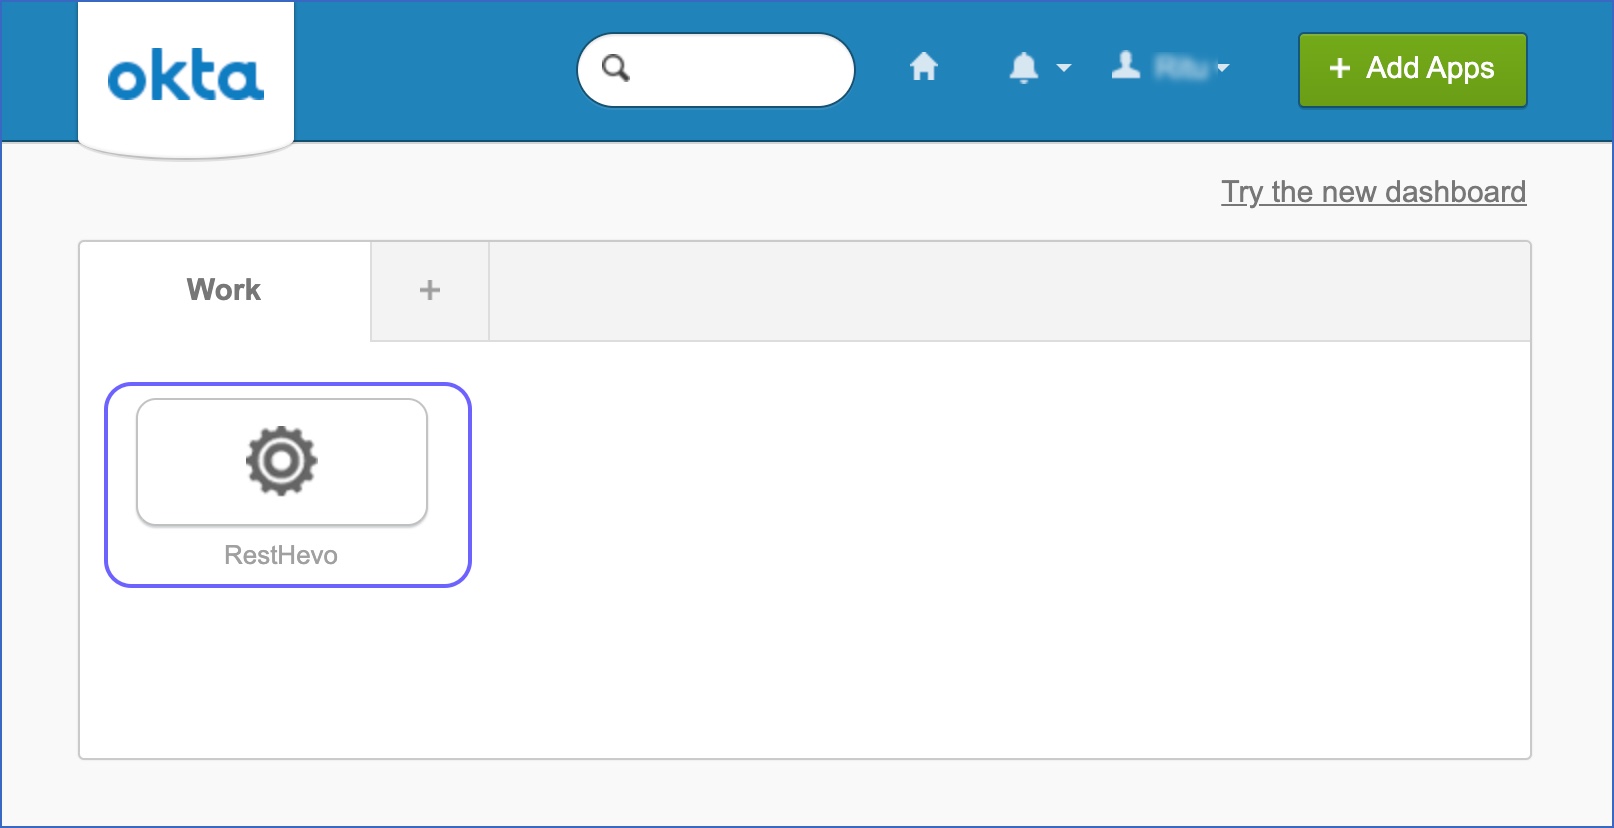
If you have configured applications in Okta previously, you may see the following screen. Click Add Application in this:

-
On the Add Application page, click Create New App.
-
In the pop-up window that appears, select the Platform as Web and Sign on method as SAML 2.0 and click Create.
-
In the General tab, specify the following App Settings including the name for the app.
-
Specify the following SAML Settings:
-
Single Sign-on URL: The URL for accessing the Hevo app. Use the URL from the Location field in the SP metadata that you copied above. For example, https://auth.hevodata.com/auth/saml/assertion.
-
Use this for Recipient URL and Destination URL: Select this check box.
-
Audience URI (SP Entity ID): The URL of the intended recipient of the SAML response. Paste the entity ID mentioned in the SP metadata XML file above. For example, http://samlsp.hevodata.com.
-
Default Relay State: Paste the relay state detail that you copied in Step 6-1 of section Retrieving Hevo App Settings above.
-
Attribute Statements - The attributes that will be included in the SAML assertion response sent by Okta for authenticating the user. At a minimum, you must add an email attribute as that is a mandatory attribute for Hevo. If this information matches what is entered by the user in Hevo, they get directly logged in.
-
Name: Specify the attribute name. For example, user-email to indicate an email ID.
-
Value: The information that the attribute holds. For example, user.email.

In this example, Hevo validates the email ID entered by the user against the user-email field in the SAML assertion response received from Okta.
Note: While you may select different IdPs such as Okta or OneLogin, Hevo mandatorily requires the users’ Email ID for authentication purposes.
-
-
-
Click Preview the SAML Assertion to view the information that is generated based on the details you entered above. A SAML assertion is the XML document containing the user authorization information that Okta would send to Hevo. For example, the attribute statement you entered above is included as follows:

-
If no further changes are needed, click Next and then, click Finish.
2. Assign users to the Hevo app
-
In your Okta dashboard, access the Applications page.
-
Click Assign Users to App.
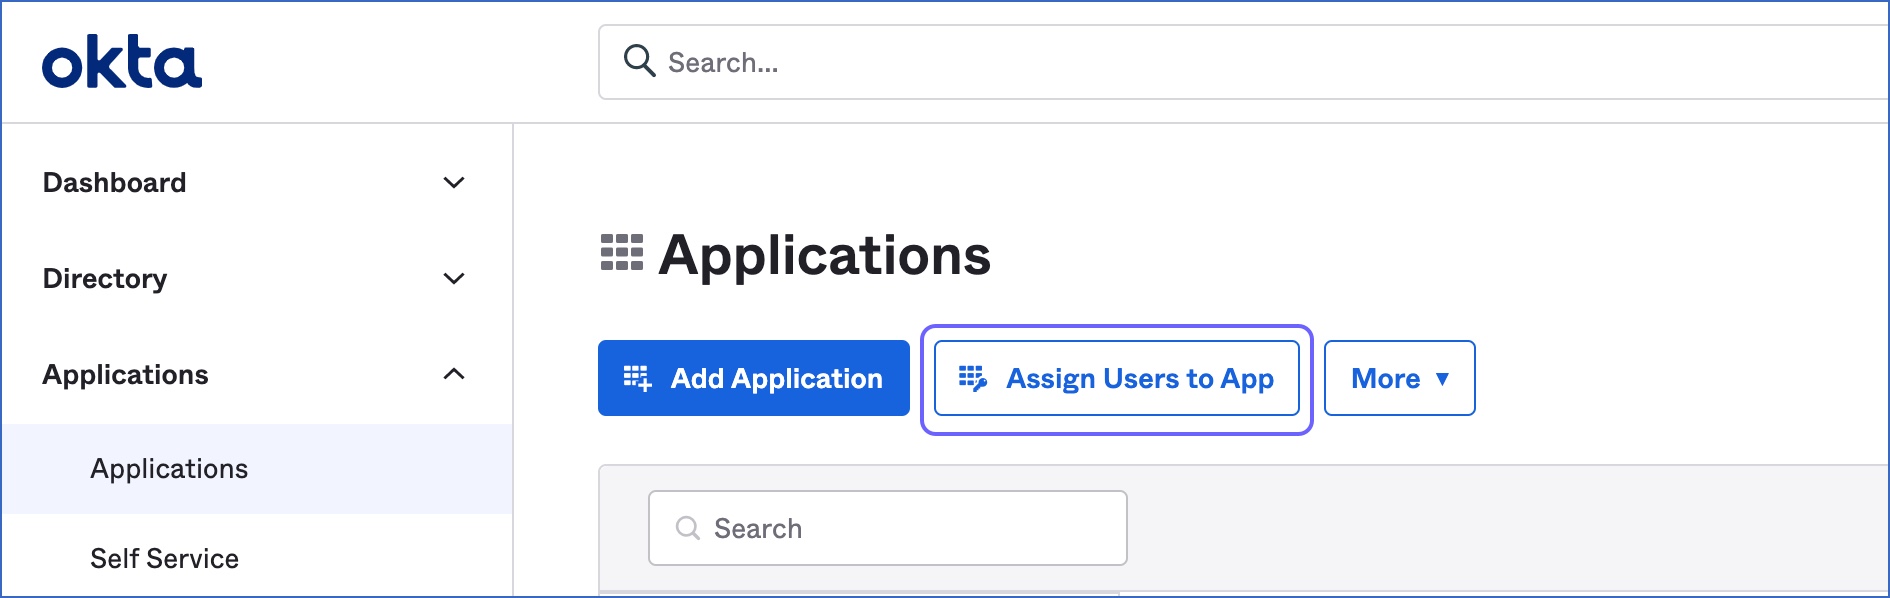
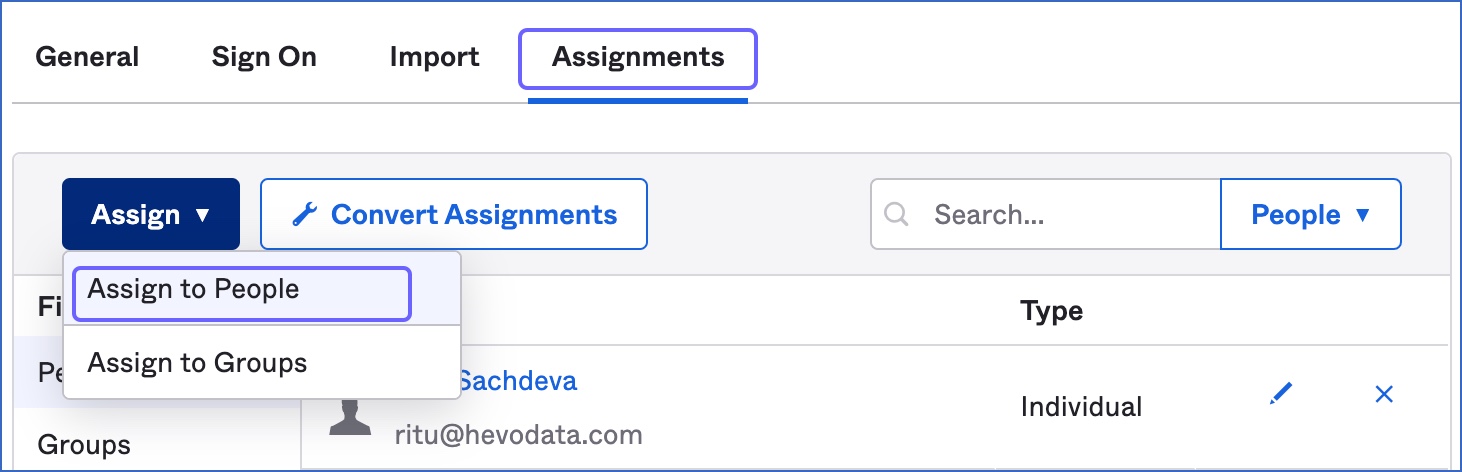
Alternatively, in the list of applications, click the Hevo app, and then click the Assignments tab.
-
Click the Assign drop-down and then click, Assign to People.
-
Search and add the users to the app.
-
Once all users are added, click Done. The users can now see Hevo in their Okta dashboard.
3. Retrieve IdP settings
When you add Hevo as an app in the IdP, it generates some configuration settings that you need for setting up SAML-SSO in Hevo.
Perform the following steps to retrieve these:
-
In your Okta dashboard, click the Hevo app, and then click the Sign On tab.
-
Click View Setup Instructions. Alternatively, click Identity Provider metadata.

-
Copy the information available on the page:
-
Identity Provider Single Sign-On URL
-
Identity Provider Issuer
-
X.509 Certificate. Click Download certificate to save the certificate file.
You need to provide these details in Hevo.
-
Azure Active Directory
Perform the following steps to add the Hevo app and set up single sign on in Azure Active Directory:
1. Add the Hevo app
-
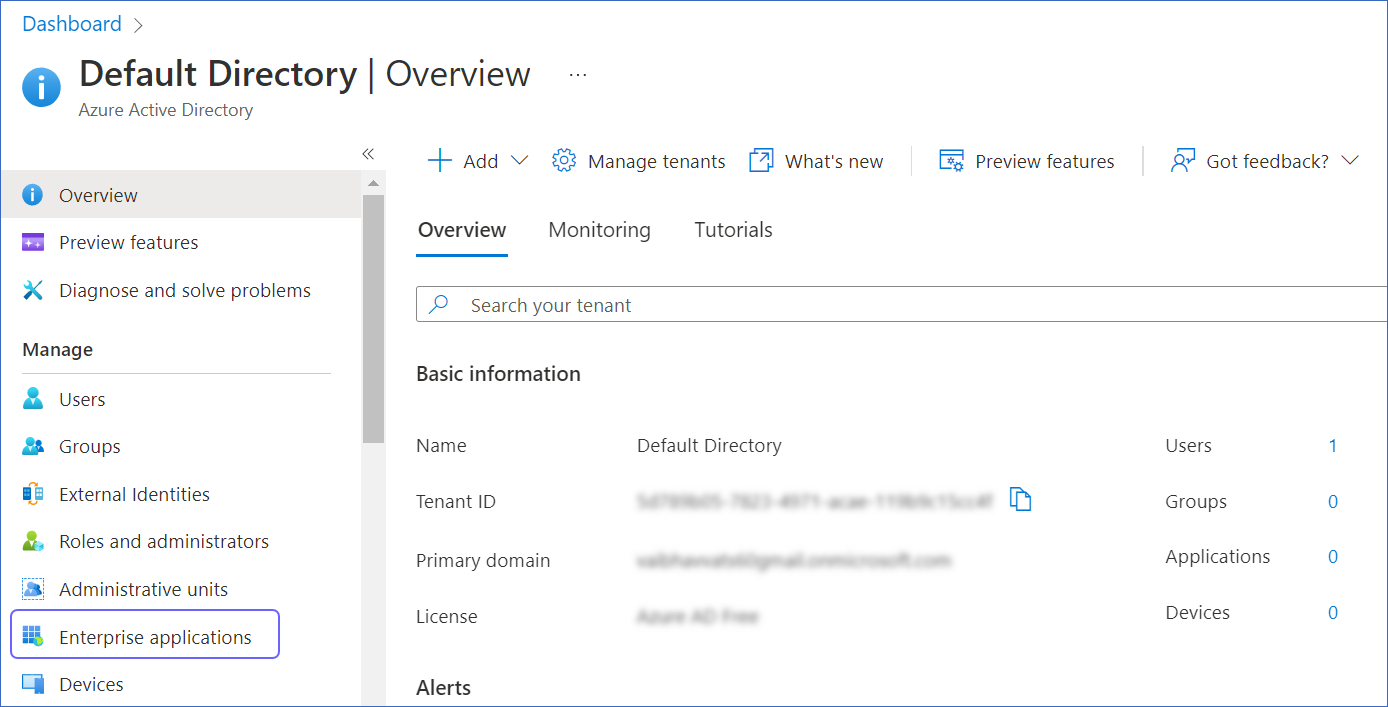
Log in to your Azure account, and navigate to Azure Active Directory.

-
In the left navigation panel, select Enterprise applications.
-
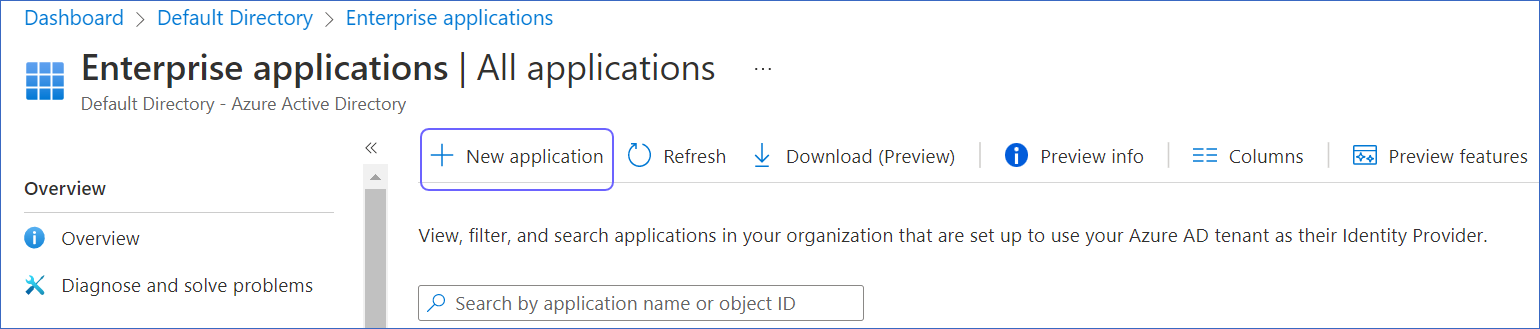
Click + New application, and then click + Create your own application.
-
On the Create your own application page, do the following:
-
In the What’s the name of your app?, enter Hevo.
-
Select the Integrate any other application you don’t find in the gallery (Non-gallery) option to create a Hevo application in Azure Active Directory.
-
Click Create.

-
-
On the Hevo Overview page, under the Getting Started section, select Set up single sign on.

-
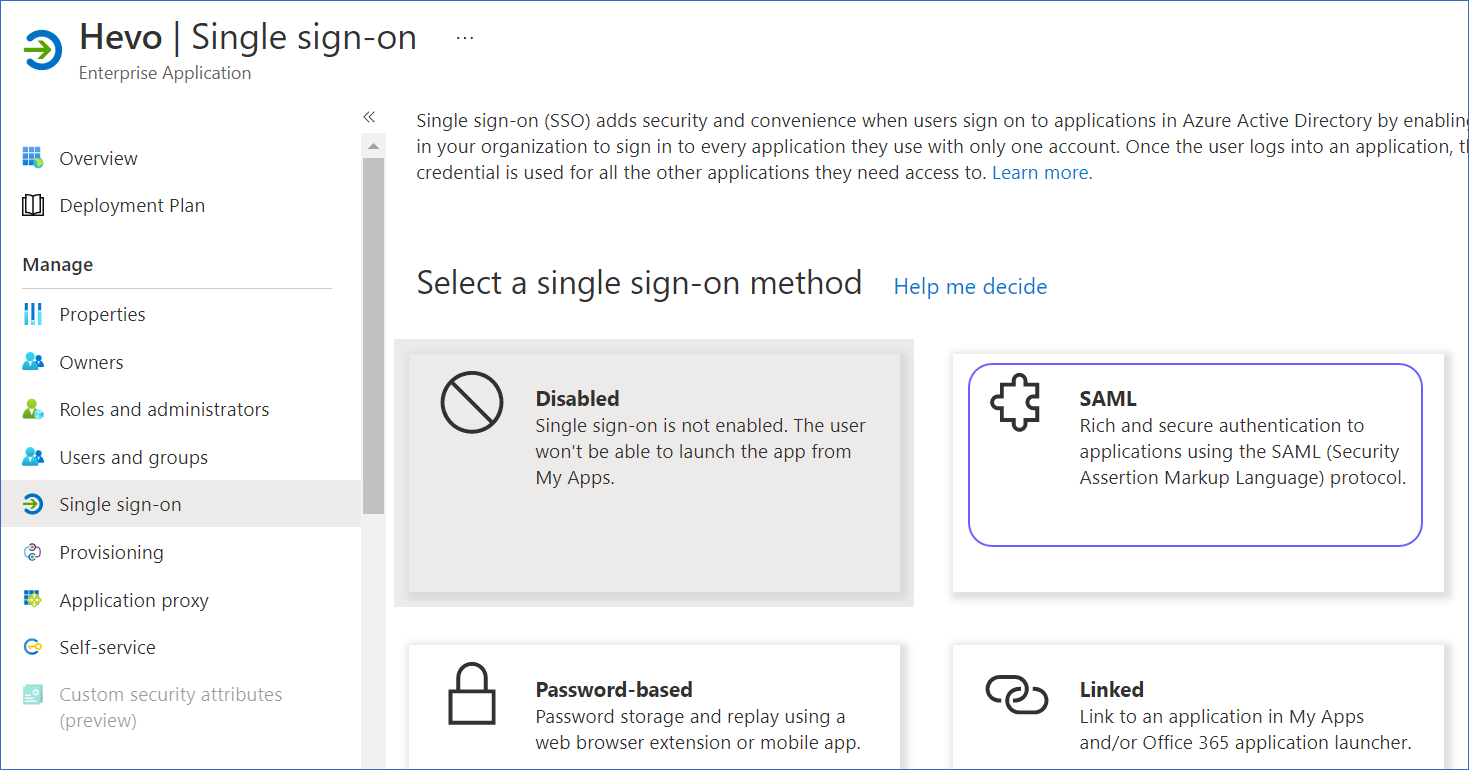
On the Select a single sign-on method page, select SAML.
-
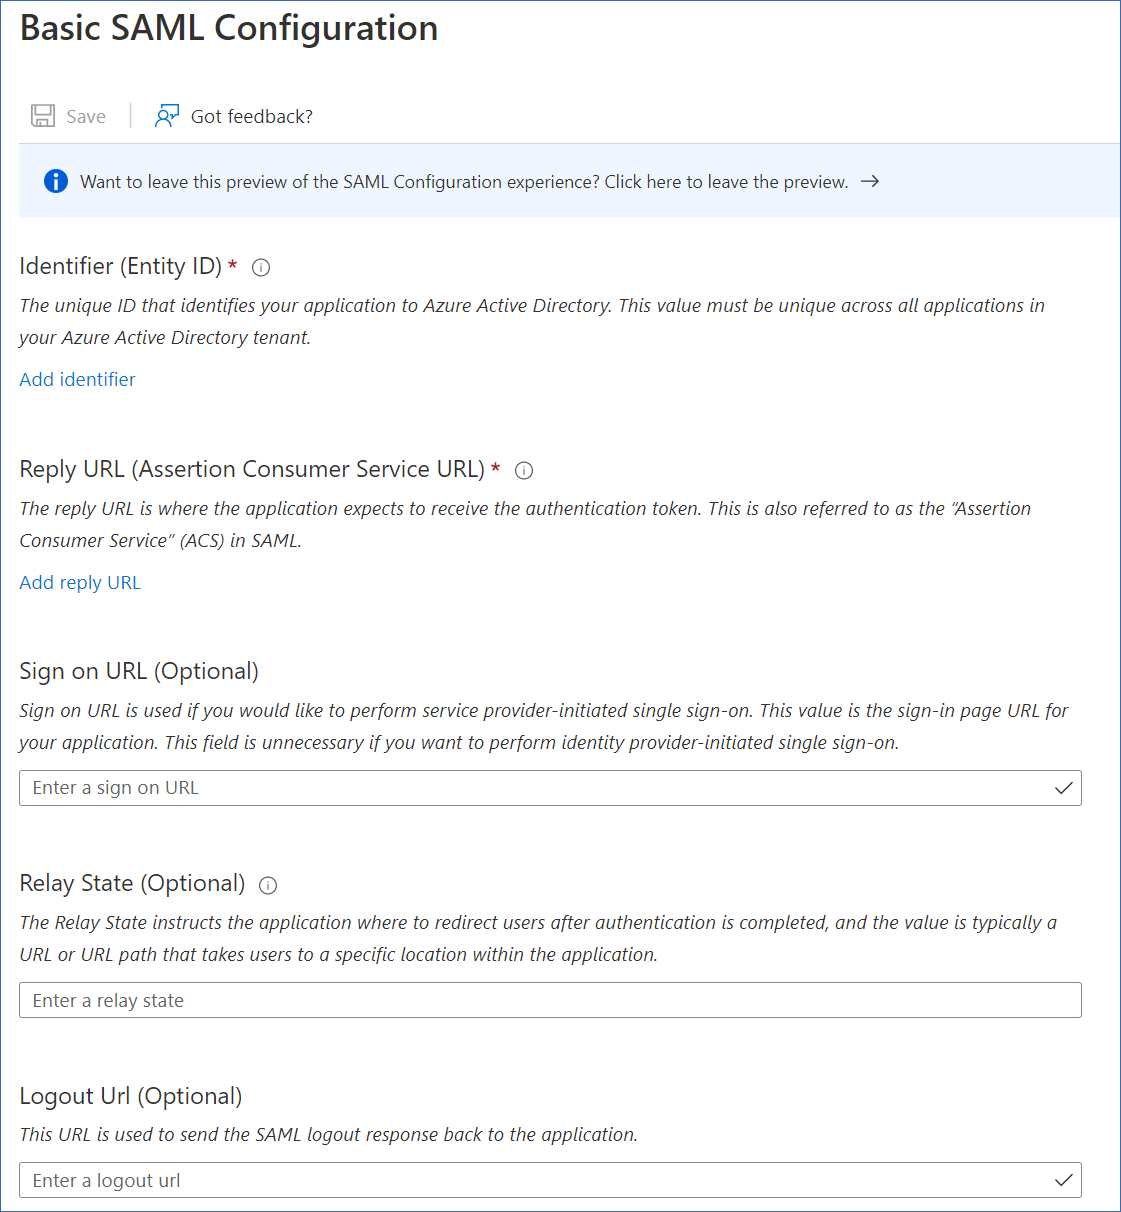
On the Set up Single Sign-On with SAML page, in the Basic SAML Configuration box, click Edit.

-
Specify the following settings:
-
Identifier (EntityID): The URL of the intended recipient of the SAML response. Paste the entity ID mentioned in the SP metadata XML file that you copied in step 6-2 of section Retrieving Hevo App Settings above. For example, http://samlsp.hevodata.com.
-
Reply URL (Assertion Consumer Service URL): The URL where Hevo receives the authentication token. Use the URL from the Location field in the SP metadata that you copied in step 6-2 of section Retrieving Hevo App Settings above. For example, https://auth.hevodata.com/auth/saml/assertion.
-
Relay State (Optional): The relay state includes details such as the team ID, Hevo environment, and the indicator that the login is occurring through the IdP. Paste the relay state detail that you copied in Step 6-1 of section Retrieving Hevo App Settings above.
-
-
Click Save.
You have successfully added Hevo as an application in Azure Active Directory.
2. Retrieve IdP settings
After you assign the basic SAML configuration settings in Azure AD, it generates a certificate and some configuration settings that you need for setting up SAML-SSO in Hevo.
On the Set up Single Sign-On with SAML page, perform the following steps to retrieve these:
-
In the SAML Signing Certificate section, download the SAML Certificate in Base64 format.

-
In the Set up Hevo section, copy the Login URL and Azure Ad Identifier, and store them in a secure location like any other password.

You need to provide these IdP settings while configuring SAML SSO in Hevo.
3. Assign users to the Hevo app
After adding Hevo as an app in Azure Active Directory, you must assign users to the app so that it is accessible to them through their dashboard.
-
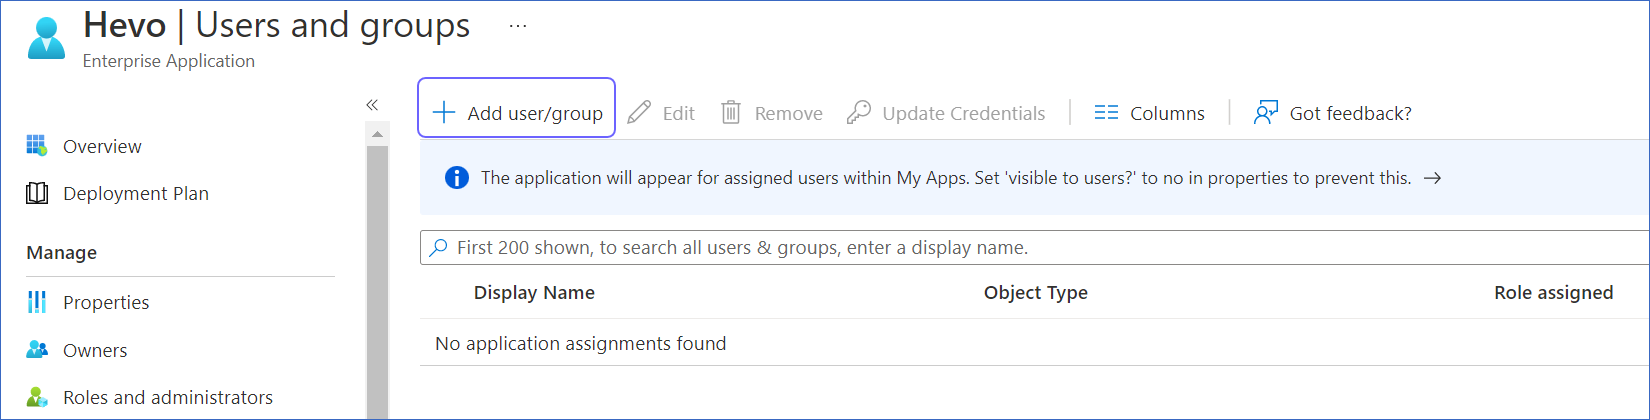
On the Hevo Overview page, under the Getting Started section, select Assign users and groups.

-
Click + Add user/group to add users to the Hevo app.
-
Search and click on the user name that is displayed, to add the user. Repeat this for every user that you want to add to the Hevo app.

-
Click Select to add the user(s) to the Hevo app.
You have successfully added users to the Hevo app.
Configuring SAML SSO in Hevo
-
Log in to Hevo.
-
Click the drop-down next to your username in the User Info Panel.
-
Click Team.
-
Click Authentication in the left navigation pane. This option is visible only to Team Owners.
-
Select Require SAML Single Sign-On (SSO). The page expands to list the configuration settings you must provide:
-
Specify the following settings:
-
Automatic Provisioning: If enabled, any new user who authenticates with Hevo via my IdP, gets added to your team. When a new user tries to log in to Hevo, they are directed to your company’s IdP’s login screen. Once they log in successfully, they are added to your Hevo account and are visible in the Team Members list.
If this setting is disabled, you must invite the new member via the Members page to enable them to log in.
-
The following settings received from the IdP in the previous section:
-
Upload X.509 Certificate for IdP: The certificate that you downloaded from the IdP. This is the signature used to validate any request received by Hevo from the IdP for a user login.
-
IdP Entity ID: The details that identify the user in the IdP.
-
Login URL: The IdP’s Single Sign-On URL. This is the URL to connect to the IdP from Hevo for authenticating the user.
-
-
Pick Email ID from saml2:NameID Element: When enabled, the field specified in the SAML assertion (received from the IdP) is used to compare the user’s email ID. If disabled, you must provide the IdP Mapping Attributes, of which, the Email field is mandatory.
-
Testing the SAML-SSO Configuration
Once you have configured SAML-SSO, you cannot modify it even as a Team Owner. Therefore, when you log out, you may not be able to log in if configurations are incorrect. You will have to contact Hevo Support in such a situation.
To preempt login difficulties, Hevo recommends that you test the configurations while being logged in to Hevo.
To do this:
-
Enable login via SAML-SSO settings in Hevo.
-
Open an incognito browser window and try to log in to Hevo via SAML-SSO.
-
If you can log in successfully, your SAML-SSO configurations are correct.
-
If you face any issue logging in, check your IdP settings to troubleshoot the problem.
-
Limitations
-
Hevo does not automatically assign roles to users who log in through SAML SSO based on their group membership in Azure Active Directory. A Team Owner or Administrator must manually assign the appropriate roles to these users in Hevo.
-
If Two-Factor Authentication (2FA) is enabled for your account in Hevo and also set up in your Identity Provider, such as Okta or Azure Active Directory, you may be prompted to authenticate more than once. To avoid duplicate prompts, you should disable 2FA for your account.
-
When users log in to Hevo using SAML SSO, only their email address is visible. First and last names are displayed only for users who sign up through the Hevo website or are invited to join a team.
Revision History
Refer to the following table for the list of key updates made to this page:
| Date | Release | Description of Change |
|---|---|---|
| Jul-18-2025 | NA | Added the Limitations section. |
| Aug-24-2022 | NA | Added section, Azure Active Directory to inform users about enforcing SAML-SSO using Azure AD as the IdP. |
| May-19-2021 | 1.63 | New document. |