Amazon Redshift
On This Page
Amazon Redshift is a fully managed, reliable data warehouse service in the cloud that offers large-scale storage and analysis of data sets, and can perform large-scale database migrations as well. It is a part of the larger cloud-computing platform, Amazon Web Services (AWS).
In Hevo Activate, you can configure Amazon Redshift as a Warehouse while creating an Activation, to synchronize data with your Target CRM application.
Prerequisites
-
An active AWS account.
-
An active Amazon Redshift instance.
-
Hevo’s IP addresses are whitelisted.
-
SELECT and USAGE privileges are granted to the database user.
-
Database hostname and port number of the Amazon Redshift instance are available.
Whitelist Hevo’s IP Addresses
You need to whitelist the Hevo IP address for your region to enable Hevo to connect to your Amazon Redshift database.
To do this, you need to add the inbound and outbound rules for your database, and configure a virtual private cloud (VPC):
1. Add Inbound and Outbound Rules
-
Log in to the Amazon Redshift dashboard.
-
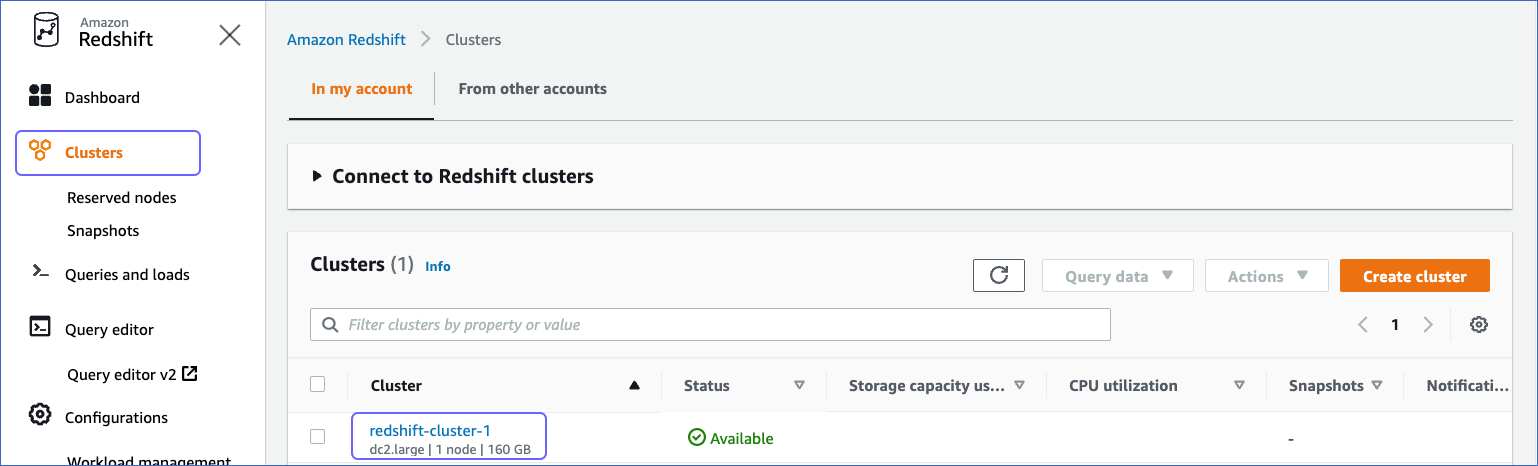
In the left navigation pane, click Clusters.
-
Click the Cluster that you want to connect to Hevo.
-
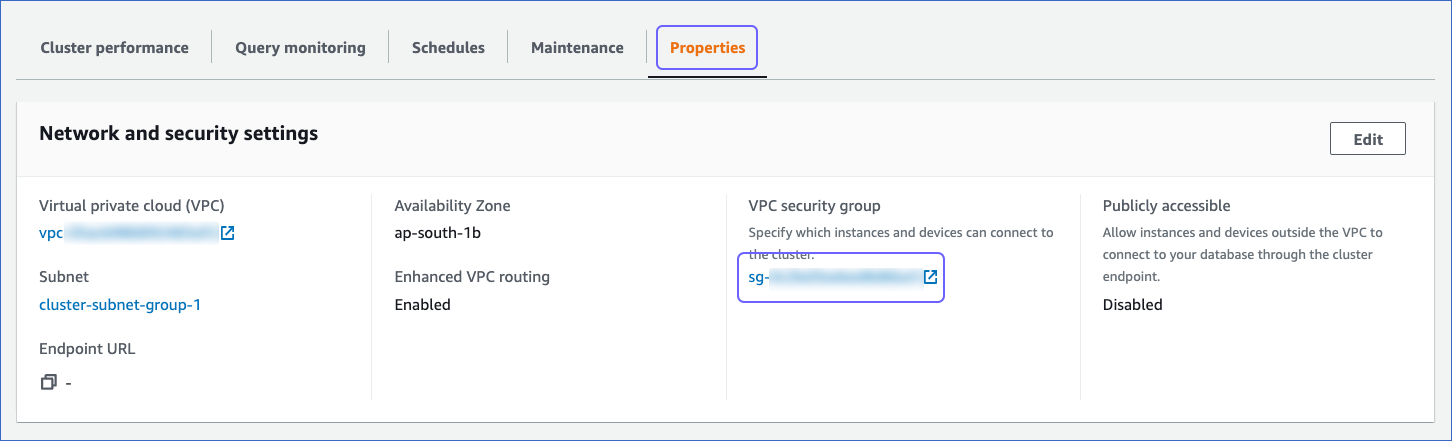
In the Properties tab, Network and security settings, click the link text under the VPC security group to open the Security Groups page.
-
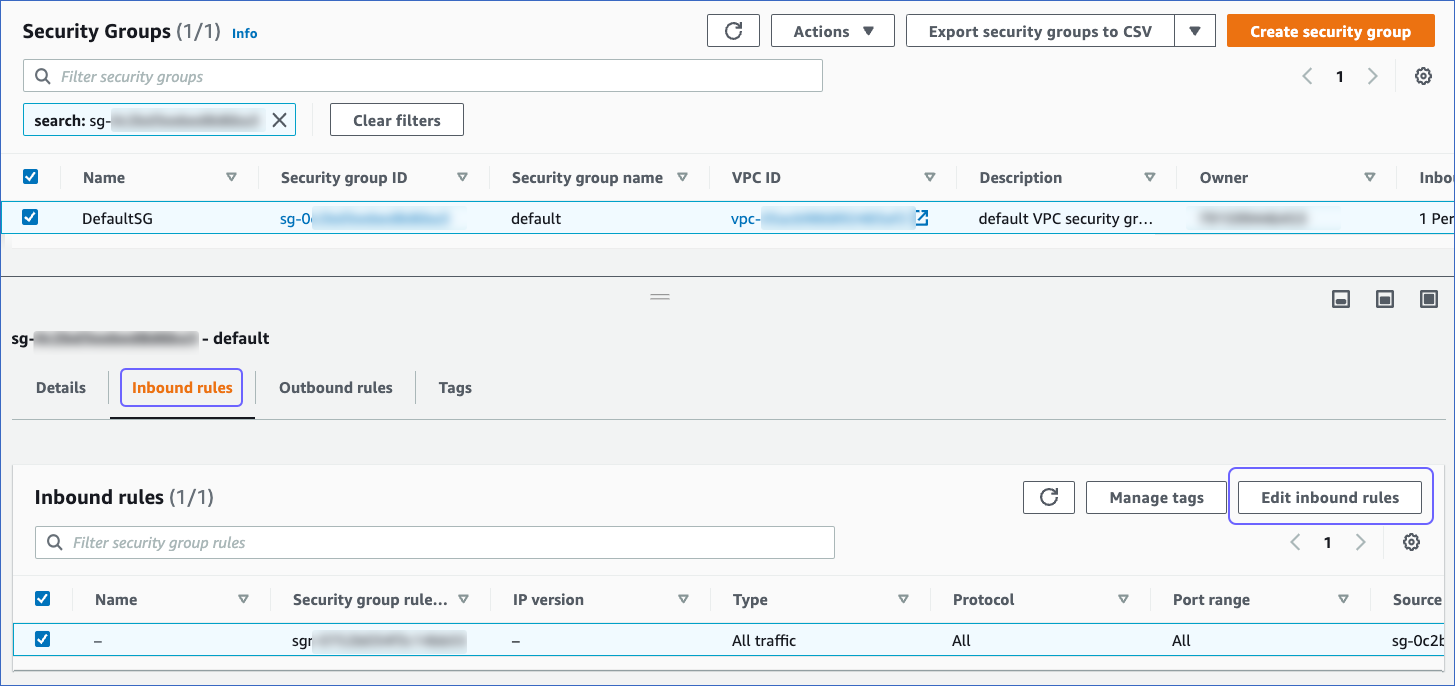
On the Security Groups page, click the Inbound rules tab, and then, click Edit inbound rules.
-
On the Edit inbound rules page:

-
Click Add rule.
-
In the Type column, select Redshift from the drop-down.
-
In the Port Range column, enter the port of your Amazon Redshift cluster. Default value: 5439.
-
In the Source column, select Custom from the drop-down and enter Hevo’s IP addresses for your region.
-
Click Save rules.
-
-
On the Security Groups page, click the Outbound rules tab, and then, click Edit outbound rules.

-
Repeat Step 6 on the Outbound rules page to configure outbound rules.
2. Configure a Virtual Private Cloud (VPC)
-
Log in to the Amazon Redshift dashboard.
-
In the left navigation pane, click Clusters.
-
Click the Cluster that you want to connect to Hevo.
-
In the Properties tab, Network and security settings, click on the link text under Virtual private cloud (VPC) to open the VPC.

-
On the Your VPCs page, in the Details panel, click on the link text under Main network ACL.

-
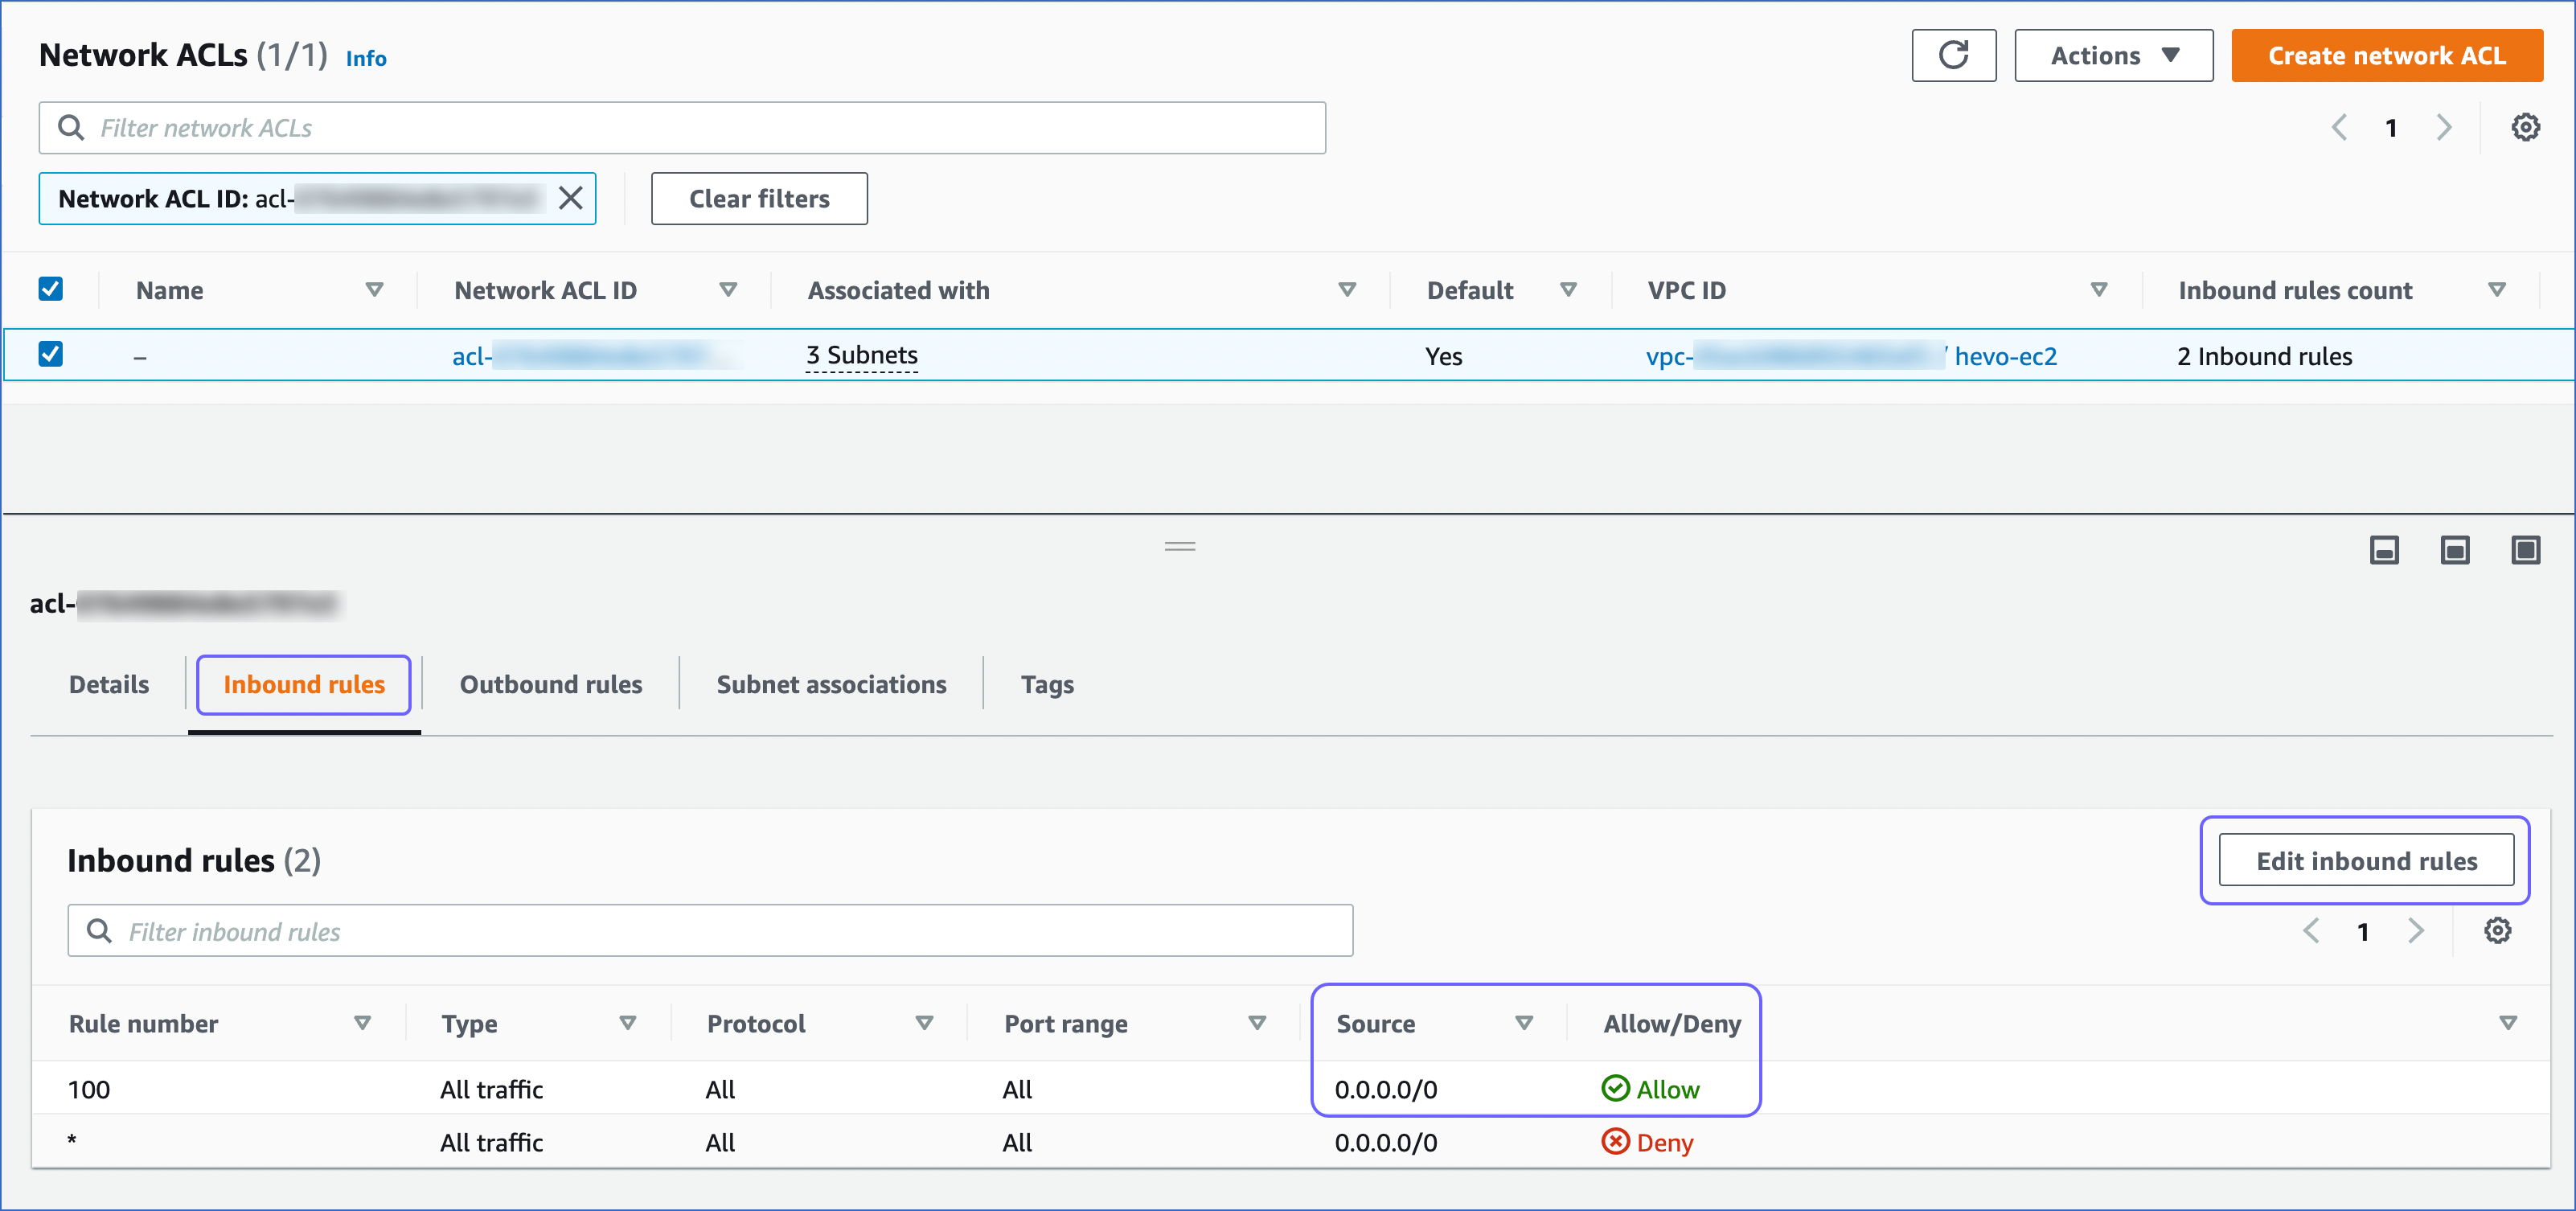
On the Network ACLs page, click the Inbound rules tab and ensure that the IP addresses you added are set to Allow. Else, click Edit inbound rules to change the setting.
-
On the Network ACLs page, click the Outbound rules tab and repeat Step 6 for the outbound rules.
Note: If you have enabled enhanced VPC routing while creating your Amazon Redshift cluster, ensure that your VPC is configured correctly. Refer to section, Warehouse Considerations.
Create a User and Grant Privileges
1. Create a user (optional)
-
Log in to your Amazon Redshift database as a
superuseror a user withCREATEprivilege. -
Enter the following command:
  CREATE USER <USER_NAME> WITH PASSWORD '<password>';

  # Example
  CREATE USER hevo WITH PASSWORD '<password>';
2. Grant privileges to the user
-
Log in to your Amazon Redshift database as a
superuser. -
Grant the required privileges as follows:
-
Grant CREATE and USAGE privileges to the database user for an existing database:
# Grant privileges to the database user that you created earlier GRANT CREATE ON DATABASE <database_name> TO <USER_NAME>; # Grant privileges to the database user on the <span class='glossary-term' data-toggle='glossary-tooltip' data-class='glossary-tooltip' data-for='schema'>schema</span>. GRANT CREATE ON SCHEMA <SCHEMA_NAME> TO <USER_NAME>; GRANT USAGE ON SCHEMA <SCHEMA_NAME> TO <USER_NAME>; -
Grant SELECT privilege to the database user on specific tables:
GRANT SELECT ON TABLE <schema_name>.<table_name> TO <USER_NAME>; # specific table
-
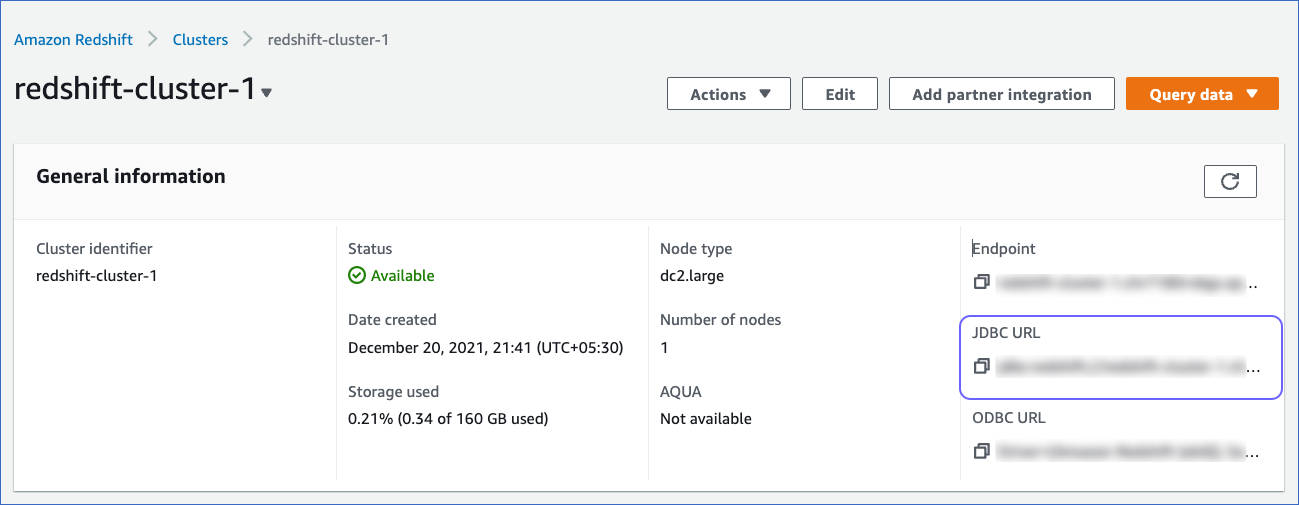
Retrieve the Hostname and Port Number (Optional)
-
Log in to the Amazon Redshift dashboard.
-
In the left navigation pane, click Clusters.
-
Click the Cluster that you want to connect to Hevo.
-
On the Clusters page, locate the JDBC URL and the Port.
Default value: 5439.
Use this JDBC URL as the database host and the Port as the database port in Hevo while configuring your Warehouse for an Activation.
Configure Amazon Redshift as a Warehouse
Perform the following steps to configure Amazon Redshift as an Activate Warehouse:
-
Do one of the following:
-
Click ACTIVATE in the Navigation Bar, and:
-
In the Activations tab, click + CREATE ACTIVATION.

-
On the Select Warehouse page, click + ADD WAREHOUSE.

-
On the Select Warehouse Type page, select Amazon Redshift.
-
-
Click DESTINATIONS in the Navigation Bar, and:
-
Click + CREATE DESTINATION in the Destinations List View.
-
On the Add Destination page, select Amazon Redshift as the Destination type.
-
-
-
On the Configure your Amazon Redshift Warehouse page, specify the following:

-
Warehouse Name: A unique name for your Warehouse.
-
Database Hostname: The Amazon Redshift host’s IP address or DNS name that you retrieved in Step 3 above.
Note: If the hostname URL is jdbc:redshift://examplecluster.abc123xyz789.us-west-2.redshift.amazonaws.com:5439/dev, enter examplecluster.abc123xyz789.us-west-2.redshift.amazonaws.com.
-
Database Port: The port on which your Amazon Redshift server listens for connections. This can be the port number that you retrieved in Step 3 or the one that you specified while configuring the database. Default value: 5439.
-
Database User: The database user that you created. A user with a non-administrative role in the Redshift database.
-
Database Password: The password of the database user.
-
Database Name: The name of the database from which data is to be synchronized.
-
Database Schema: The name of the schema on which the database user has SELECT and USAGE privileges. Default value: public.
-
Additional Settings:
-
Connect through SSH: Enable this option to connect to Hevo using an SSH tunnel. Read Connecting Through SSH. Else, whitelist Hevo’s IP addresses for your region.
Note: While whitelisting Hevo’s IP addresses, you must also make the Amazon instance publicly accessible.
-
Sanitize Table/Column Names?: Enable this option to remove all non-alphanumeric characters and spaces in a table or column name, and replace them with an underscore (_). Read Name Sanitization.
-
-
-
Click TEST CONNECTION to test connectivity with the Amazon Redshift Warehouse.
-
Once the test is successful, click SAVE & CONTINUE.
Warehouse Considerations
- Hevo copies the data identified for synchronization from your Amazon Redshift data warehouse to an S3 bucket using the UNLOAD command. Hence, if you have enabled enhanced VPC routing, ensure that your VPC is configured correctly. Enhanced VPC routing affects the way your Amazon Redshift cluster accesses other resources in your AWS network, such as the S3 bucket, specifically for the COPY and UNLOAD commands. Read Enhanced VPC Routing in Amazon Redshift.
Revision History
Refer to the following table for the list of key updates made to this page:
| Date | Release | Description of Change |
|---|---|---|
| Aug-26-2024 | NA | Updated section Configure Amazon Redshift as a Warehouse to reflect the latest UI. |
| Sep-21-2022 | NA | Added a note in section, Configure Amazon Redshift as a Warehouse. |
| Mar-07-2022 | NA | Added section, Warehouse Considerations for actions to be taken when Enhanced VPC Routing is enabled. |
| Jan-03-2022 | 1.79 | New document. |