Configuring a dbt™ Project
On This Page
At this time, the dbt Core™ on Hevo is in BETA. Please reach out to Hevo Support or your account executive to enable it for your team.
You can create dbt projects in Hevo and load the transformed data to tables and views in your Destination. These targets are created the first time you run the dbt project. In subsequent runs, the structure of your targets is retained but the existing data in them is deleted and new data loaded.
You can run the dbt project as per a defined schedule or use the Run Now option to run it on-demand. Read Scheduling a dbt Project for the details.
Prerequisites
-
An account in any Git provider such as GitHub, GitLab, or Bitbucket.
-
Read-only access to the Git repository containing your dbt project.
-
One of the following for Hevo to connect to your Git repository:
-
For all Git providers:
-
The HTTPS URL of your linked Git repository.
-
A Personal Access Token (PAT) to authenticate Hevo.
-
-
For GitHub only:
- The
repoOAuth scope is granted to Hevo in GitHub.
- The
-
-
The path to your dbt project configuration file in the Git repository.
-
The details to add a Destination or an existing Destination from the following types:
-
The tables on which the dbt project must run exist in your Destination.
Obtaining a Personal Access Token
Hevo requires a Personal Access Token (PAT) or an App password to connect to your Git provider with the HTTPS URL.
To create a PAT or an App password:
-
GitLab: Follow the steps listed on this page, Create a personal access token.
-
GitHub: Follow the steps in the section, Creating a personal access token in GitHub.
-
Bitbucket: Follow the steps listed on this page, Create an App password.
Creating a personal access token in GitHub
-
In the top-right corner of the page, click your profile photo and click Settings.

-
In the left navigation pane of Your Profile page, scroll to the bottom and click Developer settings.

-
In the Developer settings page, under Personal access tokens, click Tokens (classic).
Note: At this time, Hevo only supports classic PATs.

-
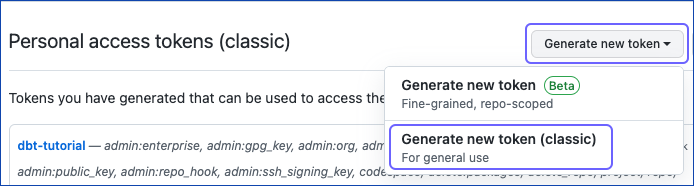
In the Personal access tokens (classic) page, click Generate new token and select Generate new token (classic) from the drop-down.
-
In the New personal access token (classic) page:

-
Describe your token in the Note field.
-
Set the Expiration to one of the predefined values or select Custom from the drop-down, to set a date using the calendar. Default value: 30 days.
-
Select the scopes of your token. Hevo requires the
reposcope to be able to clone a private repository. -
In the Select scopes section, select the following scopes for of your token to allow Hevo to clone a repository:
-
repo
-
read:org in admin:org
-
-
-
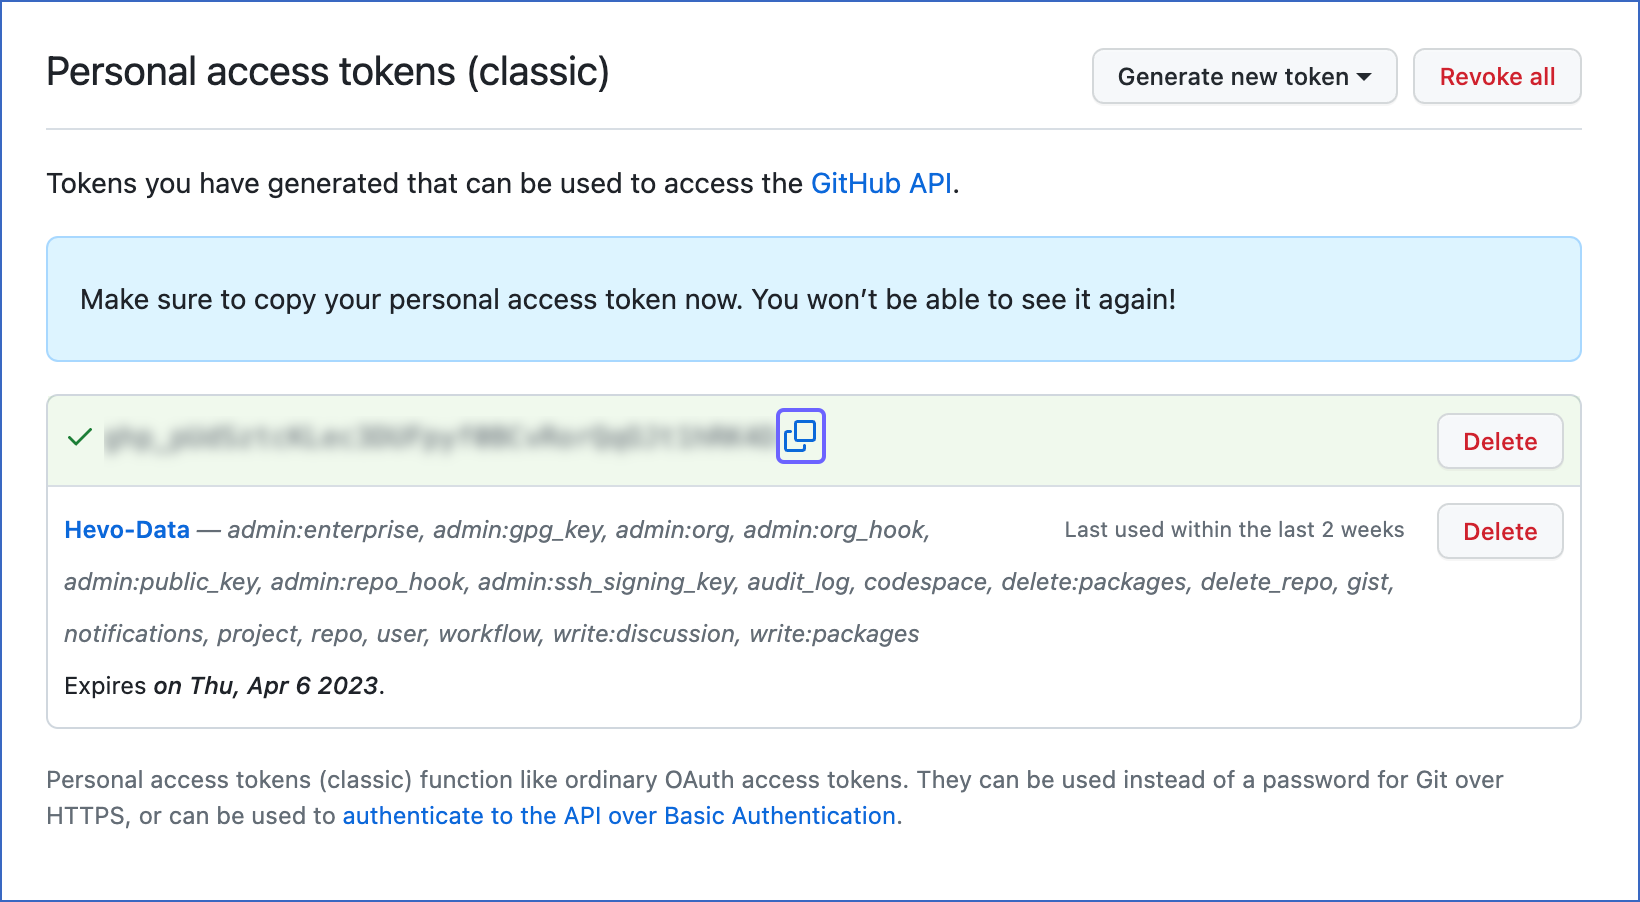
Scroll to the bottom of the page and click Generate token.
-
Copy the displayed token and save it securely like any other password.
You can provide the PAT while connecting to your Git repository using HTTPS in the Configure your dbt™ Model page.
Configuring your dbt Project
-
In the Navigation Bar, click MODELS.
-
If this is the first Model you are creating in Hevo, perform the actions listed in this step, else, skip to Step 3.
-
Click + CREATE MODEL.

-
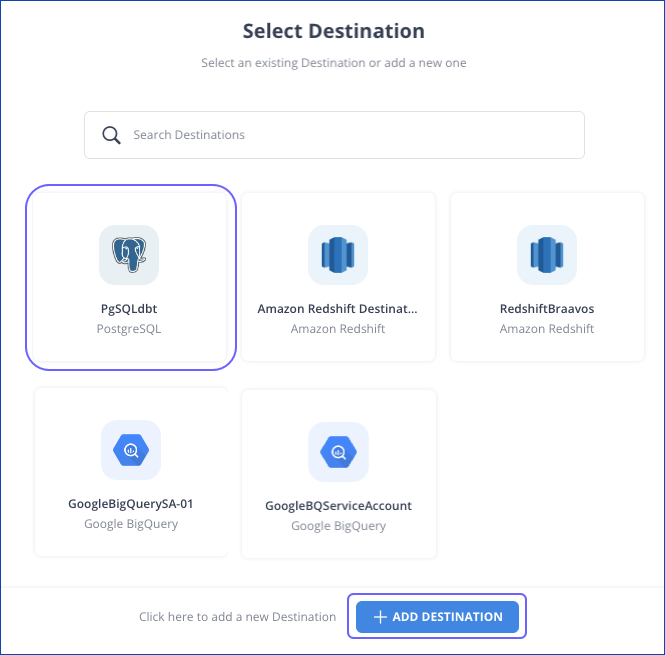
In the Select Destination page, do one of the following:
-
Select an existing Destination.
-
Click + ADD DESTINATION to configure a new Destination.
-
-
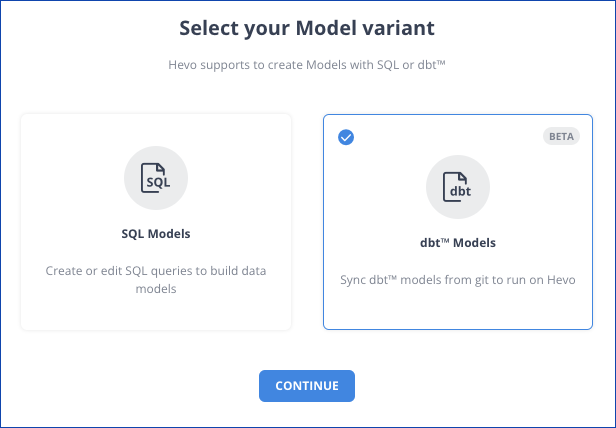
In the Select your Model variant page, select dbt™ Models and click CONTINUE.
-
Skip to Step 4.
-
-
To create your first dbt project:
-
Select the dbt Core™ tab in the Models List View, and click CREATE dbt™ MODEL.

-
In the Select Destination page, do one of the following:
-
Select an existing Destination.
-
Click + ADD DESTINATION to configure a new Destination.
-
-
-
In the Configure your dbt™ Model page, specify the following:

-
dbt™ Model Name: A unique name for your dbt project.
-
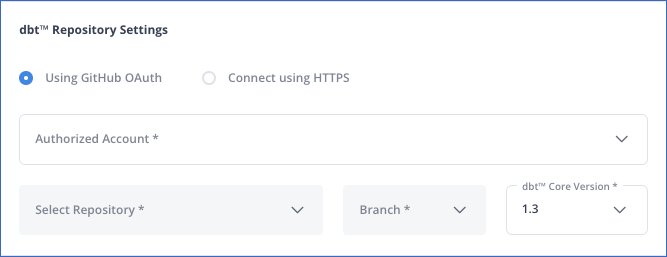
dbt™ Repository Settings: The Git repository containing your dbt projects.
Select one of the following ways to connect to the repository:
-
Using GitHub OAuth: Select this method to connect to your GitHub repository.
-
Click CONNECT GITHUB ACCOUNT.
-
Sign in to your GitHub account, and click Authorize to grant Hevo access to your repository.

-
Select your Git repository details in each drop-down field:
-
Authorized Account: The GitHub account with access to your Git repository. Select one of the available authorized accounts from the drop-down list, or add one now.
Note: Hevo can authorize only those accounts that are connected to GitHub. If you need to add a different account, you must first log in to that account in GitHub. The account is then displayed for authorization when you click + Add New User. Read Switching between accounts for information on using multiple GitHub accounts.

If you need to remove a previously authorized GitHub account from the drop-down list, click the Delete (
 ) icon next to the account.
Note:You must delete all projects associated with the authorized account before deleting it.
-
Select Repository: The Git repository linked with your dbt project.
-
Branch: The branch in your Git repository that contains your dbt project.
-
dbt™ Core Version: The dbt version in which you created your dbt project. Default value: 1.3.
-
-
-
Connect using HTTPS: Select this method to connect to your Git repository in any Git provider, such as GitHub, GitLab, and Bitbucket. Specify the following:

-
Git HTTPS: The HTTPS URL of the repository linked with your dbt project. For example, https://gitlab.example.com/namespace/mydbtproject.git is the HTTPS URL of a GitLab repository called mydbtproject.
-
Git Branch: The branch in your Git repository that contains your dbt project. For example, main.
-
Personal Access Token: A secret value to authenticate Hevo with your Git provider. Refer to your Git provider’s documentation for the steps to create one.
Note: At this time for a GitHub repository, only classic personal access tokens are supported.
-
dbt™ Core Version: Select the dbt version in which you created your dbt project from the drop-down. Default value: 1.3.
-
-
-
Advanced Settings:
-
Project Path: The location of your dbt project configuration file,
dbt_project.ymlin your Git repository. For example, /dbt_sample_project. -
Threads: The number of independent models in your dbt project that dbt can simultaneously work on. For example, if this value is set to 3, dbt can work on 3 independent models. Default value: 15. You can set a value from 1-32. However, increasing the number of threads affects the load on your Destination and may cause other processes in your database or data warehouse Destination to slow down. Read Understanding threads to see how threads affect the dbt project and your data warehouse cost and resource utilization.
-
-
-
Click TEST CONNECTION if you want to check your configuration.
-
Click TEST & CONTINUE.
Your dbt project is configured. To run the project and the models in it, you need to create a schedule. If you want, you can also run your project manually.
Revision History
Refer to the following table for the list of key updates made to this page:
| Date | Release | Description of Change |
|---|---|---|
| Feb-12-2024 | NA | Updated section, Configuring your dbt Project to add a note about Hevo authorizing accounts already connected to GitHub in the Configure your dbt™ Model page. |
| May-30-2023 | NA | Updated section, Configuring your dbt Project to add a note about deletion of projects. |
| Apr-10-2023 | NA | Updated section, Creating a personal access token in GitHub to grant permission to read organization repository. |
| Feb-07-2023 | NA | Added information about deleting a GitHub account authorized via OAuth from the Configure your dbt™ Model page. |
| Jan-02-2023 | NA | Changed from PAT to App password for Bitbucket. |
| Nov-25-2022 | NA | New document. |