Manually Mapping Event Types
On This Page
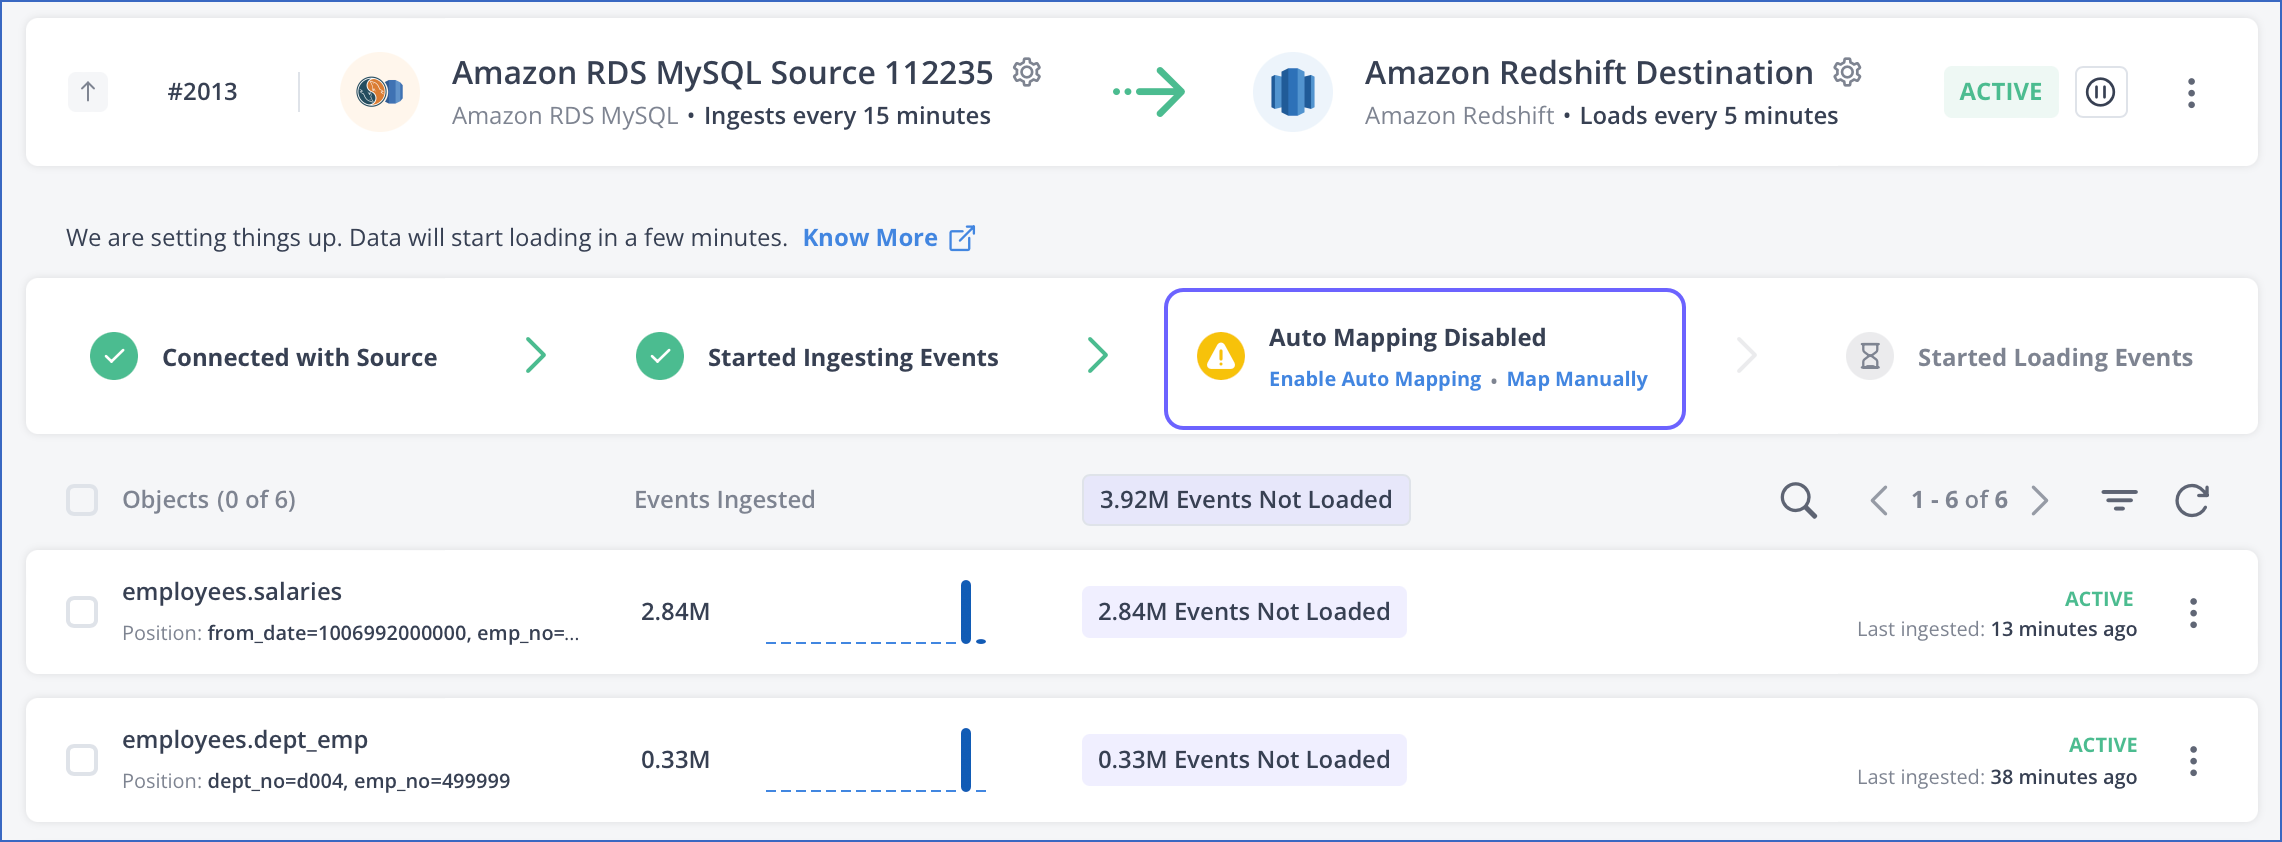
Hevo provides you an option to manually map Event Types and fields from your Source to the corresponding tables and columns in the Destination. To do this, you must disable Auto Mapping during Pipeline creation. For such Pipelines, Hevo displays Auto Mapping Disabled in the Pipeline Overview page and the Event Types displayed in the Schema Mapper page of your Pipeline remain in unmapped state. The Events ingested for these Event Types are sidelined till you either manually map the schema or enable Auto Mapping to automatically map the Source Event Types to the Destination table.
You can modify these mappings post-Pipeline creation. For Auto Mapped Pipelines, you do not need to disable Auto Mapping to make changes, unless you want to make updates like changing the Destination table. Read Modifying Schema Mapping for Event Types.
Read Auto Mapping Event Types to know how Hevo handles different data scenarios when you enable or disable Auto Mapping for your Pipeline.
The following diagram illustrates the manual mapping process. The steps are also described in detail below.

Perform the following steps to manually map an Event Type to a Destination table:
-
Navigate to the Schema Mapper page in one of the following ways:
-
In the Pipeline Overview page, click Map Manually.

-
In the left navigation pane of the Pipeline Overview page, click Schema Mapper.

-
-
In the Schema Mapper page, select the Event Type you want to map.
-
Do one of the following:
-
Map to an existing Destination table
Note: If you use this method, the Destination table prefix that you might have entered while configuring your Pipeline is lost.
-
Repeat the above steps for all Event Types that you want to map manually.
Mapping to an existing Destination table
-
In the Mapping Summary section, click Select Table, and from the drop-down, search and select the table to which you want to map the Event Type.

Note: If you use this option, the Destination table prefix that you might have entered while configuring your Pipeline is lost.
-
In the Destination Fields section, either accept the suggested Destination table fields and data types for each Source field or select them as per your requirements.

Note: If the mapped fields do not include a primary key, a banner is displayed at the top of the section.
-
(Optional) Click SET PRIMARY KEY to set the primary key for that table and do the following:
Note: It is not mandatory to set the primary key. However, its absence may cause issues such as duplicates in the loaded data.

-
In the SELECT FIELDS FOR PRIMARY KEY pop-up window, select the field that you want to set as the primary key.
You can also add multiple fields to create a composite key by clicking ADD MORE +.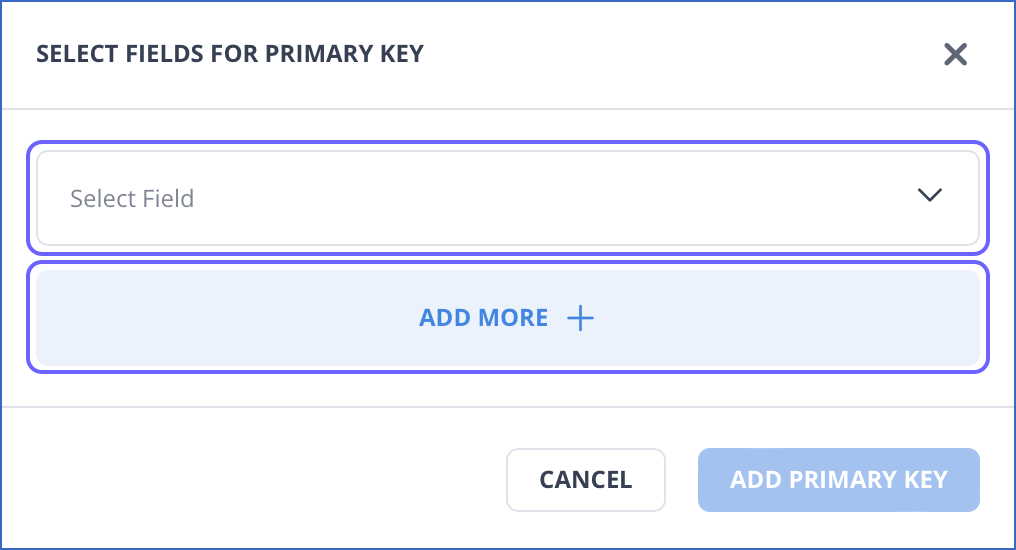
-
Click ADD PRIMARY KEY.

-
-
Click APPLY CHANGES.

Mapping to a new Destination table
-
In the Mapping Summary section, click CREATE TABLE & MAP.

-
In the mapping page that appears, Hevo suggests the Destination table name and the fields that can be mapped to the Source Event Type field. In this page, you can do the following:

-
Map to a different table: Specify a different table name than the one suggested by Schema Mapper.
-
Modify the order of fields in the Destination: Click the upward (
 ) or downward (
 ) arrow to define how you want to organize the fields in the Destination.
 -
Skip a field: Select the check box corresponding to the fields to skip them for ingestion and loading.
-
Map to a different field: Specify the Destination Field Name to which you want to map a Source Event.
-
Map to a different data type: Select the Data Type that you want to use for the Destination field above. Read Schema Mapper Compatibility Table to know about the data type that may be compatible with your Source field.
-
Select the primary and other keys for your table according to your requirements. Refer to your respective Destination documents to know about the keys available for it.
Note:
-
It is not mandatory to select these keys. However, their absence may cause issues with data replication and querying in your Destination.
-
Except for the primary key, all keys displayed on the UI are subject to change based on the Destination for which you created the Pipeline.
-
-
-
Click CREATE TABLE & MAP.
See Also
Revision History
Refer to the following table for the list of key updates made to this page:
| Date | Release | Description of Change |
|---|---|---|
| Jun-26-2023 | NA | Updated the page to add information about mapping to an existing Destination table. |
| May-03-2023 | NA | Added the manual mapping process flow diagram. |
| Mar-09-2023 | NA | New document. |