Amazon S3
On This Page
Amazon Simple Storage Service (S3) is a durable, efficient, secure, and scalable cloud storage service provided by Amazon Web Services (AWS) that can be accessed from anywhere. S3 uses the concept of buckets to store data such as images, videos, and documents, in multiple formats, organize that data, and retrieve it at any time from the cloud. It also provides you access control, versioning, and integration with other AWS services.
Hevo supports the replication of S3 data in the AVRO, CSV, JSON, JSONL, TSV, and XML file formats. While ingesting data, Hevo automatically unzips any Gzipped files. Further, if any file is updated in the Source, Hevo re-ingests its entire contents as it is not possible to identify individual changes.
For all Pipelines created from Release 1.66 onwards, Hevo uploads the __hevo_source_modified_at column to the Destination as a metadata field in order to ascertain the currency of data during replication. As a result, this field is not visible or available for mapping via the Schema Mapper. However, for older Pipelines:
-
If this field is displayed in the Source Event Type, you must ignore it and not try to map it to a Destination table column, else the Pipeline displays an error.
-
If this field is already present in the Destination table, Hevo automatically loads the metadata to it.
You can continue to use the __hevo_source_modified_at field to create Transformations using the function event.getSourceModifiedAt(). Read Metadata Column __hevo_source_modified_at.
Accessing data in S3 buckets
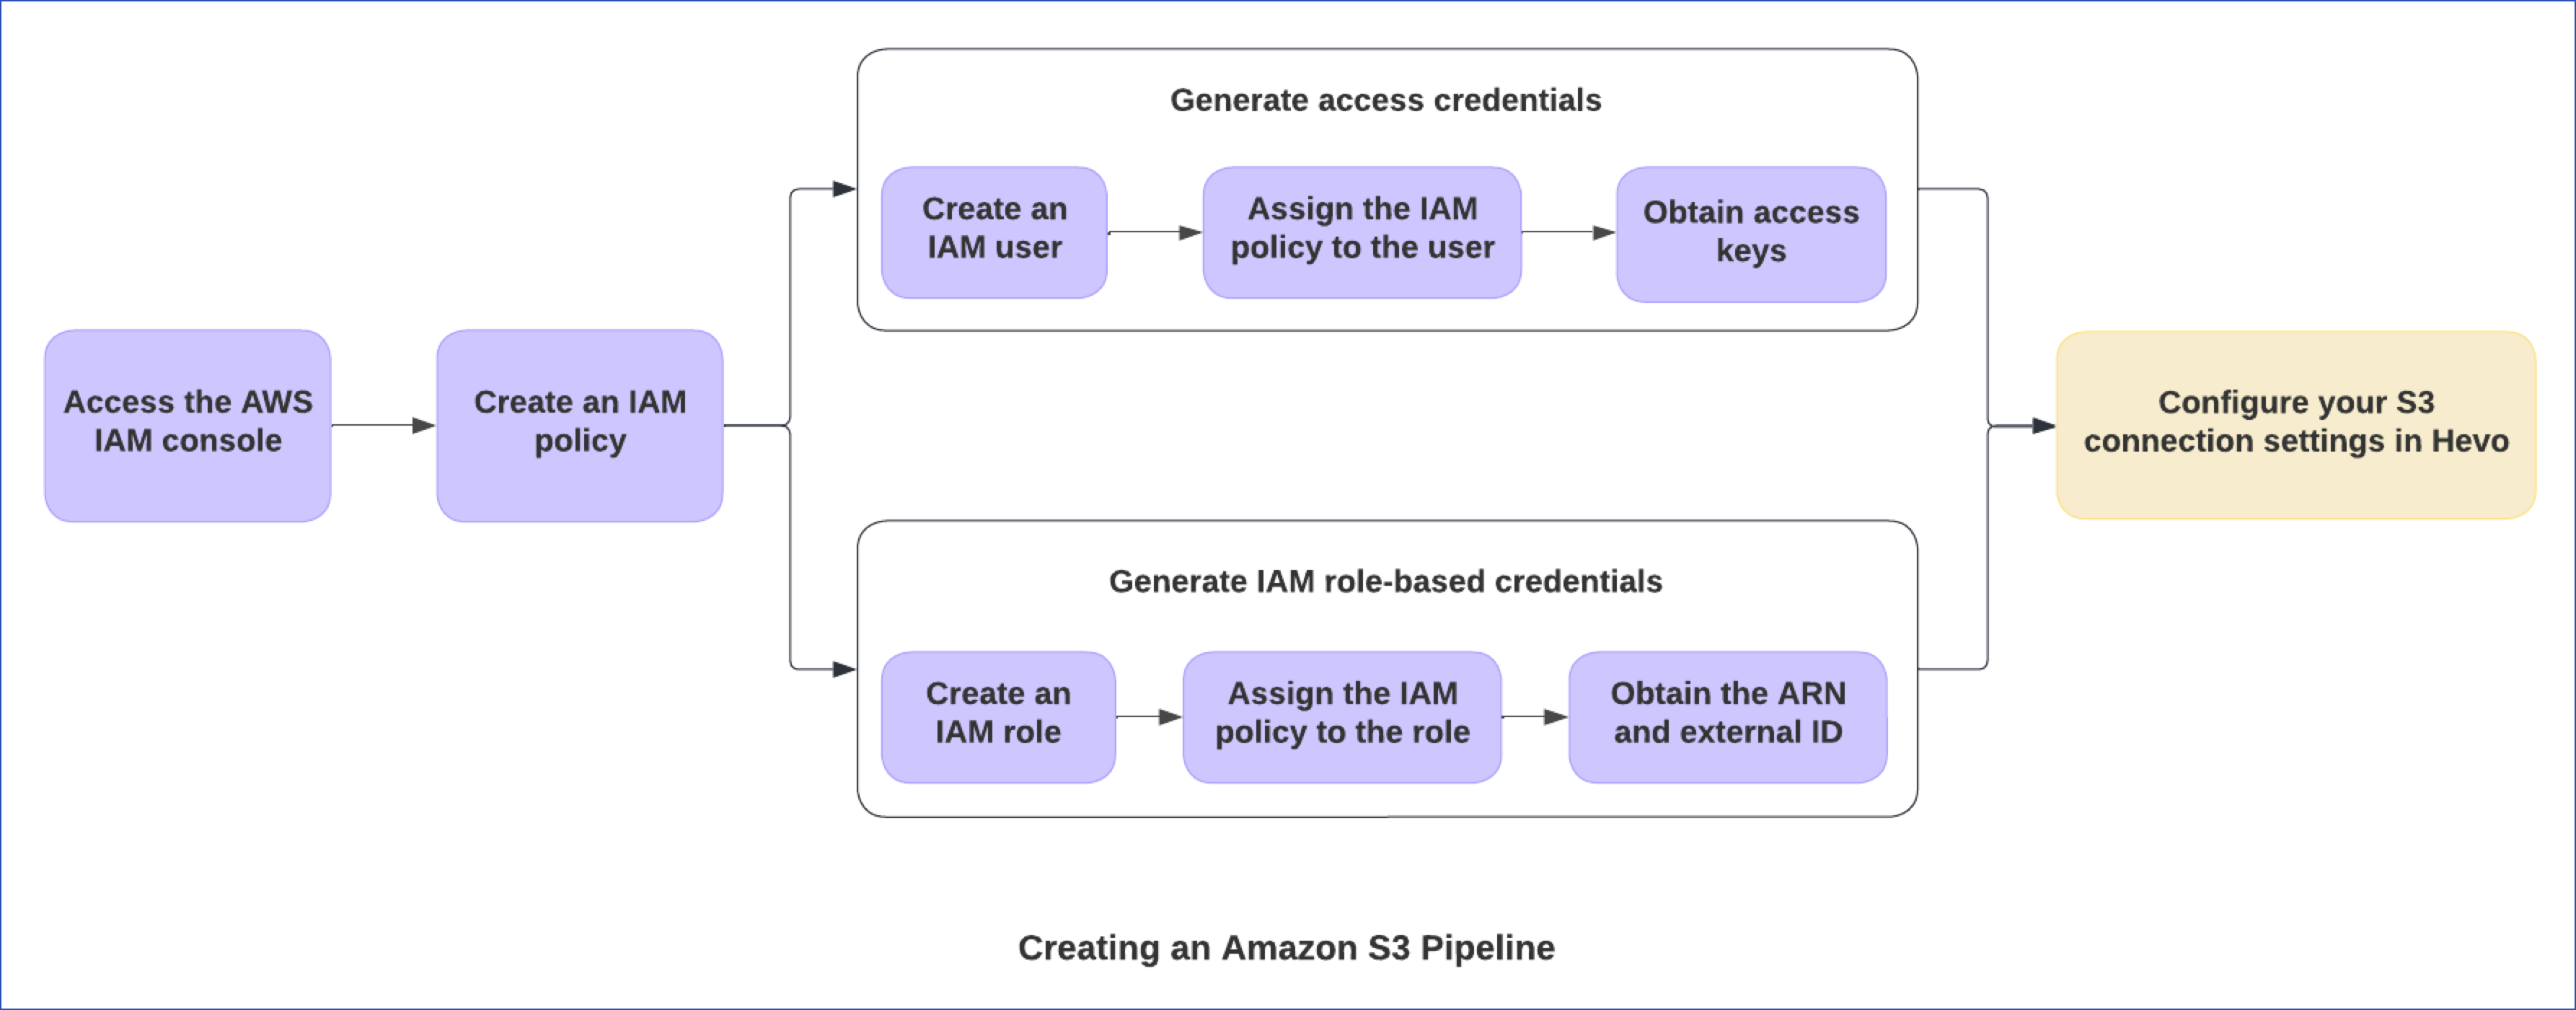
In S3, access is defined through IAM policies and an IAM role or user. You can create an IAM user or an IAM role, and assign the IAM policy to either of these to define what data Hevo can access.
The following diagram illustrates the steps to do this and configure Amazon S3 as a Source for your Hevo Pipeline. These steps are explained in detail further in this document.
Prerequisites
-
An active AWS account and an S3 bucket from which data is to be ingested exist.
-
You are logged as an IAM user with permission to:
-
The IAM role-based credentials or access credentials are available to authenticate Hevo on your AWS account.
-
You are assigned the Team Administrator, Team Collaborator, or Pipeline Administrator role in Hevo, to create the Pipeline.
Create an IAM Policy
Create an IAM policy with the ListBucket and GetObject permissions. These permissions are required for Hevo to access data from your S3 bucket.
To do this:
-
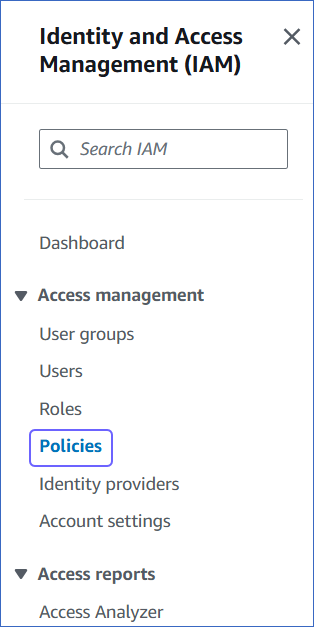
Log in to the AWS IAM Console.
-
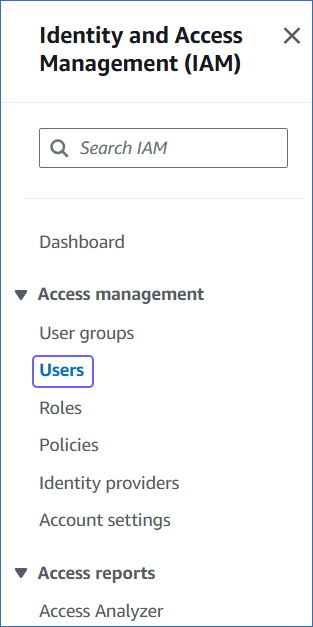
In the left navigation pane, under Access management, click Policies.
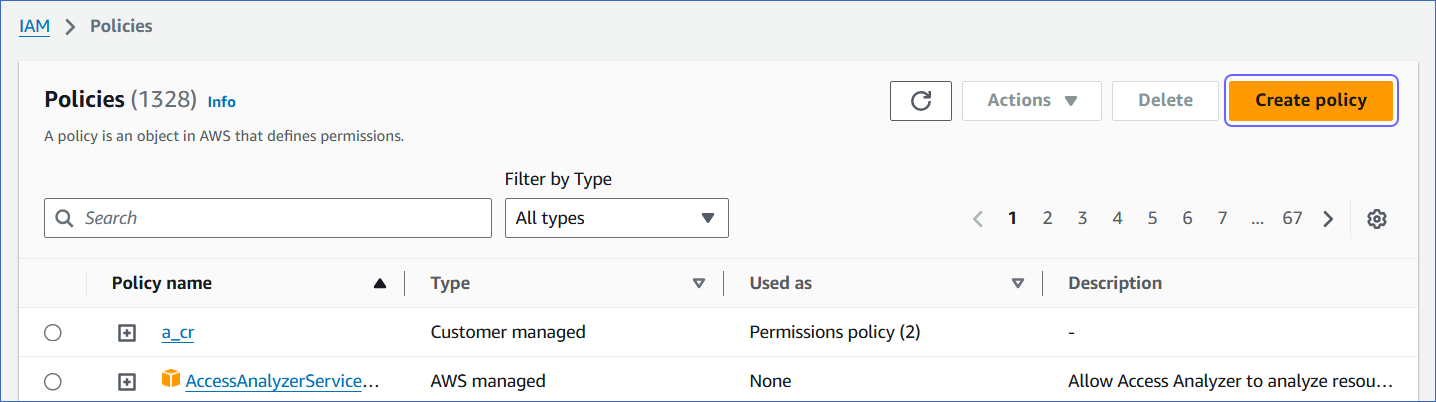
-
On the Policies page, click Create policy.
-
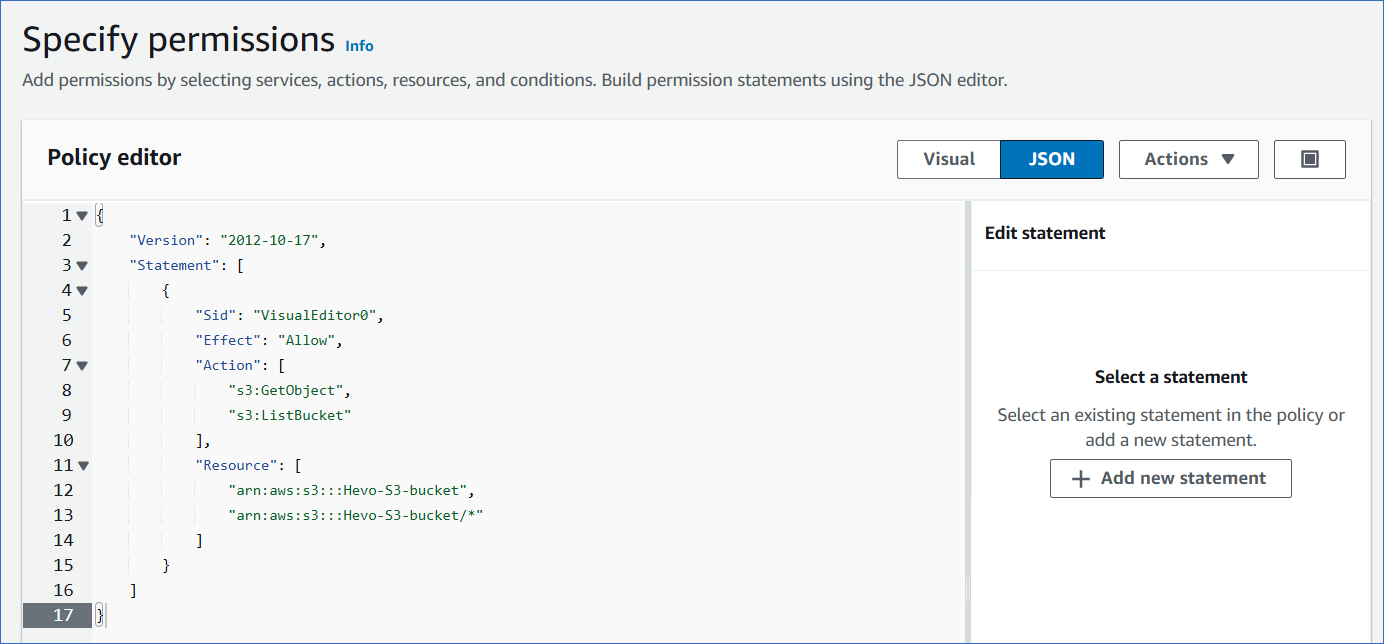
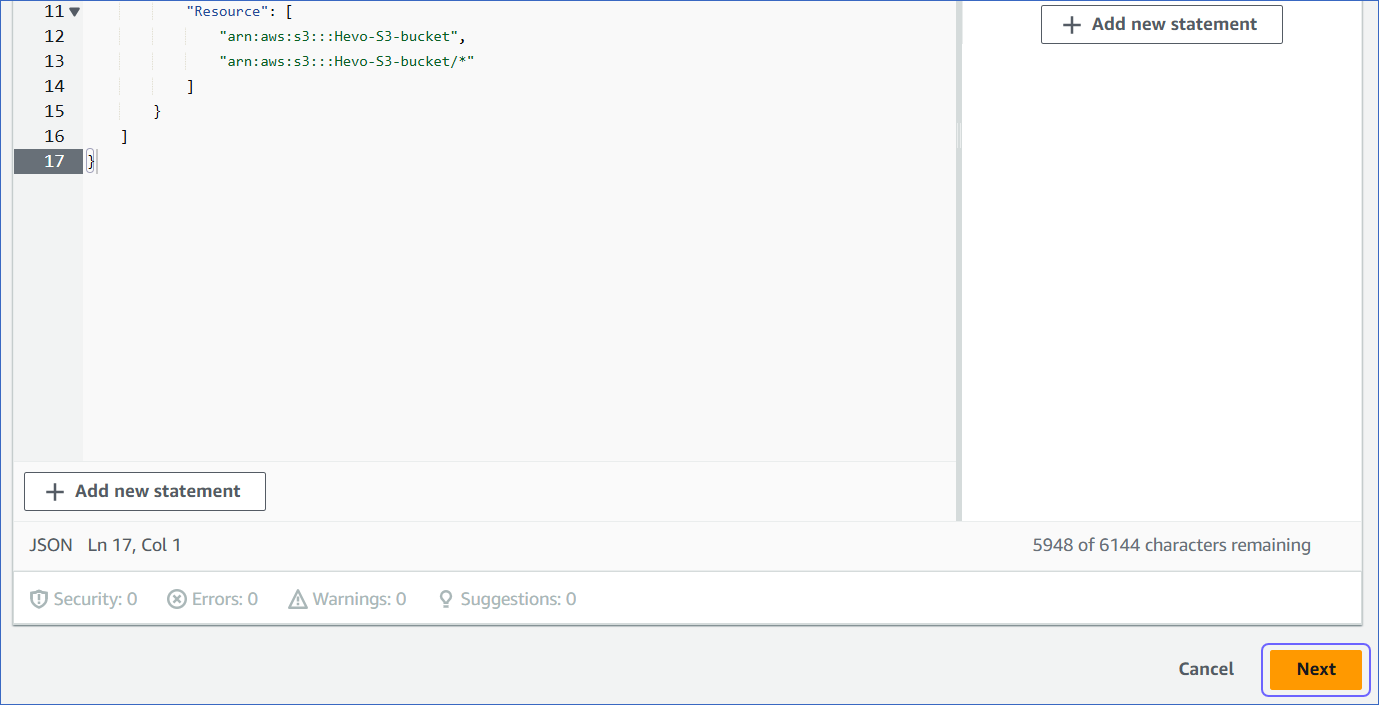
On the Specify permissions page, click JSON, and in the Policy editor section, paste the following JSON statements:

Note: Replace the placeholder values in the commands below with your own. For example, <your_bucket_name> with Hevo-S3-bucket.
{
    "Version": "2012-10-17",
    "Statement": [
        {
            "Sid": "VisualEditor0",
            "Effect": "Allow",
            "Action": [
                "s3:GetObject",
                "s3:ListBucket"
            ],
            "Resource": [
                "arn:aws:s3:::<your_bucket_name>",
                "arn:aws:s3:::<your_bucket_name>/*"
            ]
        }
    ]
}
The JSON statements allow Hevo to access and ingest data from the bucket name you specify.
-
At the bottom of the page, click Next.
-
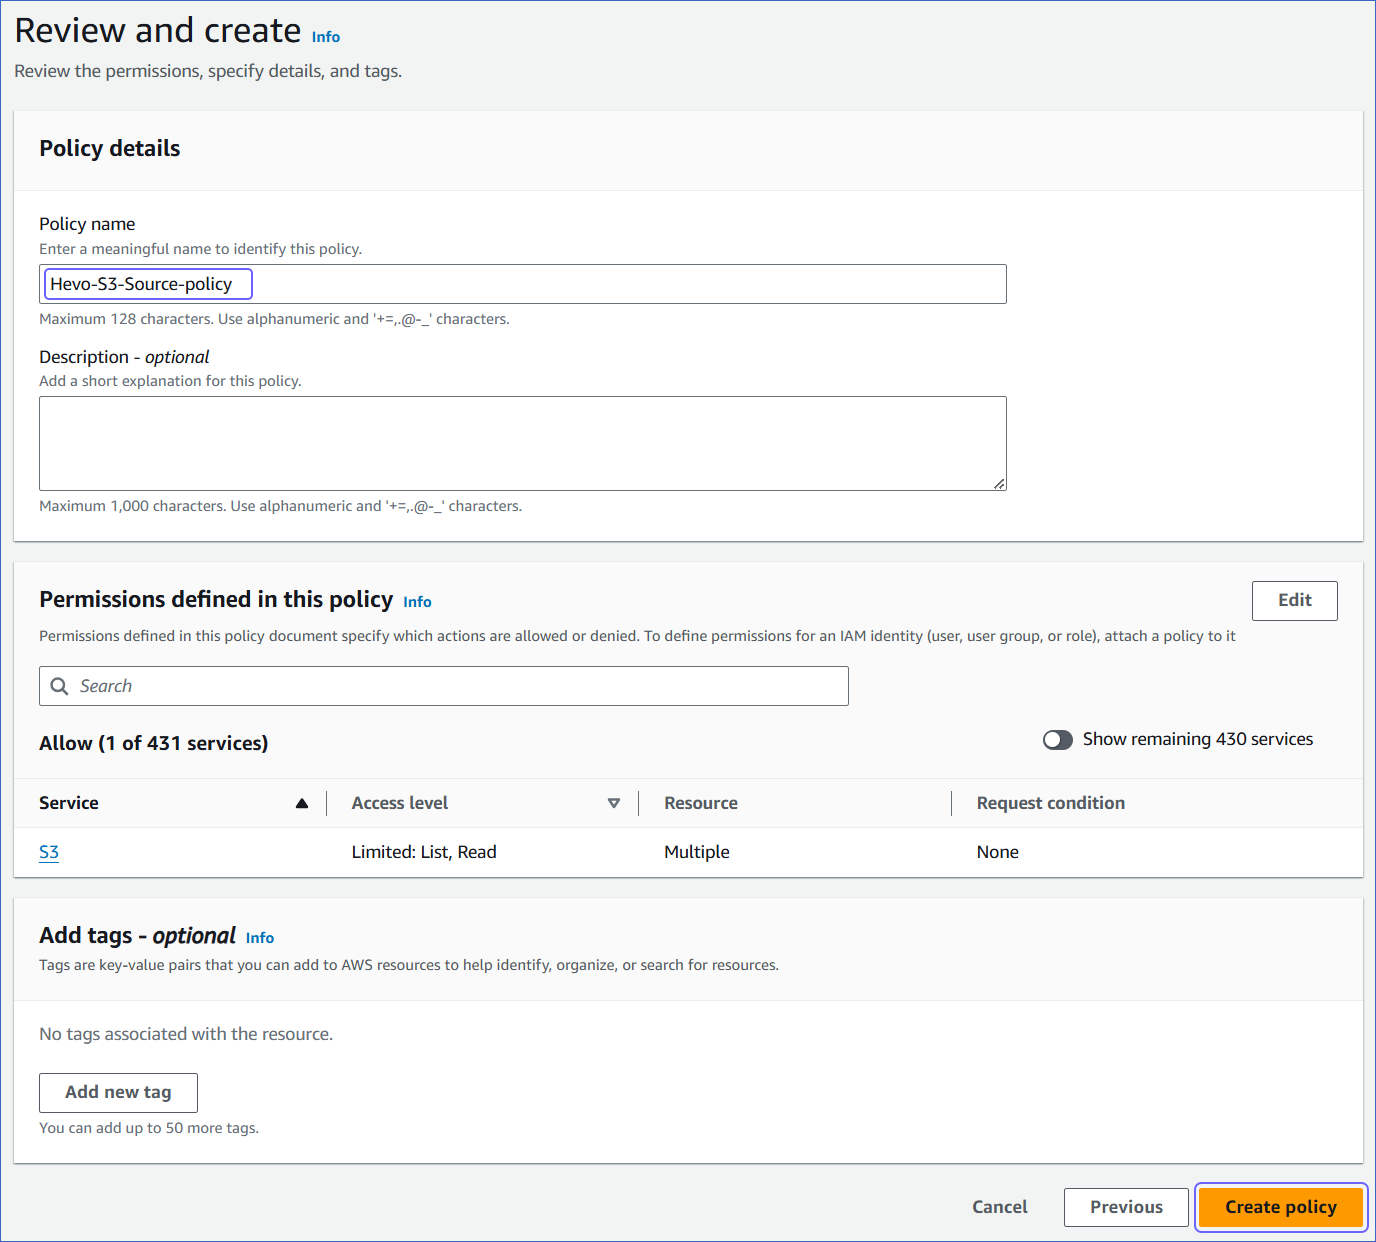
On the Review and create page, specify the Policy name, and at the bottom of the page, click Create policy.
Obtain Amazon S3 Credentials
You must generate either access credentials or IAM role-based credentials and assign them the IAM policy to access and ingest your S3 data.
Generate IAM role-based credentials
To generate your IAM role-based credentials, you need to create an IAM role for Hevo and assign the policy that you created in Step 1 above, to the role. Use the Amazon Resource Name (ARN) and external ID from this role while creating your Pipeline.
1. Create an IAM role and assign the IAM policy
-
Log in to the AWS IAM Console.
-
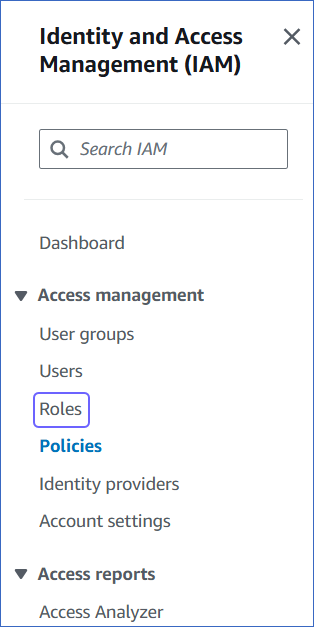
In the left navigation pane, under Access Management, click Roles.
-
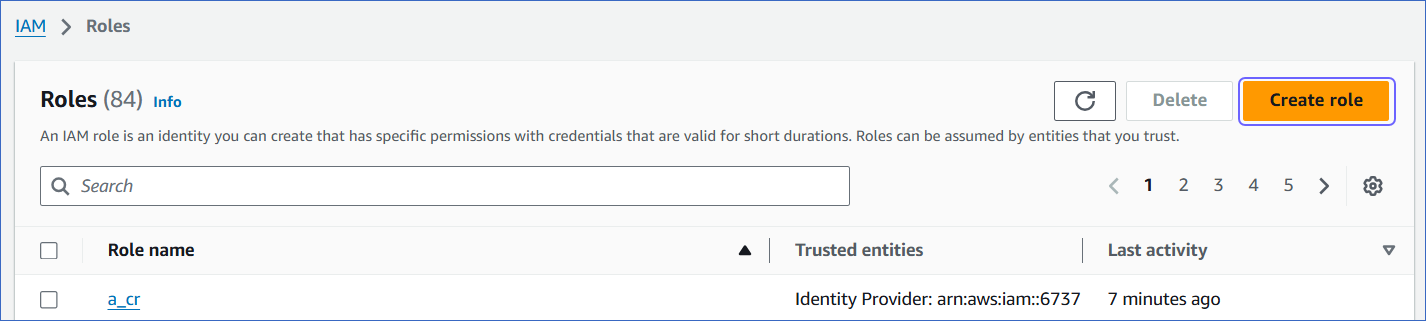
On the Roles page, click Create role.
-
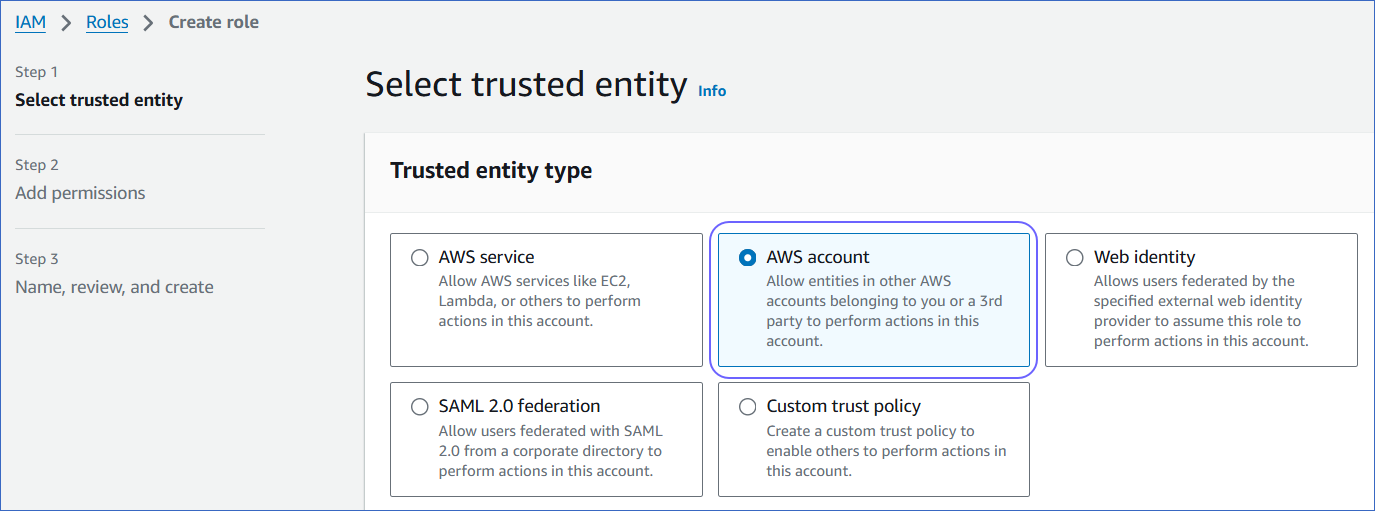
In the Select trusted entity section, select AWS account.
-
In the An AWS account section, select Another AWS account, and in the Account ID field, specify Hevo’s Account ID, 393309748692.
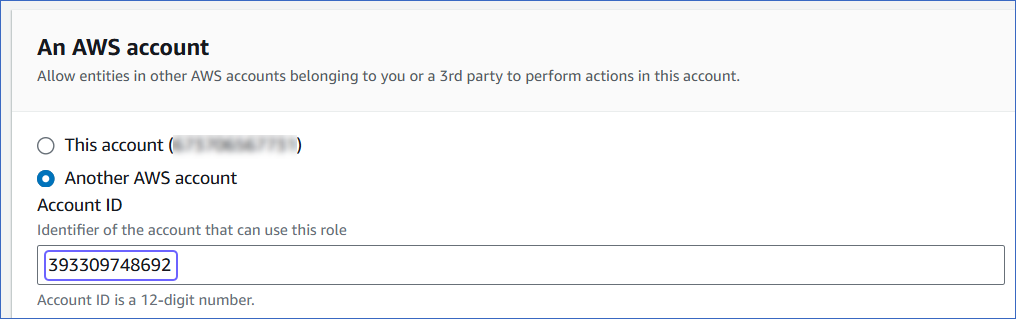
This account ID enables you to assign a role to Hevo and ingest data from your S3 bucket for replicating it to your desired Destination.
-
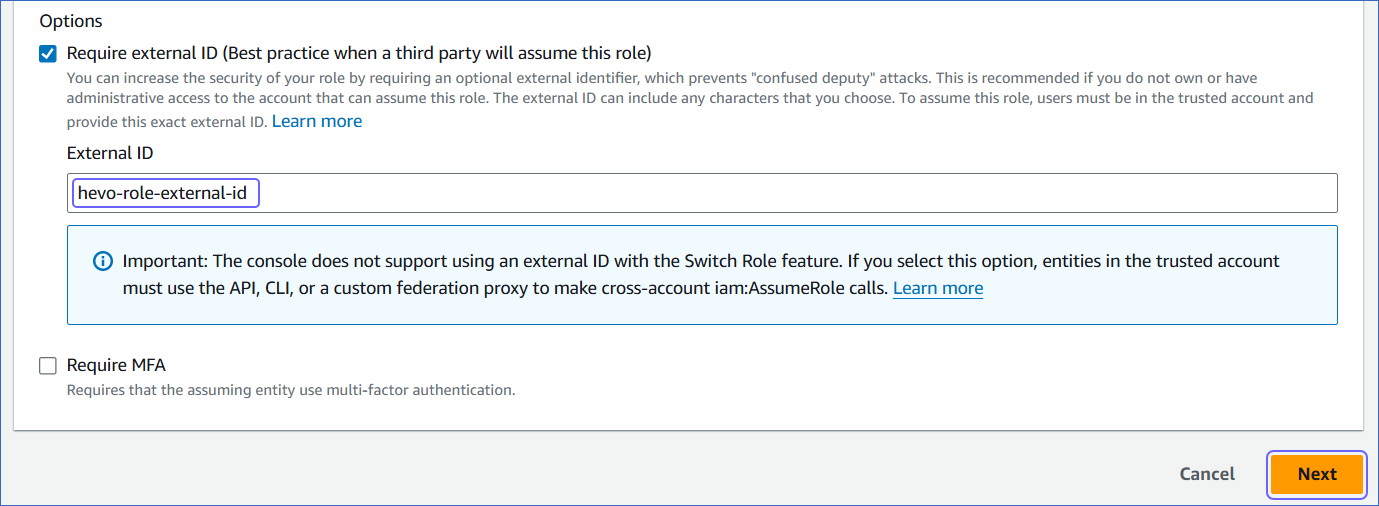
In the Options section, select the Require external ID check box, specify an External ID of your choice, and click Next.
-
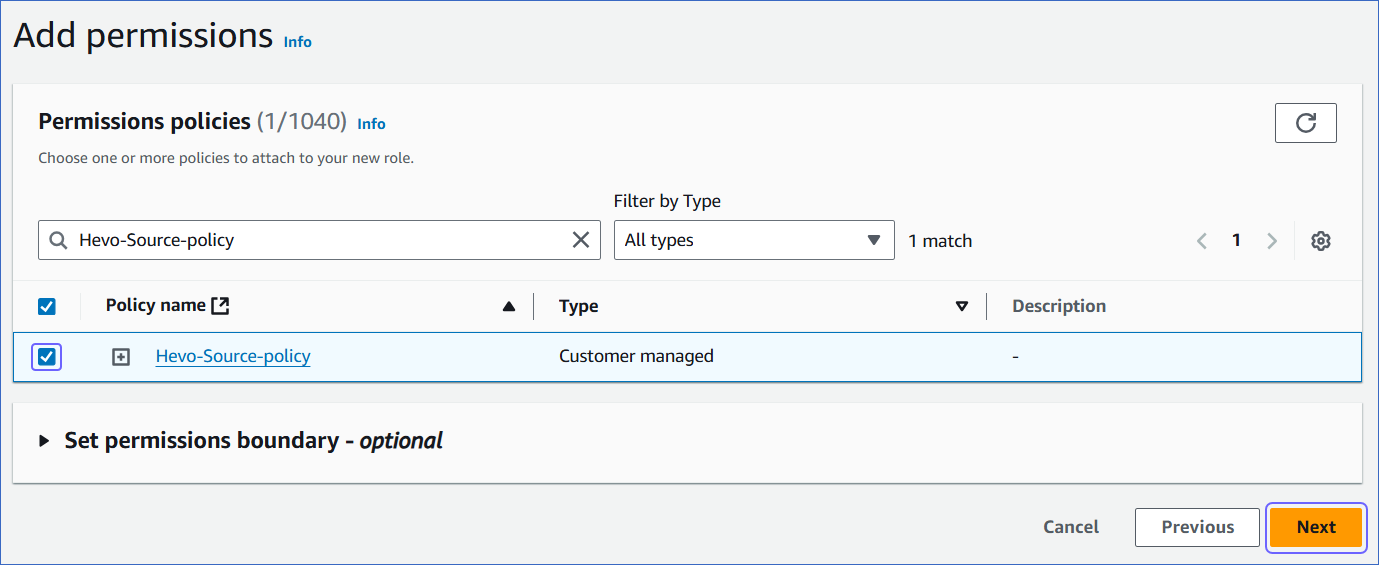
On the Add Permissions page, search and select the policy that you created in Step 1 above, and at the bottom of the page, click Next.
-
On the Name, review, and create page, specify the Role name and Description of your choice, and at the bottom of the page, click Create role.

You are redirected to the Roles page.
2. Obtain the ARN and external ID
-
On the Roles page of your IAM console, search and click the role that you created above.
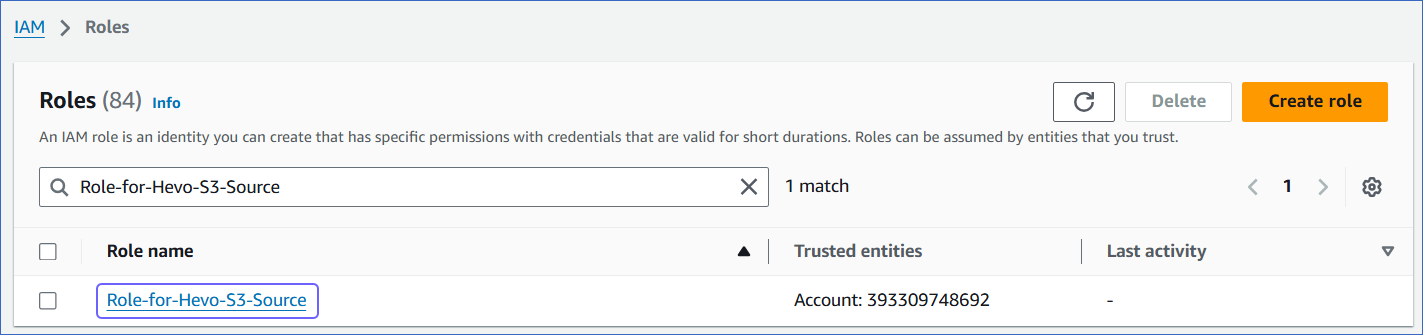
-
On the <Role name> page, Summary section, click the copy icon below the ARN field and save it securely like any other password.

-
In the Trust relationships tab, copy the external ID corresponding to the sts:ExternalID field. For example, hevo-role-external-id in the image below.

You can use this ARN and external ID while configuring your Pipeline.
Generate access credentials
Your access credentials include the access key and the secret access key. To generate these, you need to create an IAM user for Hevo and assign the policy you created in Step 1 above, to it.
Note: The secret key is associated with an access key and is visible only once. Therefore, you must make sure to save the details or download the key file for later use.
1. Create an IAM user and assign the IAM policy
-
Log in to the AWS IAM Console.
-
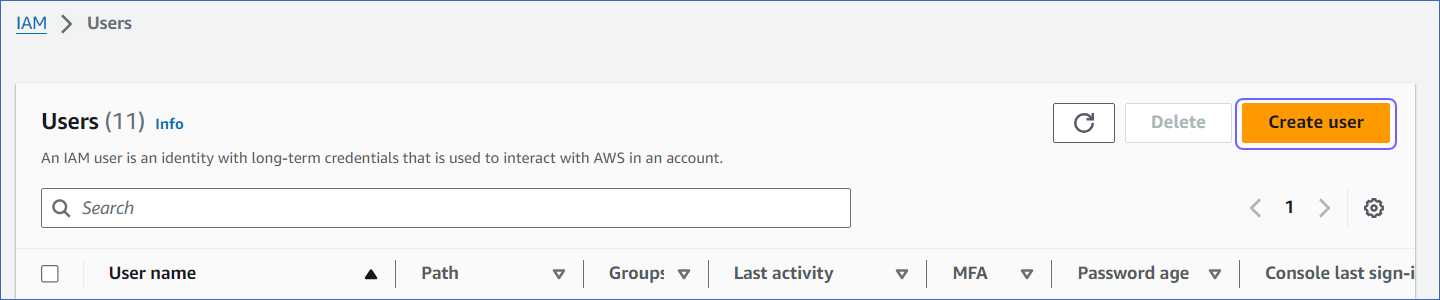
In the left navigation pane, under Access management, click Users.
-
On the Users page, click Create user.
-
On the Specify user details page, specify the User name, and click Next.

-
On the Set permissions page, Permissions options section, click Attach policies directly.

-
On the Permissions policies section, search and select the check box corresponding to the policy that you created in Step 1 above, and at the bottom of the page, click Next.

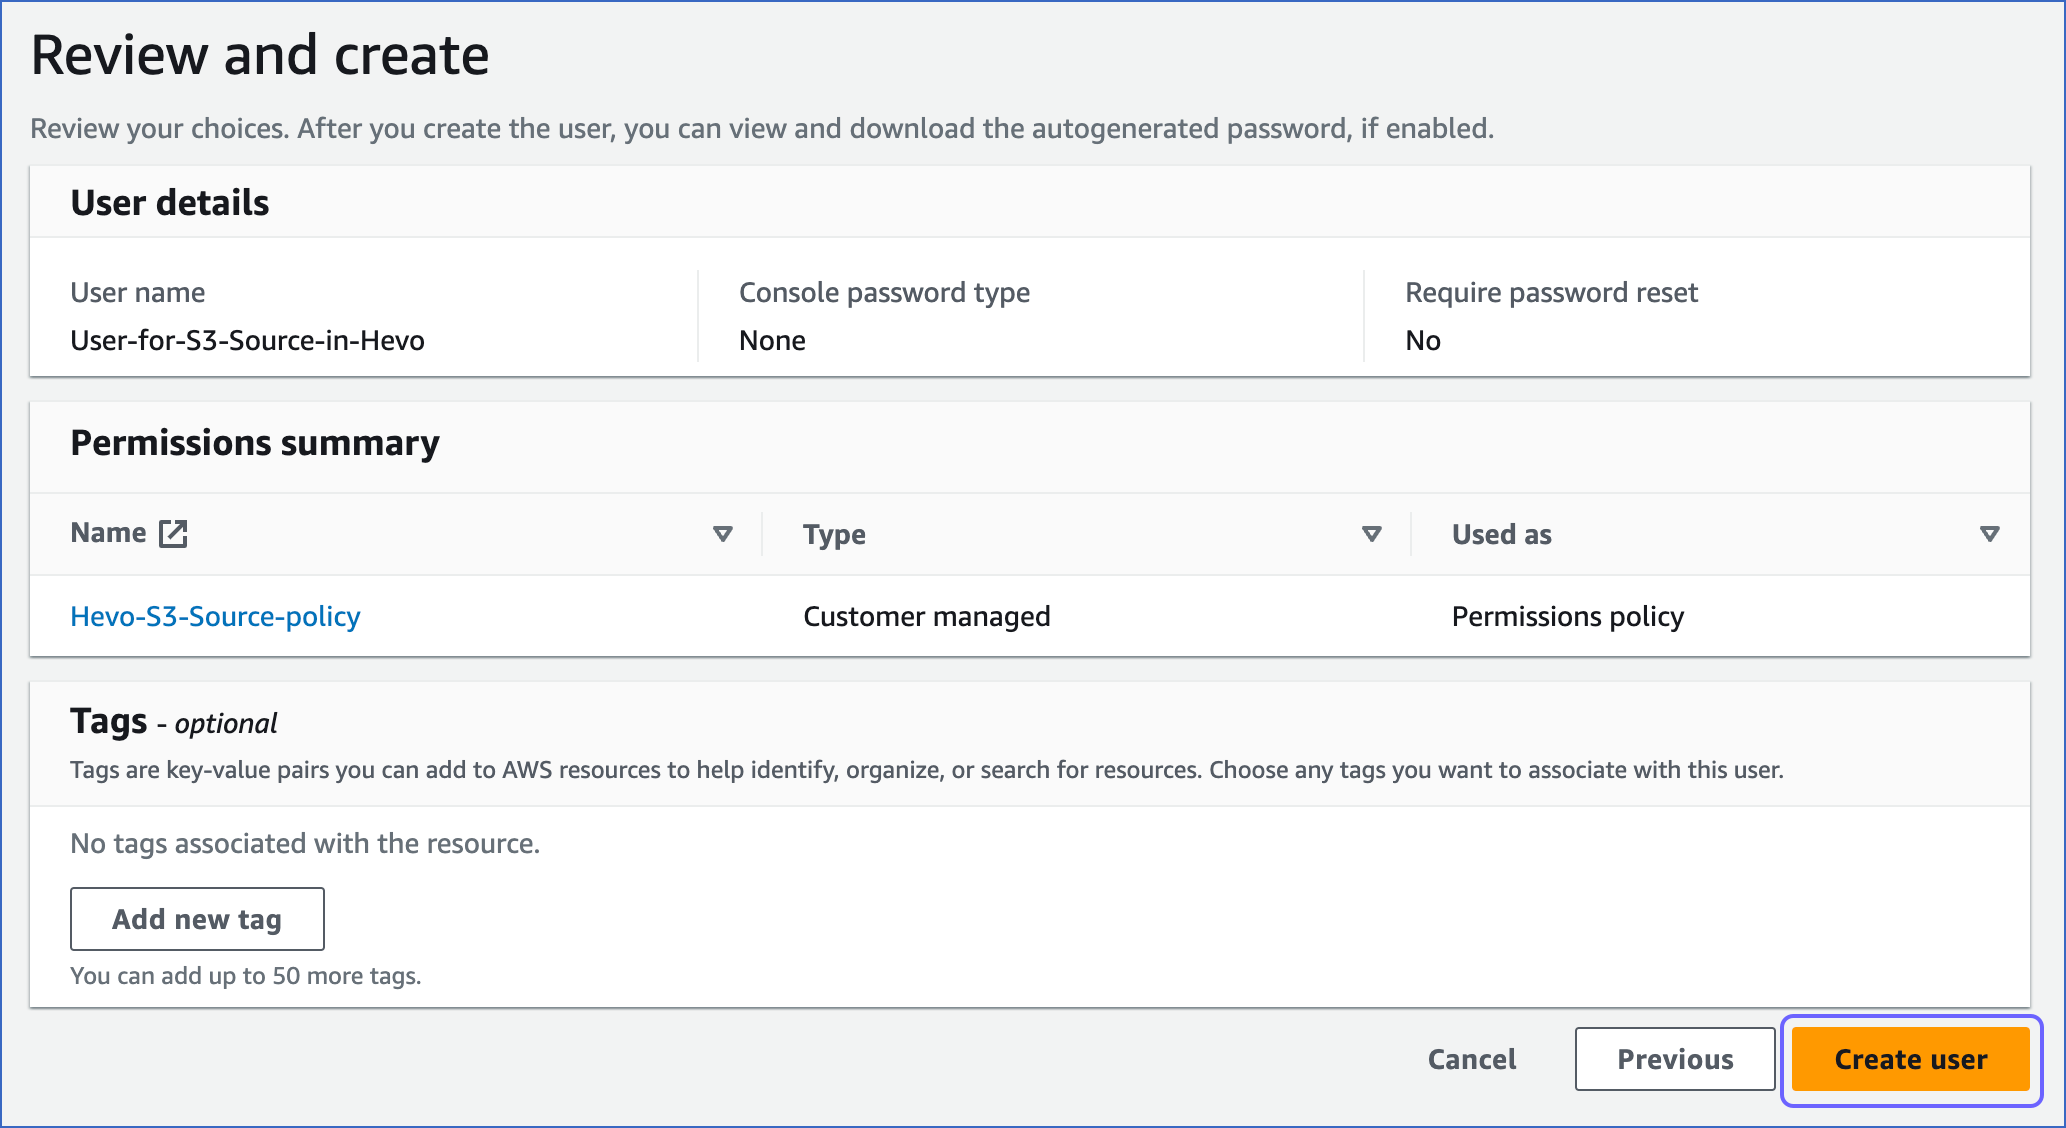
-
At the bottom of the Review and create page, click Create user.
2. Generate the access keys
-
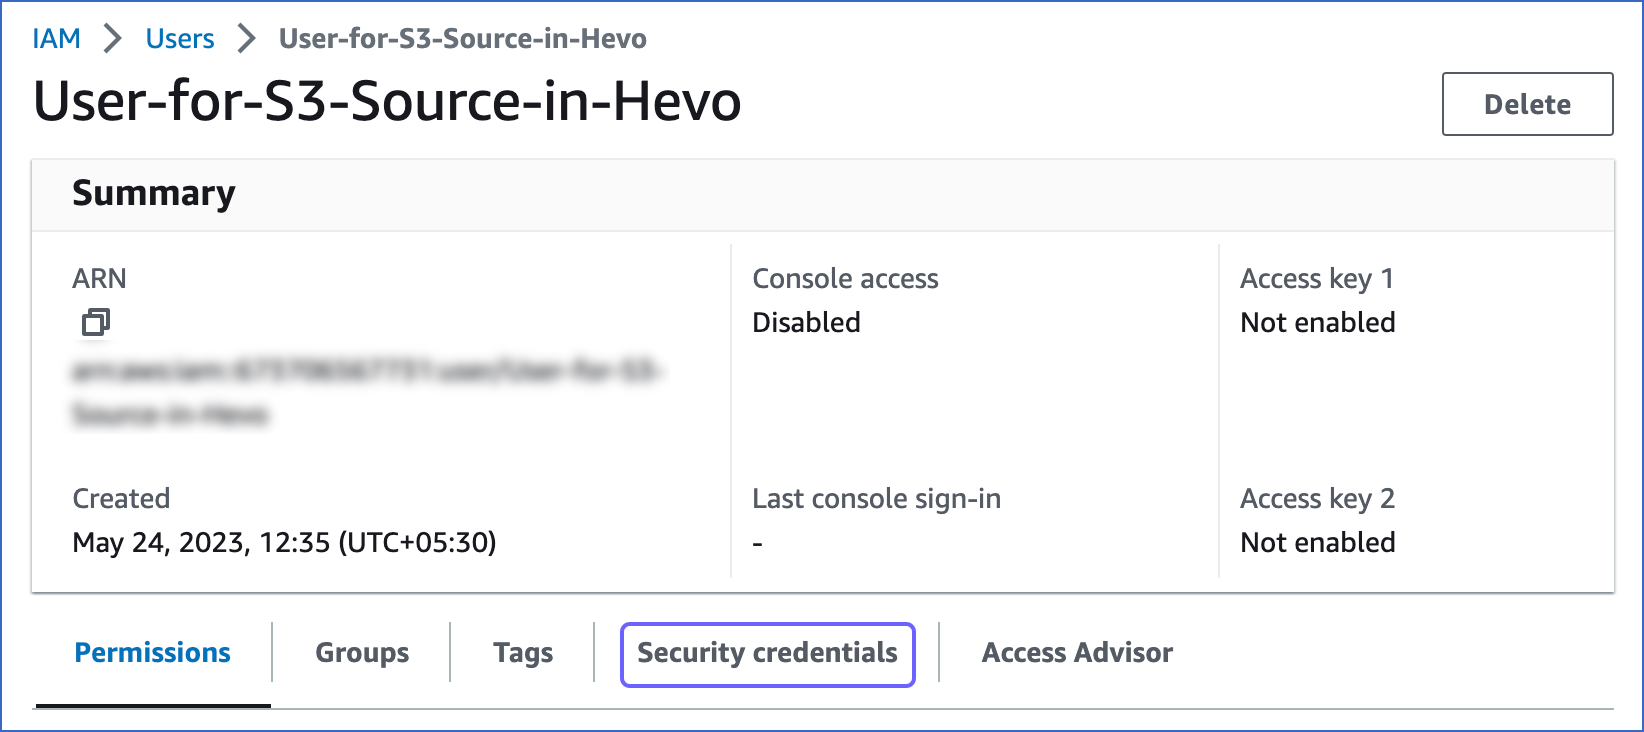
On the Users page of your IAM console, click the user that you created above.
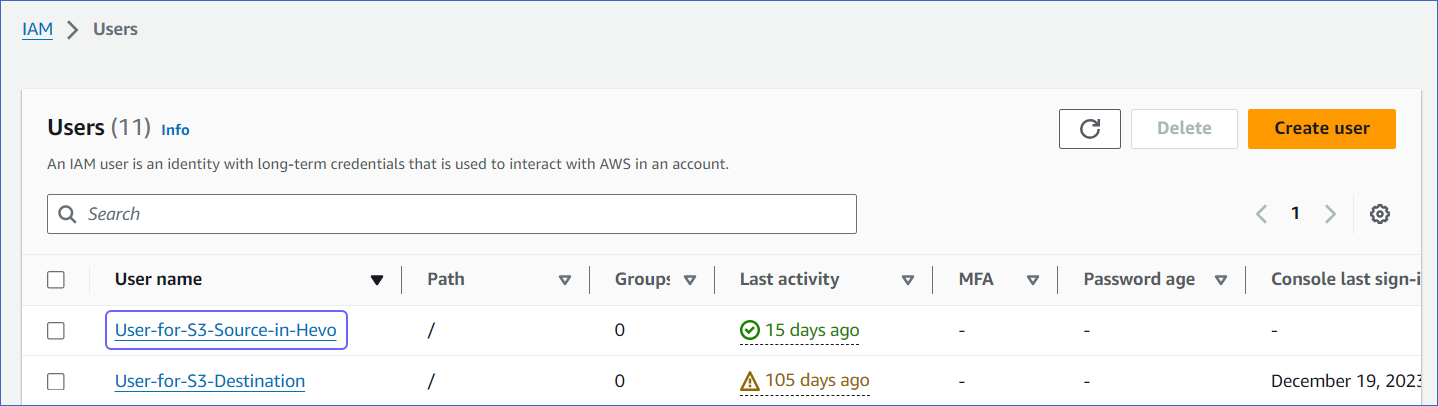
-
On the <User name> page, click the Security credentials tab.
-
On the Access keys section, click Create access key.

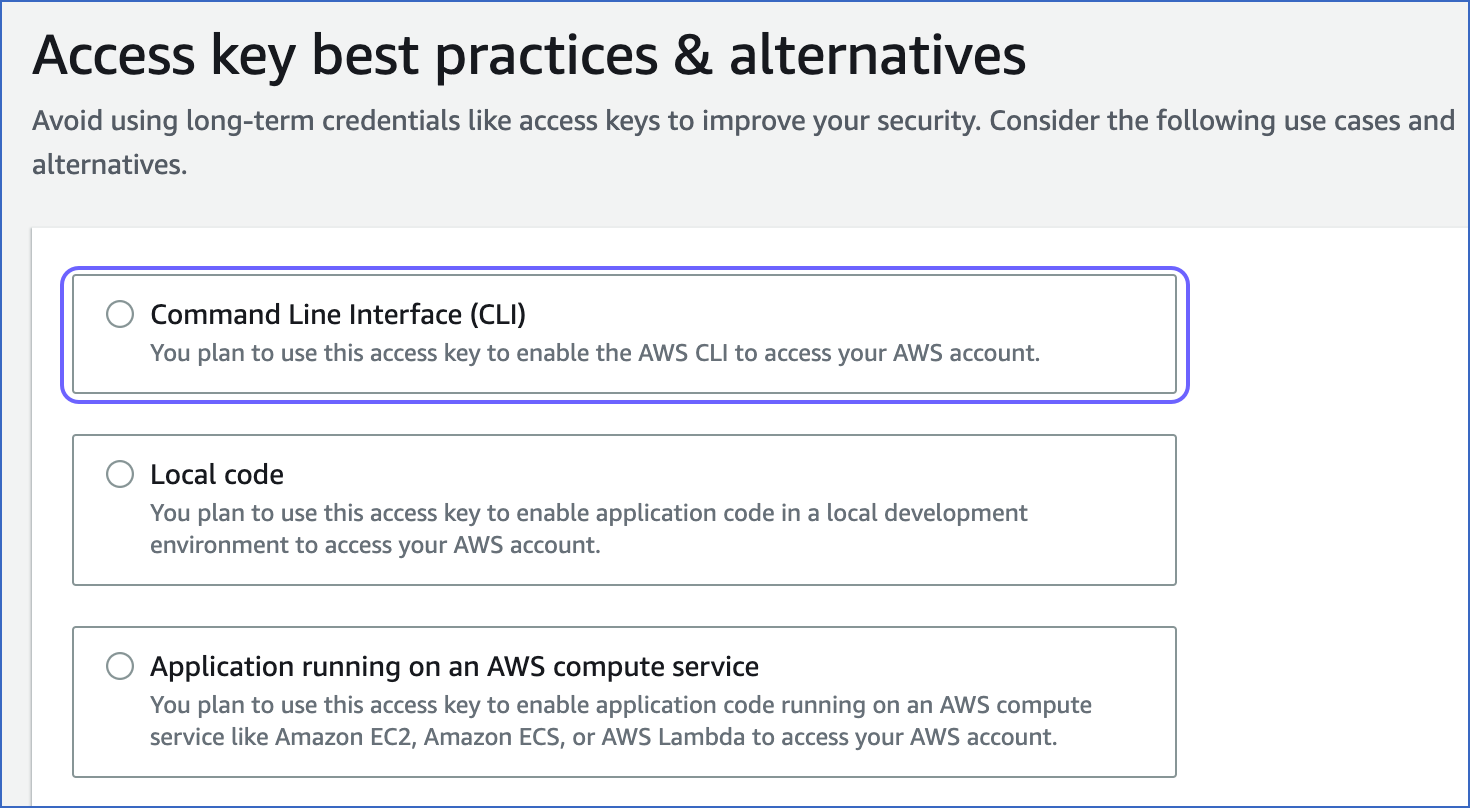
-
On the Access key best practices & alternatives page, select Command Line Interface (CLI).
-
At the bottom of the page, select the I understand the above…. check box and click Next.

-
(Optional) Specify a description for the access key.
-
Click Create access key.

-
On the Retrieve access keys page, Access key section, click the copy icon in the Access key and Secret access key fields and save the keys securely like any other password.
Optionally, click Download .csv file to save the keys on your local machine.
Note: Once you leave this page, you cannot view these keys again.

You can use these keys while configuring your Pipeline.
Configure Amazon S3 as a Source
Perform the following steps to configure S3 as the Source in your Pipeline:
-
Click PIPELINES in the Navigation Bar.
-
Click + CREATE PIPELINE in the Pipelines List View.
-
On the Select Source Type page, select S3.
-
On the Configure your S3 Source page, specify the following:

-
Pipeline Name: A unique name for the Pipeline, not exceeding 255 characters.
-
Source Setup: The credentials needed to allow Hevo to access data from your S3 account. Select one of the following setup methods:
-
Connect using IAM Role:

-
IAM Role ARN: The ARN that you retrieved above.
-
External ID: The external ID that you retrieved above.
-
Bucket Name: The name of the bucket from which you want to ingest data.
-
Bucket Region: The AWS region where the bucket is located.
-
-
Connect using Access Credentials:

-
Access Key ID: The access key that you retrieved above.
-
Secret Access Key: The secret access key that you retrieved above.
-
Bucket Name: The name of the bucket from which you want to ingest data.
-
Bucket Region: The AWS region where the bucket is located.
-
-
-
-
Click TEST & CONTINUE.
-
In the Data Root section, specify the following. The data root signifies the directories or files that contain your data. By default, the files are listed from the root directory.

-
Select the folders from which you want to ingest data.
Note: If Hevo cannot retrieve the list of files from your S3 bucket, it displays the Path Prefix field. In this situation, you must specify the prefix of the path for the directory that contains your data. To specify the path prefixes for multiple files, you can click the Plus (
 ) icon.
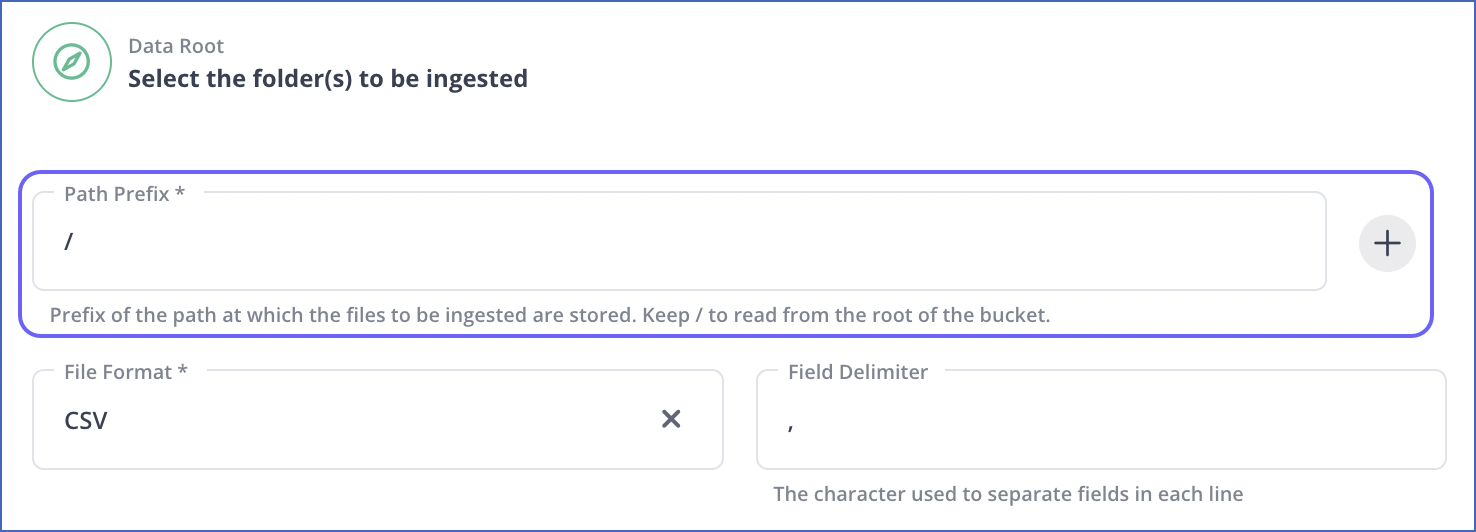
-
File Format: The format of the data file in the selected folders. Hevo supports AVRO, CSV, JSON, JSONL, TSV, and XML formats.
Note: You can select only one file format at a time. If your Source data is in a different format, you can export the data to either of the supported formats and then ingest the files.
Based on the format you select, you must specify some additional settings:
-
Field Delimiter: The character on which the fields in each line are separated. For example,
\tor,.Note: This field is visible only for CSV data.
-
Create Events from child nodes: If enabled, Hevo loads each node present under the root node in the XML file as a separate Event. If disabled, Hevo combines and loads all nodes present in the XML file as a single Event.
Note: This option is visible only for XML data.
-
Header Row: The row number in your CSV file whose data you want Hevo to use as column headers. Hevo starts ingesting data from the specified header row in your CSV file, thus skipping all the rows before it. Default value: 1.
If you set the header row to 0, Hevo automatically generates the column headers during ingestion. Refer to the Example to understand this behavior.
Note: This field is visible only for CSV data.
-
Include compressed files: If enabled, Hevo also ingests the compressed files of the selected file format from the folders. Hevo supports the tar.gz and zip compression types only. If disabled, Hevo does not ingest any compressed file present in the selected folders.
Note: This option is visible for all supported data formats.
-
Create Event Types from folders: If enabled, Hevo ingests each subfolder as a separate Event Type. If disabled, Hevo merges subfolders into their parent folders and ingests them as one Event Type.
Note:
-
By default, Hevo allows the ingestion of subfolders as separate Event Types only if the parent folder contains no more than 500 subfolders and files. If you need to increase this limit, contact Hevo Support.
-
This option is visible for all supported data formats.
-
-
Convert date/time format fields to timestamp: If enabled, Hevo converts the date/time format within the files of selected folders to timestamp. For example, 07/11/2022, 12:39:23 to 1667804963. If disabled, Hevo ingests the datetime fields in the same format.
Note: This option is visible for all supported data formats.
-
-
Click CONFIGURE SOURCE.
-
-
Proceed to configuring the data ingestion and setting up the Destination.
Data Replication
| For Teams Created | Default Ingestion Frequency | Minimum Ingestion Frequency | Maximum Ingestion Frequency | Custom Frequency Range (in Hrs) |
|---|---|---|---|---|
| Before Release 2.21 | 1 Hr | 5 Mins | 24 Hrs | 1-24 |
| After Release 2.21 | 6 Hrs | 30 Mins | 24 Hrs | 1-24 |
Note: The custom frequency must be set in hours as an integer value. For example, 1, 2, or 3, but not 1.5 or 1.75.
Example: Automatic Column Header Creation for CSV Tables
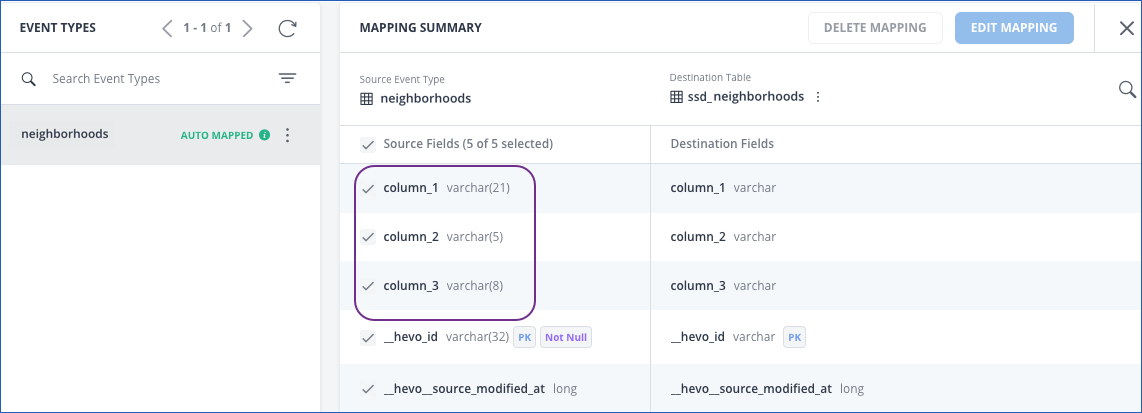
If you specify the Header Row as 0 while creating a Pipeline, Hevo automatically generates the column headers while ingesting data from the Source.
For example, consider the following data in CSV format, which has no column headers.
  CLAY COUNTY,32003,11973623
  CLAY COUNTY,32003,46448094
  CLAY COUNTY,32003,55206893
  CLAY COUNTY,32003,15333743
  SUWANNEE COUNTY,32060,85751490
  SUWANNEE COUNTY,32062,50972562
  ST JOHNS COUNTY,846636,32033,
  NASSAU COUNTY,32025,88310177
  NASSAU COUNTY,32041,34865452
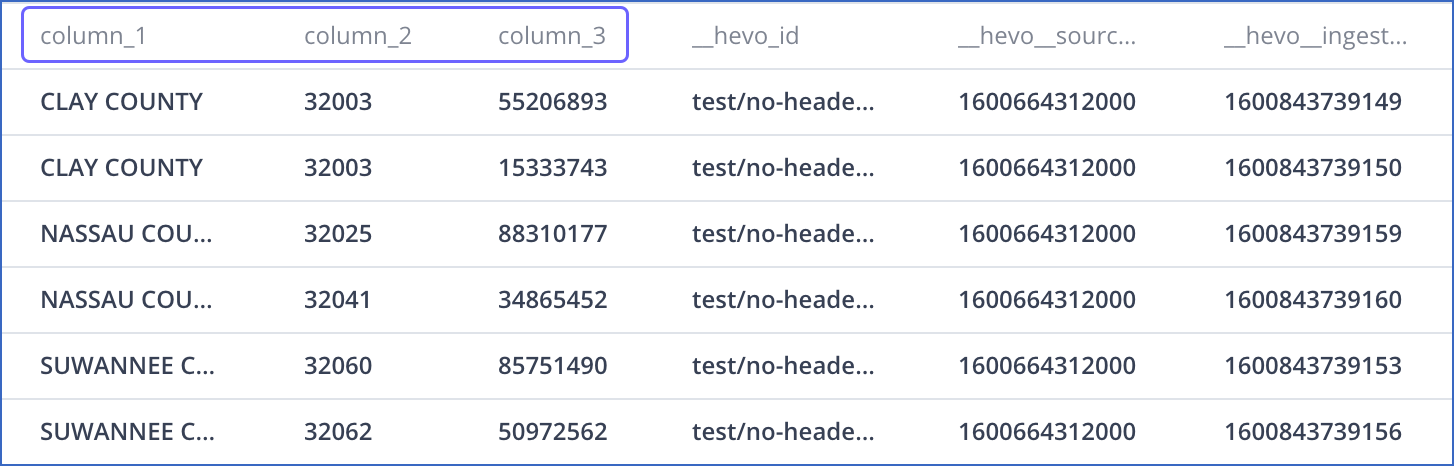
When Hevo ingests this data, it auto-generates the column headers, as displayed below:
The record in the Destination appears as follows:
Limitations
-
Hevo does not load data from a column into the Destination table if its size exceeds 16 MB, and skips the Event if it exceeds 40 MB. If the Event contains a column larger than 16 MB, Hevo attempts to load the Event after dropping that column’s data. However, if the Event size still exceeds 40 MB, then the Event is also dropped. As a result, you may see discrepancies between your Source and Destination data. To avoid such a scenario, ensure that each Event contains less than 40 MB of data.
-
Hevo currently supports only the ISO 8859-1 character set. If the file name or content includes unsupported characters, such as emojis or special symbols, the Pipeline may fail. If your file uses a different character set, contact Hevo Support.
-
If you initially select a parent folder for ingestion and later reconfigure the Source to select specific child folders within it, Hevo treats each newly selected child folder as a separate ingestion path. This triggers a new historical load for those folders, even if their data was previously ingested through the parent folder.
To avoid duplicate ingestion, you can skip the historical load and configure the child folders to resume from a specific point using the Change Position option. Any data ingested using the Change Position action is billable.
-
Hevo imposes size limits when ingesting JSON files to prevent memory-related issues. Files exceeding 100 MB are skipped entirely, and individual lines exceeding 40 MB are skipped. If you want to increase this limit, contact Hevo Support.
See Also
Revision History
Refer to the following table for the list of key updates made to this page:
| Date | Release | Description of Change |
|---|---|---|
| Jul-07-2025 | NA | Updated the Limitations section to inform about the max record and column size in an Event. |
| Jun-02-2025 | NA | - Updated section, Limitations to add a point about new historical loads when changing the path prefix. - Updated section Limitations to add a point about size limits for JSON files. |
| May-08-2025 | NA | Updated section, Limitations to add a point about Hevo supporting only ISO-8859-1 encoding format. |
| Apr-17-2025 | NA | Updated sections, Configure Amazon S3 as a Source to reflect support for JSONL file format. |
| Mar-21-2025 | 2.34.1 | Updated section, Configure Amazon S3 as a Source to add a note about the Create Event Types from folders option. |
| Jan-07-2025 | NA | Added a limitation about Event size. |
| Dec-02-2024 | NA | Updated sections, Create an IAM Policy and Obtain Amazon S3 Credentials as per the latest Amazon S3 UI. |
| Apr-29-2024 | 2.23 | Updated section, Configure Amazon S3 as a Source to add information about custom header row. |
| Mar-05-2024 | 2.21 | Added the Data Replication section. |
| Jul-17-2023 | NA | Updated section, Configure Amazon S3 as a Source to add information about path prefix. |
| Jun-26-2023 | NA | Updated the page to provide better clarity. |
| Apr-14-2023 | NA | Updated the overview section to add information about the file formats supported by Hevo. |
| Mar-09-2023 | NA | Updated section, Generate the IAM role-based credentials for consistent information structure. |
| Nov-08-2022 | NA | Updated section, Configure Amazon S3 as a Source to add information about the Convert date/time format fields to timestamp option. |
| Oct-17-2022 | 1.99 | Updated section, Configure Amazon S3 as a Source to add information about ingesting compressed files from selected folders. |
| Sep-21-2022 | 1.98 | - Added sections, Obtaining Amazon S3 Credentials and Generate the IAM role based credentials. - Renamed section, (Optional) Obtain your Access Key ID and Secret Access Key to Generate access credentials. - Updated section, Configure Amazon S3 as a Source to add information about connecting to Amazon S3 using IAM role. |
| Sep-07-2022 | 1.97 | Updated section, Configure Amazon S3 as a Source to reflect the latest UI. |
| Apr-18-2022 | NA | Added section, (Optional) Obtain your Access Key ID and Secret Access Key. |
| Apr-11-2022 | 1.86 | Updated section, Configure Amazon S3 as a Source to reflect support for TSV file format. |
| Mar-21-2022 | 1.85 | Removed section, Limitations as Hevo now supports UTF-16 encoding format for CSV files. |
| Jun-28-2021 | 1.66 | Updated the page overview with information about __hevo_source_modified_at being uploaded as a metadata field from Release 1.66 onwards. |
| Feb-22-2021 | NA | Added the limitation about Hevo not supporting UTF-16 encoding format for CSV data. |