Creating a Database Pipeline
On This Page
A database Pipeline is a Pipeline that you create with any database (RDBMS or NoSQL) as the Source. For example, MySQL, Oracle, PostgreSQL, MongoDB, and their supported variants are database Sources. You can configure any database or data warehouse as the Destination to which you want to load data, based on your business requirements.
Let us create a Pipeline to move data from a PostgreSQL Source to an Amazon Redshift Destination.
Prerequisite
-
You are assigned the Team Administrator, Team Collaborator, or Pipeline Administrator role in Hevo to create the Pipeline.
-
Access to the Source and the Destination.
Configure the Source
-
Log in to your Hevo account. By default, PIPELINES is selected in the Navigation Bar.
-
(Optional) In the User Information bar at the top of the page, select the region in which you want to create your Pipeline, if this is different from the default region of your workspace.
Note: This is applicable for customers signing up after Oct 31, 2022.

-
In the PIPELINES page, click + CREATE PIPELINE.

-
In the Select Source Type page, search and select PostgreSQL.

-
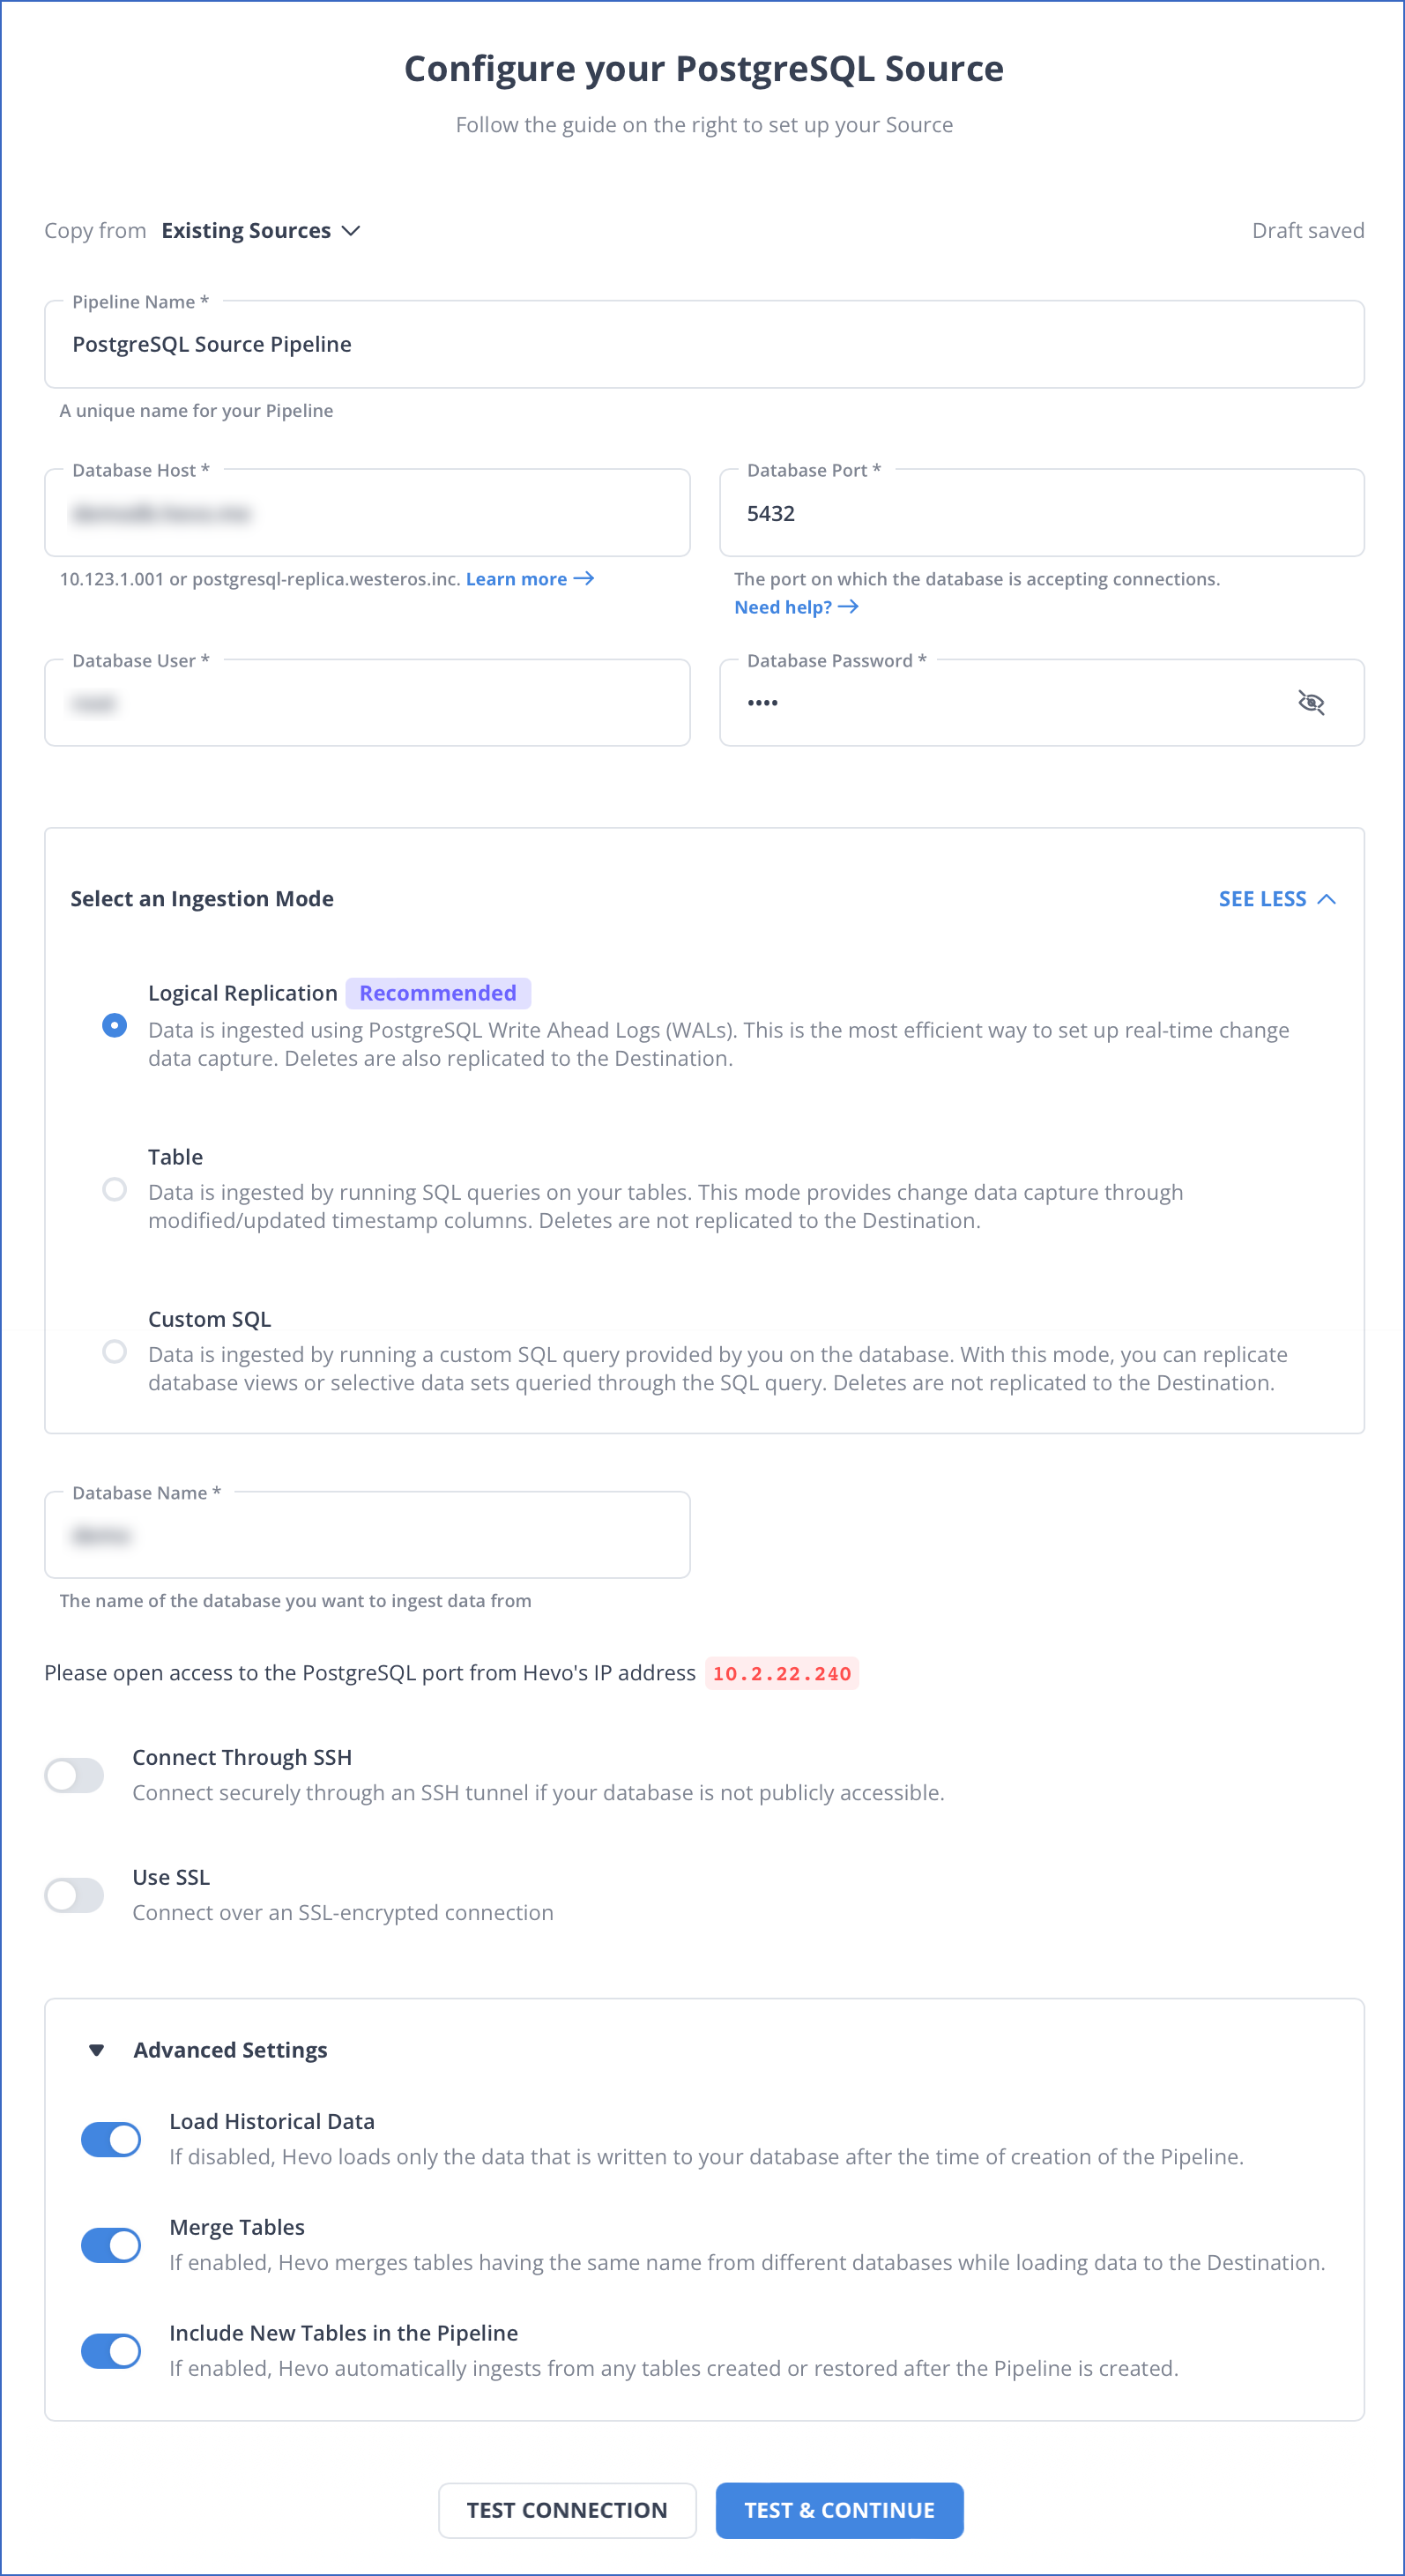
In the Configure your PostgreSQL Source page, specify the following connection settings:
Note: The fields may vary depending on the Source type. Read Sources.
-
Pipeline Name: A unique name for your Pipeline. For example, PostgreSQL Source 2.
-
Database Host: The PostgreSQL host’s IP address or DNS. For example, demodb.hevo.me.
The following table lists few examples of PostgreSQL hosts:
Variant Host Amazon RDS PostgreSQL postgresql-rds-1.xxxxx.rds.amazonaws.com Azure PostgreSQL postgres.database.azure.com Generic PostgreSQL 10.123.10.001 or postgresql.westeros.inc Google Cloud PostgreSQL 35.220.150.0 Note: For URL-based hostnames, exclude the
http://orhttps://part. For example, if the hostname URL is https://postgres.database.azure.com, enter postgres.database.azure.com. -
Database Port: The port on which your PostgreSQL server listens for connections. Default value: 5432.
-
Database User: The read-only user who has the permissions to read tables in your database. For example, root.
-
Database Password: The password for the read-only user.
-
Select an Ingestion Mode: The desired mode by which you want to ingest data from the Source. These modes define how Hevo must read data from the database. The available ingestion modes for PostgreSQL are Logical Replication, Table, and Custom SQL.
-
For ingestion mode as Table, read Object Settings for steps to configure the objects to be replicated.
-
For ingestion mode as Logical Replication, follow the steps provided in each PostgreSQL variant document to set up logical replication.
-
For ingestion mode as Custom SQL, read Ingestion Modes and Query Modes.
Here, we are selecting Logical Replication to replicate the complete database as is.
-
-
Database Name: The database that you wish to replicate. For example, demo.
-
Connection Settings:
-
Connect through SSH: Enable this option to connect to Hevo using an SSH tunnel, instead of directly connecting your PostgreSQL database host to Hevo. This provides an additional level of security to your database by not exposing your PostgreSQL setup to the public. Read Connecting Through SSH.
If this option is disabled, you must whitelist Hevo’s IP addresses. Refer to the content for your PostgreSQL variant for steps to do this.
-
Use SSL: Enable it to use SSL encrypted connection. You should also enable this if you are using Heroku PostgreSQL databases. To enable this, specify the following:
-
CA File: The file containing the SSL server certificate authority (CA).
-
Client Certificate: The client public key certificate file.
-
Client Key: The client private key file.
-
-
-
Advanced Settings
-
Load Historical Data: Applicable for Pipelines with Logical Replication mode. If this option is enabled, the entire table data is fetched during the first run of the Pipeline. If disabled, Hevo loads only the data that was written in your database after the Pipeline creation.
-
Merge Tables: Applicable for Pipelines with Logical Replication mode. If this option is enabled, Hevo merges tables with the same name from different databases while loading the data to the warehouse. Hevo loads the Database Name field with each record. If disabled, the database name is prefixed to each table name. Read How does the Merge Tables feature work?.
-
Include New Tables in the Pipeline: Applicable for all Ingestion modes except Custom SQL.
If enabled, Hevo automatically ingests data from tables created in the Source after the Pipeline has been built. These may include completely new tables or previously deleted tables that is re-created in the Source.
If disabled, new and re-created tables are not ingested automatically. They are added in SKIPPED state in the objects list, in the Pipeline Overview page. You can update their status to INCLUDED to ingest data.
Note: You can change this setting later.
-
-
-
Click TEST & CONTINUE. The objects available in your database are displayed. If the test fails, fix the errors, re-test, and continue with the configuration.
Select Source Objects
-
Select the objects that you want to replicate in your Destination and click CONTINUE. By default, all the objects are selected.
Note: If your objects or tables do not have a primary key, you need to provide a query mode for your data in the next screen. By default, Hevo recommends the optimal query mode required for every such object, however you can also select a different query mode according to your requirements.
Select and Configure the Destination
-
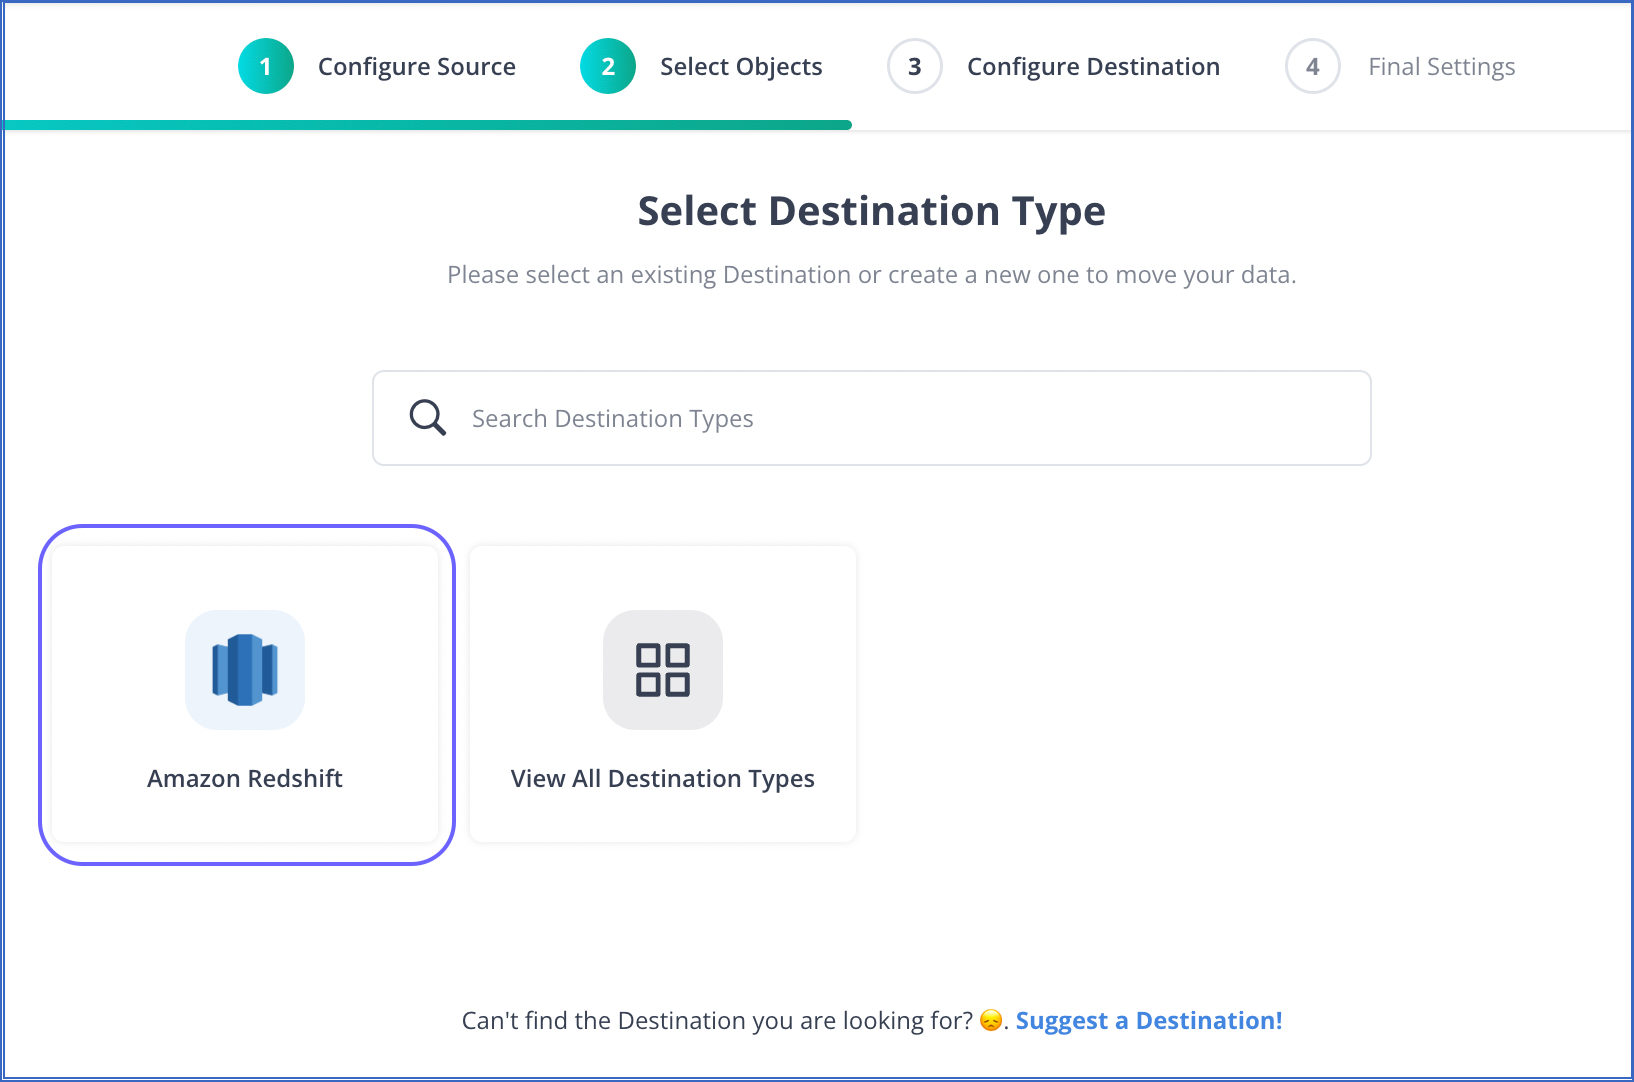
In the Select Destination Type page, select your Destination. You can see the Destination type that you selected at the time of setting up your account with Hevo. Here, we are selecting Amazon Redshift.
Note: You can click View All Destination Types to select another Destination type.
-
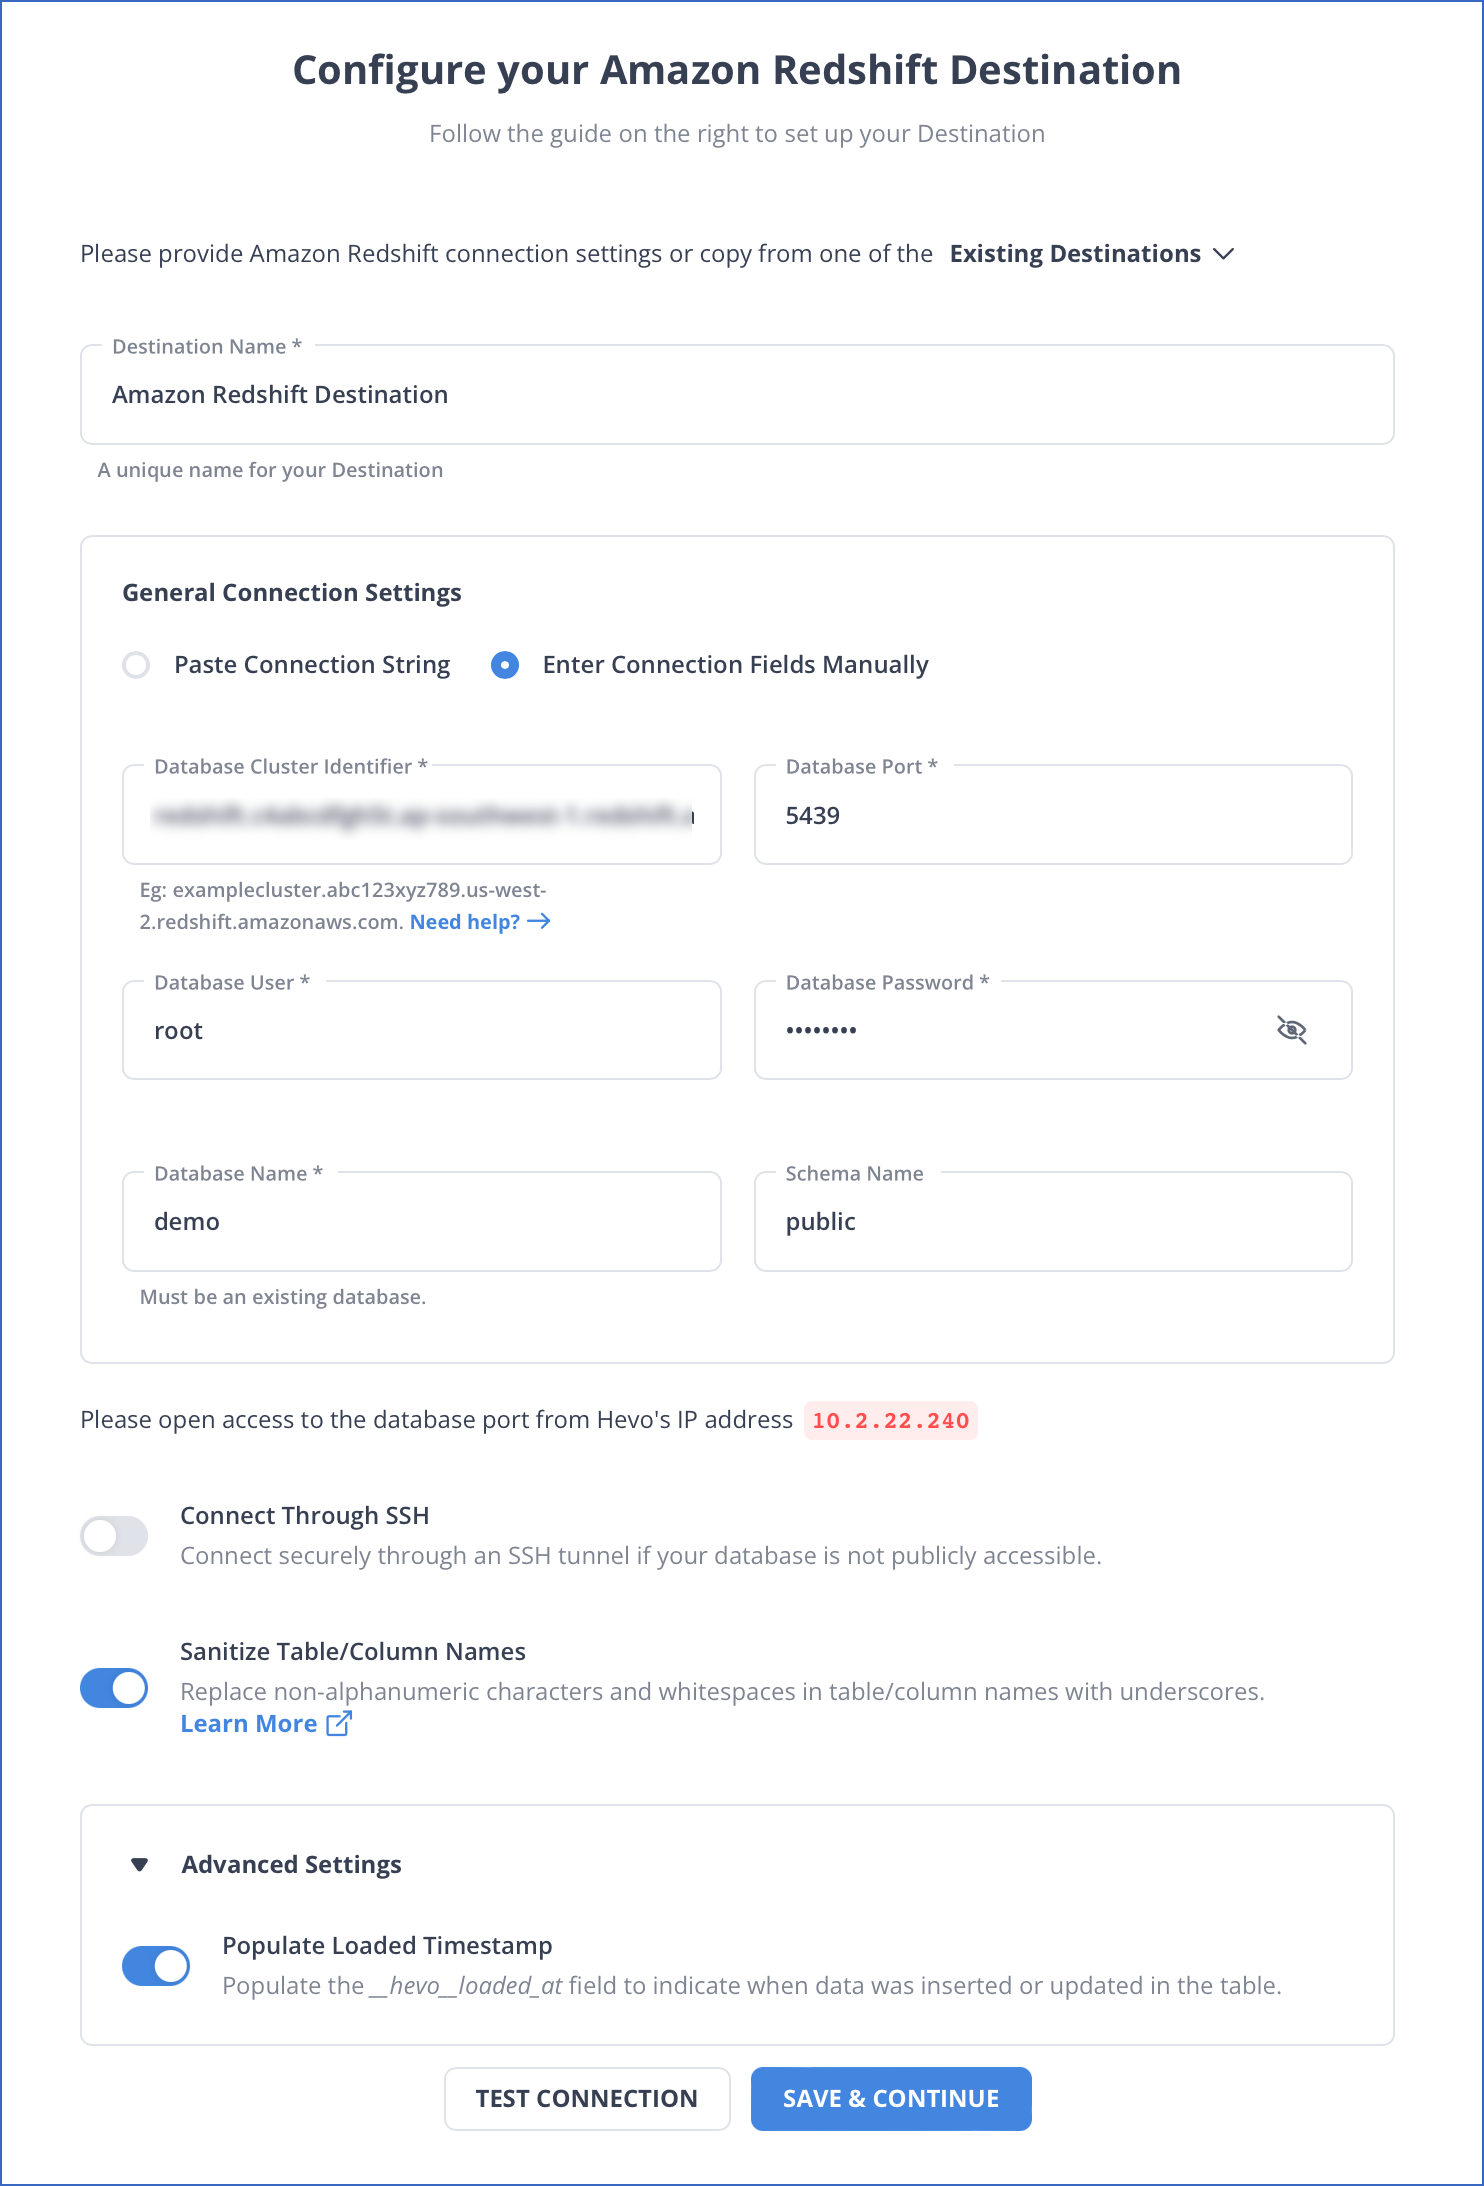
In the Configure your Amazon Redshift Destination page, specify the Amazon Redshift database settings. Read Amazon Redshift to know how to configure your Amazon Redshift Destination.
Note: The fields may vary depending on the type of the Destination you want to configure. Read Destinations.
-
Click SAVE & CONTINUE.
-
In the Destination Table Prefix field, provide a prefix if you want to modify the Destination table or partition name, else, you can leave the field blank.
-
Click CONTINUE.
Final Settings
-
Optionally, as part of the final settings, you can set up Transformations to cleanse the Source data or enrich it in any other way. You can also view the Source to Destination field mapping via the Schema Mapper and edit these, if needed.
Your first Pipeline with the database Source is created and the data ingestion starts.
Revision History
Refer to the following table for the list of key updates made to this page:
| Date | Release | Description of Change |
|---|---|---|
| Oct-03-2023 | NA | Updated the page as per the latest Hevo UI. |
| Oct-31-2022 | 2.00 | Updated section, Configure the Source to add step regarding selecting region before creating a Pipeline. |
| Oct-13-2022 | 1.99 | Updated section, Select Source Objects information about the query mode suggestions that Hevo makes in the Configure Objects page. |
| Oct-10-2022 | NA | Updated the section, Configure the Source to reflect the latest UI changes. |
| Jul-27-2022 | 1.93 & 1.94 | Updated the screenshot in the Select and Configure the Destination section to reflect the latest UI. |
| May-02-2022 | NA | Updated section, Configure the Source according to the latest UI. |
| Mar-21-2022 | NA | New document. |