Snowflake
On This Page
Snowflake offers a cloud-based data storage and analytics service, generally termed as data warehouse-as-a-service. Companies can use it to store and analyze data using cloud-based hardware and software.
In Snowflake, you can create both data warehouses and databases to store your data. Each data warehouse can further have one or more databases, although this is not mandatory. Snowflake provides you one data warehouse automatically when you create an account.
For Hevo to access your data, you must assign the required permissions. Snowflake uses Roles to assign permissions to users. You need ACCOUNTADMIN, SECURITYADMIN or SYSADMIN privileges to create the required roles for Hevo. Read more about Roles in Snowflake.
Prerequisites
-
An active Snowflake account.
-
The user has
ACCOUNTADMINorSECURITYADMINprivileges in Snowflake to create a role for Hevo. -
The user has
ACCOUNTADMINorSYSADMINprivileges in Snowflake, if a warehouse is to be created. -
Hevo is assigned the
USAGEpermission on data warehouses and databases.
Perform the following steps to configure your Snowflake data warehouse:
Create a Snowflake Warehouse (Optional)
When you create an account, Snowflake automatically creates a warehouse for you. However, you can choose to create a different warehouse for your Activation. To do this:
-
Do one of the following to connect to your Snowflake account:
-
In your SQL client, connect to your Snowflake account.
-
Log in to your Snowflake instance. Click + Worksheet.

-
-
Run the following commands:
USE ROLE <ACCOUNTADMIN or SYSADMIN>;

CREATE WAREHOUSE <warehouse_name> WITH AUTO_RESUME = TRUE
WAREHOUSE_SIZE = <size> // size = {XSMALL | SMALL | MEDIUM | LARGE | XLARGE | XXLARGE | XXXLARGE | X4LARGE} AUTO_SUSPEND = <time_in_seconds>; // default suspending time is 600 seconds
In the commands above:
-
Auto-resume specifies whether to automatically resume a Warehouse when a SQL query is submitted to it.
-
Warehouse size is the size of the Warehouse which depends on your cost & usability. Default: XSmall.
-
Auto-suspend specifies the number of seconds of inactivity after which the Warehouse is automatically suspended. When data is received, the Warehouse is automatically resumed if Auto-resume is set to True.
-
Create a Snowflake Database (Optional)
You can use the default database provided with your Snowflake data warehouse for loading the data or create another database as per your requirements.
To create a database:
-
Do one of the following to connect to your Snowflake account:
-
In your SQL client, connect to your Snowflake account.
-
Log in to your Snowflake instance. Click + Worksheet.
-
-
Run the following commands:
USE ROLE <ACCOUNTADMIN or SYSADMIN>; // use one of the roles
CREATE DATABASE <database_name>; // replace <database_name> with a database name
Create a Role and Grant Permissions
Activate does not need a user with the ACCOUNTADMIN role to connect to your Snowflake warehouse. To connect to your Snowflake warehouse, you can create a non-administrative user and assign a custom role to it, or use one of the admin roles.
The custom role must have the USAGE permission on the warehouse and the database. In addition, the custom role must have the CREATE SCHEMA permission on the database if it needs to create the bookkeeping schema. Activate uses this schema to efficiently determine the data to be loaded to the Target. This is a feature introduced in Release Version 1.69.
You can use any SQL tool that allows connecting to your Snowflake account to create a custom role and grant permissions to it. For example, SnowSQL or Snowsight Worksheets. In this section, we have used Snowsight Worksheets, which is available through Snowflake’s web user interface.
Perform the following steps to create a role and grant permissions:
-
Log in to your Snowflake account. Click the + icon and select SQL Worksheet, to create a worksheet.

-
Enter the following commands in the worksheet:
-
Create a role for the user:
USE ROLE <ACCOUNTADMIN or SECURITYADMIN>; // use one of the roles CREATE ROLE <role_name> COMMENT = 'Role for Activate User'; // replace <role_name> with a name for the role -
(Optional) If you have created a hierarchy in your Snowflake account, whereby all custom roles are assigned to the SYSADMIN role, grant this new role to the SYSADMIN role:
GRANT ROLE <role_name> to role SYSADMIN; -
Grant warehouse-level privileges to the role you created:
Note: You can either specify an existing warehouse or the one that you created in Step 1 above.
GRANT USAGE ON WAREHOUSE <warehouse_name> TO ROLE <role_name>; -
Create a user for Activate:
CREATE USER IF NOT EXISTS <user_name> // replace <user_name> with a name for the user PASSWORD='<password>' COMMENT='User for Activate' DEFAULT_ROLE='<role_name>' DEFAULT_WAREHOUSE='<warehouse_name>'; // the role must have usage permission on the specified warehouseNote: You can either specify an existing warehouse or the one that you created in Step 1 above.
-
Grant the role to the user you created:
GRANT ROLE <role_name> TO USER <user_name>; -
Grant database-level privileges to the role you created:
Note: The database must exist in the default warehouse configured for the user created in the step above.
GRANT USAGE ON DATABASE <database_name> TO ROLE <role_name>; // Grant access to the database GRANT SELECT ON ALL TABLES IN DATABASE <database_name> to role <role_name>; // Grant access to existing data in the database GRANT SELECT ON FUTURE TABLES IN DATABASE <database_name> to role <role_name>; // Grant access to any new tables added to the database GRANT CREATE SCHEMA ON DATABASE <database_name> to role <role_name>; // Grant permission to create the bookkeeping schemaNote: The bookkeeping schema must be created only once for the configured database.
-
Grant schema-level privileges to the role you created:
Note: If you have created a schema for Activate in your database, specify that name here.
GRANT ALL PRIVILEGES ON SCHEMA <schema_name> TO ROLE <role_name>; // Grant access to the schema
Note: Replace all placeholder values in the commands above with your own. For example, <role_name> with hevoadmin.
-
Create and Grant Privileges on the Bookkeeping Schema
Hevo maintains a bookkeeping schema, hevo, for all Activations in the configured database. If this schema does not exist, you must create it.
1. Create the bookkeeping schema
-
Log in to your Snowflake account as the user created in Step 3. Click the + icon and select SQL Worksheet, to create a worksheet.

-
Enter the following commands in the worksheet:
-
Access the configured database:
USE [DATABASE] <database_name>; // The DATABASE keyword is optional -
Create the bookkeeping schema:
USE ROLE <role_name>; // Use the role created earlier for this user

CREATE SCHEMA IF NOT EXISTS hevo; // The schema is created only if it does not exist
The bookkeeping schema has to be created only once, during the configuration of the selected database. The role that creates this schema has
OWNERSHIPprivileges and does not need additional permissions to access the bookkeeping schema.
Note: Replace all placeholder values in the commands above with your own. For example, <database_name> with RETAIL_DB.
-
2. Grant privileges on the bookkeeping schema to other roles (Optional)
Note: All roles and users who need to use Activate must have access to the hevo schema.
-
Log in to your Snowflake account. Click the + icon and select SQL Worksheet, to create a worksheet.
-
Enter the following commands in the worksheet:
-
Access the configured database:
USE [DATABASE] <database_name>; // The database containing the bookkeeping schema -
Grant permissions to the role in one of the following ways:
-
Grant all privileges:
GRANT ALL PRIVILEGES ON SCHEMA hevo TO ROLE <role_name>; // Use the role created for the user -
Grant only the essential privileges:
GRANT USAGE, CREATE TABLE ON SCHEMA hevo TO ROLE <role_name>; // Use the role created for the user
Note: Replace all placeholder values in the commands above with your own. For example, <database_name> with RETAIL_DB.
-
-
(Optional) Verify the assigned privileges:
SHOW GRANTS ON SCHEMA hevo; // check the assigned permissions on the schemaThe following is a sample output, where only the essential privileges are granted to the role ROLE_AA:

-
Obtain your Snowflake Account and Region Name
The Snowflake data warehouse may be hosted on any of the following Cloud providers:
-
Amazon Web Services (AWS)
-
Google Cloud Platform (GCP)
-
Microsoft Azure (Azure)
The account name, cloud region ID, and cloud service provider are visible in your Snowflake web interface URL.
For most accounts, the URL looks like https://<account_name>.<cloud_region_id>.
For example, https://westeros.us-east-2.aws.snowflakecomputing.com. Here, westeros is your account name, us-east-2 is the cloud region ID, and aws is the cloud service provider.
However, if your Snowflake instance is hosted on AWS, US West region, the URL looks like https://account_name.snowflakecomputing.com
Perform the following steps to obtain your Snowflake Account URL:
-
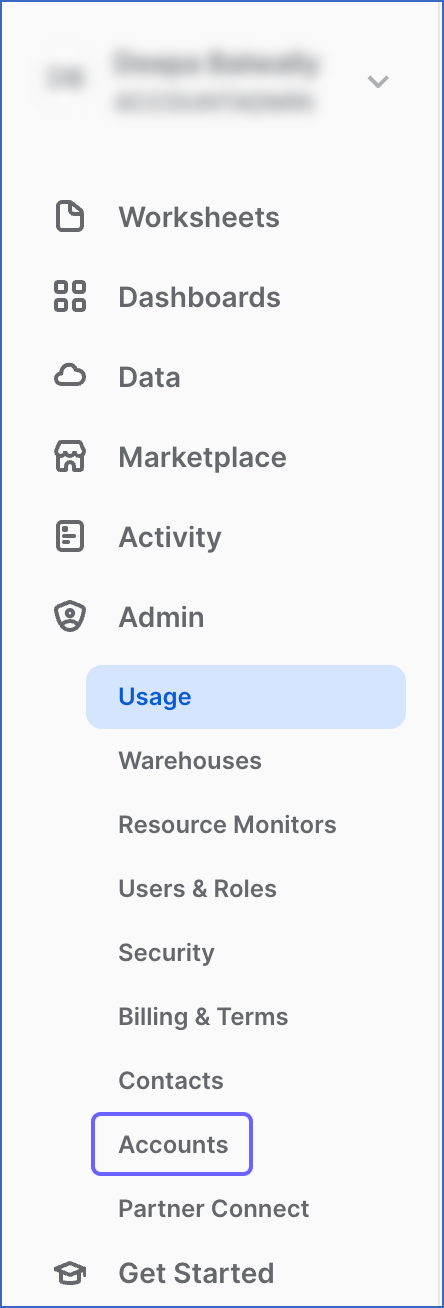
Log in to your Snowflake account and in the left panel, click on Admin.
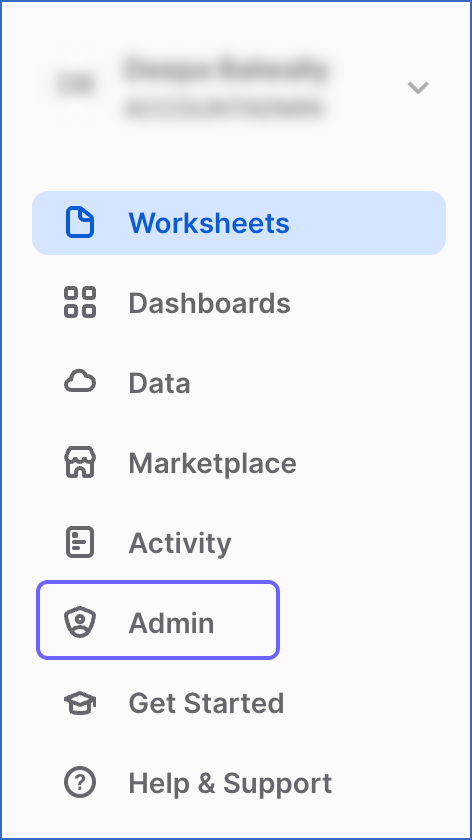
-
Under the Admin tab, click on Accounts.
-
On the Accounts page, hover the mouse on the LOCATOR field corresponding to the account for which you want to obtain the URL.

-
Click on the link icon to copy your account URL. Save the URL and use it while configuring Snowflake as an Activate Warehouse.
Configure Snowflake as a Warehouse
Skip this step if you already have a Snowflake data warehouse set up.
-
Do one of the following:
-
Click ACTIVATE in the Navigation Bar, and:
-
In the Activations tab, click + CREATE ACTIVATION.

-
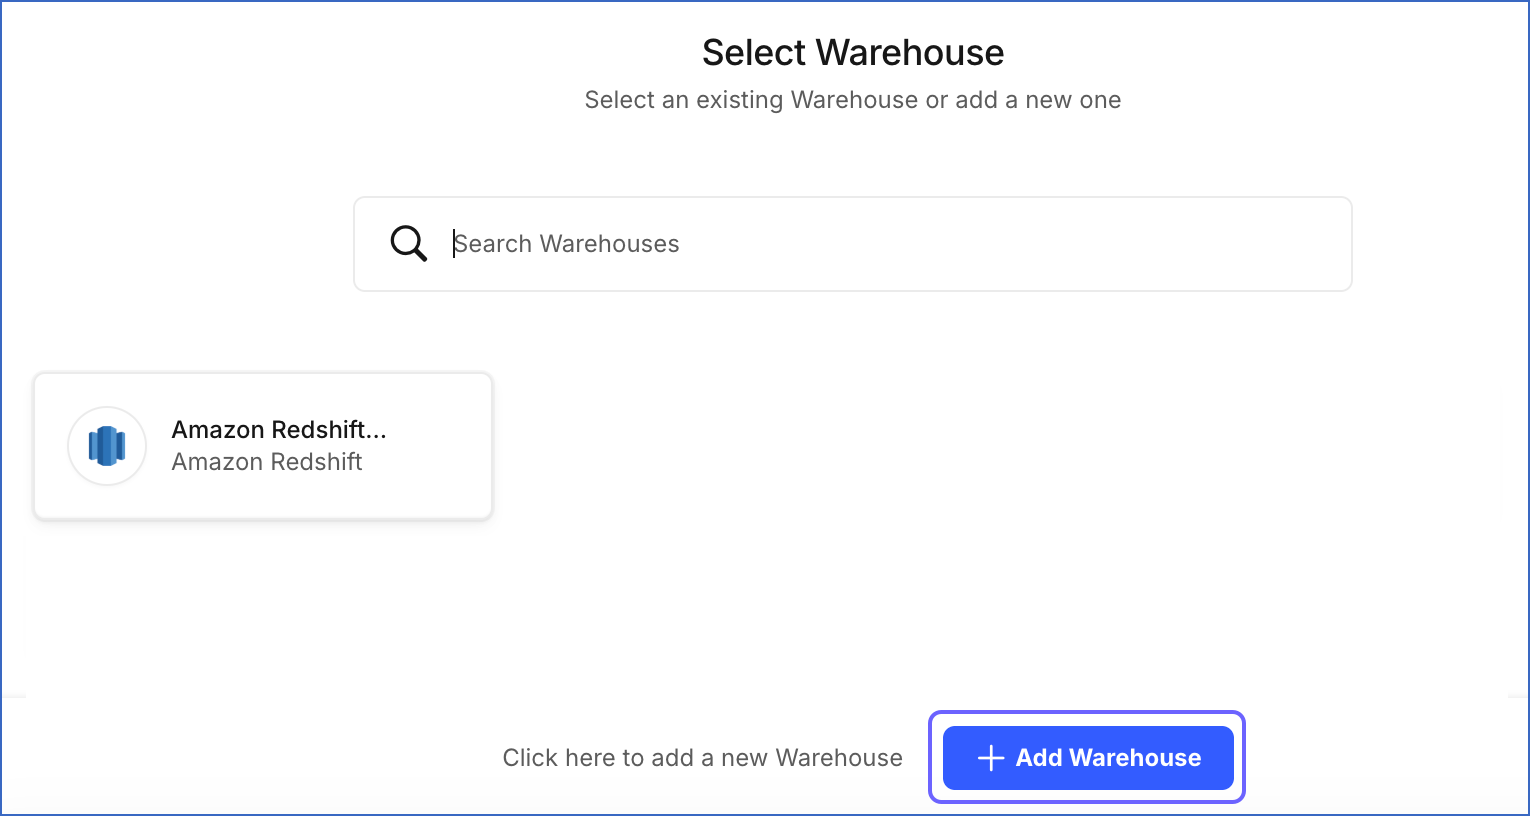
On the Select Warehouse page, click + Add Warehouse.
-
On the Select Warehouse Type page, select Snowflake.
-
-
Click DESTINATIONS in the Navigation Bar, and:
-
Click + CREATE DESTINATION in the Destinations List View.
-
On the Add Destination page, select Snowflake as the Destination type.
-
-
-
On the Configure your Snowflake Warehouse page, specify the following:

-
Warehouse Name: A unique name for your Warehouse.
-
Snowflake Account URL: The account URL that you retrieved in Step 5 above.
-
Database User: The Hevo user that you created. This user has a non-administrative role in the Snowflake database.
-
Database Password: The password of the database user.
-
Database Name: The name of the database from which data is to be synchronized.
-
Schema Name: The name of the schema on which the database user has USAGE privileges. Default value: PUBLIC.
Note: The schema name is case-sensitive.
-
Warehouse: The Snowflake warehouse associated with your database, where the SQL queries and DML operations are performed.
-
-
Click TEST CONNECTION to test connectivity with the Snowflake warehouse.
-
Once the test is successful, click SAVE & CONTINUE.
Revision History
Refer to the following table for the list of key updates made to this page:
| Date | Release | Description of Change |
|---|---|---|
| Aug-26-2024 | NA | Updated section Configure Snowflake as a Warehouse to reflect the latest UI. |
| Apr-10-2023 | NA | Updated sections: - Create a Role and Grant Permissions, to provide new privileges for the role created for Activate, - Create and Grant Privileges on the Bookkeeping Schema, to include information about using the non-administrative user to create the bookkeeping schema, - Obtain your Snowflake Account and Region Name, to add information about obtaining the URL. |
| Jun-21-2022 | NA | Updated the Configure Snowflake as a Warehouse section to reflect the UI changes. |
| Mar-31-2022 | NA | Updated the screenshots to reflect the latest Snowflake UI. |
| Sep-20-2021 | 1.72 | Updated the following sections, Prerequisites, Create a Role and Grant Permissions to remove the mentions of the ALL permission, as the user creates the hevo schema now. Updated the section, Create and Grant Privileges on the Bookkeeping Schema to grant appropriate permissions on the hevo schema to Activate roles. |
| Sep-09-2021 | 1.71 | Added section, Create and Grant Privileges on the Bookkeeping Schema. |
| Jul-12-2021 | 1.67 | New document. |