Creating the UI Components
On This Page
To build a custom connector, you need to define various User Interface (UI) groups and fields. This allows users to specify necessary details such as the host, port, credentials, and other settings for the data source.
Creating a UI Group for Connection
A UI Group is a logical grouping of related fields that allows users to provide necessary connection parameters. For example, you can create a Connection group where users enter the database host, port, user credentials, and other connection settings.
To create a UI group, you can use the @Group annotation:
@Group(type = Group.Type.CONNECTION, title = "<your-title-here>", order = <your-group-order>)
-
type: Defines whether the group is for Connection or Additional Settings. -
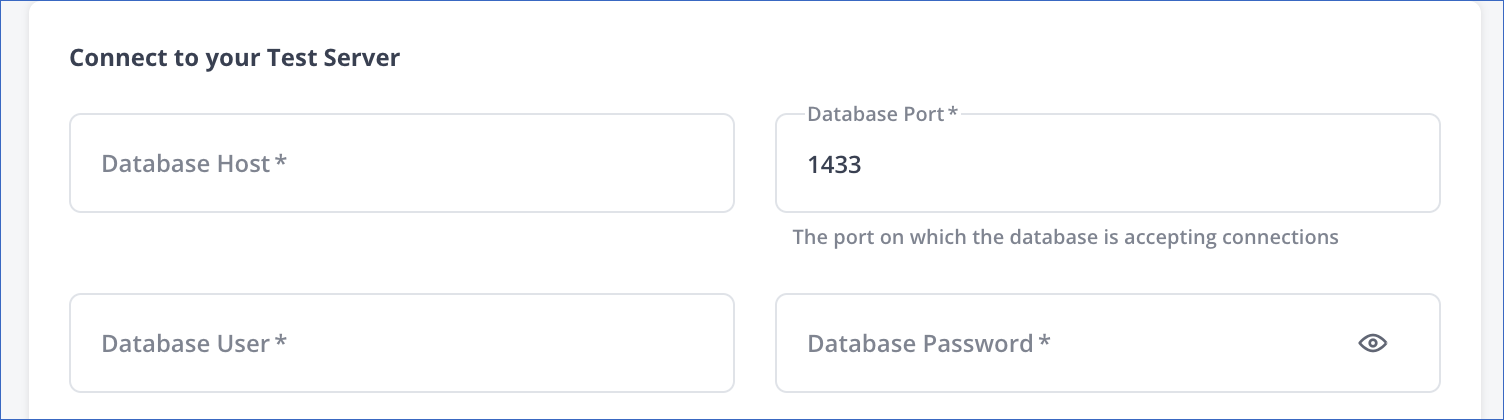
title: The title displayed for the group. For example, Connect to your Test Server. -
order: Determines the order in which the group will appear in the UI. For example, if the order is set to 1, this Connection group will appear at the top.
Creating UI Fields in the Connection Group
Within the Connection group, you can create UI Fields for user input. These fields are defined using the @Property annotation. For each group, you can create multiple fields as show below:
Creating the Database Host Field
The host field allows users to specify the hostname or IP address of the database.
@Property(
     name = "<your-host-name>",
     type = PropertyType.STRING,
     displayName = "<Your Display Name>",
     description = "<Description of the field>",
     helperText = "<Example or hint for the user>",
     fieldOrder = <your-field-order>,
     size = Property.Size.<your-size>)
public String <your-variable-name>;
-
name: Internal identifier for the field. For example, host is used to store the database hostname. -
type: Data type of the input, such as STRING, LONG, or PASSWORD. -
displayName: Label displayed in the UI. For example, Database Host for the hostname input or Database Port for the port number input. -
description: Subtext explaining what this field is used for. For example, SQL Server Host - 10.123.10.001 or sqlserver-replica.westeros.inc. explains what values users should enter in the host field. -
helperText: Example value for the field. For example, Enter the database hostname, such as sqlserver-replica.westeros.inc. for the host field. -
fieldOrder: Determines the order in which the field appears in the UI. For example, 1 ensures the host field appears before any other field. -
size: Defines the width of the field. For example,_50sets the field width to 50% of the UI form.
Creating the Database Port Field
The port field allows users to specify the port number for the database connection. For example:
@Property(
    name = "port",
    type = PropertyType.LONG,
    displayName = "Database Port",
    defaultValue = "1433",
    description = "SQL Server port",
    fieldOrder = 2,
    size = Property.Size._50,
    helperText = "The port on which the database is accepting connections")
public long port;
Creating the User Credentials Fields
For user authentication, you will need fields for the database user and password. For example:
@Property(
    name = "user",
    type = PropertyType.STRING,
    displayName = "Database User",
    description = "Database User with appropriate permissions",
    fieldOrder = 3,
    size = Property.Size._50)
public String user;
@Property(
    name = "password",
    type = PropertyType.PASSWORD,
    displayName = "Database Password",
    description = "Password",
    fieldOrder = 4,
    size = Property.Size._50)
public String password;
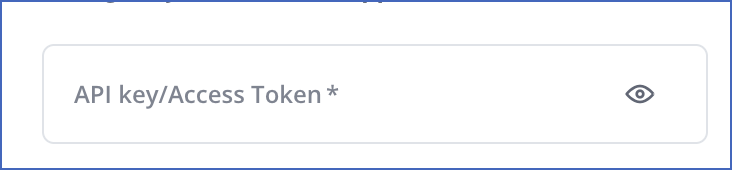
Creating the API Key Field
Some data sources may require an API key for authentication. You can add this field as shown in the following example:
@Property(
    name = "api_key",
    type = PropertyType.PASSWORD,
    displayName = "Api Key",
    description = "Api Key",
    fieldOrder = 5,
    size = Property.Size._50)
public String api_key;
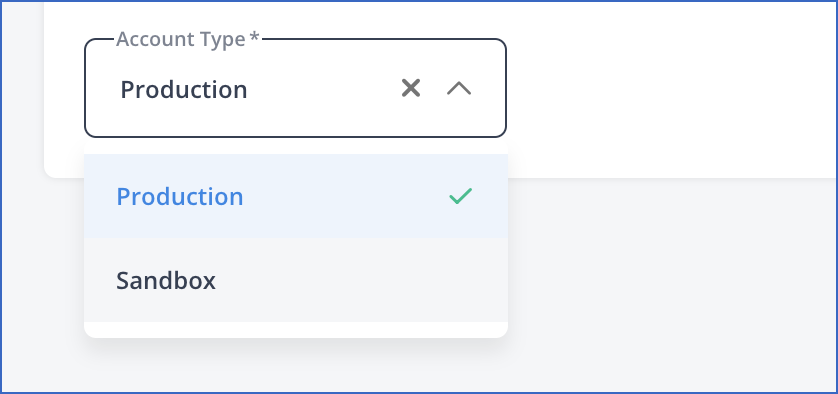
Creating the Account Type Field
This field lets users select an account type. You can use an option reference to provide predefined values for selection.
@Property(
    name = "account_type",
    displayName = "Account Type",
    defaultValue = "PRODUCTION",
    fieldOrder = 20,
    optionsRef =
        @OptionsRef(
            type = OptionsRefType.STATIC,
            allowedValues = {"<account-type-1>", "<accoun-type-2>"}))
private AccountType accountType;
-
optionsRef: Allowed values in the account type dropdown. For example, for Salesforce, we can add PRODUCTION and SANDBOX.
Creating the Auth Type Button
For certain connectors, you may need to handle authentication via OAuth or another type. To do this, create an Auth Type field.
@Auth(name = "auth_type", displayName = "Auth Type", type = AuthType.OAUTH, fieldOrder = 1)
private AuthCredentials authCredentials;
-
type: Specifies the type of authentication such asOAUTH.

Creating a UI Group for Additional Settings
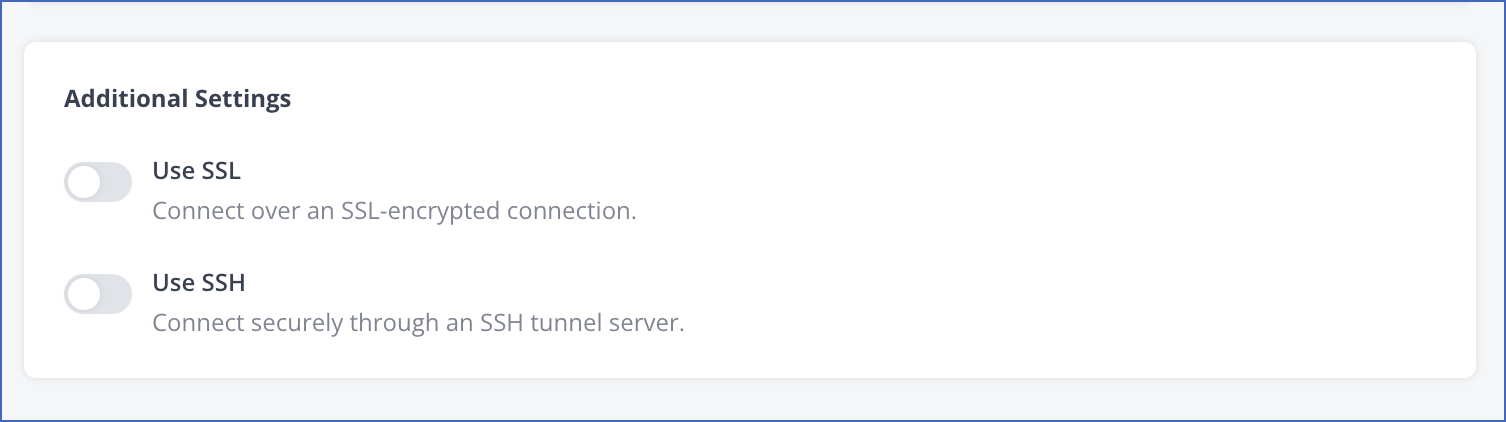
The Additional Settings group allows users to provide configuration options that are not essential for the connection but are important for customizing the connection setup, such as enabling SSL or SSH.
@Group(type = Group.Type.ADDITIONAL_SETTINGS, title = "Additional Settings", order = 2)
Creating SSH and SSL Fields in Additional Settings
You can provide fields for enabling SSL and SSH connections. These fields are created using the @SSL and @SSH annotations.
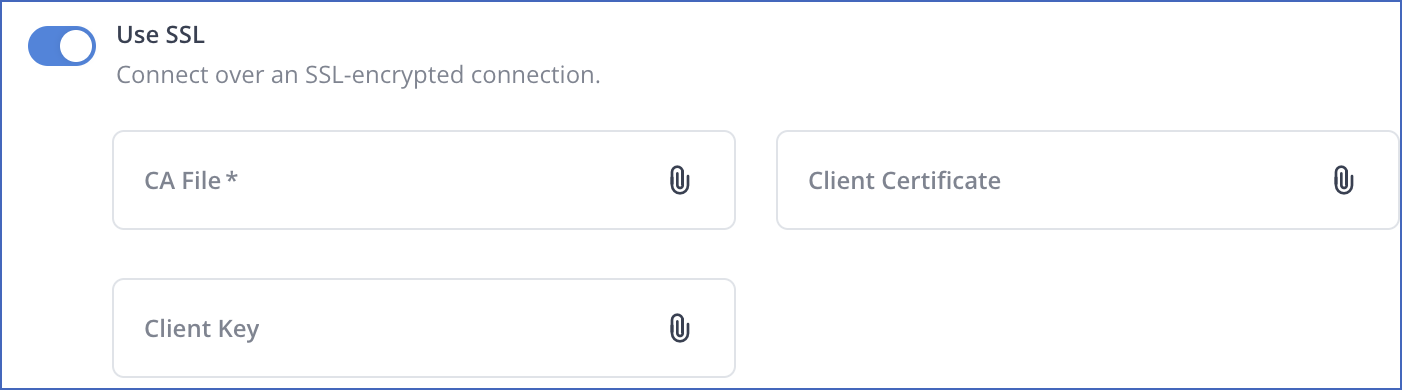
Creating the SSL Field
This allows the user to enable SSL for secure communication with the server.
@SSL(name = "ssl", displayName = "SSL", fieldOrder = 7, defaultValue = false)
public SSLCredentials ssl;
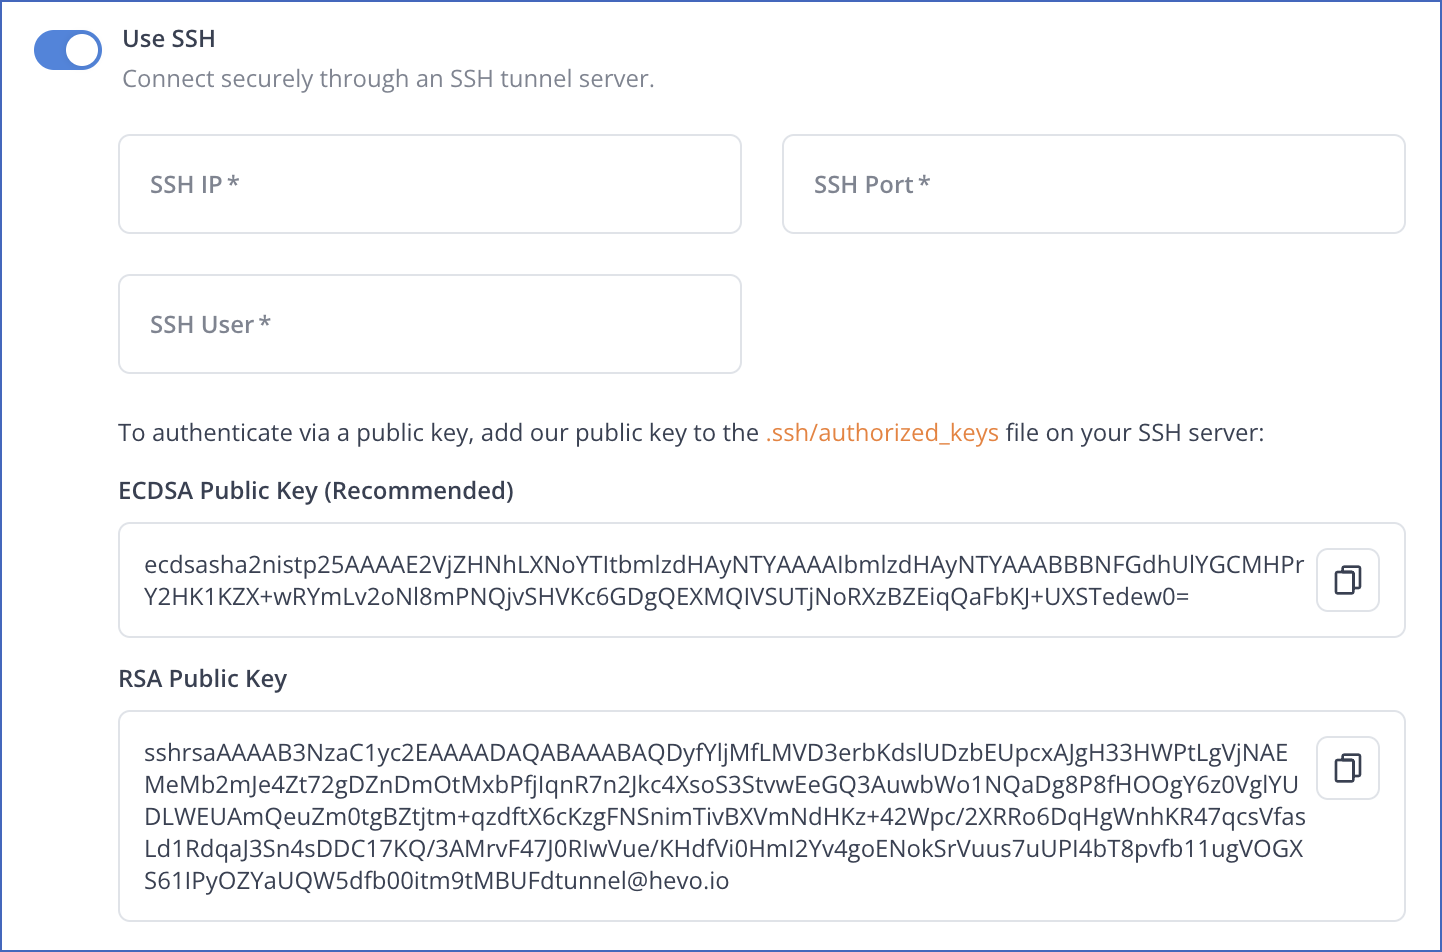
Creating the SSH Field
This allows the user to configure an SSH tunnel for the connection.
@SSH(name = "ssh", displayName = "SSH", fieldOrder = 8, defaultValue = false)
public SSHConfig ssh;
When developing a custom connector for your specific Source, you must implement connection logic suitable for that Source’s authentication method. For example, if you connect to a database, you would use JDBC to establish a connection using the hostname, port, username, and password provided through the UI. For API-based services, you would authenticate requests by using API keys or tokens specified by the user. You must always ensure the connection logic correctly leverages user-provided configuration values to establish communication with your Source. Read Creating the Connection Logic.