Connecting Through AWS Transit Gateway
On This Page
Hevo provides you with the option of connecting to your Source or Destination database on AWS, such as Amazon RDS or Amazon Aurora, via an AWS transit gateway. This option is available only under a business plan.
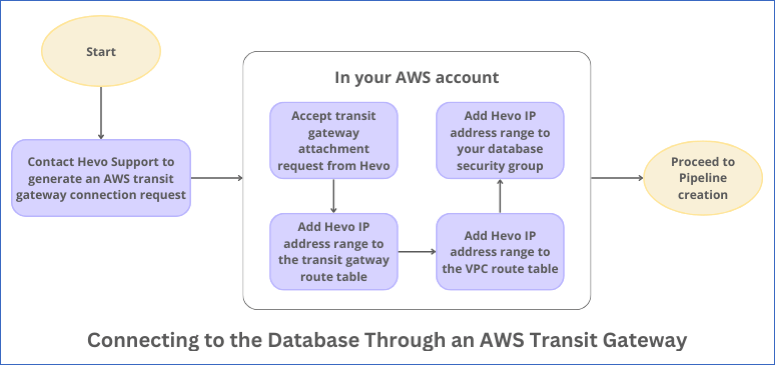
As seen in the image below, to establish a connection through a transit gateway between the Hevo platform and your database, Hevo:

-
Creates an intermediate VPC or uses an existing one.
-
Creates a transit gateway or uses an existing one.
-
Peers a connection between Hevo’s transit gateway and your transit gateway.
-
Communicates with your database through a tunnel instance inside the intermediate VPC, routing the network traffic via the transit gateway.
Note: Your transit gateway must be attached to the VPC where your database resides for Hevo to connect to it successfully.
The following image illustrates the steps for connecting your Source or Destination database through the AWS transit gateway. The steps are also described in detail in the sections below.
Initiate AWS Transit Gateway Request
To create a connection between your transit gateway (Accepter) and Hevo’s transit gateway (Requester), you must contact Hevo Support with the following details obtained from your AWS account:
-
AWS Account ID: The ID of the AWS account containing the transit gateway to be peered.
-
Accepter Classless Inter-Domain Routing (CIDR) Range: The IP address range of your network in CIDR format. For example, 10.0.0.0/24.
-
Region: The AWS region of the account that hosts your Source or Destination database.
-
Transit Gateway ID: The ID of the transit gateway attached to the VPC in which your Source or Destination database resides.
Based on these details, Hevo Support generates a transit gateway peering attachment request and provides you with the following information:
-
Requester Classless Inter-Domain Routing (CIDR): The IP address range of Hevo’s network in CIDR format. For example, 10.0.0.0/28. You must add this IP address range to your database security group and the route tables of your transit gateway and VPC. Refer to the respective sections below.
-
Hevo Transit Gateway ID: The ID of the transit gateway peering attachment request that Hevo generates. For example, tgw-attach-01a11fd1e11a11b1f. You can use this to identify the peering attachment request from Hevo.
Accept the Transit Gateway Attachment Request
-
Log in to your Amazon VPC console.
-
At the top right corner of the page, click the region selector to select your region from the drop-down. For example, Asia Pacific (Singapore).

-
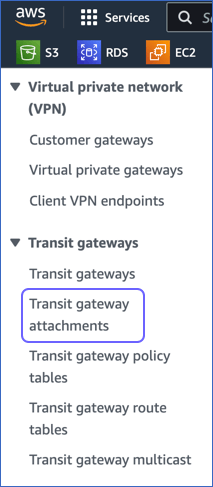
In the left navigation pane, scroll down to the Transit gateways section and click Transit gateway attachments.
-
On the Transit gateway attachments page, do the following:
-
Click the Transit gateway attachment ID for the Transit gateway ID obtained in Step 1 above, click Actions, and select Accept transit gateway attachment from the drop-down.

-
In the pop-up dialog that appears, click Accept.

-
Add Hevo IP Address Range to your Transit Gateway Route Table
To direct network traffic via the transit gateway attachment to Hevo’s IP address range, you must add the range to your transit gateway route table. For this, perform the following steps:
-
Log in to your Amazon VPC console.
-
In the left navigation pane, scroll down to the Transit gateways section and click Transit gateway route tables.

-
On the Transit gateway route tables page, click the Transit gateway route table ID associated with the transit gateway peering attachment obtained in Step 1 above.
-
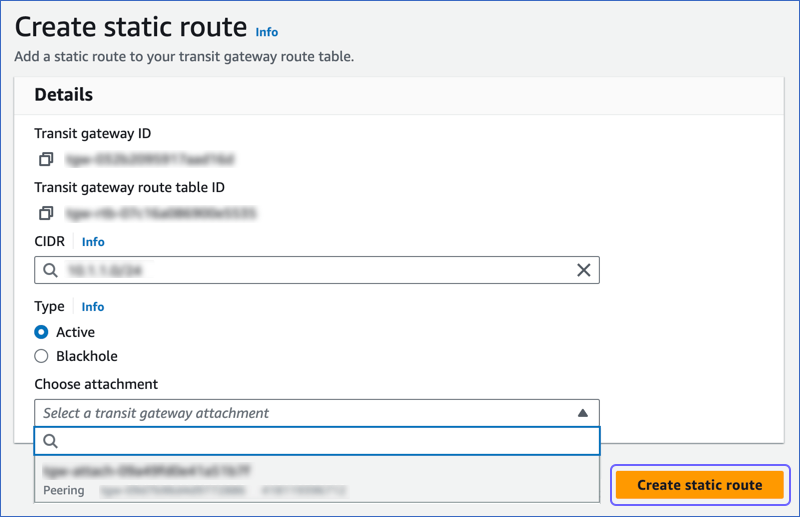
In your Transit gateway route tables panel, click Routes and then click Create static route.

-
On the Create static route page, do the following:
Add Hevo IP Address Range to your VPC Route Table
To direct the network traffic to Hevo’s IP address range from your VPC via the transit gateway, add the range to your VPC route table. For this, perform the following steps:
-
Log in to your Amazon VPC console.
-
In the navigation pane, under Virtual private cloud, click Route tables.

-
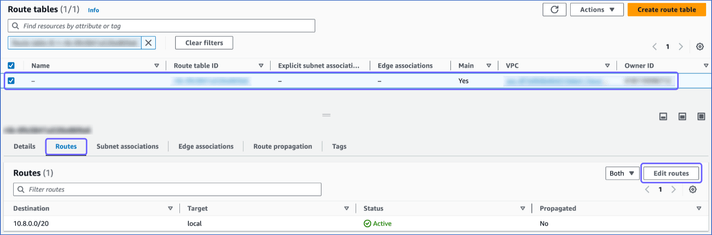
On the Route tables page, click the Route table ID associated with your database VPC.
-
In the <Your Route table ID> description section, click Routes and then click Edit routes.
-
On the Edit routes page, do the following:
-
Click Add route.

-
In the Destination column, enter the Hevo IP address range obtained in Step 1 above.

-
In the Target column, select Transit Gateway from the drop-down and specify your transit gateway ID.

Note: The ID of your transit gateway is not available for selection if your VPC is not attached to the transit gateway.
-
Click Save changes.
-
Add Hevo IP Address Range to your Database Security Group
To allow inbound traffic to your database instance from Hevo, add Hevo’s IP address range to your database’s security group. For this, perform the following steps:
-
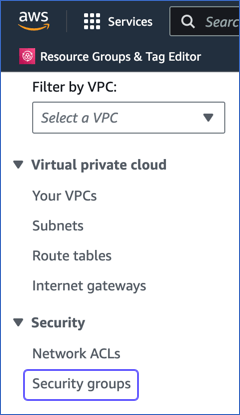
Log in to your Amazon VPC console.
-
In the left navigation pane, under Security, click Security groups.
-
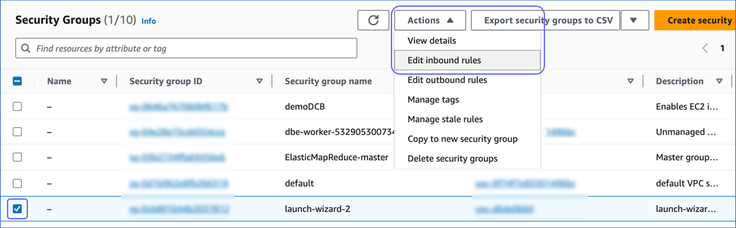
On the Security Groups page, select the check box next to the Security group ID associated with your database, and click Actions.
-
From the Actions drop-down, select Edit inbound rules.
-
On the Edit inbound rules page, do the following:

-
Click Add rule.
-
In the Type column, select the type of your database instance from the drop-down. For example, MYSQL/Aurora.
-
The Port range column is pre-filled with the port number of your database instance. For example, 3306 for a MySQL/Aurora database.
Note: This column is non-editable.
-
In the Source column, select Custom from the drop-down and enter Hevo’s IP address range obtained in Step 1 above.
-
Click Save rules.
-
Once you perform the steps above, you can configure your AWS database as a Source or Destination in Hevo.
Revision History
Refer to the following table for the list of key updates made to this page:
| Date | Release | Description of Change |
|---|---|---|
| Apr-08-2024 | 2.22.1 | New document. |