Using Edge Pipelines with Airflow
On This Page
Edge Pipeline is now available for Public Review. You can explore and evaluate its features and share your feedback.
Apache Airflow is a workflow management system that lets you define batch workflows as code. It provides robust scheduling, dependency management, retries, and monitoring, making it a natural fit for orchestrating Edge Pipelines. The Hevo Airflow Provider enables triggering and monitoring Hevo Pipeline syncs from Airflow Directed Acyclic Graphs (DAGs) with deferrable execution support. You can coordinate data syncs from your Source to any supported Destination, making the data available to downstream jobs, such as dbt models or BI tools, in a single, end-to-end workflow.
Prerequisites
-
An active Hevo account. You can start with a 14-day full-feature, free trial account.
-
A working Apache Airflow environment with version 2.4.0 or above.
Note: For production environments, the minimum recommended version is 2.4.0.
-
Python version 3.9 or above is installed.
-
A GitHub account to access the Hevo Airflow Provider repository.
-
A user with the Administrator role in Hevo for generating API credentials in your account region.
Perform the following steps to integrate Edge Pipelines with Apache Airflow:
-
Configure an Edge Pipeline to sync data on demand.
Note: You can skip this step if you want to run a DAG from the examples in Hevo Airflow Provider repository.
-
Install the Hevo Airflow Provider in your Airflow environment.
-
Test the Hevo Airflow Provider setup:
-
Create an Airflow DAG to trigger data syncs for your Edge Pipeline.
-
Obtain Hevo API Credentials
To trigger Pipeline syncs using Hevo APIs, you need to generate API credentials. Perform the following steps to do this:
-
Log in to your Hevo account and click the link for your account region to access the API Keys page:
Hevo Account Region API Keys Link Asia (asia) https://asia.hevodata.com/account/api-keys Australia (au) https://au.hevodata.com/account/api-keys Europe (eu) https://eu.hevodata.com/account/api-keys India (in) https://in.hevodata.com/account/api-keys US east (us) https://us.hevodata.com/account/api-keys US west (us2) https://us2.hevodata.com/account/api-keys -
Click + New API Key to generate the API key for your account region.
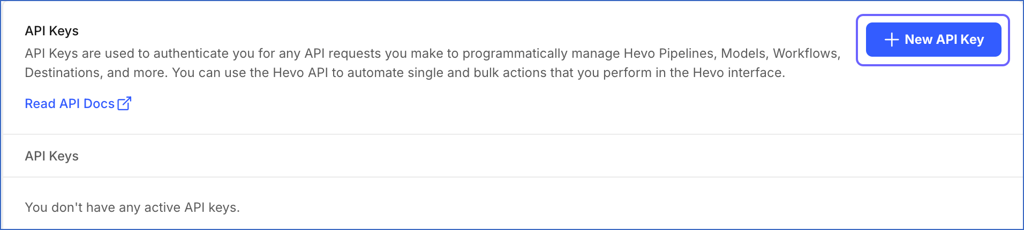
Note: The credentials are valid for all APIs in that region and need to be generated only once.
-
In the API Key window, click the copy icon in the Access Key and Secret Key fields and save them securely like any other password. Optionally, click Download to save the API credentials on your local machine.
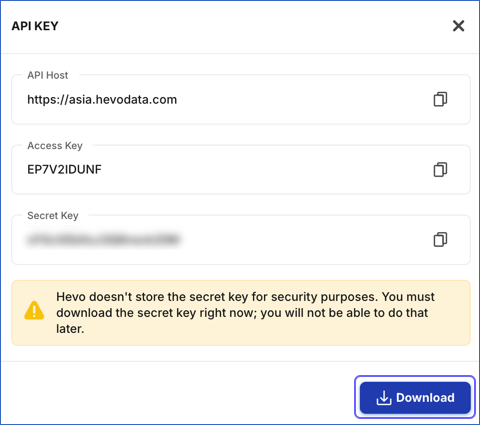
Note: The Secret Key is not displayed once you close the API Key window.
Provide these API credentials when creating an Airflow connection to Hevo.
Create a Sync On Demand Pipeline
You can use the Hevo Airflow Provider to trigger data syncs for an Edge Pipeline. For this, the Pipeline must be created to sync data on demand.
Note: Skip to the Install the Hevo Airflow Provider section if you want to run a DAG from the examples in Hevo Airflow Provider repository.
Perform the following steps to create the Pipeline:
-
Log in to your Hevo account. By default, Pipelines is selected in the Navigation Bar.
-
On the Pipelines page, click + Create Pipeline, and then do the following:
-
Set up the Source that you want to use for data ingestion.
-
Configure the Destination where you want to replicate your Source data.
-
Select Sync On Demand for the sync frequency when providing the Pipeline-specific settings.
-
Select the Source objects from which you want to ingest data.
-
-
Click Save & Continue. To proceed to the Review page, you must select at least one object for data ingestion.
-
In the Summary screen, review all the configurations defined for the Pipeline.
-
Click Save Pipeline to create the Pipeline.
-
Verify that the Pipeline is Enabled and Not Scheduled, and note the Pipeline ID. You need to provide this ID to the DAG that you want to run.

Install the Hevo Airflow Provider
You can install the Hevo Airflow Provider from its GitHub repository. Refer to the Hevo Airflow Provider Setup Guide for instructions on installing the provider across different environments.
Perform the following steps to install the Hevo Airflow Provider:
-
Open a Terminal window and navigate to the location where you want to clone the provider repository.
-
Run the following command to clone the repository:
git clone https://github.com/hevoio/hevo-airflow-provider.git -
Run the following commands to install the provider in your Airflow installation:
cd hevo-airflow-provider
pip install .
Create an Airflow Connection to Hevo
Create an Airflow connection to Hevo so your DAGs can trigger on-demand syncs for your Pipelines.
Perform the following steps to do this:
-
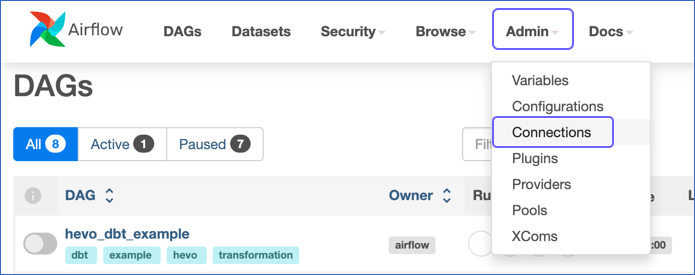
From a web browser, access the Airflow UI at http://localhost:8080 and log in as an admin user.
-
On the Airflow page, click Admin in the top navigation bar and select Connections from the drop-down.
-
On the List Connection page, click the + icon to add a new record.

-
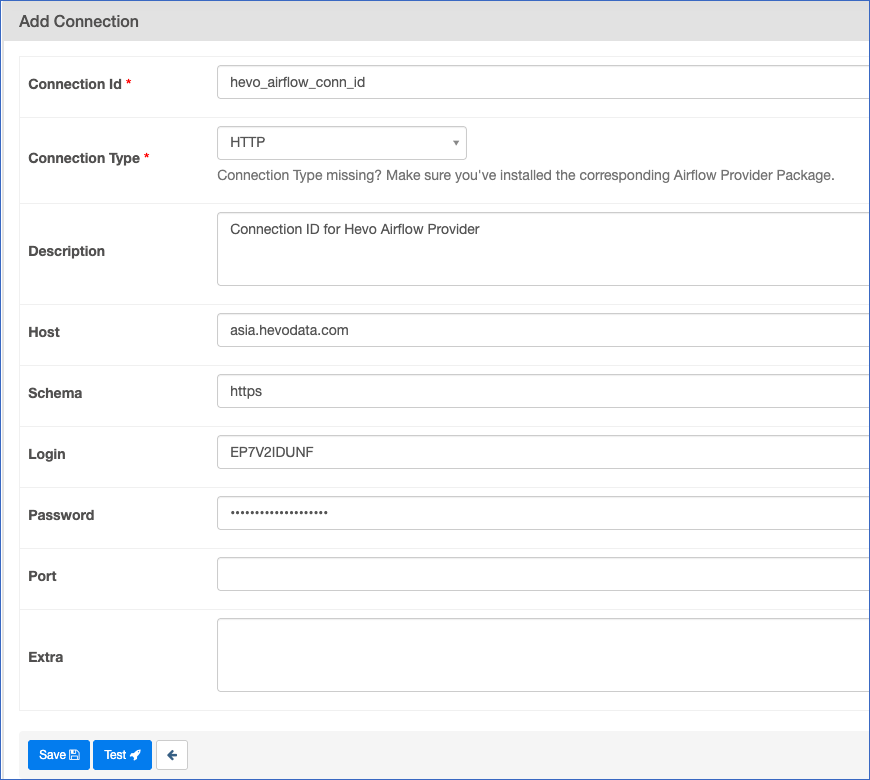
On the Add Connection page, specify the following:
-
Connection Id: A unique name to reference the connection in your DAGs. Enter hevo_airflow_conn_id. This is the default value for Hevo Airflow Provider.
-
Connection Type: The type of the external system. Select HTTP from the drop-down. This allows Airflow to manage the base URL and credentials.
-
Description: A suitable text describing the connection.
-
Host: The hostname or IP address of the external server. Provide the region of your Hevo account. For example, asia.hevodata.com.
-
Schema: The internal database for data systems or the communication protocol for web services. As the Connection Type is HTTP, set this to https.
-
Login: The username for connecting to the external system. Provide the access key from the generated API Credentials.
-
Password: The password for the specified Login. Provide the secret key from the generated API credentials.
-
(Optional) Extra: A JSON-formatted field to store non-standard, provider-specific configurations, such as custom HTTP headers. For example, {“headers”: {“X-Custom-Header”: “value”}}.
-
-
Click Save.
On the List Connection page, verify that the connection has been created, and specify it in your DAG.
Test the Hevo Airflow Provider Setup
You can test the setup using one of the sample DAGs from the dag_examples directory of the Hevo Airflow Provider or by adding a DAG to sync data from the Pipeline created in the Create a Sync On Demand Pipeline section. Here, we are creating a DAG.
Perform the following steps to test the setup:
1. Create the DAG file
-
Open a terminal window and navigate to your Airflow home directory.
-
If the
dagsdirectory does not exist, run the following command to create it:mkdir -p dags -
Navigate to the
dagsdirectory:cd dags -
Run the following command to create a DAG file.
touch test_hevo_sync.pyNote: You can replace the sample value, test_hevo_sync, in the command above with your own DAG name.
-
Open the file in a text editor and paste the following code:
from airflow import DAG from datetime import datetime from airflow.hevo.operators import HevoPipelineOperator from airflow.operators.bash import BashOperator with DAG( dag_id="hevo_test_sync", start_date=datetime(2026, 1, 1), schedule_interval=None, # Set to None for manual or external triggering catchup=False ) as dag: # 1. Trigger and Monitor the Hevo Pipeline sync_and_monitor = HevoPipelineOperator( task_id="run_hevo_pipeline", pipeline_id=<your Pipeline ID>, # Pipeline ID from Step 2 connection_id="hevo_airflow_conn_id", # Must match the Conn ID in UI # MONITORING: Setting wait_for_completion to True enables status polling wait_for_completion=True, # EFFICIENCY: Deferrable mode uses the Hevo Triggerer to free up worker slots deferrable=True ) # 2. Downstream task: Runs only after the Pipeline job completes successfully post_sync_transform = BashOperator( task_id="run_dbt_transformations", bash_command="dbt run" ) # Ensures dbt runs only after fresh data is available sync_and_monitor >> post_sync_transform -
Save the file and exit the editor. Airflow automatically detects new DAG files placed in the
dagsdirectory.
Refer to the Example section to understand what the DAG does.
2. Refresh the Airflow UI
-
From a web browser, access the Airflow UI at http://localhost:8080 and log in as an admin user.
-
On the Airflow page, click DAGs in the top navigation bar.

-
If the scheduler has successfully parsed the file added above, the DAG
hevo_test_syncshould appear in the list. If it is not displayed, wait for a minute and refresh the browser.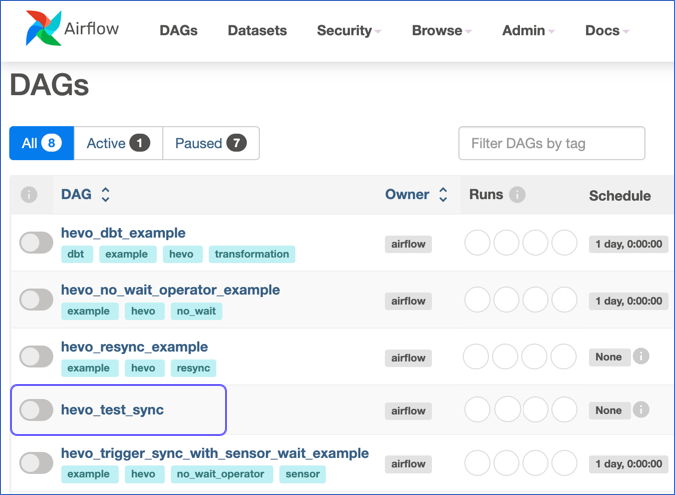
Note:
-
Airflow’s scheduler automatically scans the
dagsdirectory in your Airflow installation every 30-60 seconds. -
You must resolve the parsing errors, if any, before proceeding further.
-
-
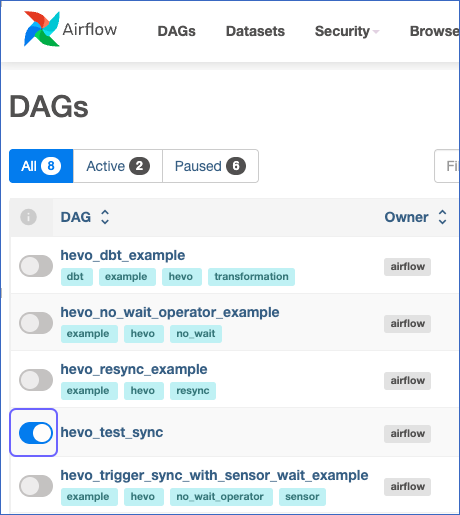
By default, the DAG is paused. Unpause the DAG by clicking the toggle switch on the left.
3. Trigger and Monitor the DAG
-
On the DAGs page, click the DAG ID to trigger. For example,
hevo_test_sync. Ensure the DAG is active.
-
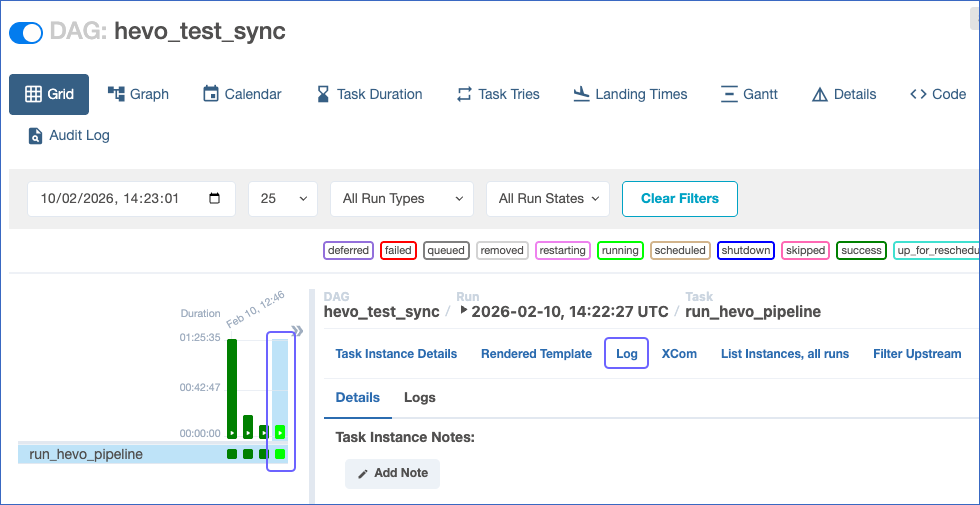
On the DAG: <Your DAG ID> page, click the Play button and select Trigger DAG from the drop-down.

-
Click the task square to open the details panel and select Log to monitor the response from Hevo APIs.
-
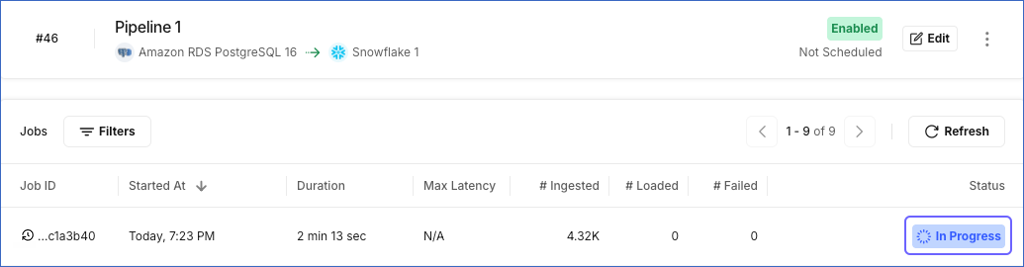
Check the Job history in your Pipeline to confirm that the data sync was triggered.
How the Example works
The DAG file in the Create the DAG file section demonstrates how to orchestrate a Sync On Demand Pipeline. It triggers the sync and waits for it to finish before running a downstream transformation.
The following explains how the DAG configuration manages an end-to-end data flow:
-
Integrated Orchestration: The
HevoPipelineOperatoris the single point of control that triggers the job and retrieves the details of the active run. -
Blocking for Monitoring: The
wait_for_completion=Trueensures that the task remains in an active state in Airflow until the Pipeline job reaches the Completed or Completed with Failures state. -
State Polling: While the task is active, it uses the Pipeline Job APIs to poll for the current state of the job.
-
Resource Optimization: Setting
deferrable=Truedelegates polling to theHevoTriggererservice, releasing Airflow worker slots while waiting for long-running data ingestion processes. -
Dependency Alignment: This canonical design ensures that downstream tasks only run once fresh data is confirmed to be available at the Destination.
Revision History
Refer to the following table for the list of key updates made to this page:
| Date | Release | Description of Change |
|---|---|---|
| Feb-20-2026 | NA | New document. |