NetSuite SuiteAnalytics (Edge)
On This Page
Currently, this Source is in BETA. You can contact Hevo Support or your account executive to enable it for your team.
NetSuite SuiteAnalytics is a powerful business intelligence and analytics toolset available within Oracle NetSuite. It provides real-time access to transactional and operational data across your NetSuite account. It supports customizable dashboards, reporting tools, and data exploration across entities such as transactions, customers, items, and employees.
Hevo connects to the NetSuite2.com Data Source using the SuiteAnalytics Connect service to replicate data in a relational, table-based format into the Destination of your choice.
Hevo supports the following authentication methods to connect to your NetSuite account:
-
Token-based authentication: Allows Hevo to connect to your account using access tokens generated in NetSuite, enabling secure data access for replication. This method is easier to set up, as it does not require generating or managing certificates.
-
OAuth 2.0 authentication: Allows Hevo to connect to your account using a client-based authentication flow, where Hevo establishes a secure connection and verifies its identity before accessing your data. This method requires additional setup, such as generating certificates and uploading the public certificate to NetSuite.
OAuth 2.0 is recommended if your organization requires certificate-based authentication or follows strict security guidelines.
Supported Features
| Feature Name | Supported |
|---|---|
| Capture deletes | Yes (for objects where the complete data is ingested during each Pipeline run) |
| Custom data (user-configured tables & fields) | Yes |
| Data blocking (skip objects and fields) | Yes |
| Resync (objects and Pipelines) | Yes |
| API configurable | Yes |
| Authorization via API | Yes |
Prerequisites
-
An active NetSuite account exists from which data is to be ingested.
-
You are logged in as an Administrator user to create a role and user for Hevo.
-
The required credentials are available to provide Hevo access to your NetSuite account data.
-
The SuiteAnalytics Connect service is enabled with access to the NetSuite2.com Data Source.
Obtain the NetSuite Credentials
To connect Hevo to your NetSuite account, you need the following credentials:
-
Your account ID
-
Authentication credentials (token-based or OAuth 2.0)
-
The data warehouse integrator role ID
These credentials allow Hevo to identify the NetSuite account from which data is to be ingested, authenticate the connection, and access data through the SuiteAnalytics Connect service.
Perform the following steps to obtain these credentials:
Note: You must log in as an Administrator user to perform the steps below.
1. Obtain your Account ID
Perform the following steps to obtain your NetSuite account ID:
-
Log in to your NetSuite account.
-
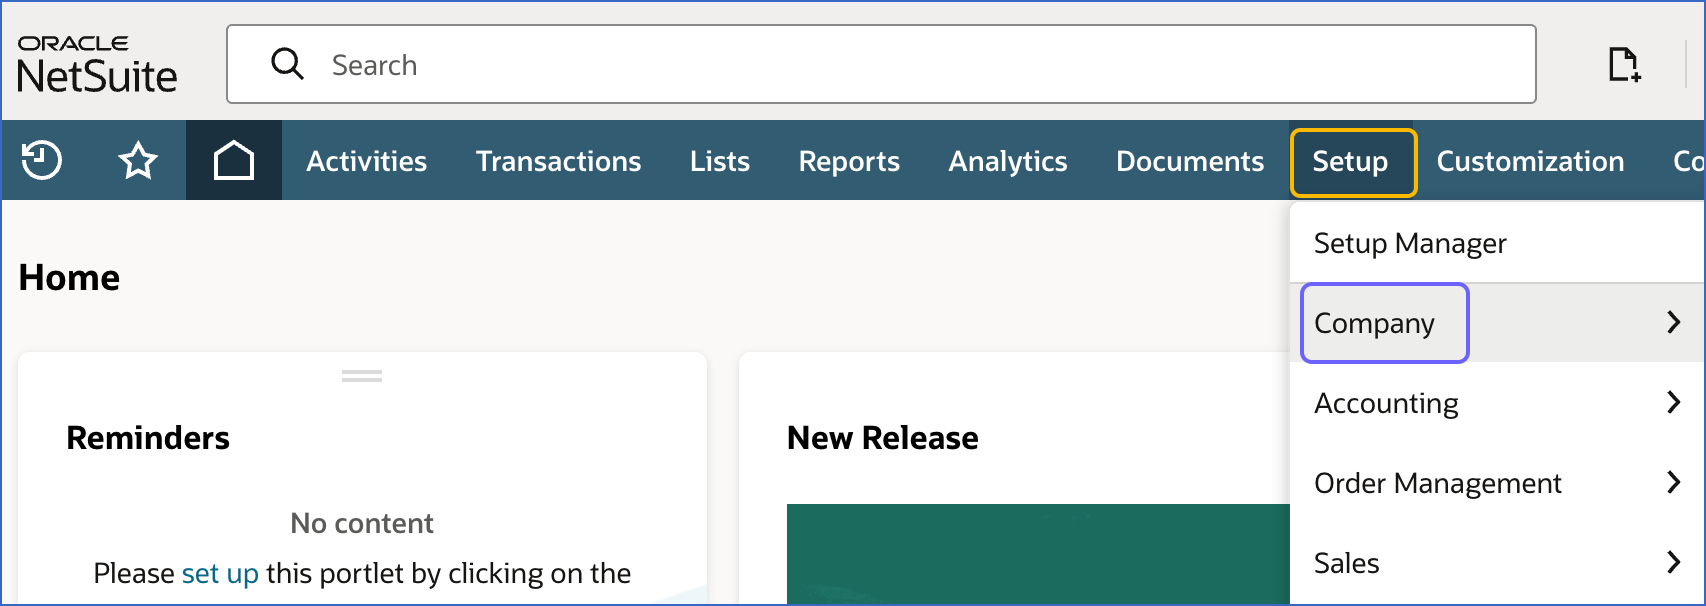
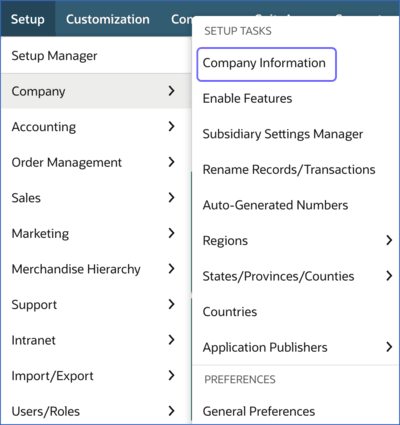
In the top navigation bar, hover over Setup and click Company.
-
Under the SETUP TASKS section, click Company Information.
-
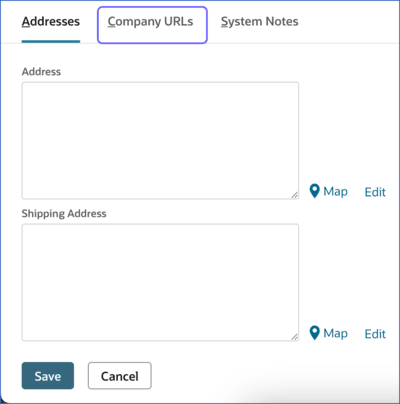
Scroll to the bottom of the page and click the Company URLs tab.
-
In the SuiteAnalytics Connect field, locate the endpoint URL. Copy the numeric value at the beginning of the URL. This is your account ID.

For example, if 1234567.connect.api.netsuite.com:1708 is the endpoint, use 1234567 as the Account ID while configuring your NetSuite SuiteAnalytics Source in the Pipeline.
2. Obtain the Authentication credentials
To allow Hevo to authenticate the connection to your NetSuite account, you must obtain the required credentials for the authentication method you want to use. The steps to obtain these credentials depend on the authentication method you select while configuring your Source in the Pipeline.
Hevo supports the following authentication methods:
-
Token-based authentication: Uses access tokens generated in NetSuite to establish the connection and enable data replication. This method is easier to set up, as it does not require generating or managing certificates.
-
OAuth 2.0 authentication: Uses a client-based authentication flow, where Hevo securely connects to NetSuite and verifies its identity before accessing data. This method requires additional setup, such as generating certificates and uploading the public certificate to NetSuite.
Token-based authentication
Token-based Authentication (TBA) allows Hevo to securely connect to your NetSuite account using access tokens generated in NetSuite.
To use this method, you must complete the following steps in order:
Perform the following steps to obtain the required credentials to connect Hevo to your NetSuite account using token-based authentication:
1. Enable SuiteScript and Token-based authentication
To allow token-based authentication, you must enable the required SuiteScript and TBA features in your NetSuite account. To do this:
-
Log in to your NetSuite account.
-
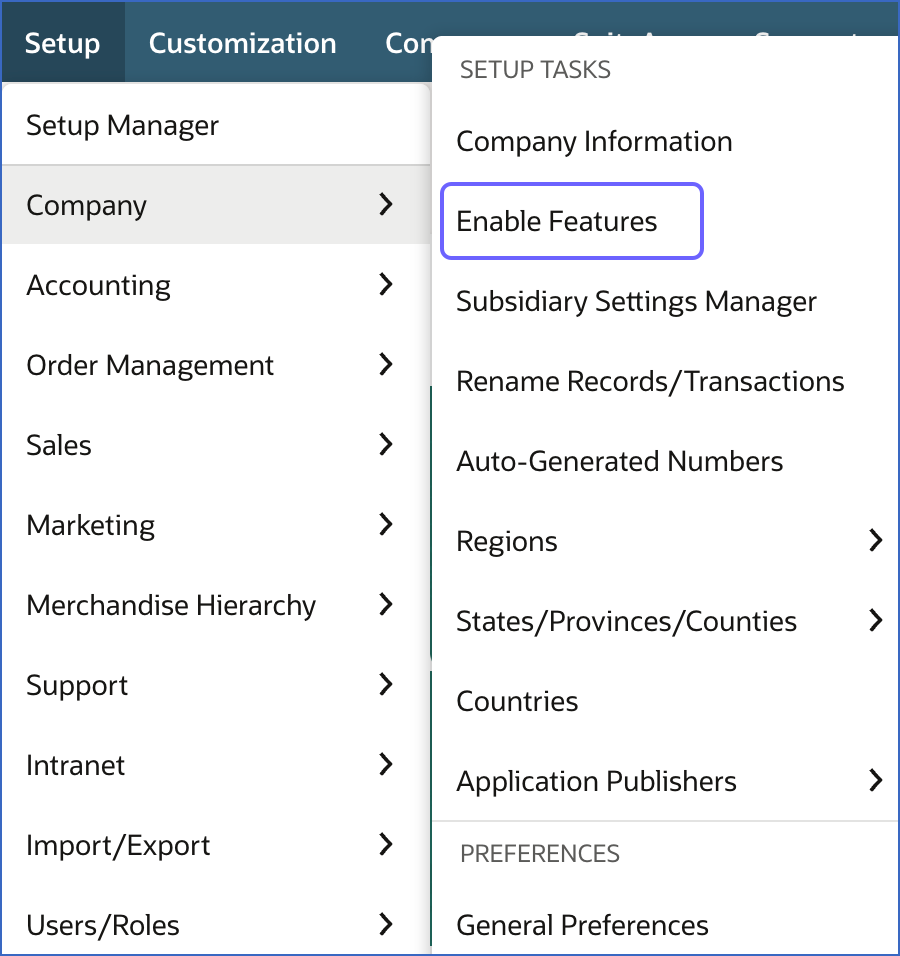
In the top navigation bar, hover over Setup and click Company.
-
Under the SETUP TASKS section, click Enable Features.
-
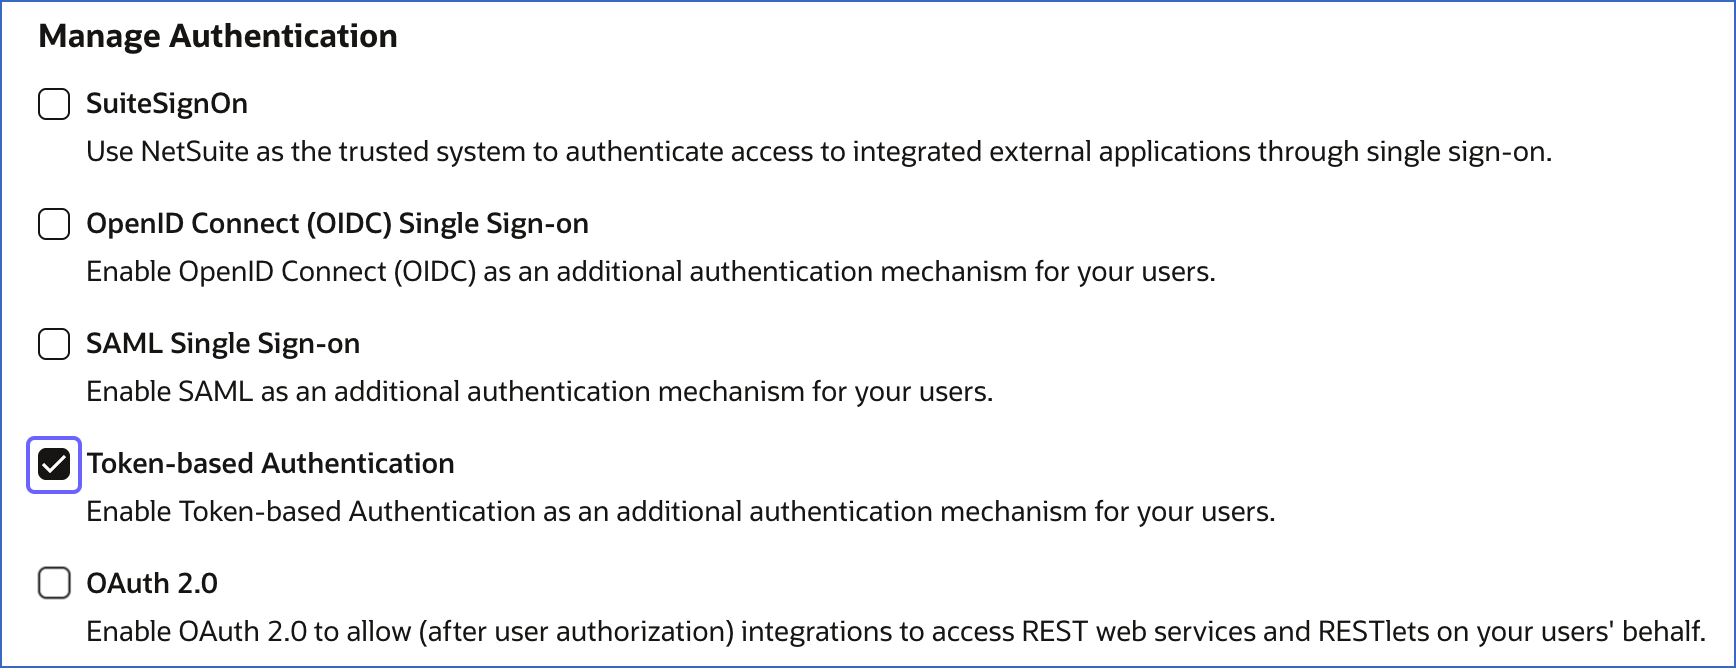
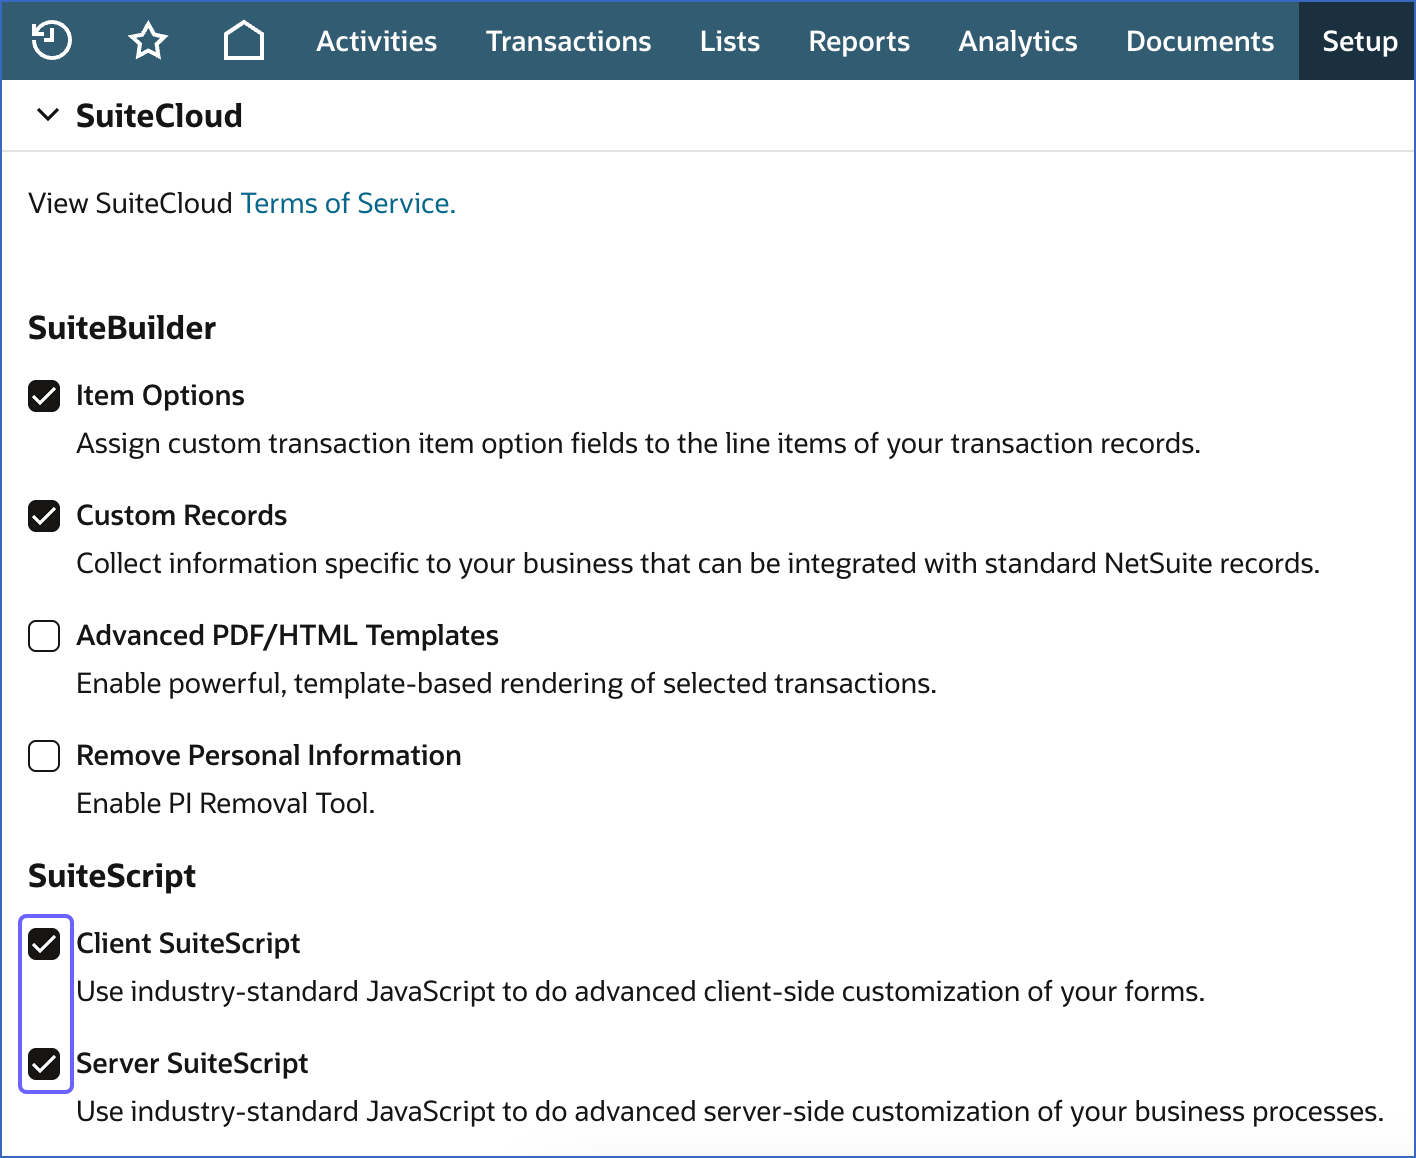
On the Enable Features page, scroll to the SuiteCloud section and do the following:
-
In the SuiteScript section, do the following:

-
Select the check box next to Client SuiteScript.
-
Click I Agree to accept the NetSuite Terms of Service displayed in a new tab.
-
Select the check box next to Server SuiteScript.
-
Click I Agree to accept the NetSuite Terms of Service displayed in a new tab.
-
-
Scroll to the Manage Authentication section and select the check box next to Token-based Authentication.
-
Click I Agree to accept the NetSuite Terms of Service displayed in a new tab.
-
Scroll to the bottom of the page and click Save.
-
You have successfully enabled the required features for token-based authentication in your NetSuite account. Proceed to create an integration record with token-based authentication permissions.
2. Create an integration record with Token-based authentication permissions
To establish a connection between Hevo and your NetSuite account, you must create an integration record with token-based authentication enabled. This record helps Hevo identify itself during authentication.
Perform the following steps to create an integration record:
-
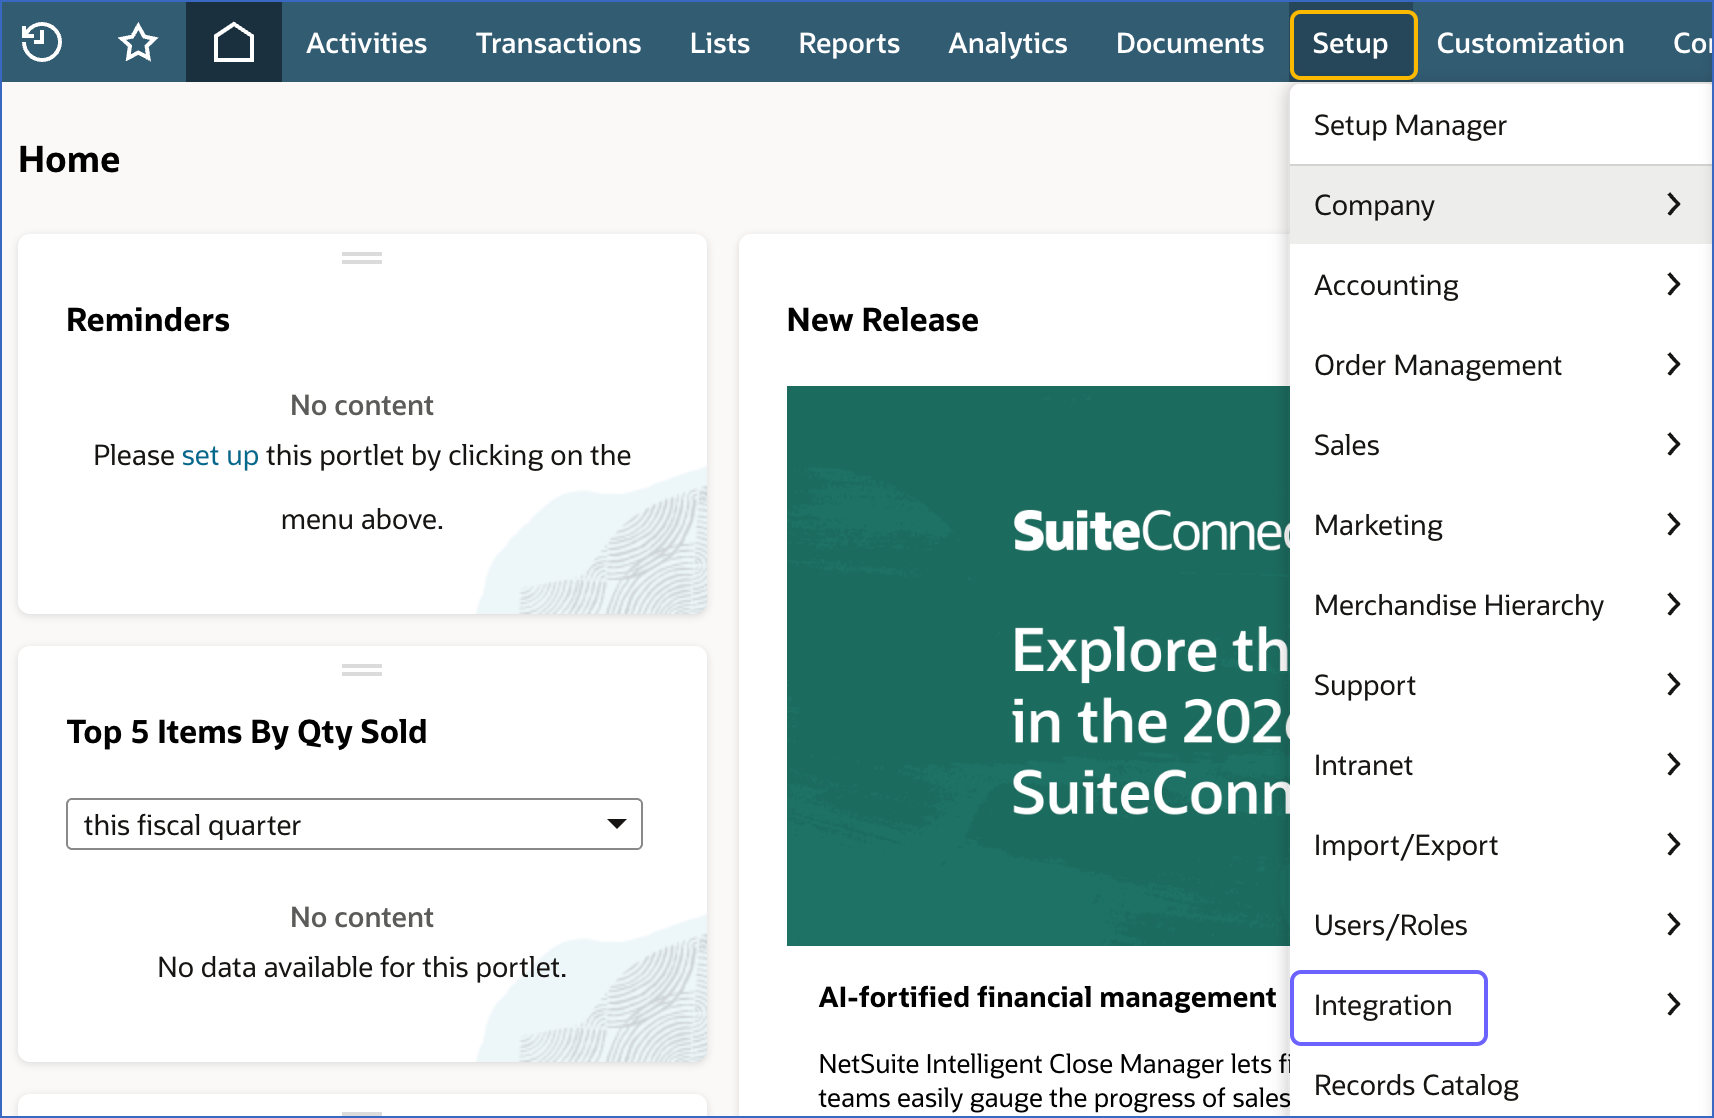
In the top navigation bar, hover over Setup and click Integration.
-
Under the INTEGRATION MANAGEMENT section, hover over Manage Integrations and click New.
-
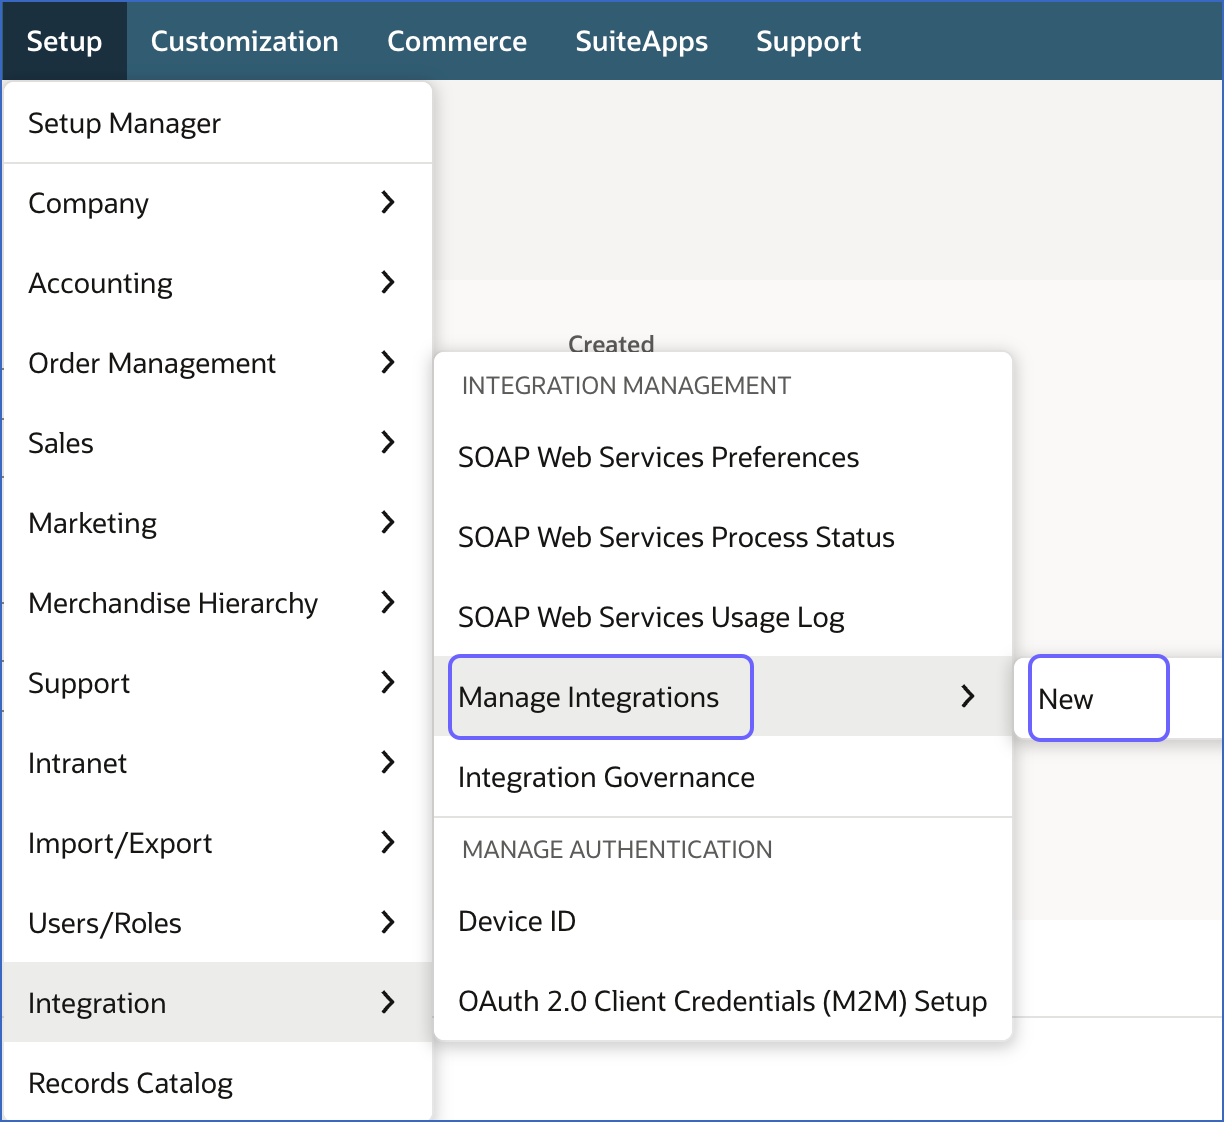
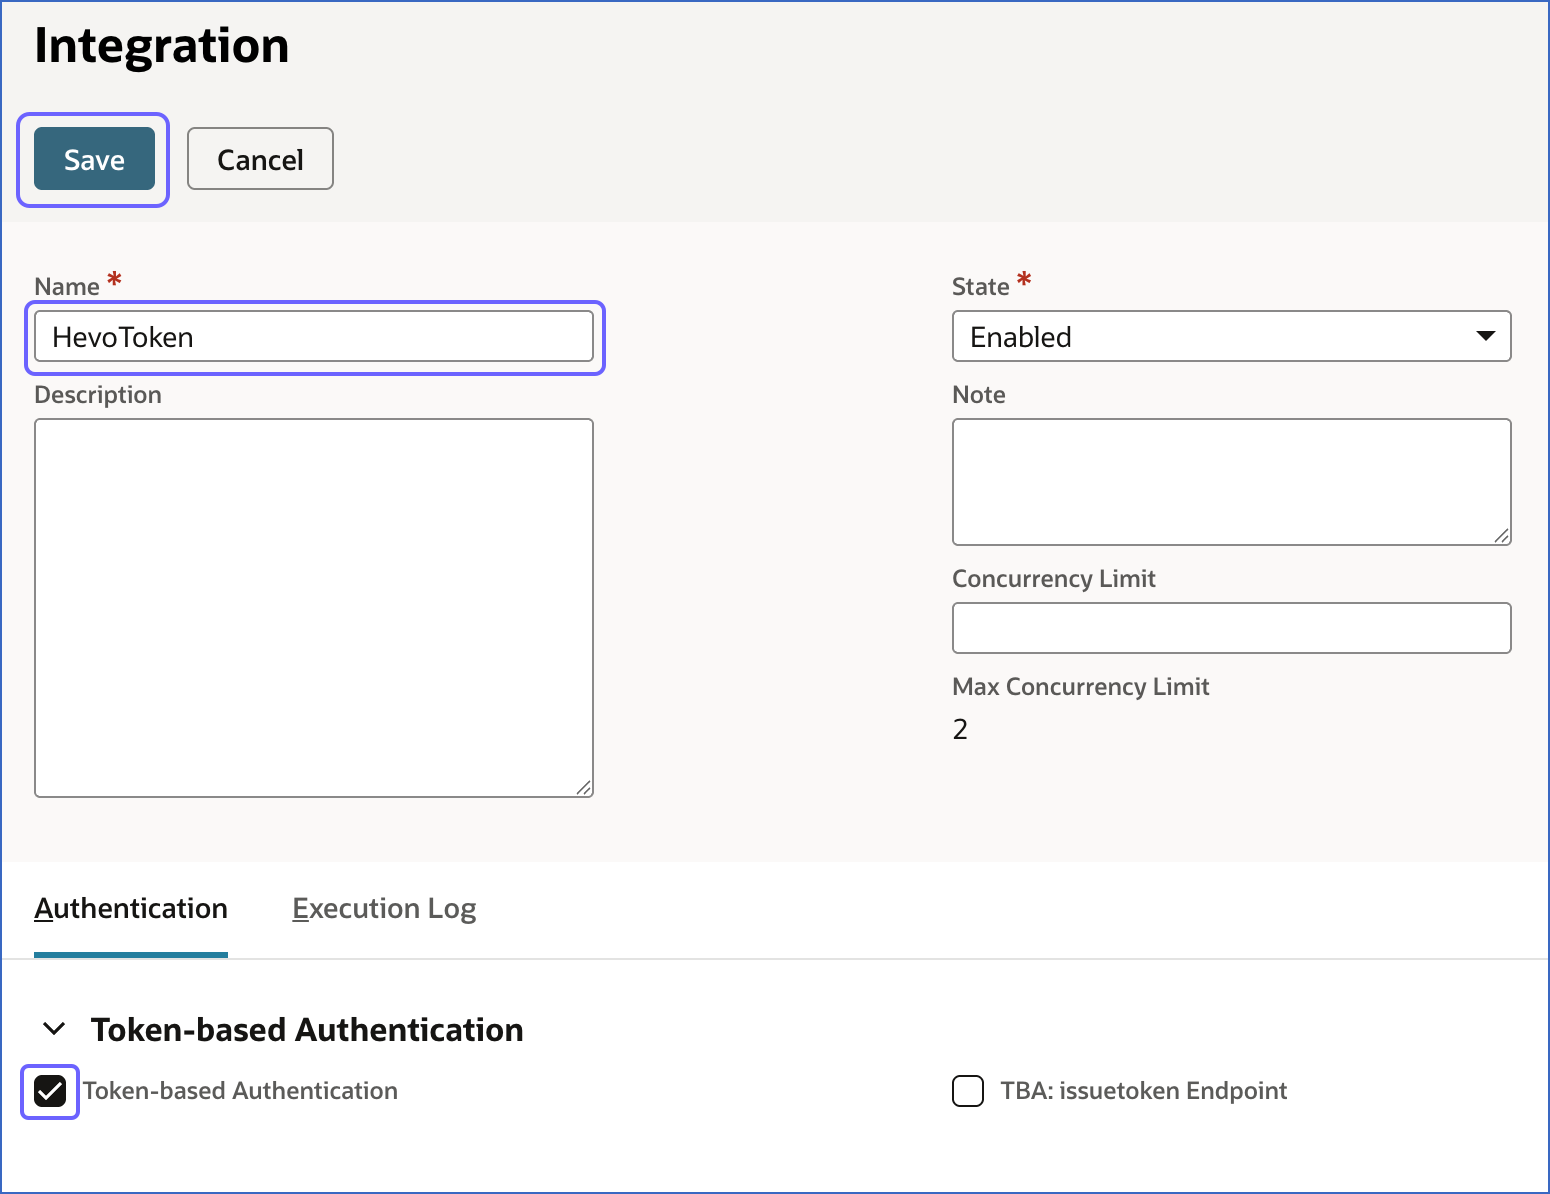
On the Integration page, do the following:
-
Specify a unique name for the integration. For example, HevoToken.
-
Under the Authentication tab, select the check box next to Token-based Authentication to allow Hevo to access your NetSuite account data.
-
Click Save.
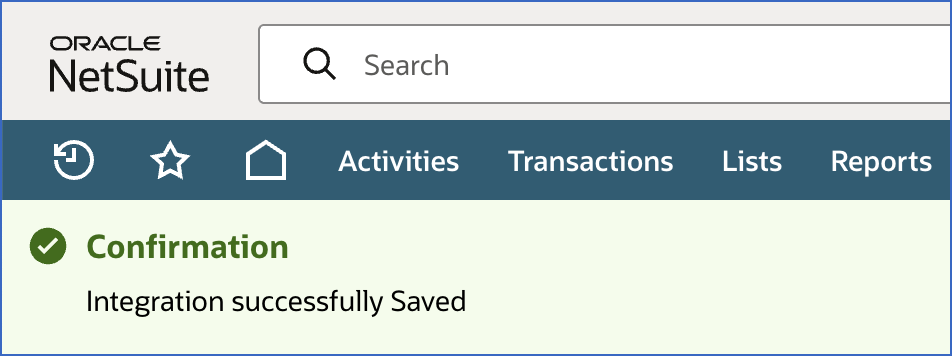
A confirmation message is displayed on the screen indicating that the integration is successfully created and saved.
-
-
Scroll to the Client Credentials section and copy the Consumer Key / Client ID and Consumer Secret / Client Secret. Save these values securely like any other password.
The Consumer Key / Client ID and Consumer Secret / Client Secret are displayed only once for security reasons. Once you leave the Integration page, they cannot be retrieved. Never share these credentials via email or with unauthorized individuals. If the credentials are lost, you must create a new integration record and modify the Source configuration in the Pipeline with valid credentials.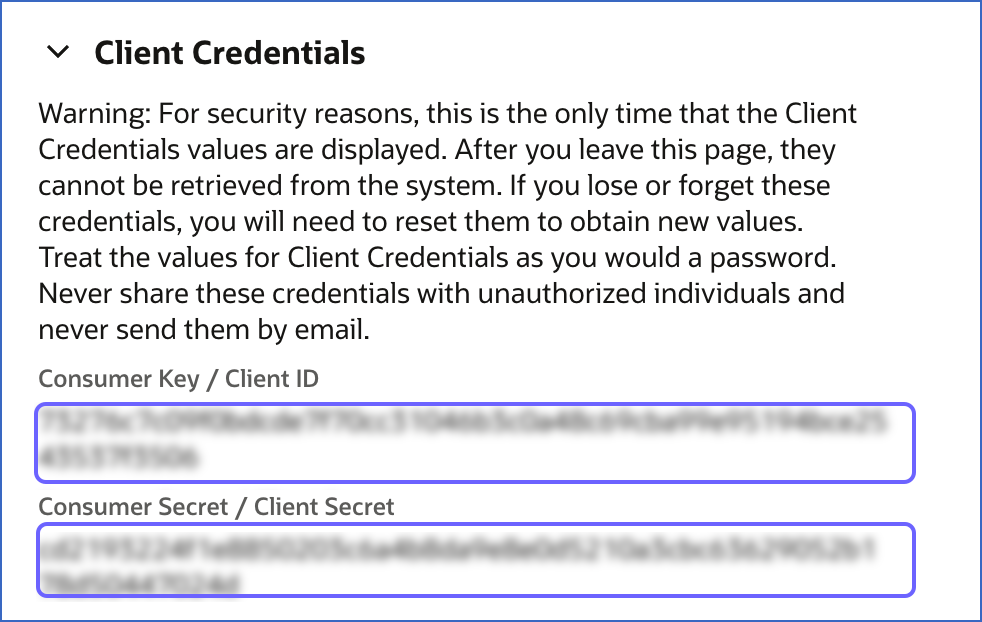
Use these credentials while configuring your NetSuite SuiteAnalytics Source in the Pipeline. Proceed to create a role for Hevo and assign permissions.
3. Create a role for Hevo and assign permissions
To allow Hevo to access data from your NetSuite account, you must create a dedicated role with the required permissions. This role determines the data that Hevo can access for replication.
Perform the following steps to create the role and assign the required permissions:
-
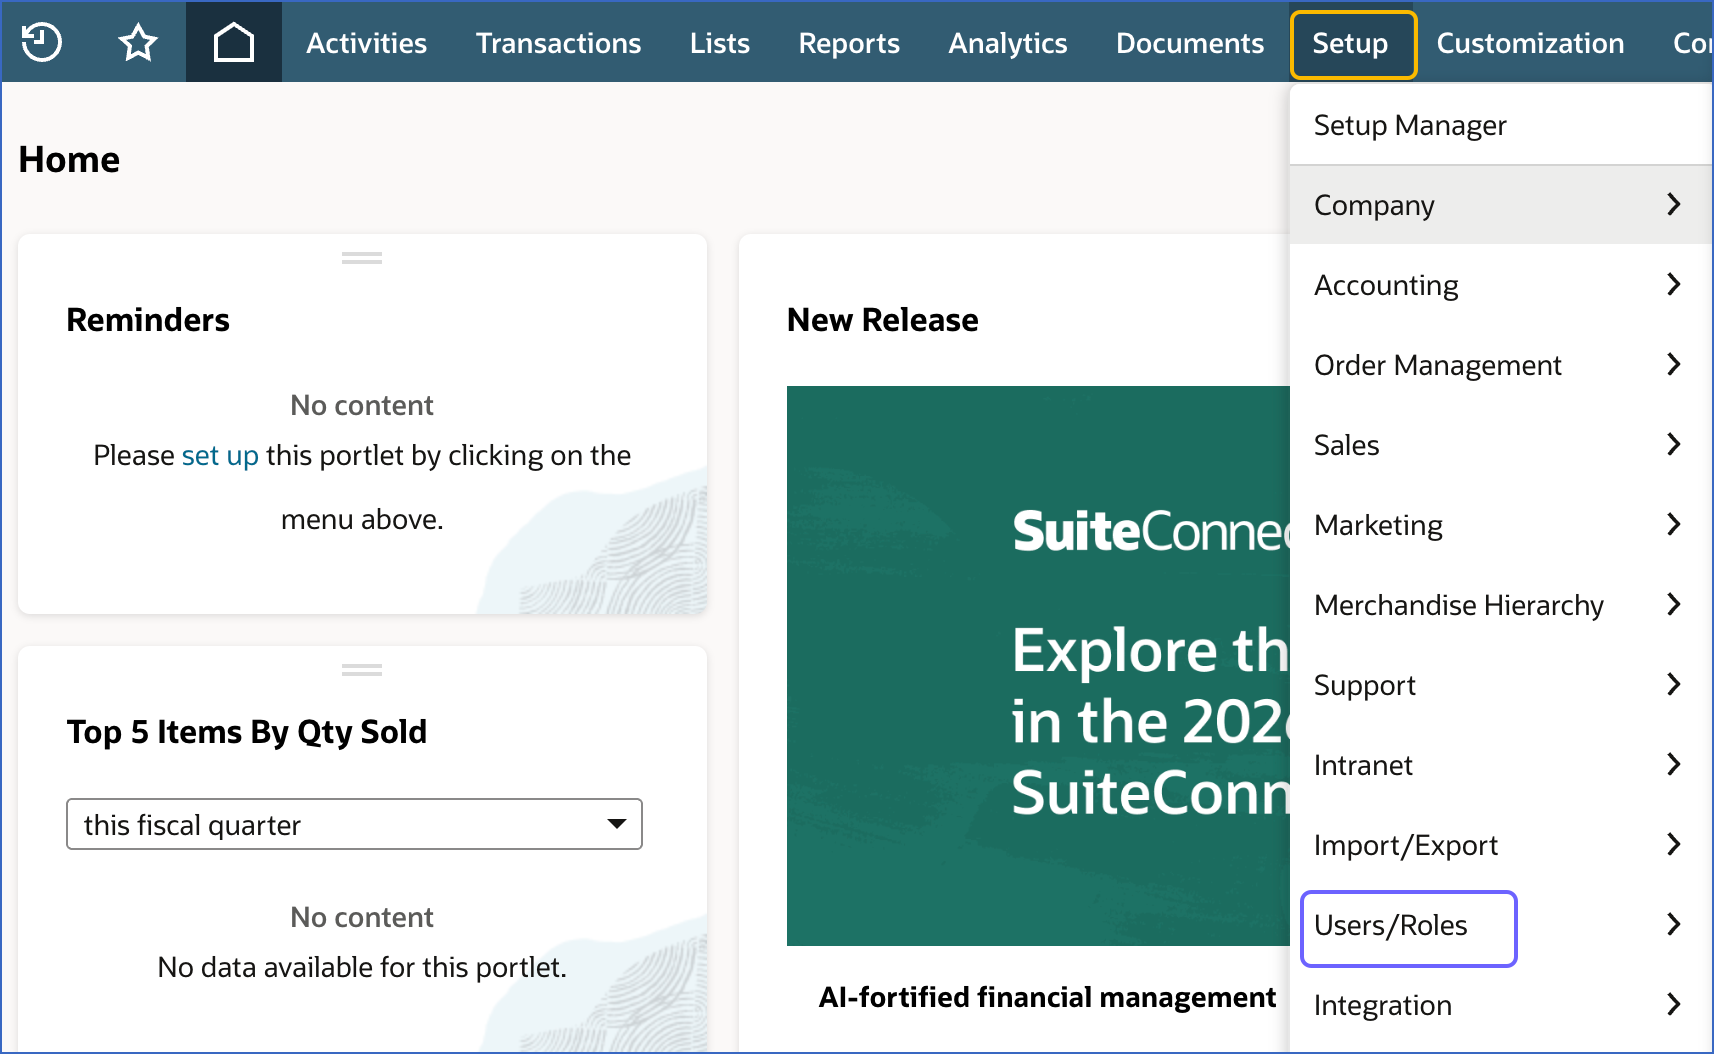
In the top navigation bar, hover over Setup and click Users/Roles.
-
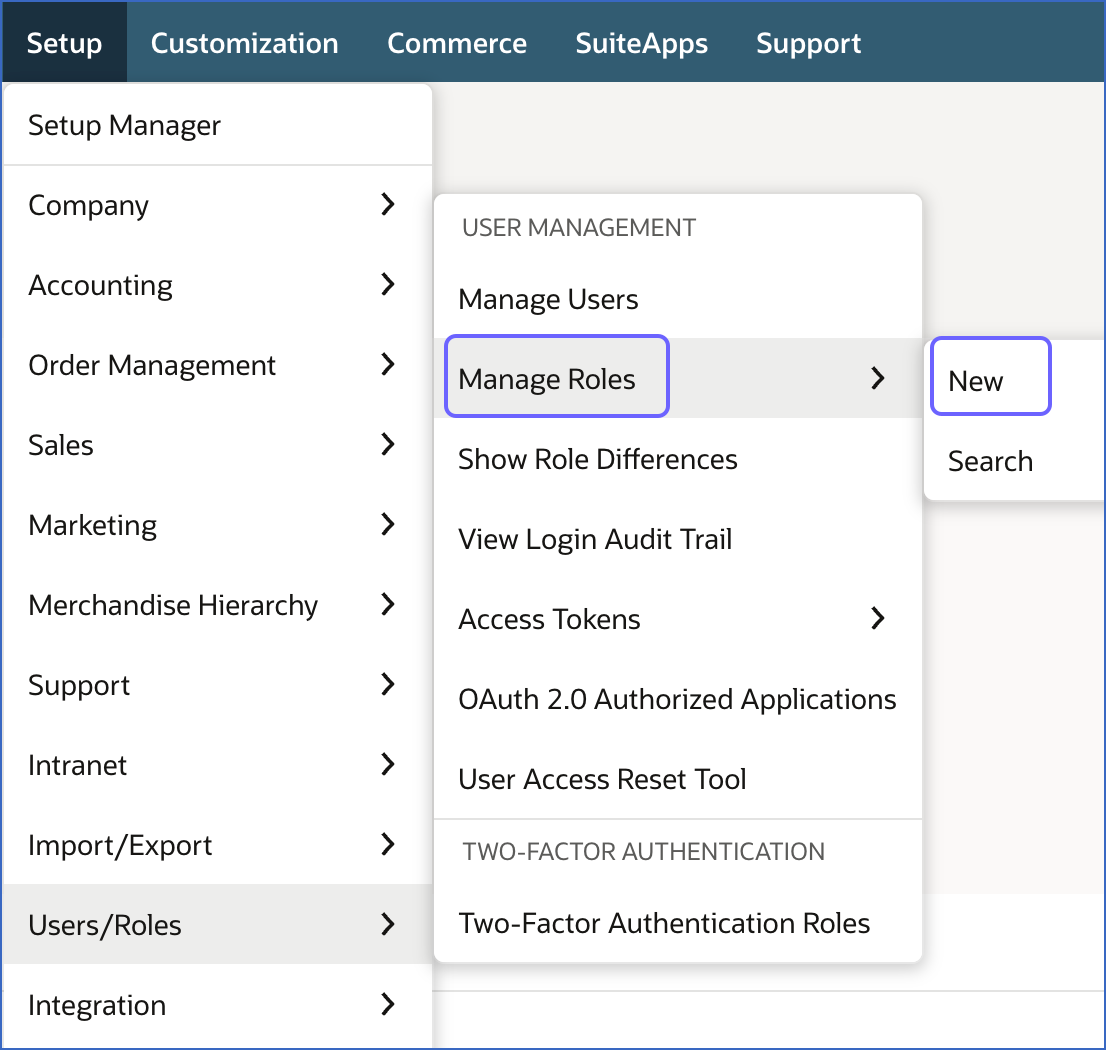
Under the USER MANAGEMENT section, hover over Manage Roles and click New.
-
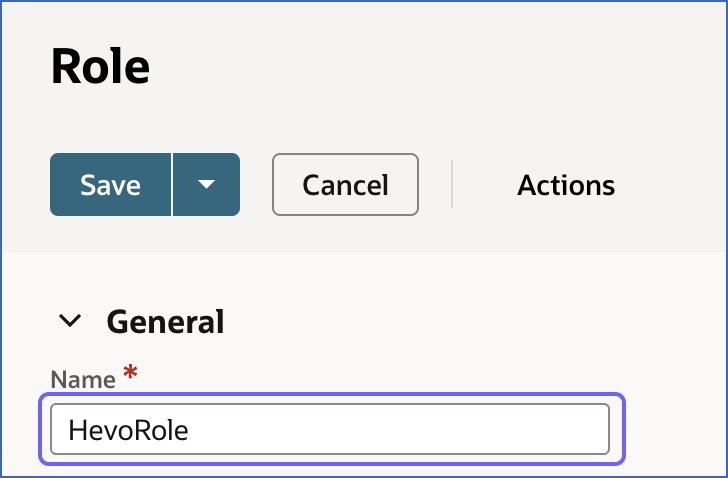
On the Role page, do the following:
-
In the Name field, specify a name for the role. For example, HevoRole.
-
Scroll to the Permissions tab and click the Setup tab.
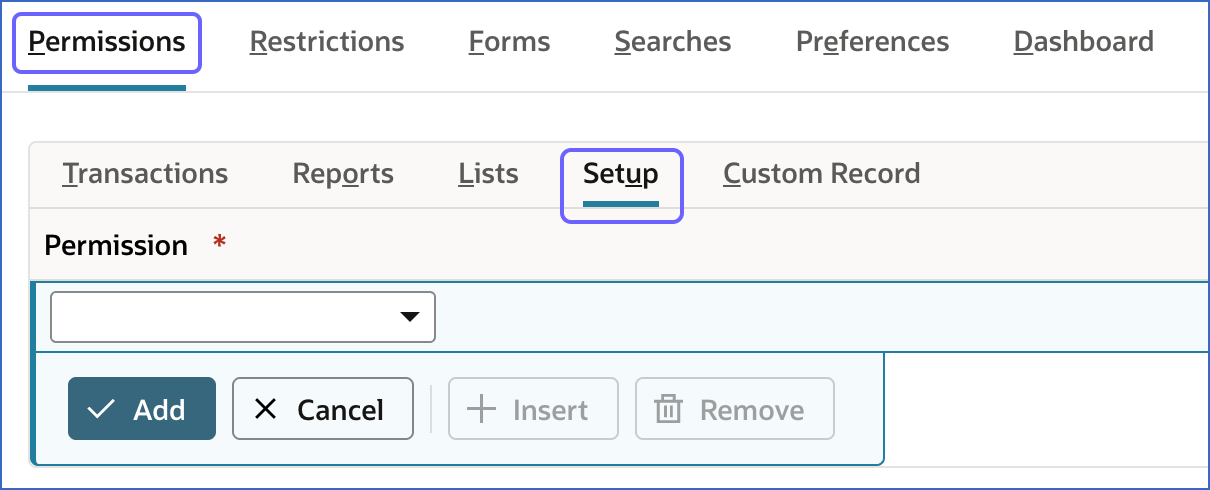
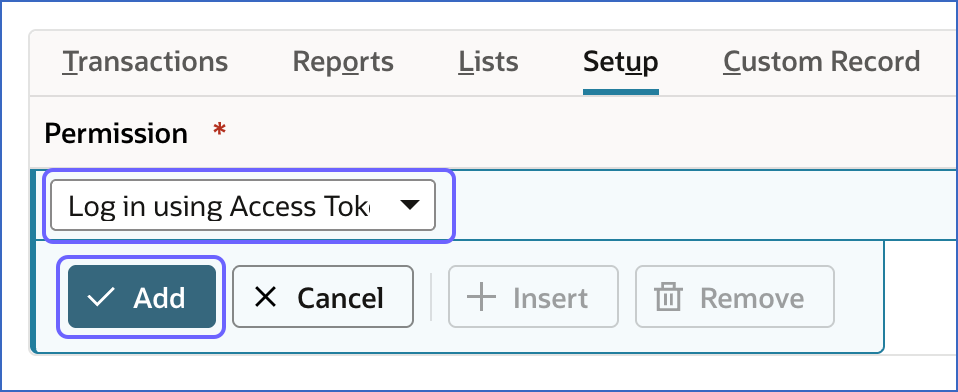
-
From the Permission drop-down, select Log in using Access Tokens, and then click Add. This permission allows Hevo to authenticate with your NetSuite account using token-based or OAuth 2.0 credentials.
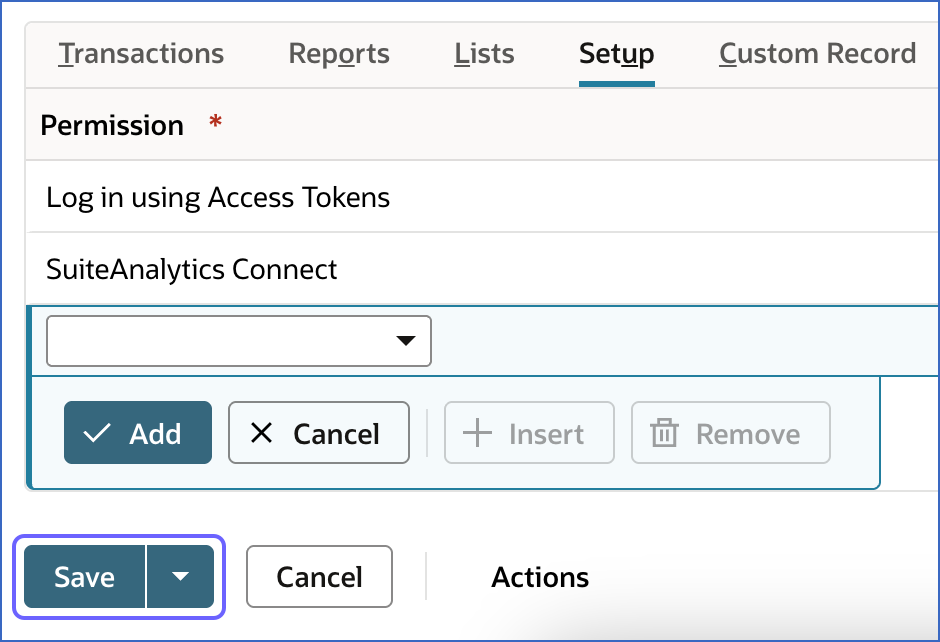
-
From the Permission drop-down, select SuiteAnalytics Connect, and then click Add. This permission allows Hevo to connect to the NetSuite2.com data source and access your data for replication through the SuiteAnalytics Connect service.
-
Click Save.
-
You are redirected to the Manage Roles page, where the role you created appears as a new row. You can now assign this role to a NetSuite user.
4. Configure a user for Hevo and assign role
You must assign the role you created in the Create a role for Hevo and assign permissions section to a NetSuite user so Hevo can authenticate and access data. Depending on your NetSuite setup, either configure an existing user or create one for Hevo.
Note: Avoid using a NetSuite user that is already used for other integrations. We recommend creating a dedicated user for Hevo so that credentials can be managed independently and access can be revoked without impacting other integrations.
-
If the user already exists:
-
In the top navigation bar, hover over Setup and click Users/Roles.
-
Under the USER MANAGEMENT section, click Manage Users.
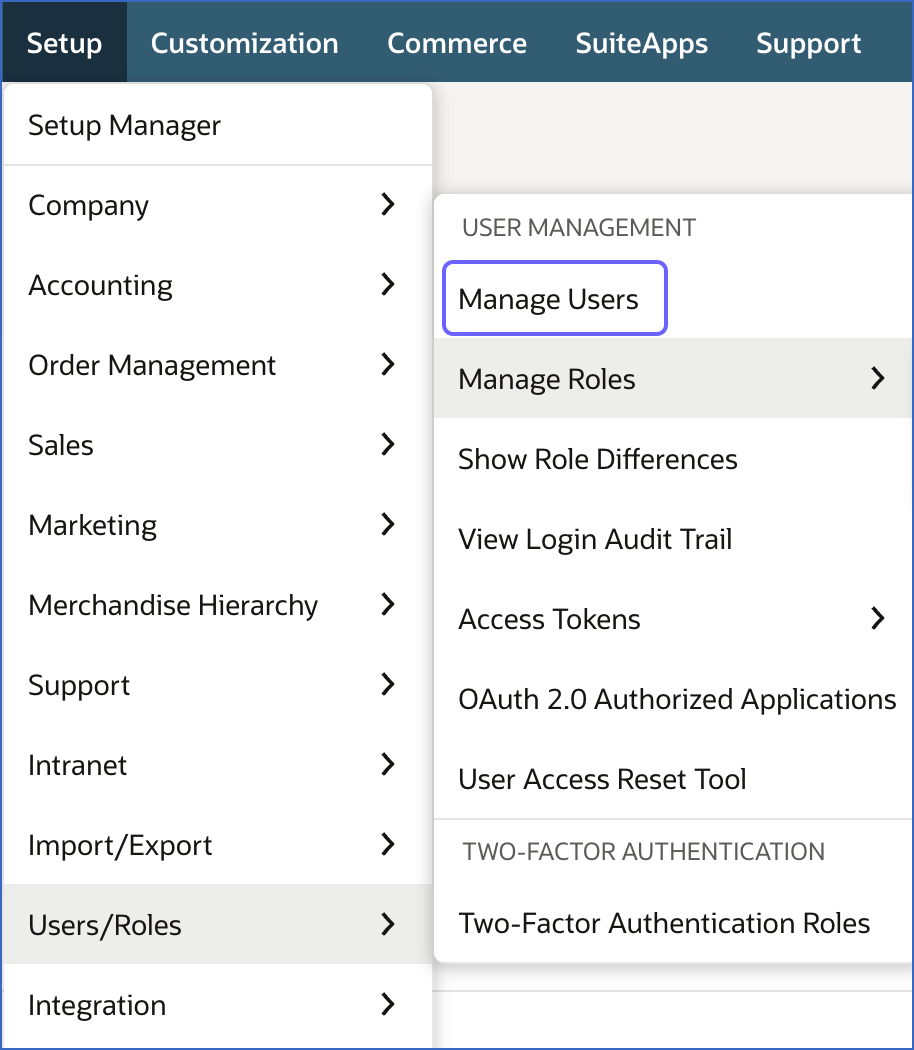
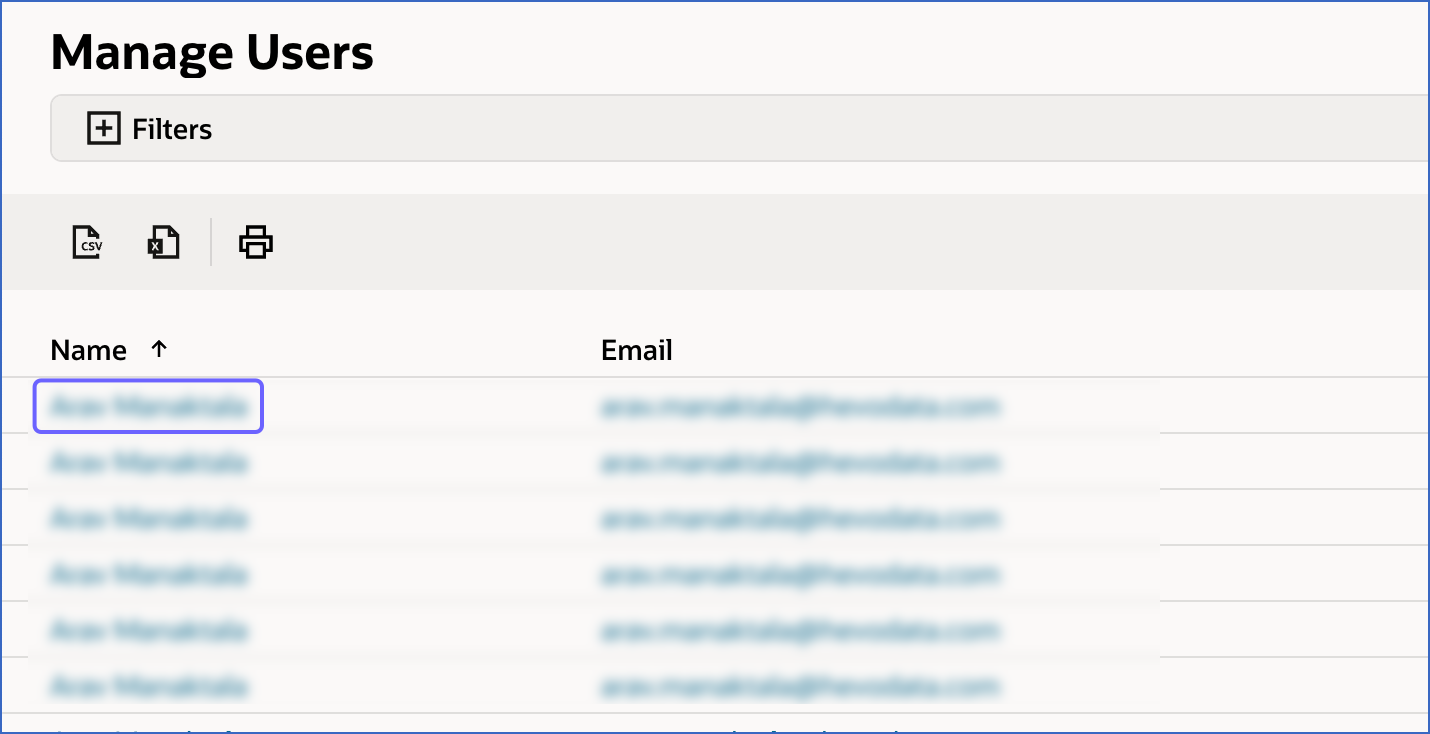
-
On the Manage Users page, click the user you want to configure for Hevo.
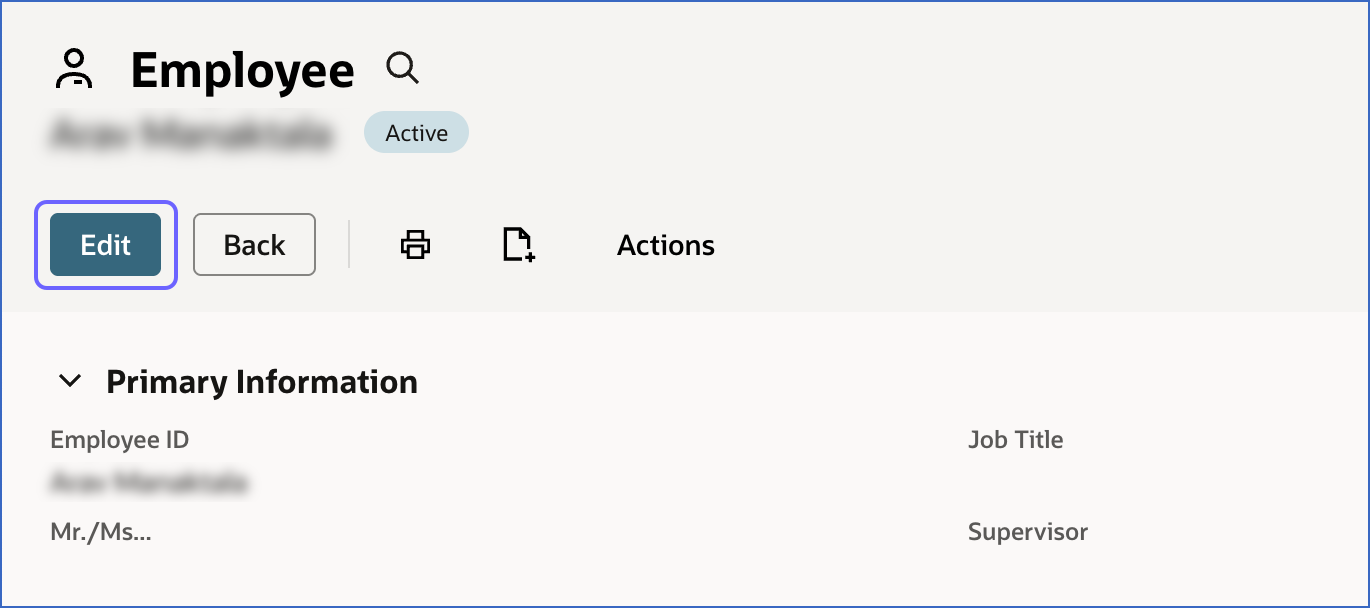
-
On the Employee page, click Edit.
-
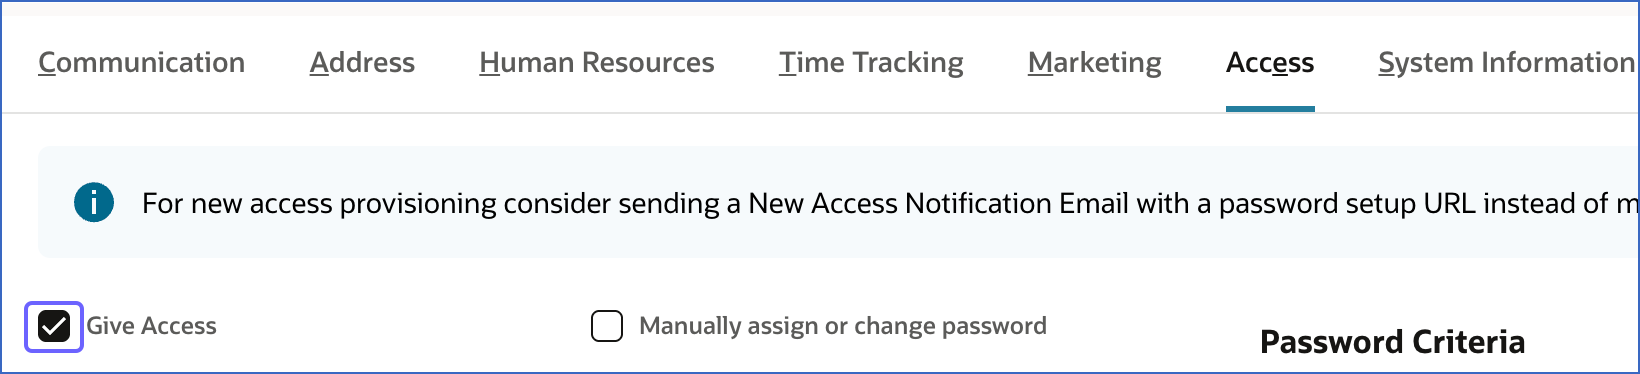
Click the Access tab and do the following:
-
Select the check box next to Give Access.
-
In the Roles tab, do the following:

-
From the Role drop-down, select the role that you created in the Create a role for Hevo and assign permissions section, and then click Add.
-
From the Role drop-down, select Data Warehouse Integrator, and then click Add. This role provides the required access to NetSuite data for extraction using the SuiteAnalytics Connect service.
-
-
Click Save.
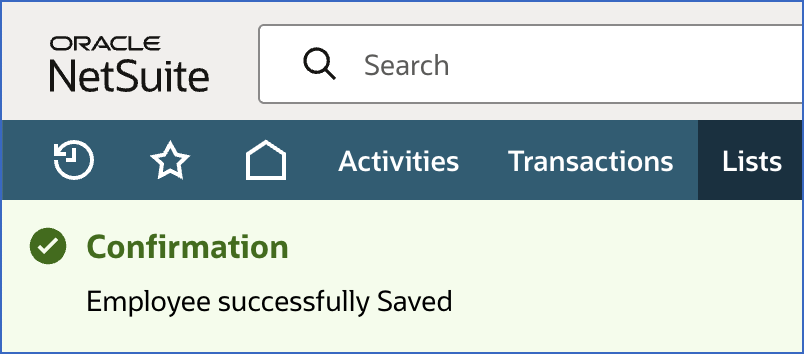
A confirmation message is displayed on the screen indicating that the the employee record is successfully updated and saved.
-
-
-
If you need to create a new user:
-
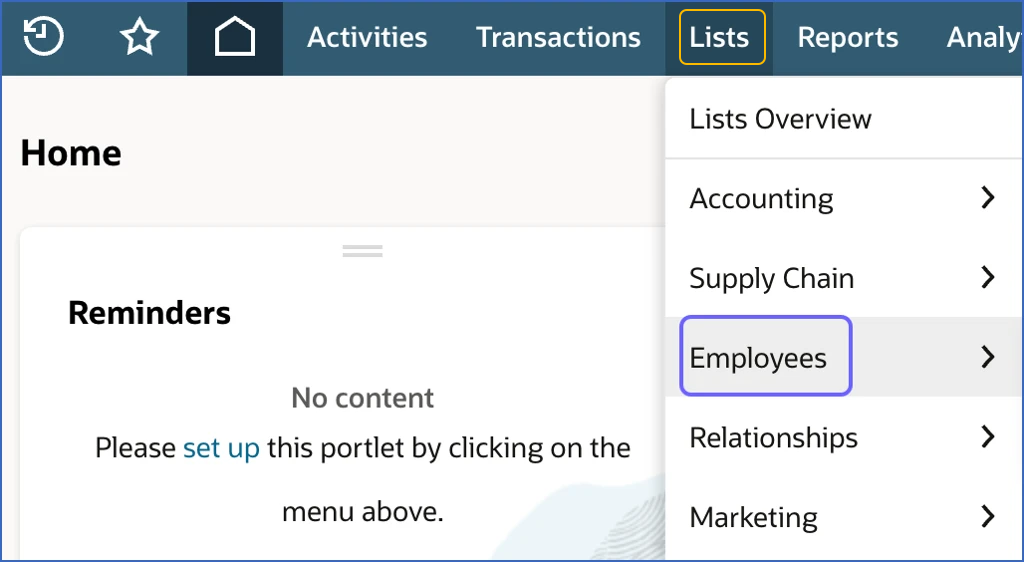
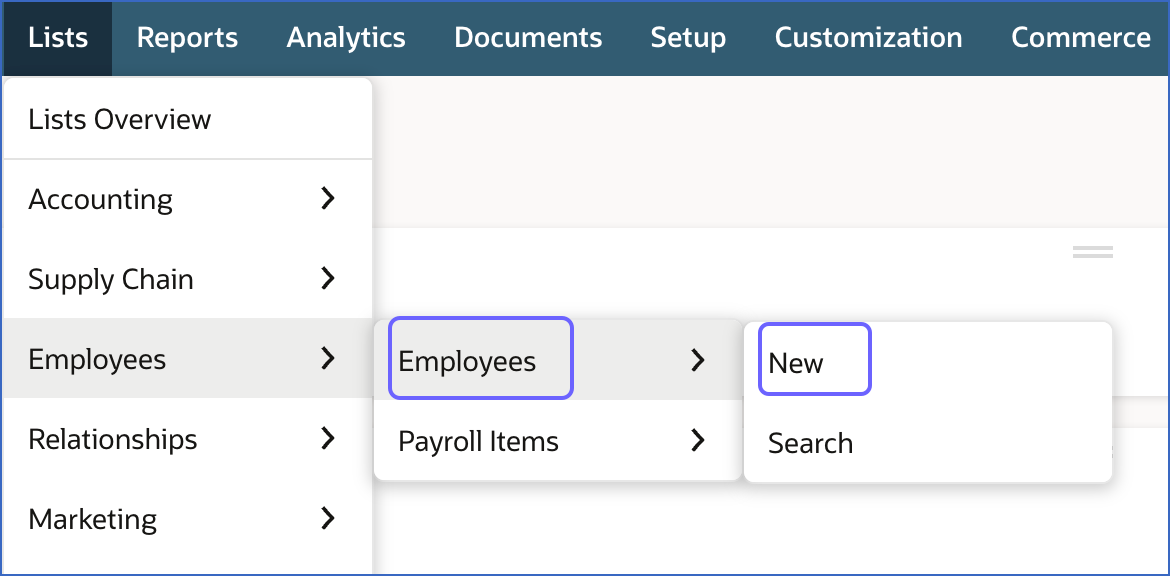
In the top navigation bar, hover over Lists and click Employees.
-
In the sub-menu, hover over Employees and click New.
-
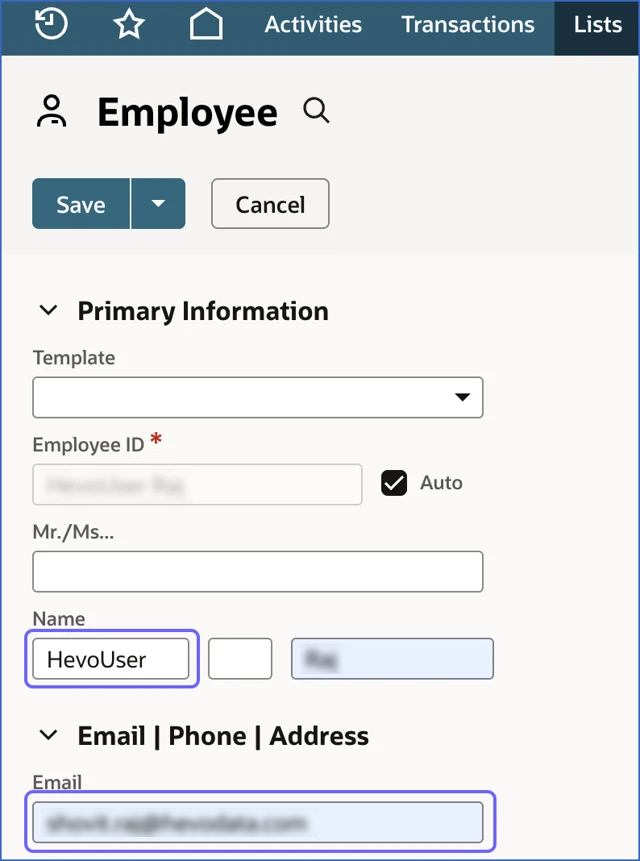
On the Employee page, do the following:
-
Specify the following:
-
Name: A unique name for the user.
-
Email: The email address used for login access and account-related notifications.
-
-
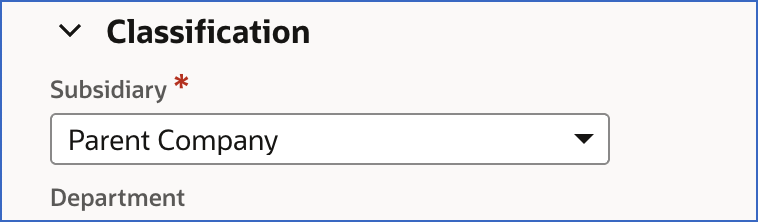
Scroll to the Classification section, and from the Subsidiary drop-down, select the subsidiary for which the user is being created. This determines the data and records the user can access based on the selected subsidiary. For example, here, we are selecting Parent Company.
Note: Ensure you select the correct subsidiary. An incorrect selection will restrict the data Hevo can access during replication.
-
Click the Access tab, and do the following:
-
Select the check box next to Give Access.
-
In the Roles tab, do the following:
-
From the Role drop-down, select the role that you created for Hevo in the Create a role for Hevo and assign permissions section, and then click Add.
-
From the Role drop-down, select Data Warehouse Integrator, and then click Add. This role provides the required access to NetSuite data for extraction using the SuiteAnalytics Connect service.
-
-
Click Save.
A confirmation message is displayed on the screen indicating that the the employee record is successfully created and saved.
-
-
-
You have successfully configured a user for Hevo. Proceed to generate access tokens for authentication.
5. Create an access token
To complete token-based authentication setup, you must create an access token associated with the integration record, user, and role you configured in the previous steps. This generates the Token ID and Token Secret required to establish the connection.
Perform the following steps to create an access token:
-
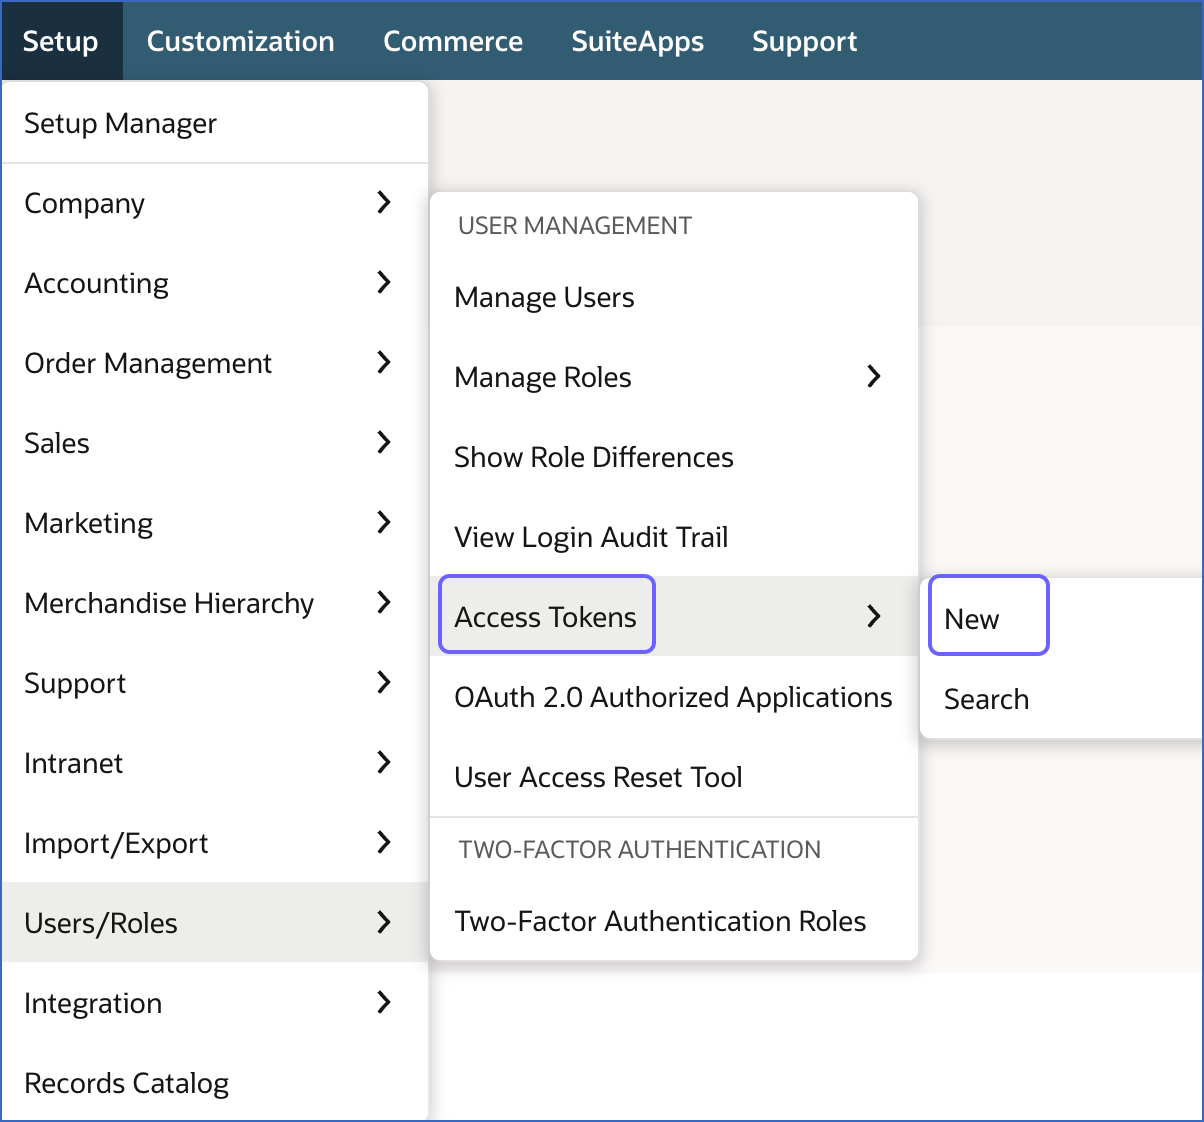
In the top navigation bar, hover over Setup and click Users/Roles.
-
Under the USER MANAGEMENT section, hover over Access Tokens and click New.
-
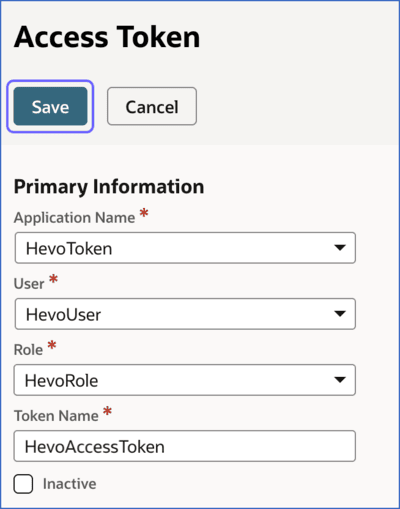
On the Access Token page, do the following:
-
From the Application Name drop-down, select the integration record that you created in the Create an integration record with token-based authentication permissions section.
-
From the User drop-down, select the user that you configured in the Configure a user for Hevo and assign role section.
-
From the Role drop-down, select the role that you created in the Create a role for Hevo and assign permissions section.
-
In the Token Name field, specify a unique name for the token. For example, HevoAccessToken.
-
Click Save.
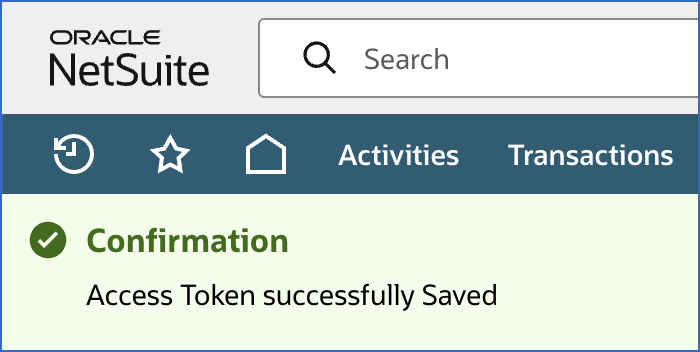
A confirmation message is displayed on the screen indicating that the token is successfully created and saved.
-
-
Scroll to the Token Id / secret section and copy the Token Id and Token Secret. Save these values securely like any other password.
The Token ID and Token Secret are displayed only once for security reasons. Once you leave the Access Token page, they cannot be retrieved. Never share these credentials via email or with unauthorized individuals. If the credentials are lost, you must generate new tokens and modify the Source configuration in the Pipeline with valid credentials.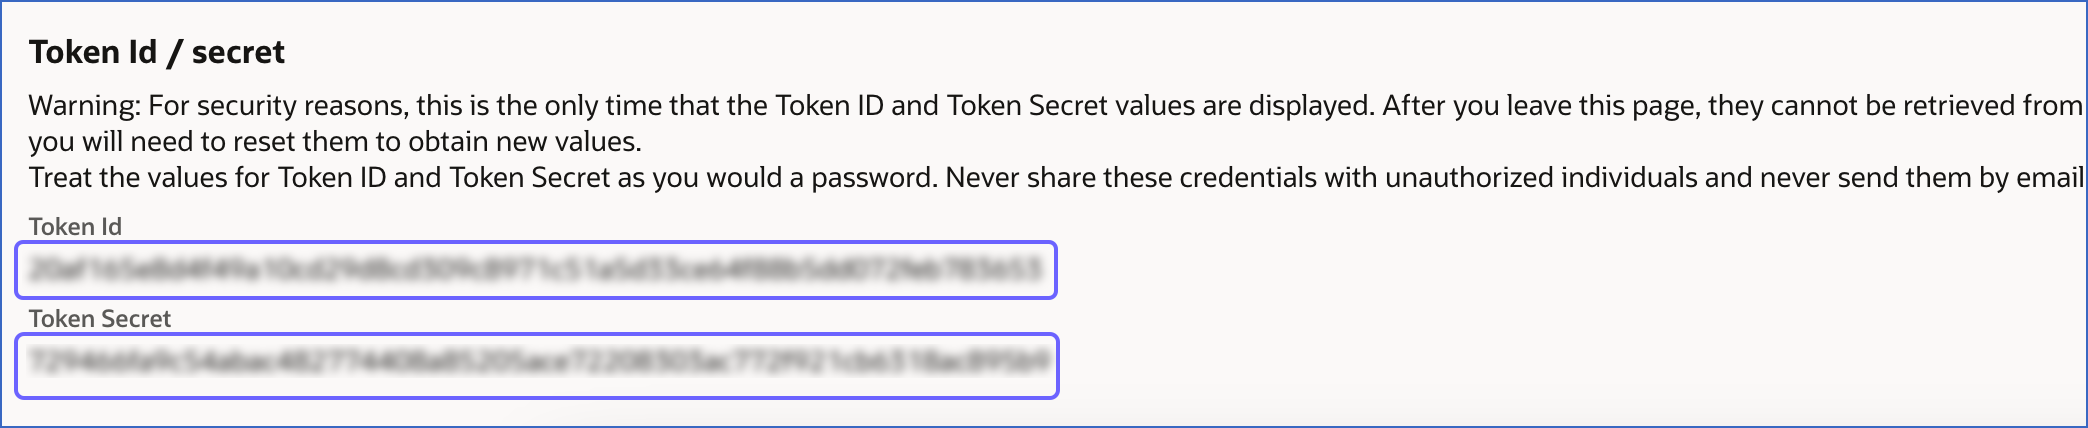
You now have all the credentials required for token-based authentication:
-
Account ID
-
Consumer Key
-
Consumer Secret
-
Token ID
-
Token Secret
Use them while configuring your NetSuite SuiteAnalytics Source in the Pipeline.
OAuth 2.0 authentication
OAuth 2.0 authentication allows Hevo to securely connect to your NetSuite account using a client-based authentication flow, where Hevo verifies its identity using a certificate before accessing your data. This method is recommended if your organization requires certificate-based authentication or follows strict security guidelines.
Note: If you prefer a simpler setup that does not require managing certificates, consider using token-based authentication instead.
To use this method, you must complete the following steps in order:
Perform the following steps to obtain the required credentials to connect Hevo to your NetSuite account using OAuth 2.0 authentication:
1. Enable SuiteScript and OAuth 2.0
To allow OAuth 2.0 authentication, you must enable the required SuiteScript and OAuth features in your NetSuite account. To do this:
-
Log in to your NetSuite account.
-
In the top navigation bar, hover over Setup and click Company.
-
Under the SETUP TASKS section, click Enable Features.
-
On the Enable Features page, scroll to the SuiteCloud section and do the following:
-
In the SuiteScript section, do the following:
-
Select the check box next to Client SuiteScript.
-
Click I Agree to accept the NetSuite Terms of Service displayed in a new tab.
-
Select the check box next to Server SuiteScript.
-
Click I Agree to accept the NetSuite Terms of Service displayed in a new tab.
-
-
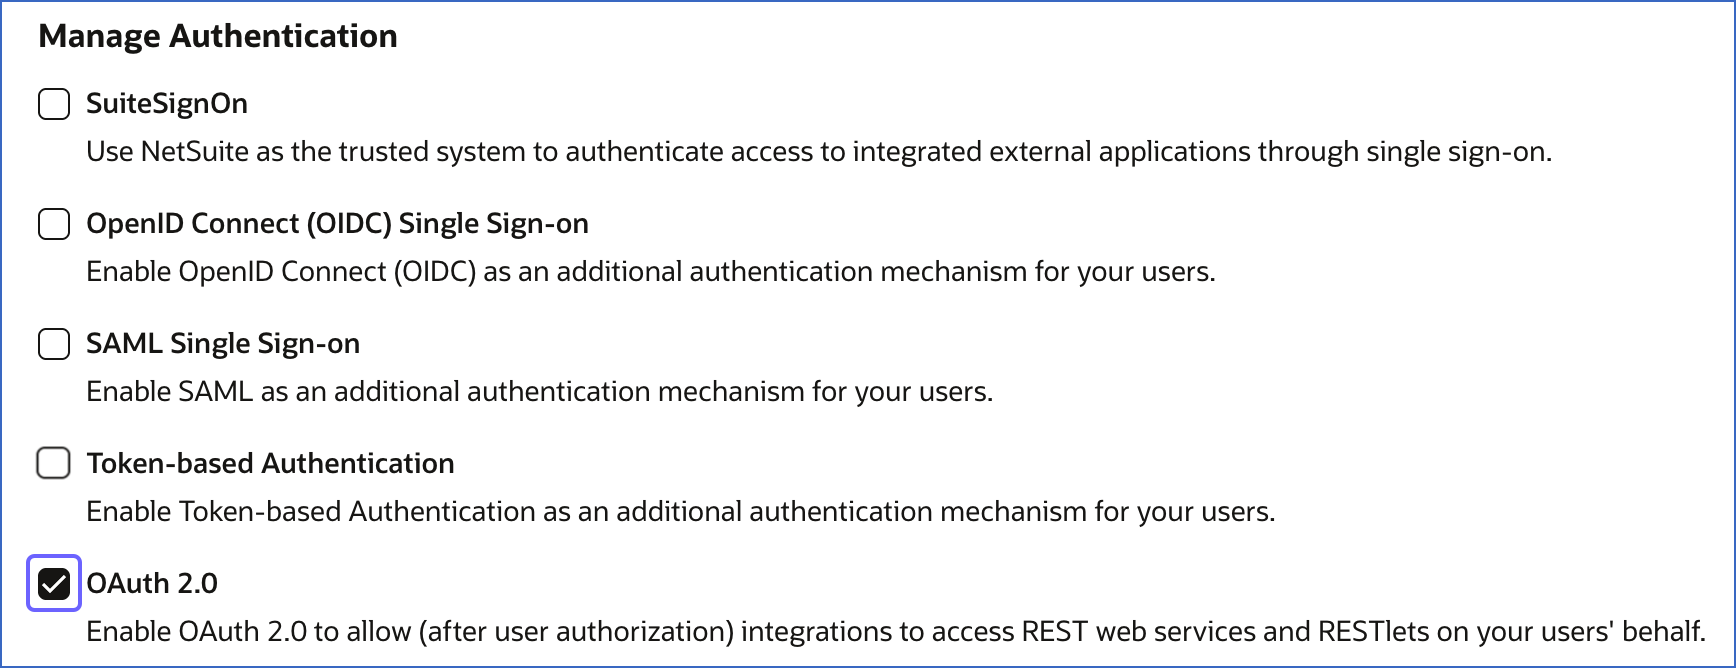
Scroll to the Manage Authentication section and select the check box next to OAuth 2.0.
-
Click I Agree to accept the NetSuite Terms of Service displayed in a new tab.
-
Scroll to the bottom of the page and click Save.
-
You have successfully enabled the required features for OAuth 2.0 authentication in your NetSuite account. Proceed to create an integration record with OAuth 2.0 permissions.
2. Create an integration record with OAuth 2.0 permissions
To establish a connection between Hevo and your NetSuite account, you must create an integration record with OAuth 2.0 enabled. This record helps Hevo identify itself during authentication.
Perform the following steps to create an integration record:
-
In the top navigation bar, hover over Setup and click Integration.
-
Under the INTEGRATION MANAGEMENT section, hover over Manage Integrations and click New.
-
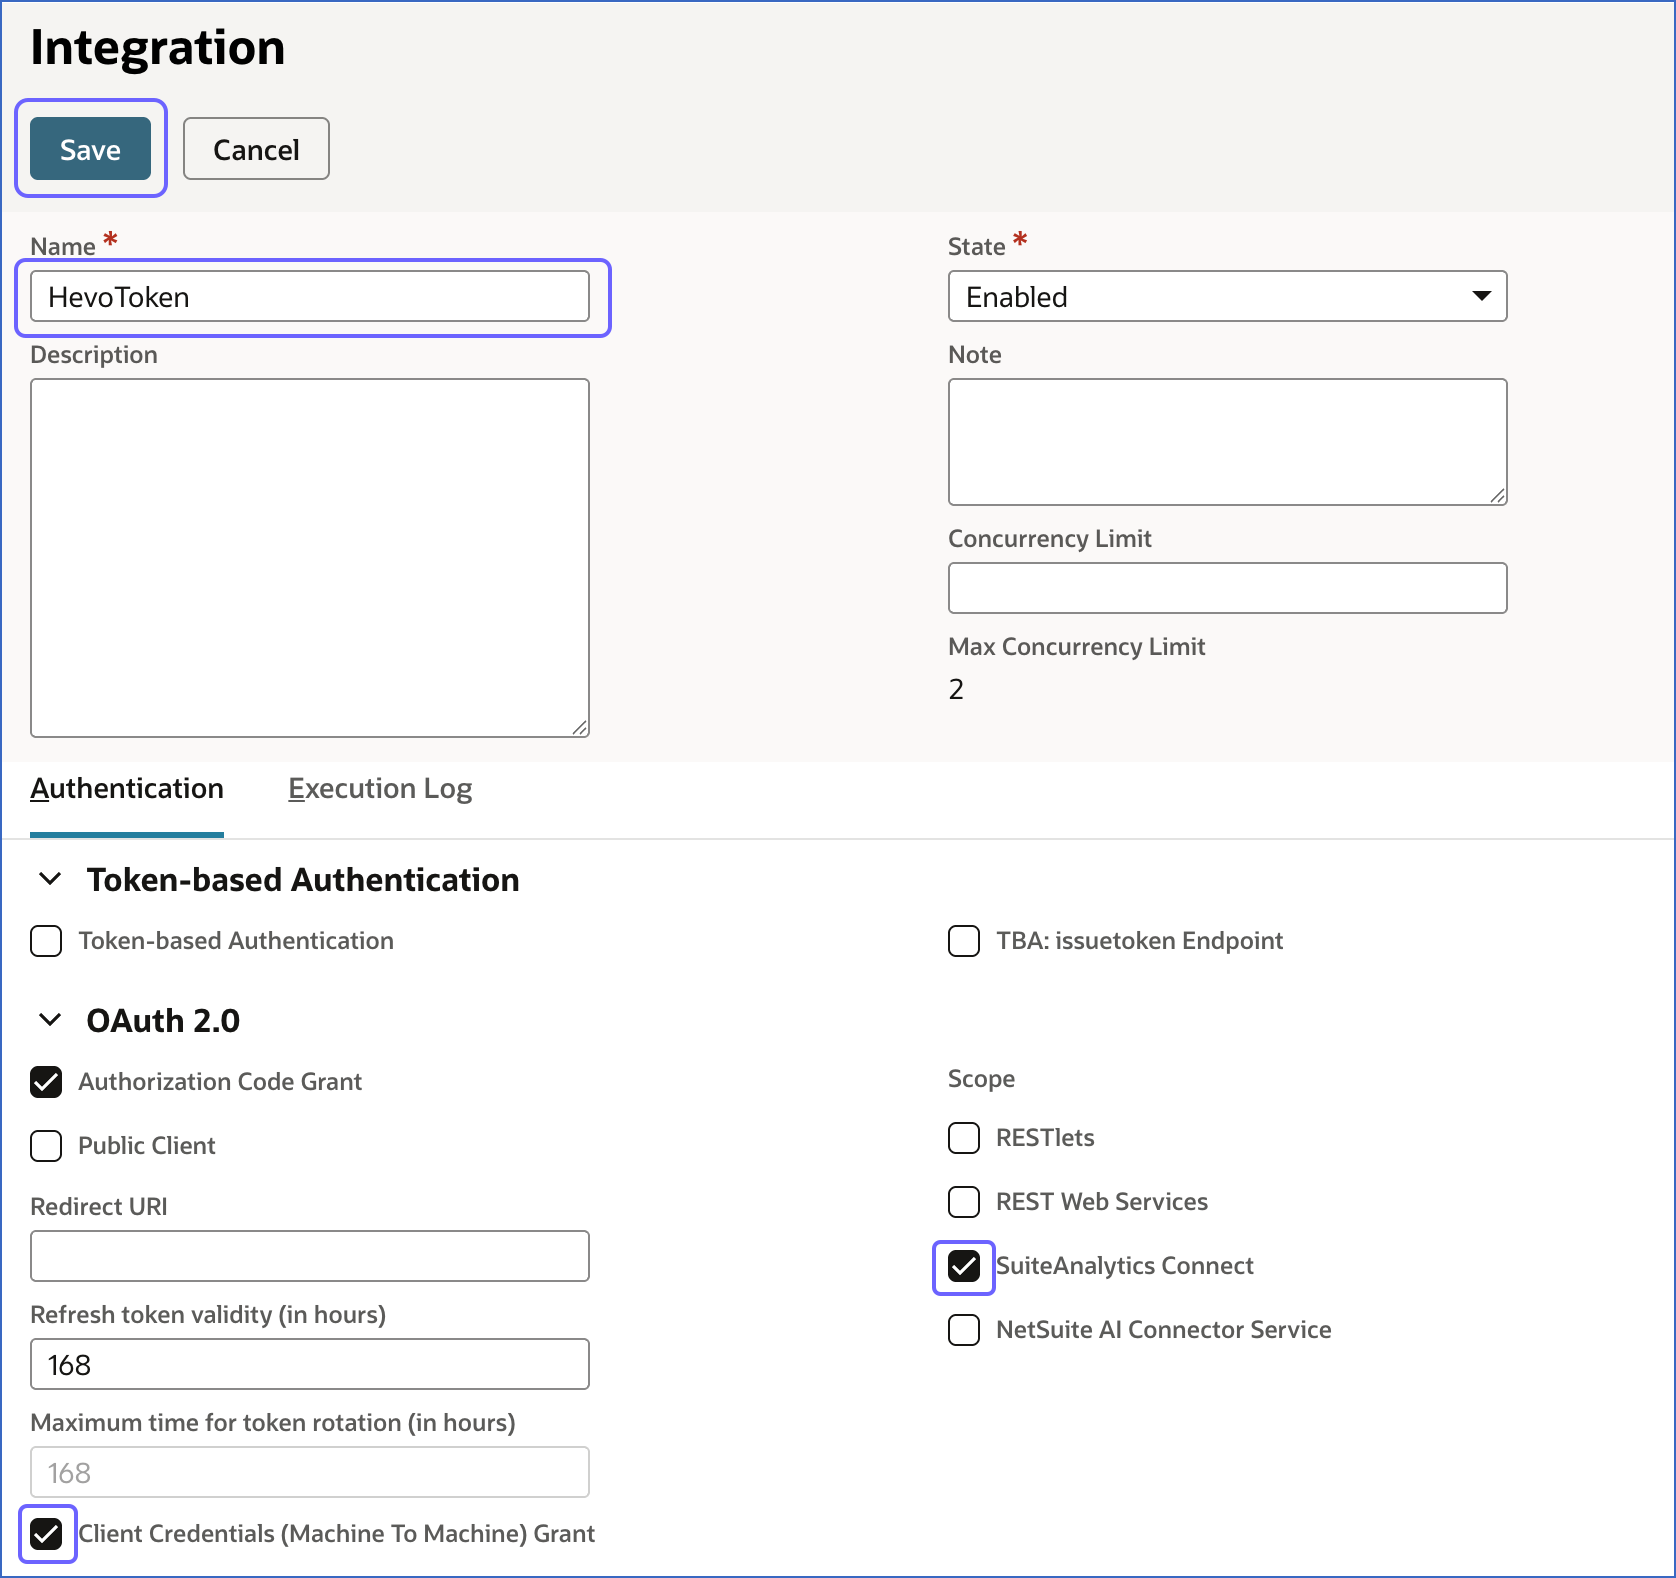
On the Integration page, do the following:
-
Specify a unique name for the integration. For example, HevoToken.
-
Under the Authentication tab, in the OAuth 2.0 section, select the check boxes next to Client Credentials (Machine To Machine) Grant and SuiteAnalytics Connect to allow Hevo to access your NetSuite account data.
-
Click Save.
A confirmation message is displayed on the screen indicating that the integration is successfully created and saved.
-
-
Scroll to the Client Credentials section and copy the Consumer Key / Client ID. Save this value securely like any other password.
The Consumer Key / Client ID is displayed only once for security reasons. Once you leave the Integration page, it cannot be retrieved. Never share this credential via email or with unauthorized individuals. If the credential is lost, you must create a new integration record and modify the Source configuration in the Pipeline with valid credentials.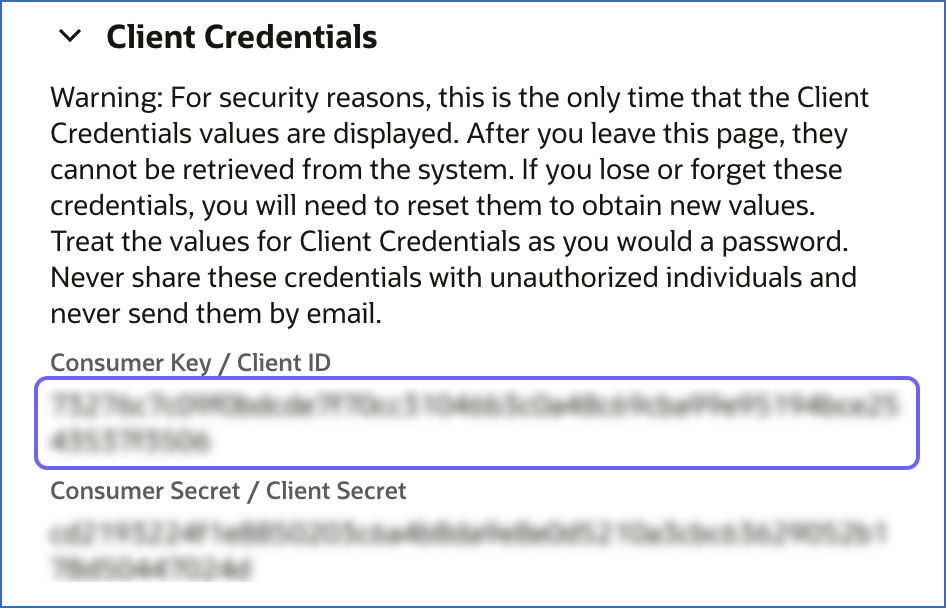
Use the Client ID while configuring your NetSuite SuiteAnalytics Source in the Pipeline. Proceed to create a role for Hevo and assign permissions.
3. Create a role for Hevo and assign permissions
To allow Hevo to access your NetSuite data using OAuth 2.0, you must create a dedicated role with the required permissions for this authentication method. These permissions allow Hevo to authenticate the connection using tokens and access data using the SuiteAnalytics Connect service.
Perform the following steps to create the role and assign the required permissions:
-
In the top navigation bar, hover over Setup and click Users/Roles.
-
Under the USER MANAGEMENT section, hover over Manage Roles and click New.
-
On the Role page, do the following:
-
In the Name field, specify a name for the role . For example, HevoRole.
-
Scroll to the Permissions tab and click the Setup tab.
-
From the Permission drop-down, select Log in using Access Tokens, and then click Add. This permission allows Hevo to authenticate with your NetSuite account using token-based or OAuth 2.0 credentials.
-
From the Permission drop-down, select SuiteAnalytics Connect, and then click Add. This permission allows Hevo to connect to the NetSuite2.com data source and access your data for replication through the SuiteAnalytics Connect service.
-
Click Save.
-
You are redirected to the Manage Roles page, where the role you created appears as a new row. You can now assign this role to a NetSuite user.
4. Configure a user for Hevo and assign role
You must assign the role you created in the Create a role for Hevo and assign permissions section to a NetSuite user so Hevo can authenticate and access data. Depending on your NetSuite setup, either configure an existing user or create one for Hevo.
Note: Avoid using a NetSuite user that is already used for other integrations. We recommend creating a dedicated user for Hevo so that credentials can be managed independently and access can be revoked without impacting other integrations.
-
If the user already exists:
-
In the top navigation bar, hover over Setup and click Users/Roles.
-
Under the USER MANAGEMENT section, click Manage Users.
-
On the Manage Users page, click the user you want to configure for Hevo.
-
On the Employee page, click Edit.
-
Click the Access tab and do the following:
-
Select the check box next to Give Access.
-
In the Roles tab, do the following:
-
From the Role drop-down, select the role that you created in the Create a role for Hevo and assign permissions section, and then click Add.
-
From the Role drop-down, select Data Warehouse Integrator, and then click Add. This role provides the required access to NetSuite data for extraction using the SuiteAnalytics Connect service.
-
-
Click Save.
A confirmation message is displayed on the screen indicating that the the employee record is successfully updated and saved.
-
-
-
If you need to create a new user:
-
In the top navigation bar, hover over Lists and click Employees.
-
In the sub-menu, hover over Employees and click New.
-
On the Employee page, do the following:
-
Specify the following:
-
Name: A unique name for the user.
-
Email: A valid, accessible email address for login access and account-related notifications.
-
-
Scroll to the Classification section, and from the Subsidiary drop-down, select the subsidiary for which the user is being created. This determines the data and records the user can access based on the selected subsidiary. For example, here, we are selecting Parent Company.
Note: Ensure you select the correct subsidiary. An incorrect selection will restrict the data Hevo can access during replication.
-
Click the Access tab, and do the following:
-
Select the check box next to Give Access.
-
In the Roles tab, do the following:
-
From the Role drop-down, select the role that you created for Hevo in the Create a role for Hevo and assign permissions section, and then click Add.
-
From the Role drop-down, select Data Warehouse Integrator, and then click Add. This role provides the required access to NetSuite data for extraction using the SuiteAnalytics Connect service.
-
Click Save.
A confirmation message is displayed on the screen indicating that the the employee record is successfully created and saved.
-
-
-
-
You have successfully configured a user for Hevo. Proceed to generate certificates for authentication.
5. Generate certificates for authentication
To enable secure authentication using OAuth 2.0, you must generate a private key and a corresponding public certificate. The private key is used by Hevo to verify its identity during authentication, and must be kept secure. The public certificate is uploaded to NetSuite to establish connection between Hevo and your NetSuite account.
Perform the following steps to generate the certificates:
-
Open a terminal window on your machine.
-
Run the following command to generate a private key (
private_key.pem) and a public certificate (public_cert.pem):openssl req -new -x509 -newkey rsa:2048 -keyout private_key.pem -out public_cert.pem -nodes -days 365This command performs the following actions:
-
-newkey rsa:2048: Creates a 2048-bit RSA private key, which is used by Hevo to authenticate its identity. -
-keyout private_key.pem: Saves the generated private key to a file on your machine. -
-x509: Uses the private key to generate a self-signed public certificate, -
-out public_cert.pem: Saves the generated public certificate to a file, which you will upload to NetSuite.
-
-
Specify the details as per your organization’s information. This data will be embedded in the CA certificate to uniquely identify it.
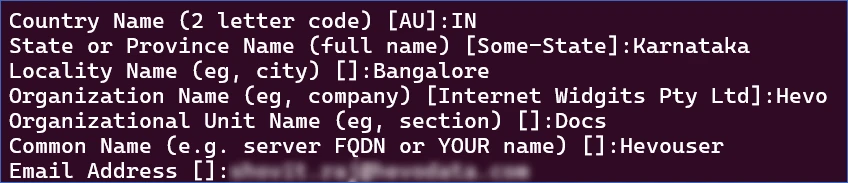
Once the command executes successfully, both files are generated and saved in your current directory.
Use the private key while configuring your NetSuite SuiteAnalytics Source in the Pipeline. Proceed to upload the public certificate to NetSuite to complete the OAuth 2.0 setup.
The private key (private_key.pem) is highly sensitive and must be stored securely. Do not share it with anyone. If the private key is lost or compromised, you must regenerate both files and re-upload the public certificate to NetSuite.
6. Upload the public certificate in NetSuite
To complete the OAuth 2.0 setup, you must upload the generated public certificate in NetSuite and associate it with the required user, role, and integration record. This step generates the certificate ID required for configuring your Source in the Pipeline.
Perform the following steps to upload the certificate:
-
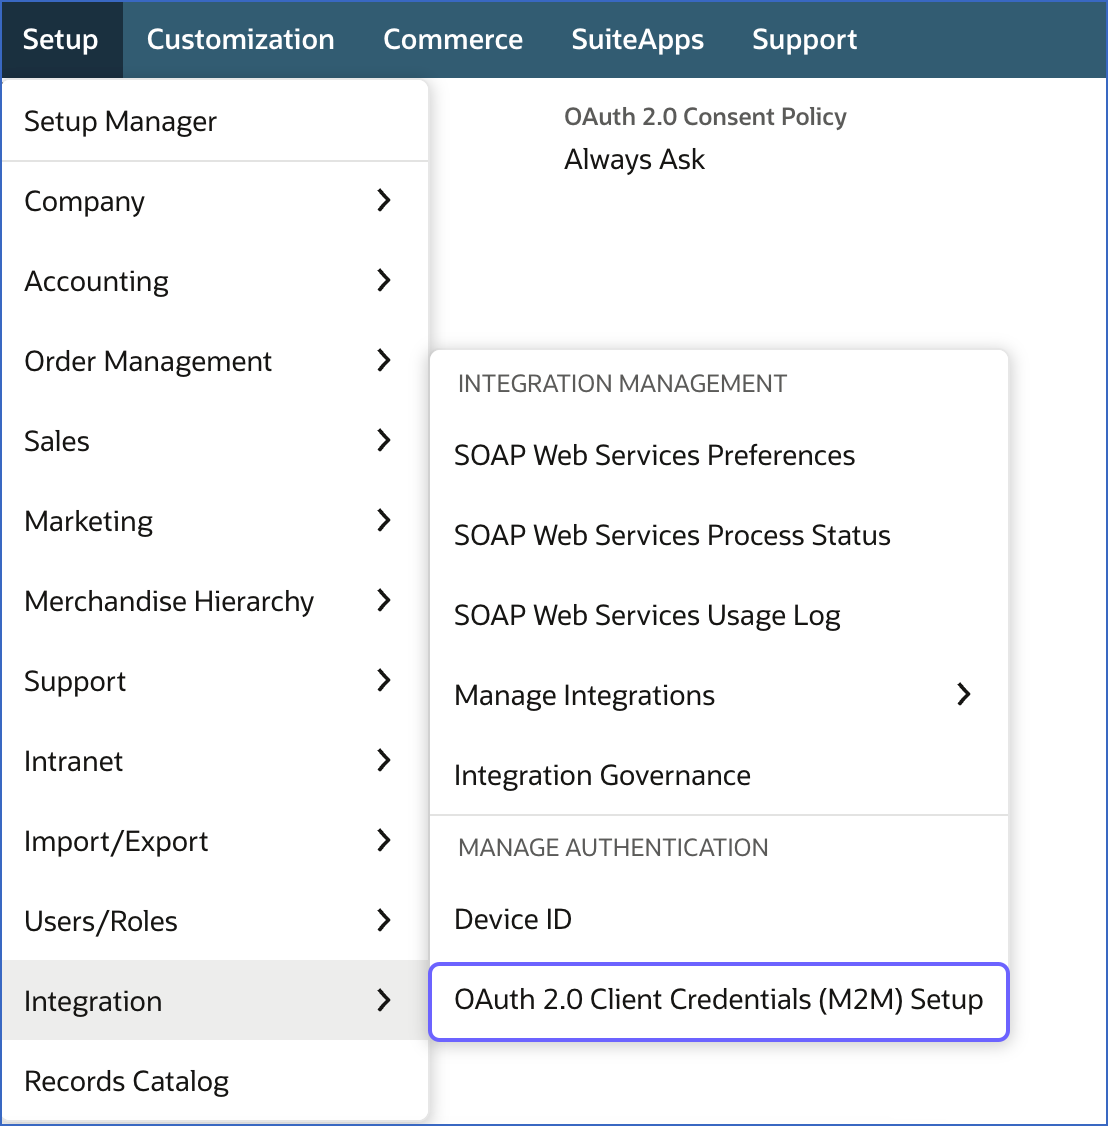
In the top navigation bar, hover over Setup and click Integration.
-
Under the Manage Authentication section, click OAuth 2.0 Client Credentials (M2M) Setup.
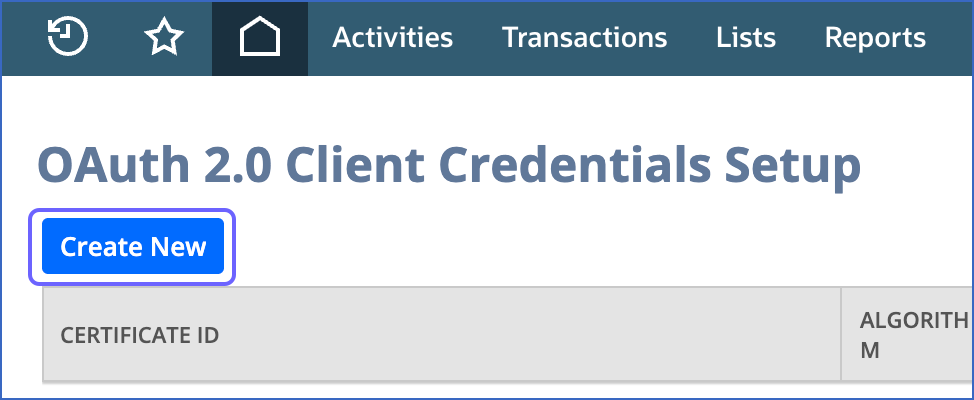
-
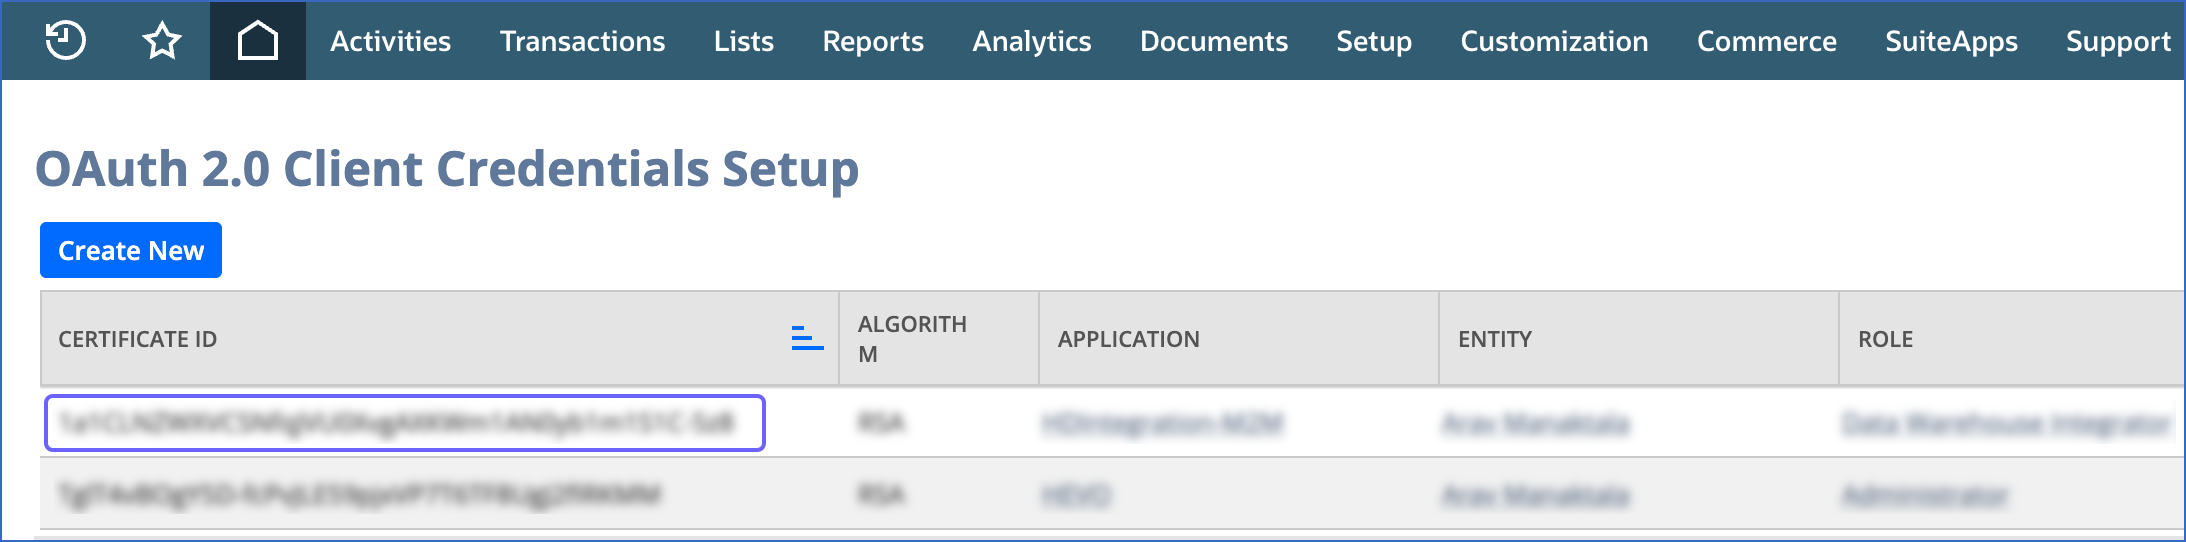
On the OAuth 2.0 Client Credentials Setup page, click Create New.
-
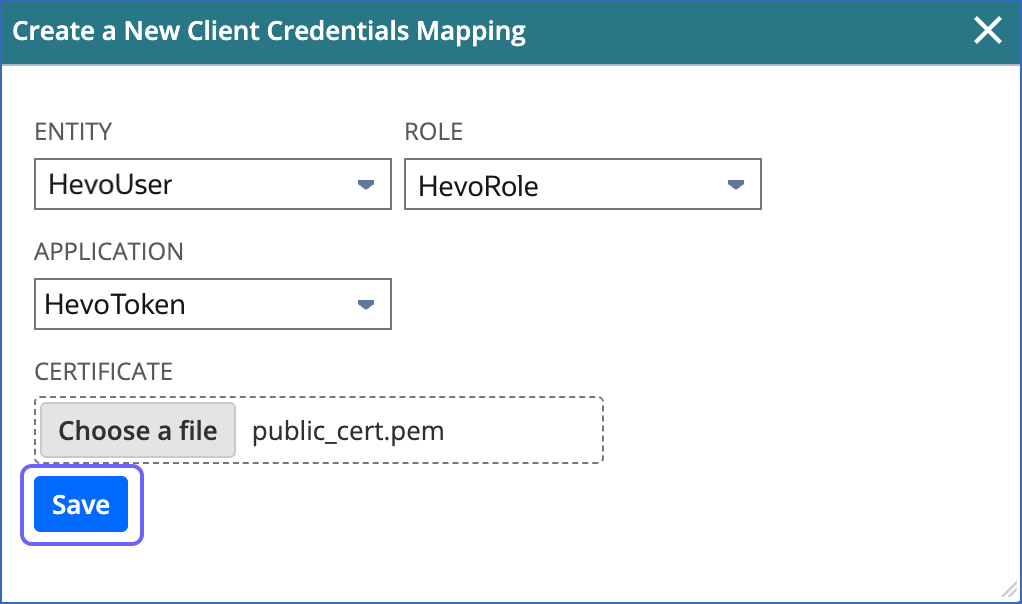
In the Create a New Client Credentials Mapping dialog box, do the following:
-
From the ENTITY drop-down, select the user that you configured in the Configure a user for Hevo and assign role section.
-
From the ROLE drop-down, select the role that you created in the Create a role for Hevo and assign permissions section.
-
From the APPLICATION drop-down, select the integration record that you created in the Create an integration record with OAuth 2.0 permissions section.
-
In the CERTIFICATE field, click Choose a file and upload the public certificate (
publickey.pem) saved on your machine. -
Click Save.
Once saved, NetSuite registers the certificate and associates it with the selected user, role, and integration record. The newly created certificate is displayed as a row on the OAuth 2.0 Client Credentials Setup page.
-
-
Copy the CERTIFICATE ID of your certificate and save it securely like any other password.
You now have all the credentials required for OAuth 2.0 authentication:
-
Client ID
-
Certificate ID
-
Private Key.
Use them while configuring your NetSuite SuiteAnalytics Source in the Pipeline.
3. Obtain the Data Warehouse Integrator Role ID
To allow Hevo to access data from your NetSuite account, you must obtain the ID of the data warehouse integrator role, which is required for data extraction using SuiteAnalytics Connect.
Perform the following steps to obtain the role ID:
-
In the top navigation bar, hover over Setup and click Users/Roles.
-
Under the User Management section, click Manage Roles.

-
On the Manage Roles page, copy the Internal ID of the Data Warehouse Integrator role, and save it securely like any other password.
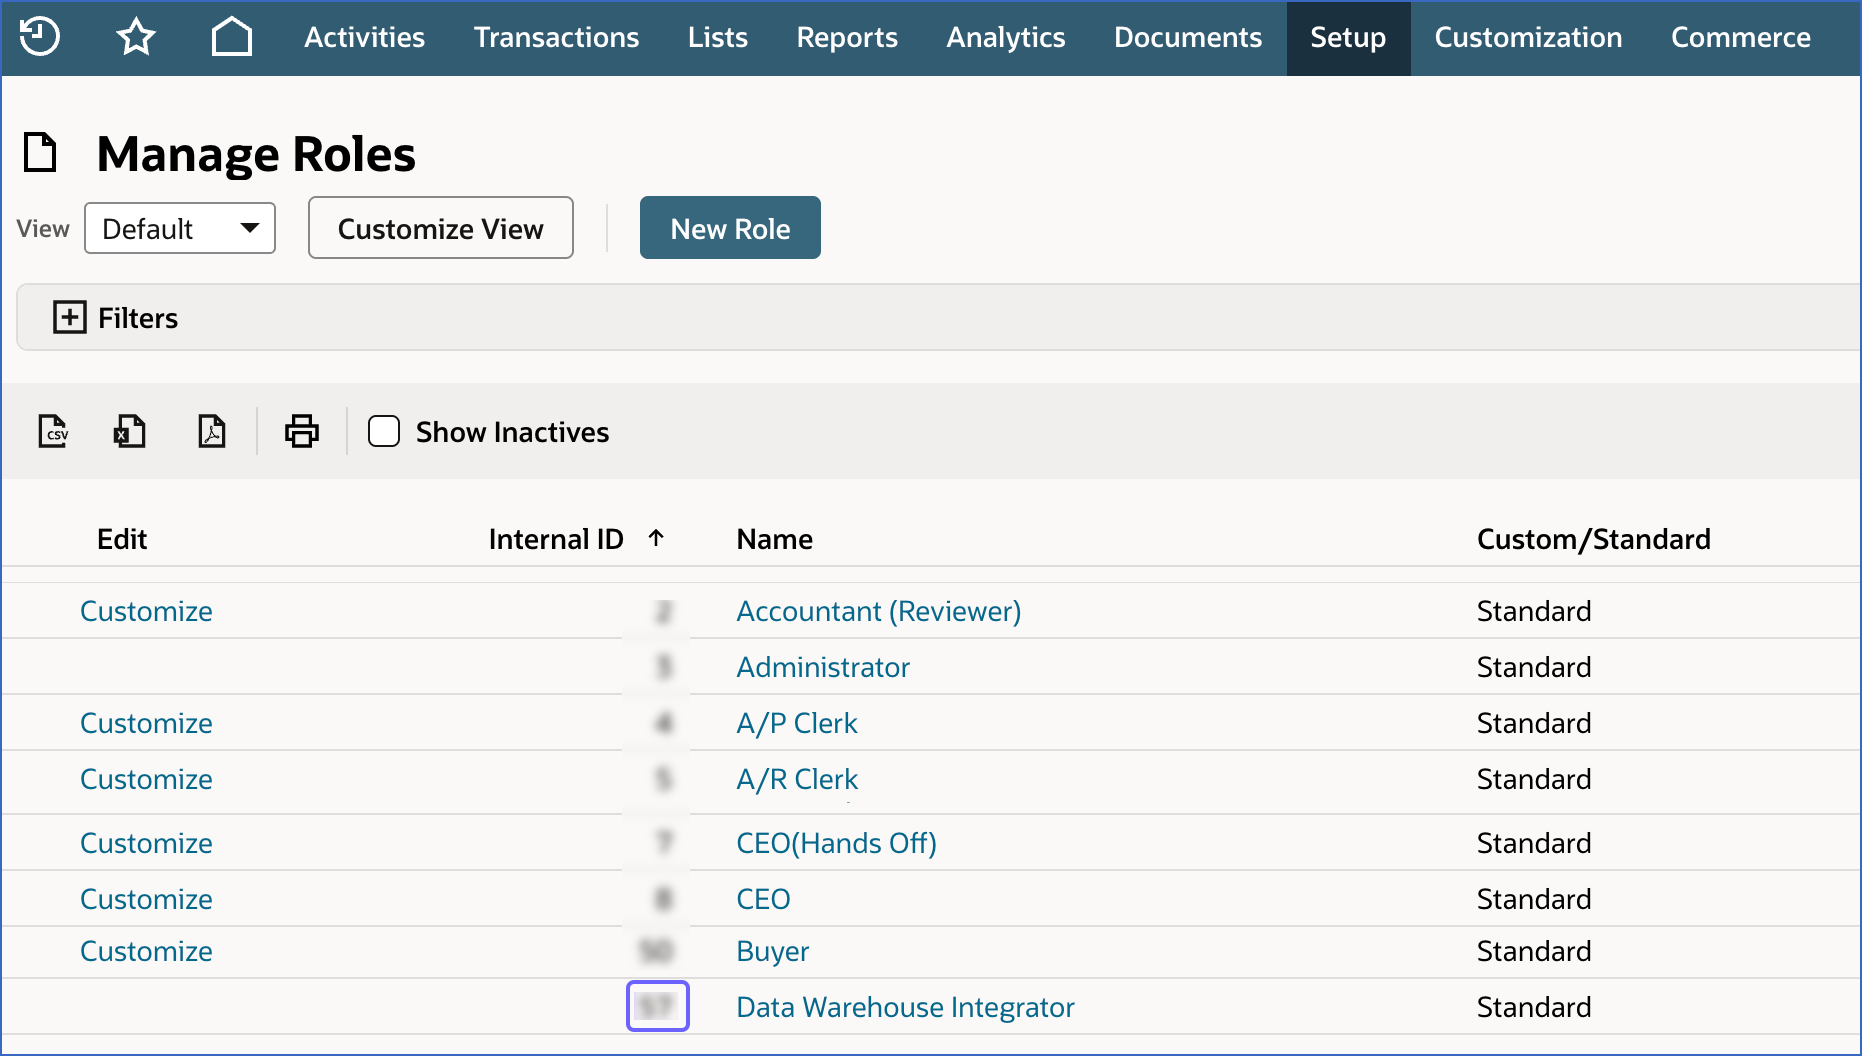
Use this as Role ID while configuring your NetSuite SuiteAnalytics Source in the Pipeline.
Configure NetSuite SuiteAnalytics as a Source in your Pipeline
Perform the following steps to configure your NetSuite SuiteAnalytics Source:
-
Click Pipelines in the Navigation Bar.
-
Click + Create Pipeline in the Pipelines List View.
-
On the Select Source Type page, select NetSuite SuiteAnalytics.
-
On the Select Destination Type page, select the type of Destination you want to use.
-
On the Select Pipeline Type page, click Edge, and then click Continue.

This page appears only if the selected Destination type is supported in Edge and your Team has an existing NetSuite SuiteAnalytics Pipeline with the same Destination type. Otherwise, you can proceed to create an Edge Pipeline.
-
In the Configure Source screen, specify the following:
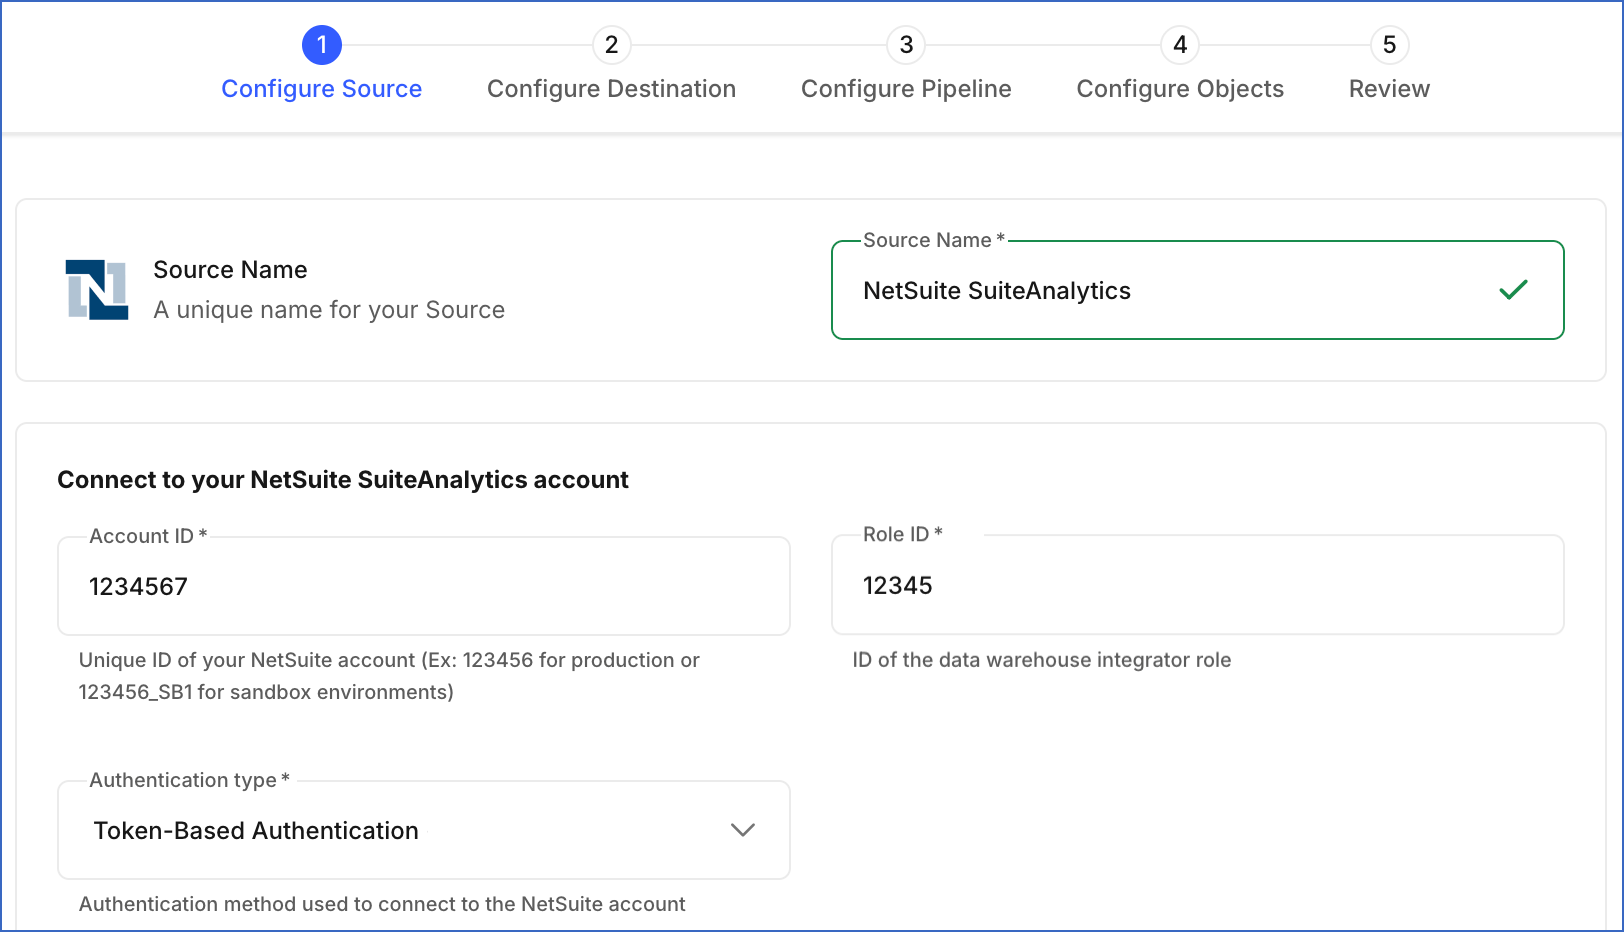
-
Source Name: A unique name for your Source, not exceeding 255 characters. For example, NetSuite SuiteAnalytics.
-
In the Connect to your NetSuite SuiteAnalytics account section:
-
Account ID: The unique identifier of your NetSuite account that you obtained in the Obtain your Account ID section.
-
Role ID: The data warehouse integrator role ID that you obtained in the Obtain the Data Warehouse Integrator Role ID section.
-
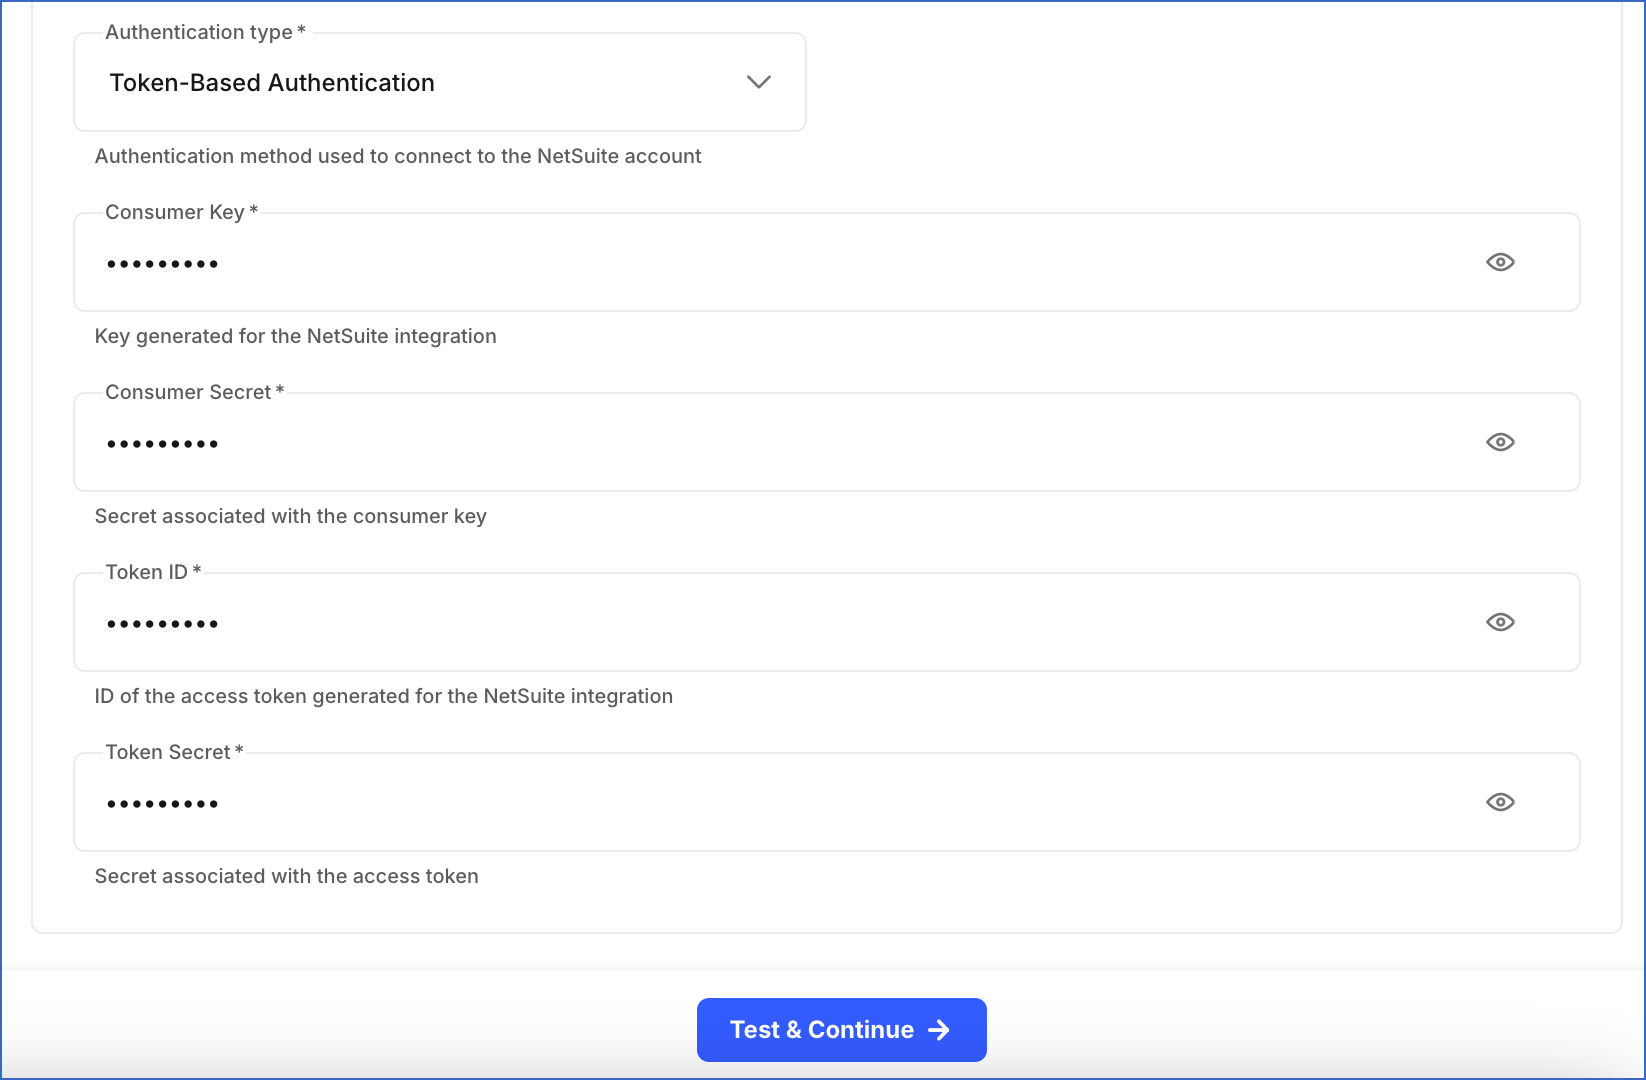
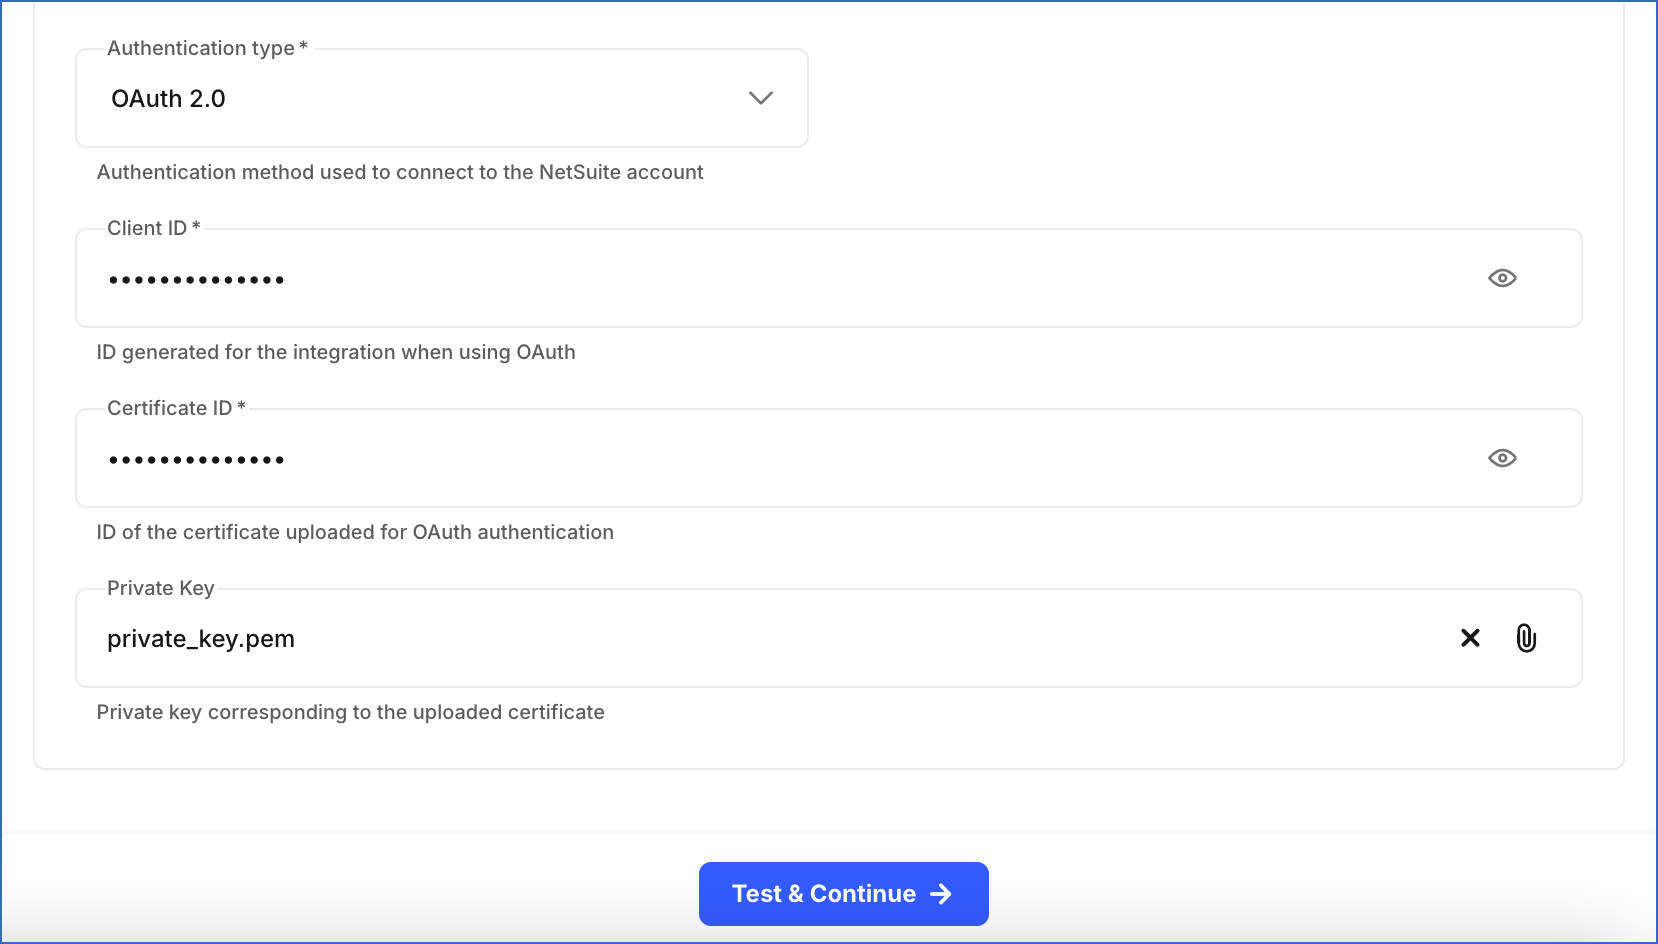
From the Authentication type drop-down, select the method you want to use for authenticating Hevo’s connection to your NetSuite account:
-
Token-Based Authentication: Connect to your NetSuite account using access tokens generated in NetSuite.
-
Consumer Key: The key obtained upon creating the integration record in the Create an integration record with Token-based authentication permissions section.
-
Consumer Secret: The secret associated with the consumer key that you obtained in the Create an integration record with Token-based authentication permissions section.
-
Token ID: The ID of the access token that you created in the Create an access token section, to allow Hevo to access your NetSuite account data.
-
Token Secret: The secret associated with the access token that you created in the Create an access token section.
-
-
OAuth 2.0: Connect to your NetSuite account using a client-based authentication flow.
-
Client ID: The client ID obtained upon creating the integration record in the Create an integration record with OAuth 2.0 permissions section.
-
Certificate ID: The certificate ID generated after uploading the public certificate in NetSuite in the Upload the public certificate in NetSuite section.
-
Private Key: The private key file generated in the Generate certificates for authentication section.
-
-
-
-
-
Click Test & Continue to test the connection to your NetSuite SuiteAnalytics Source.
When you click this button, Hevo runs a query on the oa_tables metadata table in your NetSuite account schema to retrieve a sample record. If the query is successful, it verifies that Hevo can access your NetSuite data, and the connection test is marked as successful. You can then proceed to set up your Destination.
Data Replication
Hevo replicates data for all the objects selected on the Configure Objects page during Pipeline creation. By default, all supported objects and their available fields are selected. However, you can modify this selection while creating or editing the Pipeline.
Selecting a parent object automatically includes all its associated child objects for replication. Child objects cannot be selected or deselected individually.
Hevo ingests the following types of data from your Source objects:
-
Historical Data: The first run of the Pipeline ingests all available historical data for the selected objects and loads it into the Destination.
-
Incremental Data: Once the historical load is complete, new and updated records for objects are ingested as per the sync frequency.
For the following objects, Hevo ingests only the incremental data in subsequent Pipeline runs:
| Object Category | Objects |
|---|---|
| Core Entities | Competitor, Contact, ContactRole, Customer, customerCategory, employee, entity, EntityGroup, LeadSource, otherName, Partner, Subsidiary, Vendor, VendorCategory |
| Entity Addresses | CompanyAddressbook, CompanyAddressbookEntityAddress, ContactAddressbook, ContactAddressbookEntityAddress, customerAddressbook, customerAddressbookEntityAddress, employeeAddressbook, employeeAddressbookEntityAddress, EntityAddress, entityAddressbook, jobAddressbook, jobAddressbookEntityAddress, MfgProjectAddressbook, MfgProjectAddressbookEntityAddress, otherNameAddressbook, otherNameAddressbookEntityAddress, PartnerAddressbook, PartnerAddressbookEntityAddress, vendorAddressbook, vendorAddressbookEntityAddress, WorkplaceMainAddress |
| Entity Relationships | CompanyContactRelationship, CustomerSubsidiaryRelationship, VendorSubsidiaryRelationship |
| Transactions | InvoiceGroup, JournalTransactions, promotionCode, RecentActivity, RecentTransactions, RecentTransactionsWithoutJournal, StatisticalJournalEntry, StatisticalJournalEntryLine, RevenueElement, TimeBill, transaction, TransactionAccountingLine, transactionLine, transactionNote |
| Transaction Addresses | checkPayeeAddress, revenueCommitmentBillingAddress, revenueCommitmentReversalBillingAddress, revenueCommitmentReversalShippingAddress, revenueCommitmentShippingAddress, payrollItem, transactionBillingAddress, transactionBillingAddressbook, transactionBillingAddressbookEntityAddress, transactionShippingAddress, transactionShippingAddressbook, transactionShippingAddressbookEntityAddress, transactionReturnAddressbook, transactionReturnAddressbookEntityAddress, transactionPayeeAddressbook, transactionPayeeAddressbookEntityAddress, transactionAddressbook |
| Transaction Address Mappings | transactionAddressMapping, transactionAddressMappingAddress, transactionLineAddressMappingLineAddress |
| Cash Transaction Addresses | CashSaleBillingAddress, CashSaleItemShippingAddress, CashSaleShippingAddress, cashRefundBillingAddress, cashRefundShippingAddress, customerRefundPayeeAddress |
| Credit Transaction Addresses | CreditMemoItemShippingAddress, creditMemoBillingAddress, creditMemoShippingAddress |
| Invoice Transaction Addresses | InvoiceBillingAddress, InvoiceItemShippingAddress, InvoiceShippingAddress |
| Purchase Transaction Addresses | PurchaseOrderBillingAddress, PurchaseOrderShippingAddress, returnAuthorizationBillingAddress, returnAuthorizationShippingAddress, vendorBillBillingAddress, VendorCreditBillingAddress, VendorReturnAuthorizationBillingAddress |
| Sales Transaction Addresses | estimateBillingAddress, estimateItemShippingAddress, estimateShippingAddress, opportunityBillingAddress, opportunityShippingAddress, salesOrderBillingAddress, salesOrderItemShippingAddress, salesOrderShippingAddress |
| Transaction Relationships | NextTransactionAccountingLineLink, NextTransactionLineLink, PreviousTransactionAccountingLineLink, PreviousTransactionLineLink, TransactionContact |
| Accounting and Finance | Account, accountingBook, accountingPeriod, AmortizationSchedule, AmortizationTemplate, BillingClass, BillingRateCardVersion, BillRunSchedule, budgetLegacy, budgets, budgetsMachine, currency, currencyRate, ExpenseCategory, GeneralAllocationSchedule, Incoterm, InventoryCostTemplate, PeriodClosingTaskStatus, plannedStandardCost, salesTaxItem, standardCostVersion, term |
| Activities and Communication | Activity, CalendarEvent, EmailTemplate, FaxTemplate, MailTemplate, Message, PhoneCall, SystemEmailTemplate, SystemNote, Task |
| Files and Documents | File, MediaItemFolder, memDocTransactionTemplate, PdfTemplate |
| Items and Pricing | assemblyItemPrice, downloadItemPrice, GiftCertificate, giftCertificateItemPrice, inventoryItemPrice, item, itemPrice, kitItemPrice, nonInventoryItemPrice, nonInventoryResaleItemPrice, nonInventorySaleItemPrice, otherChargeItemPrice, otherChargeResaleItemPrice, otherChargeSaleItemPrice, priceLevel, pricingGroup, QuantityPricingSchedule, serviceItemPrice, serviceResaleItemPrice, serviceSaleItemPrice |
| Inventory and Fulfillment | aggregateItemLocation, assemblyItemLocations, fulfillmentRequest, InboundShipment, intercompanyTransferOrderShippingAddress, inventoryItemLocations, itemFulfillmentReturnAddress, itemFulfillmentShippingAddress, ShippingPackage, storePickupFulfillment, transferOrderShippingAddress |
| Organizational Structure | classification, department, escalationTerritory, JobStatus, Location, LocationMainAddress, LocationReturnAddress, salesTerritory, SubsidiaryMainAddress, SubsidiaryReturnAddress, SubsidiaryShippingAddress, supportTerritory |
| Payment and Financial Instruments | AutomatedClearingHouse, cardholderAuthentication, generalToken, jobPaymentInstrumentList, MfgProjectPaymentInstrumentList, paymentInstrument, PaymentInstrumentList, paymentMethod, vendorPaymentInstrument, VendorAutomatedClearingHouse, VendorPaymentPayeeAddress, VendorPrepaymentPayeeAddress, VendorVendorPaymentInstrumentList |
| Subscriptions and Notes | ContactNote, ContactSubscriptions, CustomerNote, CustomerSubscriptions, employeeSubscriptions, entityNote, EntitySubscriptions, itemNote, jobNote, MfgProjectNote, otherNameSubscriptions, PartnerSubscriptions, subscriptionPlanNote, VendorSubscriptions |
| Support and Service | supportCase, supportCaseIssue, supportCaseNote, supportCaseOrigin, supportCaseType |
| Custom Objects | CustomField, CustomList, CustomRecordType, usernotes_CUSTOMLIST1, usernotes_CUSTOMLIST2, usernotes_CUSTOMLIST3, usernotes_CUSTOMLIST5, usernotes_CUSTOMLIST6, usernotes_CUSTOMLIST_BSP_COLUMN_DELIMITER_CSV, usernotes_CUSTOMLIST_BSP_FIELD_MAPPING_CAMT053, usernotes_CUSTOMLIST_BSP_MEMO_MAPPING_MT940, usernotes_CUSTOMLIST_BSP_NEG_NUMBER_FORMAT_CSV, usernotes_CUSTOMLIST_BSP_NUMBER_FORMAT_CSV, usernotes_CUSTOMLIST_BSP_TEXT_QUALIFIER_CSV, usernotes_CUSTOMLIST_BSP_TXS_TYPES_CAMT053, usernotes_CUSTOMRECORD123332323, usernotes_CUSTOMRECORD4, usernotes_CUSTOMRECORD_BSP_CONFIG_CSV, usernotes_CUSTOMRECORD_BSP_CONFIGURATION_VALUE |
Incremental changes are detected using timestamp fields such as:
-
date
-
datelastmodified
-
lastmodifieddate
-
linelastmodifieddate
For all other objects, Hevo ingests the entire data during each Pipeline run.
Note:
-
You can create a Pipeline with this Source only using the Merge load mode. The Append mode is not supported for this Source.
-
The SystemNote object is immutable and is not updated after creation. Each change is recorded as a new entry instead of modifying existing records. Since updates and deletes are not applicable for this object, Hevo ingests only new records during incremental Pipeline runs using the date field.
Schema and Primary Keys
Hevo uses the following schema to upload the records in the Destination. For a detailed view of the objects, fields, and relationships, click the ERD.
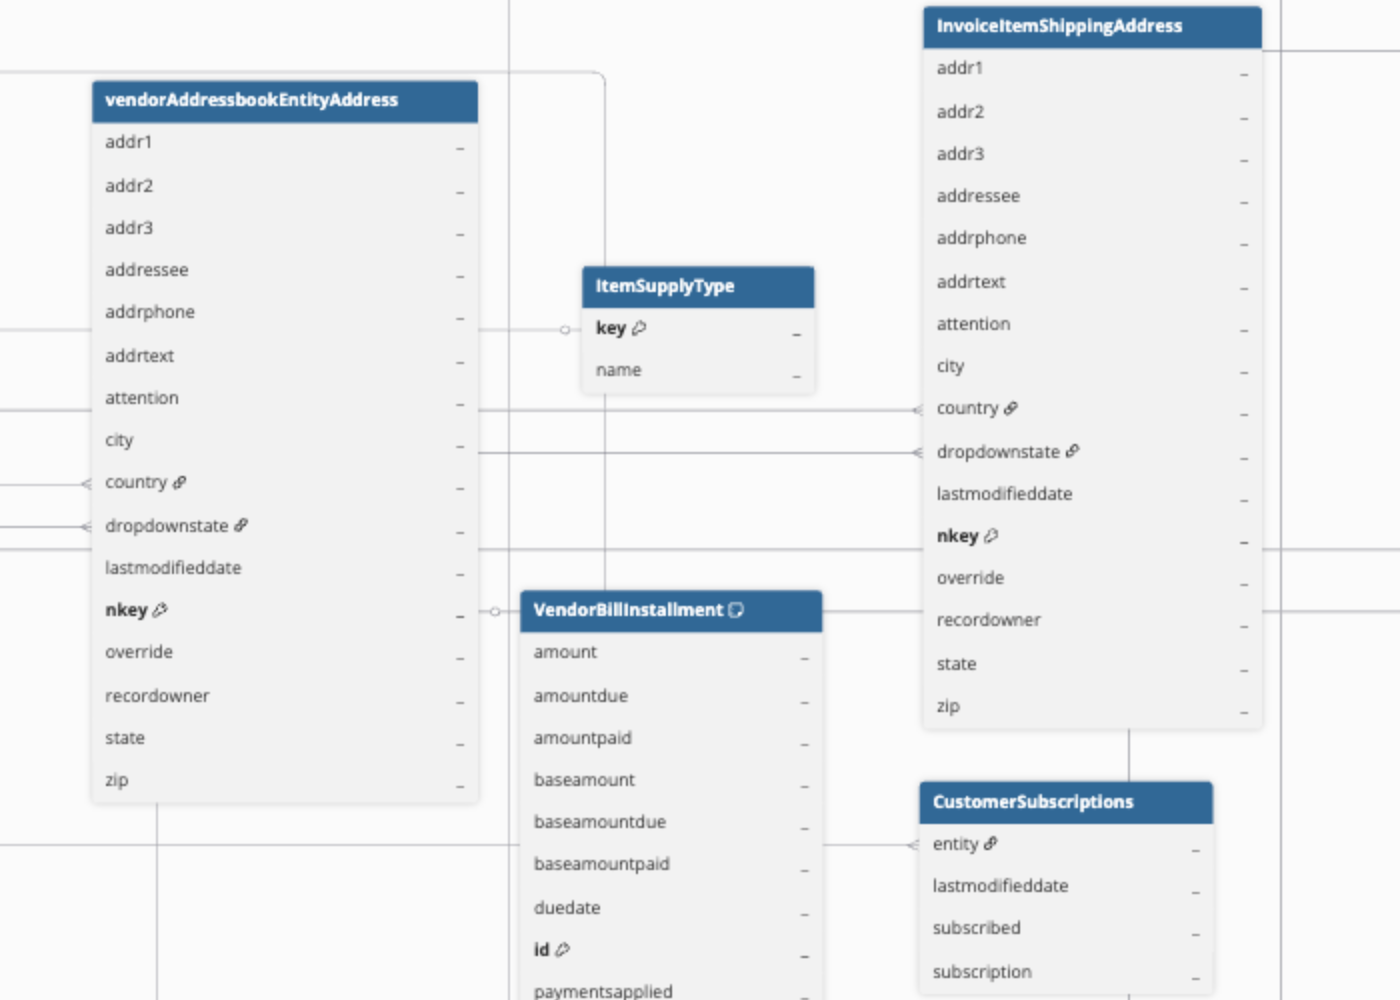
Data Model
The NetSuite2.com Data Source uses a relational data model that is optimized for analytics and reporting. It organizes data into structured tables representing different business entities. Details about the available record types in NetSuite2.com are available in the Records Catalog.
Hevo supports data ingestion from objects listed in the Analytics Browser of SuiteAnalytics. Read Analytics Browser to view the list of objects available for ingestion.
Additional Information
Read the detailed Hevo documentation for the following related topics:
Data Type Mapping
Hevo maps the NetSuite SuiteAnalytics Source data type internally to a unified data type, referred to as the Hevo Data Type, in the table below. This data type is used to represent the Source data from all supported data types in a lossless manner.
The following table lists the supported NetSuite SuiteAnalytics data types and the corresponding Hevo data type to which they are mapped:
| NetSuite SuiteAnalytics Data Type | Hevo Data Type |
|---|---|
| - BIGINT - INTEGER - SMALLINT - TINYINT |
LONG |
| - BINARY - BLOB - LONGVARBINARY - VARBINARY |
BYTE_ARRAY |
| - BIT - BOOLEAN |
BOOLEAN |
| - CHAR - CLOB - LONGVARCHAR - NCHAR - NCLOB - NVARCHAR - ROWID - VARCHAR |
VARCHAR |
| - DATE | DATE |
| - DECIMAL - NUMERIC |
DOUBLE |
| - DOUBLE - FLOAT - REAL |
DOUBLE |
| - TIME | TIME |
| - TIMESTAMP | DATETIME_TZ |
Any other data type not listed in the table above is not supported by Hevo.
Note: If any of the Source objects contain data types that are not supported by Hevo, the corresponding fields are marked as Unsupported during object configuration in the Pipeline.
Handling of Deletes
Hevo handles deleted records differently based on how data is ingested for an object.
For objects where the complete data is ingested during each Pipeline run:
-
Hevo compares the latest data fetched from the Source with the data present in the Destination. If a record exists in the Destination but is no longer returned by the Source, the record is treated as deleted.
-
Instead of removing the record, Hevo sets the metadata column __hevo__marked_deleted to True.
For objects where only new and updated records are ingested after the first Pipeline run, Hevo does not capture records that are permanently deleted in the Source. To track deletes in such cases, you can ingest data from system objects, such as DeletedRecord and DeletedTransaction objects. These objects contain information about deleted records.
Source Considerations
-
NetSuite SuiteAnalytics enforces limits on the number of concurrent queries per account. This limit depends on:
-
Service tier
-
Number of SuiteCloud Plus licenses
If the limit is exceeded:
-
Hevo is temporarily unable to fetch data.
-
Hevo retries the query automatically.
-
If retries fail, ingestion is deferred to the next Pipeline run.
-
-
In NetSuite, Hevo uses timestamp fields such as lastmodifieddate to identify records for incremental ingestion. However, some NetSuite objects contain fields whose values are automatically calculated and updated without any user intervention. Changes to these fields do not trigger updates to the lastmodifieddate field. As a result, these changes are not captured during incremental ingestion.
To retrieve updated values for these fields in your Destination, you can resync the corresponding objects at regular intervals to refresh the data.
Revision History
Refer to the following table for the list of key updates made to this page:
| Date | Release | Description of Change |
|---|---|---|
| Mar-26-2026 | NA | New document. |