Configuring an SSH Tunnel
On This Page
If your database is hosted on Amazon Web Services (AWS) and is not publicly accessible, you can connect to Hevo using an SSH tunnel. To create the connection, use a publicly accessible EC2 instance or an SSH server instance. The SSH server acts as an intermediary, forwarding traffic from Hevo through an encrypted tunnel to your hosted database.
Prerequisites
-
AWS privileges:
-
Create and manage EC2 instances to set up the SSH server in your VPC.
-
Create and manage Security Groups to whitelist Hevo’s IP addresses.
-
Access to view database details to retrieve your database’s connection information.
-
-
Familiarity with Linux and its command-line interface.
Perform the following steps to configure your SSH server:
Verify your Hevo Account’s Data Pipeline Region
The Hevo Data platform is available in multiple regions. The app URL indicates your Hevo account’s region. For example, if your app URL is https://asia.hevodata.com/, then your region is asia. You need to whitelist Hevo’s IP addresses according to your region. Read Regions to locate the IP addresses you need to whitelist for your region.
Make a note of your region and its corresponding IP addresses. You will need this information to configure your SSH server’s security group.
Obtain the VPC ID and Port Number of your Database
Perform the following steps to obtain the VPC ID and port number for your database type:
Connecting to an RDS database
-
Open the Amazon RDS console.
-
In the left navigation pane, click Databases.
-
In the Databases section on the right, click the DB identifier of the database that you want to connect to Hevo.
-
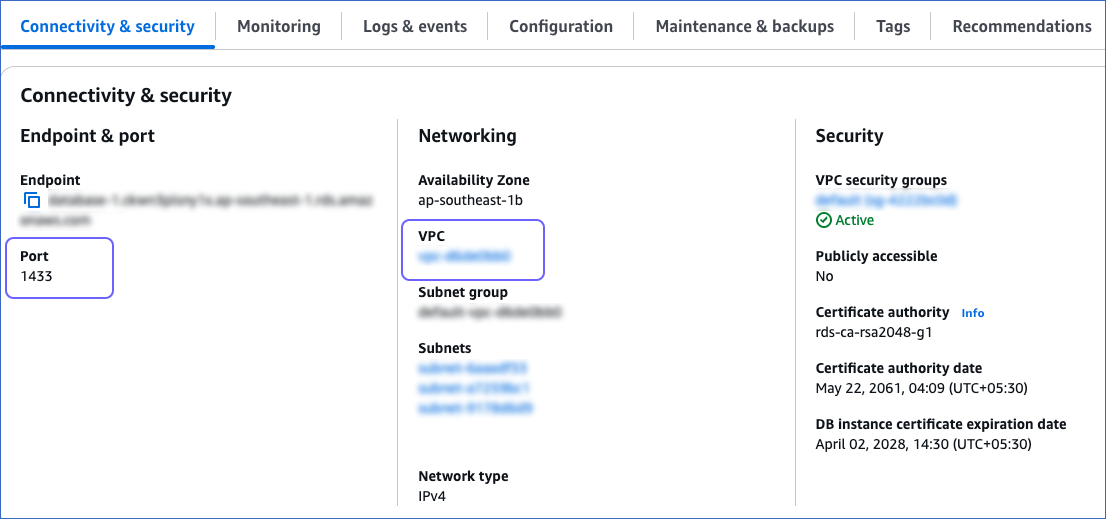
Under the Connectivity & security tab, make a note of the values in the VPC field and the Port field.
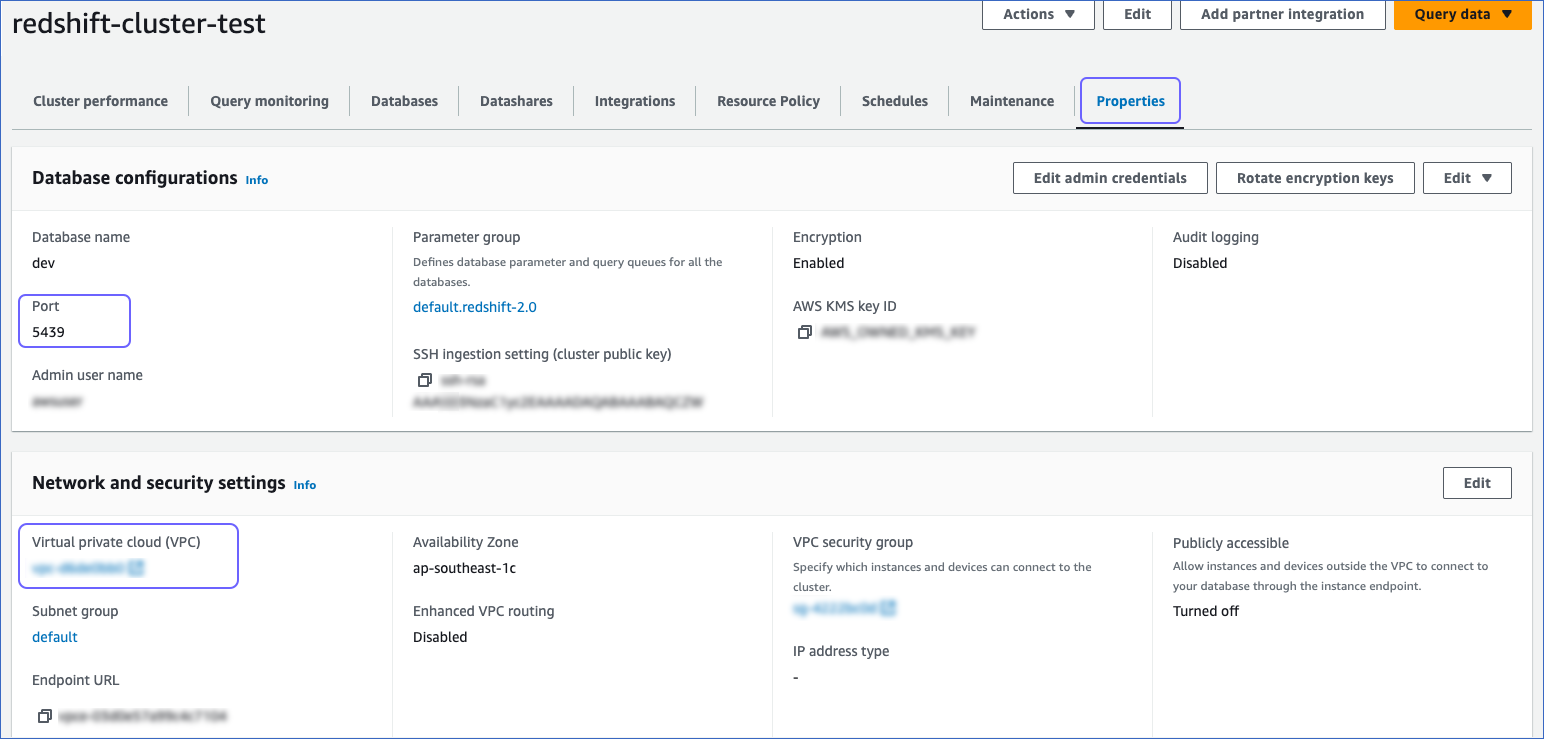
Connecting to a Redshift database
-
Log in to the Amazon Redshift dashboard.
-
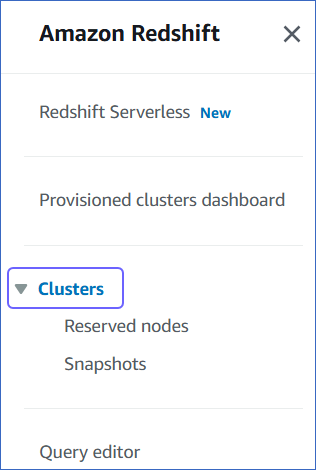
Click the hamburger menu at the top left corner of the dashboard.
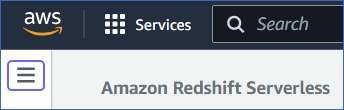
-
In the left navigation pane, click Clusters.
-
In the In my account tab, Clusters section, click the cluster you want to connect to Hevo.
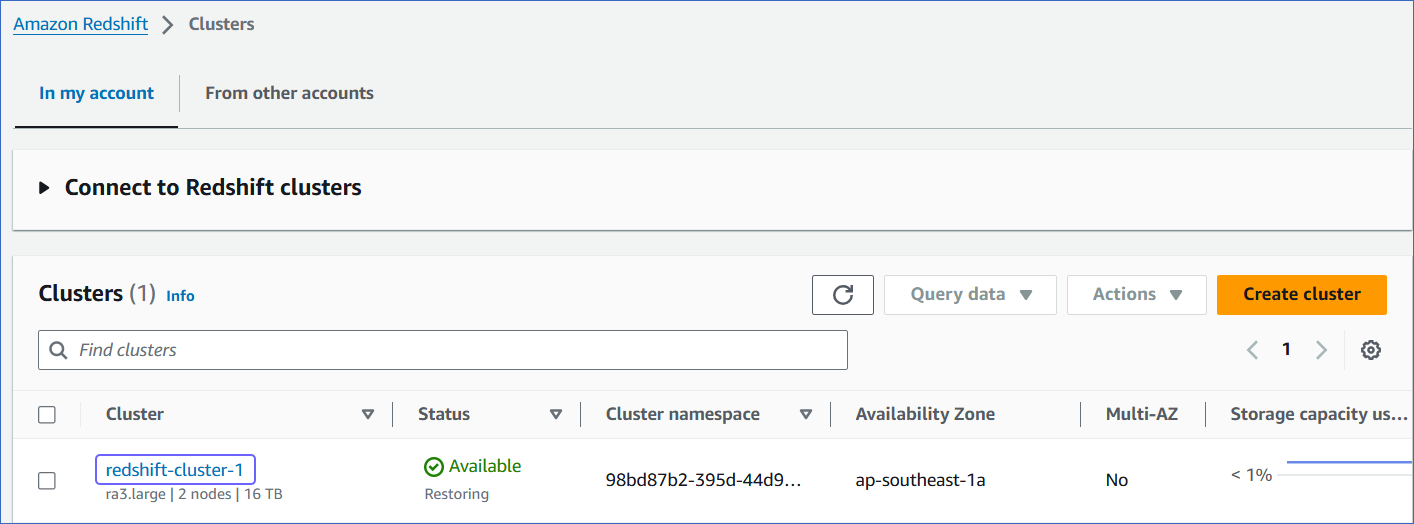
-
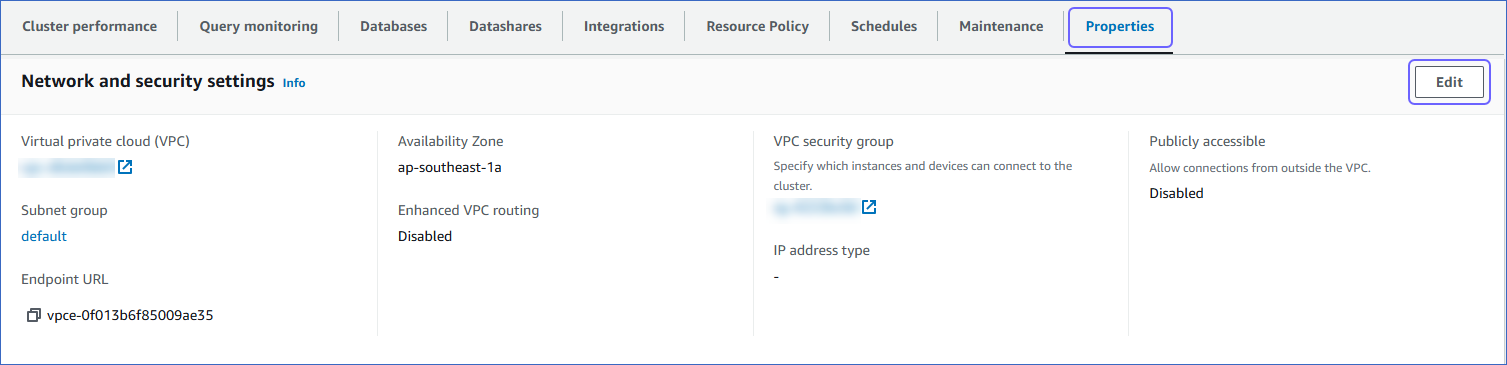
On the <Cluster Name> page, navigate to the Properties tab and make a note of the values in the Virtual private cloud (VPC) field and the Port field.
Create an SSH Server in your VPC
In this step, you will launch an EC2 instance to serve as the SSH server. This instance must reside in the same VPC as your database. Read Obtain the VPC ID of your Database for more information.
Perform the following steps to configure the SSH server:
-
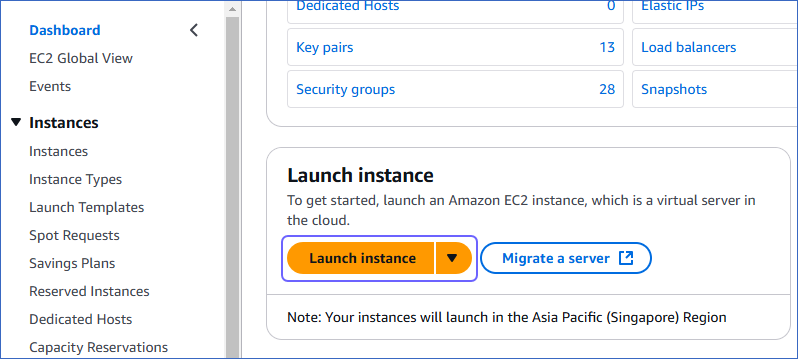
Open the EC2 Management Console in your AWS account.
-
On the EC2 dashboard, click Launch instance.
-
On the Launch an instance page, do the following:
-
In the Name and tags panel, specify a unique name for the EC2 instance. For example, HevoEC2.
-
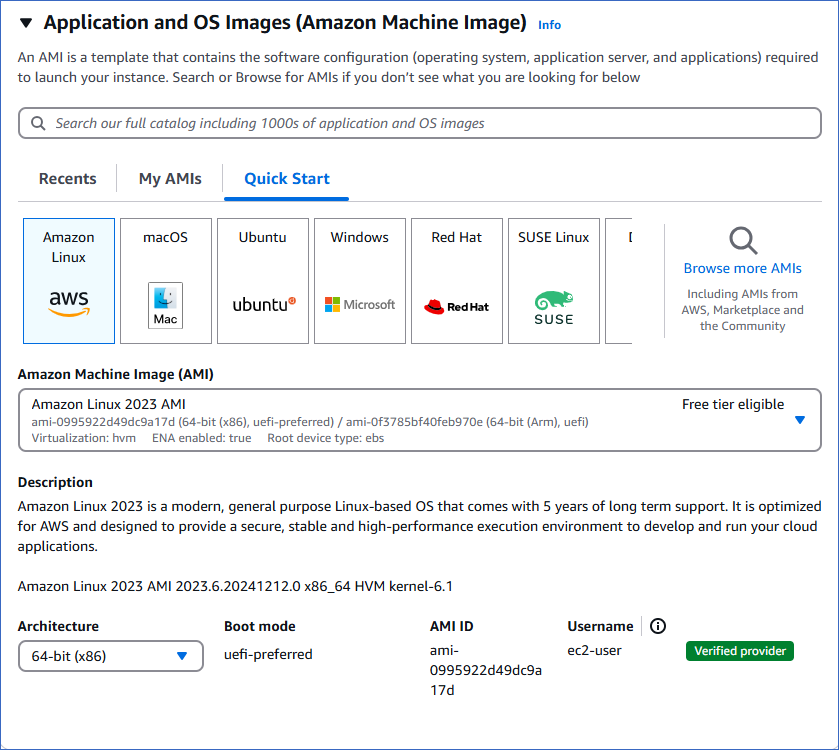
In the Application and OS Images (Amazon Machine Image) panel, select an Amazon Machine Image (AMI) from the available configurations. For example, the Amazon Linux or Ubuntu. Read Amazon Machine Images (AMI) to decide which AMI best suits your needs.
-
In the Instance type panel, select the hardware configuration of your instance. For example, t2.micro. Read Amazon EC2 instance types for more information.
-
In the Key pair (login) panel, do the following:
-
Click Create new key pair.

-
On the Create key pair page, specify a unique name for your key pair, and then click Create key pair.
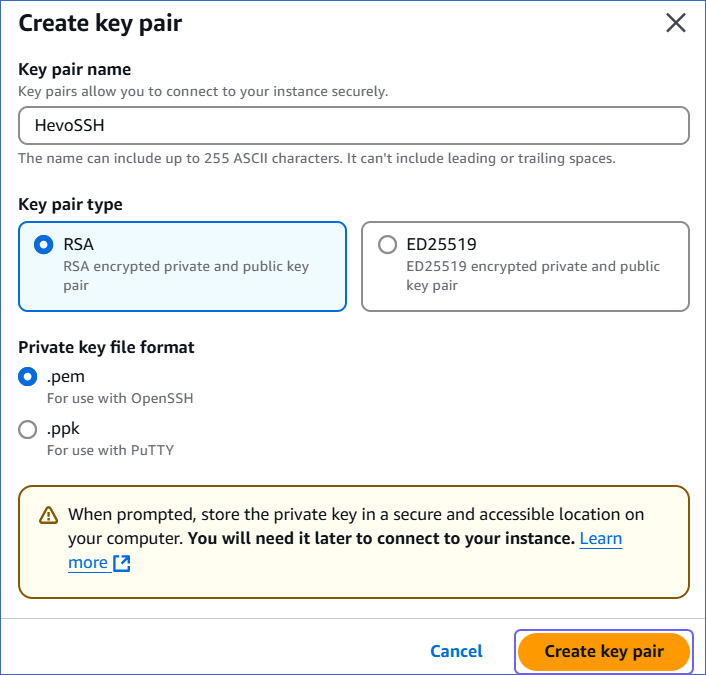
The key pair is successfully created and downloaded to your machine. Use this to connect to your EC2 instance (SSH server) through an SSH client.
-
-
In the Network settings panel, click Edit, and then specify the following:
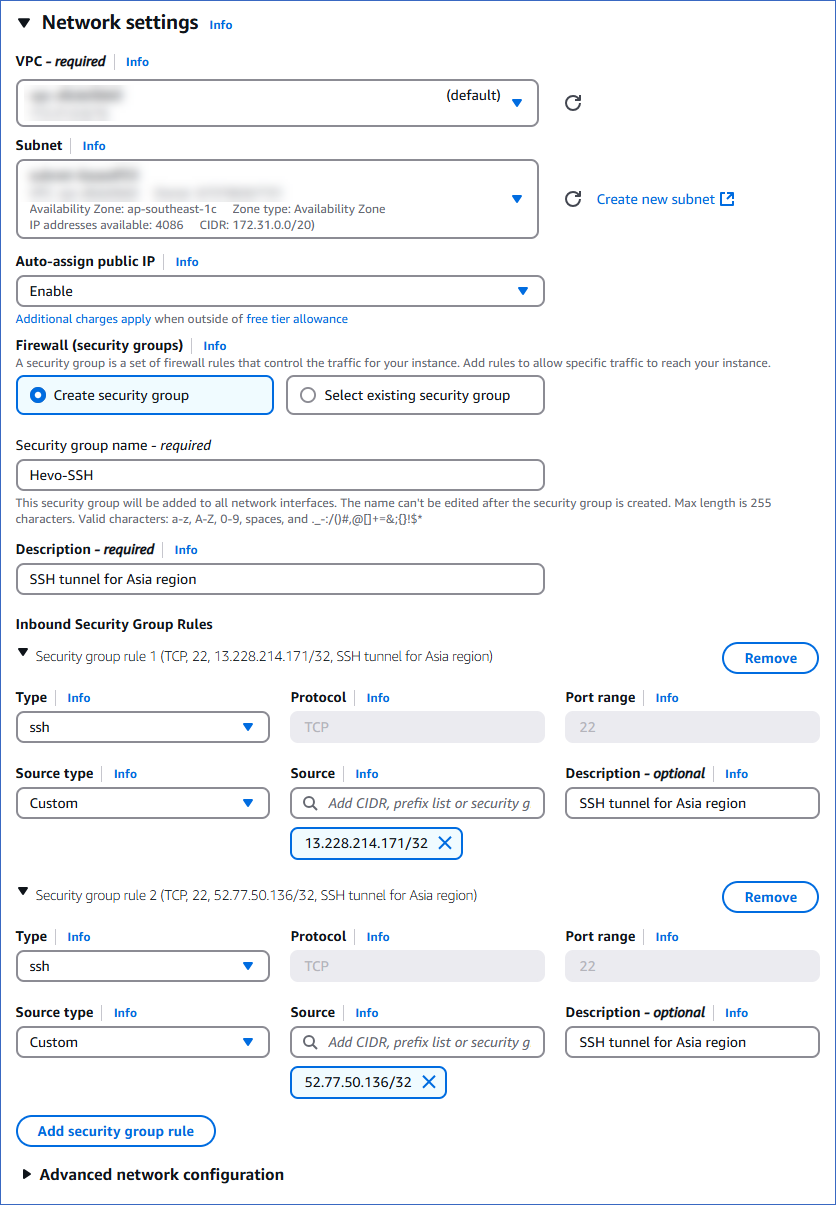
-
VPC: Select the same VPC as your database from the drop-down.
-
Subnet: Select a public subnet from the drop-down or leave it unchanged. Amazon auto-assigns a public subnet if you select No preference.
-
Auto-assign public IP: Select Enable from the drop-down to ensure the instance has a public IP address.
-
Firewall (security groups): Select Create security group to create a new security group for your SSH server.
-
Security group name: Specify a unique name for the security group. For example, Hevo-SSH.
-
Description: Specify a description for the security group.
-
In the Inbound Security Group Rules section, do the following:
-
Click Add security group rule.
-
From the Type drop-down, select ssh.
-
In the Protocol field, ensure that the value is set to TCP.
-
In the Port range field, ensure that the value is set to 22.
-
From the Source type drop-down, select Custom.
-
In the Source field, specify one of Hevo’s IP addresses for your region in the CIDR notation. To specify an individual IP address in the CIDR notation, suffix the address with the routing suffix /32. For example, 172.31.10.122/32.
-
Repeat steps 1 to 6 if you need to add more rules.
Note: To connect to the EC2 instance from your local machine, select My IP from the Source type drop-down in step 5.
-
-
-
-
Skip the configuration steps for Configure storage and Advanced details as this information is not required for the SSH tunnel instance.
-
In the Summary panel, review your instance settings, and then click Launch instance.
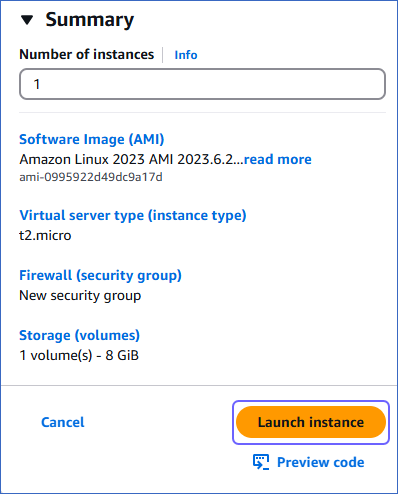
It takes a few minutes for the instance creation process to complete. The status in the EC2 Dashboard page changes to Running when the instance is ready.
Enable the SSH Server to Access the Database
In this section, you will configure access rules for the database and create a VPC security group to allow traffic from the EC2 instance (SSH server) to your database in the private subnet.
1. Retrieve the SSH Server’s Connection Details
To set up the database’s security group, you need the SSH server’s private IP address.
Perform the following steps to retrieve these details:
-
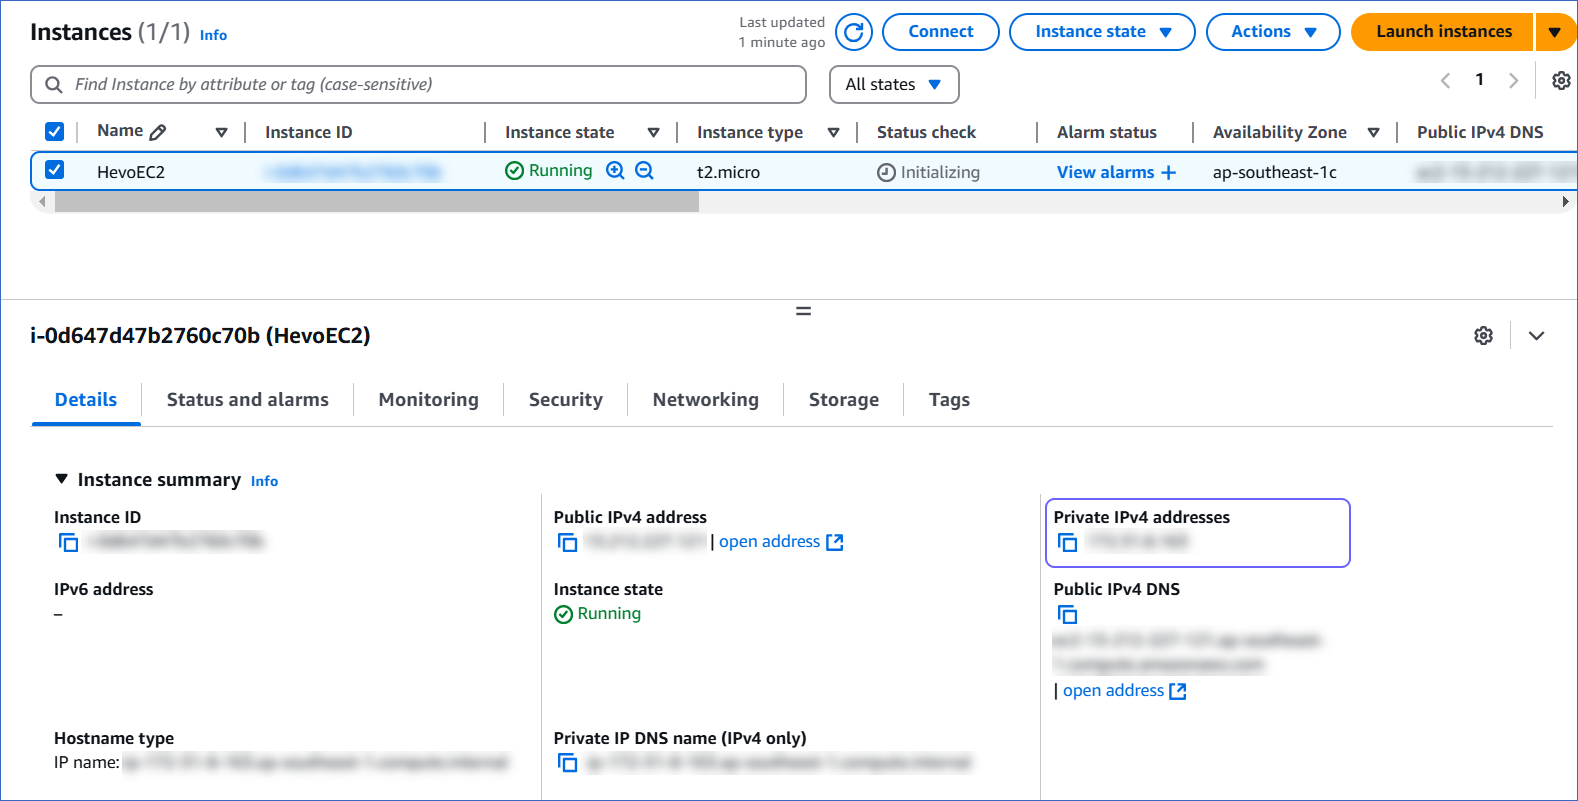
Open the EC2 Management Console in your AWS account.
-
On the EC2 dashboard, from the Instances menu, select Instances, and locate the EC2 instance (SSH server) that you created.
-
Click the instance to open its details.
-
Make a note of the value in the Private IPv4 addresses field. You need to provide this while creating a VPC security group to whitelist the SSH server.
2. Create a VPC Security Group and Whitelist the SSH server
To allow traffic from an SSH server to access the database, you must whitelist the SSH server’s private IP address in a security group.
Perform the following steps to create and configure the security group:
-
Open the EC2 Management Console in your AWS account.
-
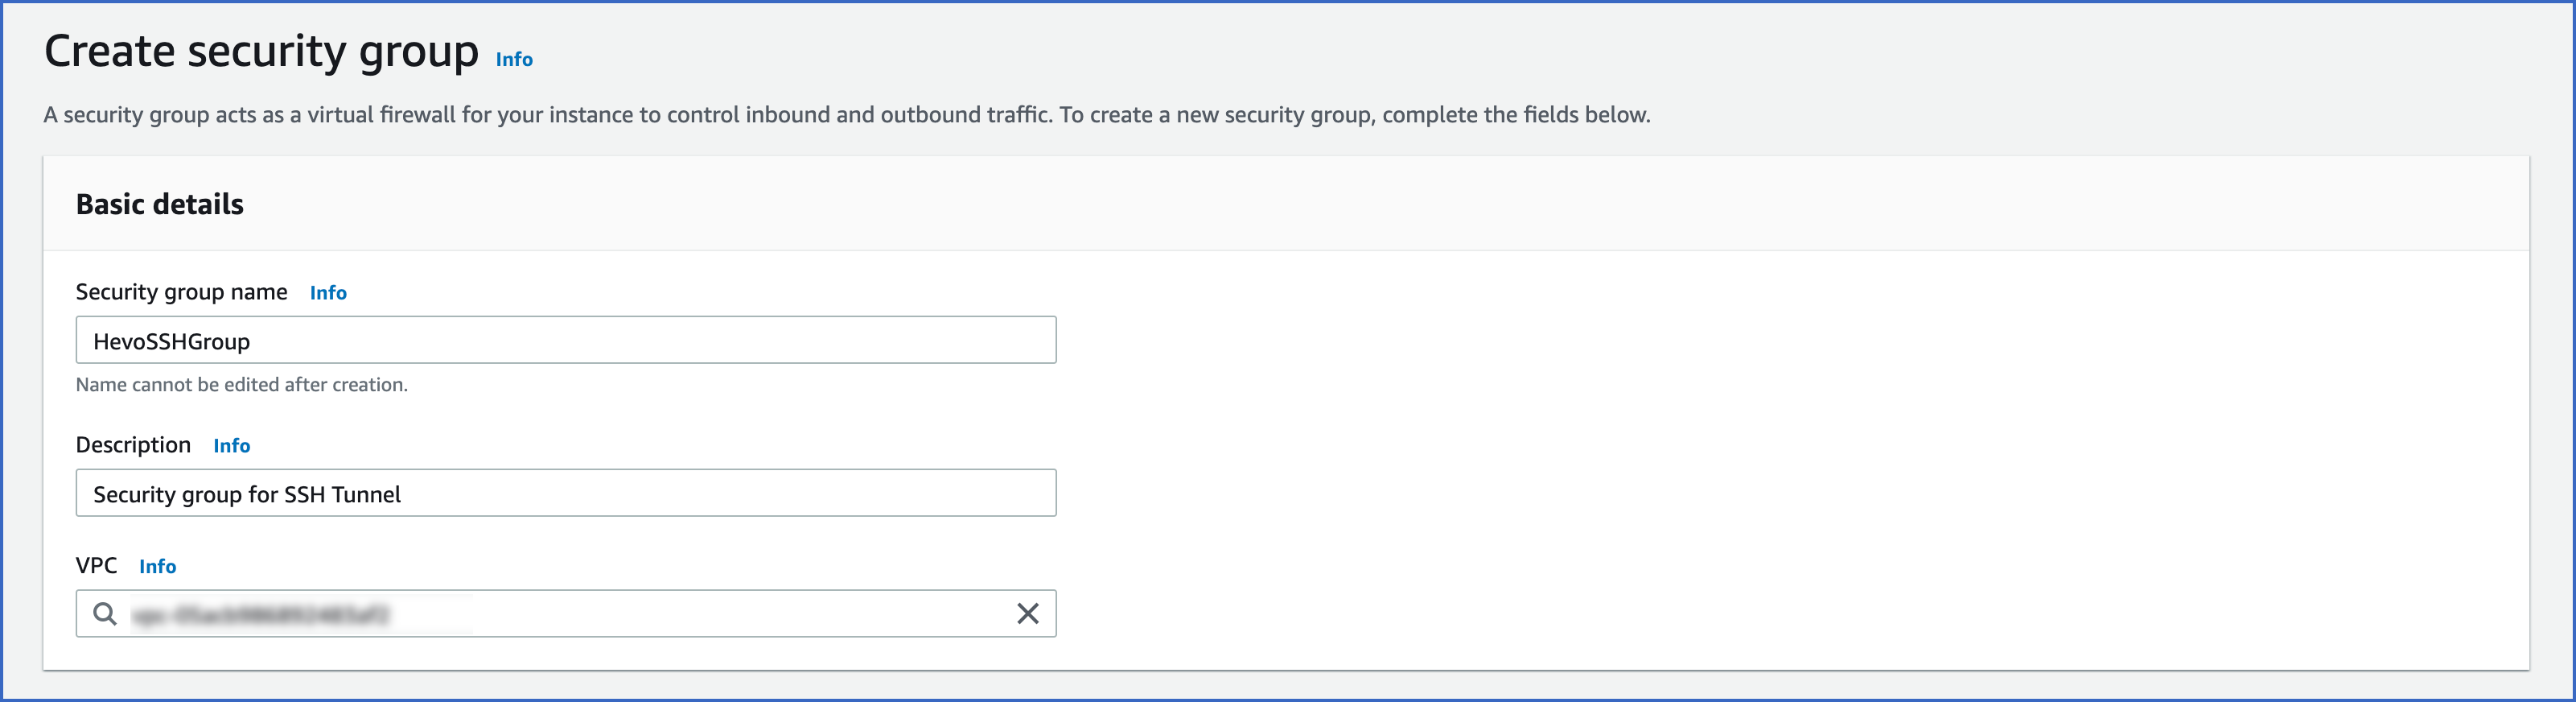
In the left navigation pane, from the Network and Security menu, select Security Groups and then click Create security group.

-
On the Create security group page, specify the following:
-
Security group name: Specify a unique name for the security group. For example, HevoSSHGroup.
-
Description: Provide a brief description of the group.
-
VPC: Select the VPC containing the database and the SSH server from the drop-down.
-
-
In Inbound rules, click Add rule, and specify the following:

-
Type: The type of protocol to allow. Set this to Custom TCP.
-
Protocol: The protocol to allow. This defaults to TCP; leave it unchanged.
-
Port Range: Specify the port used by the database you are connecting to Hevo. This can be the port number you obtained in Step 2. For example, the default value for a PostgreSQL database is 5432.
-
Source: The source to allow traffic from. Select Custom from the drop-down. In the field next to the drop-down menu, specify the SSH server’s private IP address in the CIDR notation. To specify an individual IP address in the CIDR notation, suffix the address with the routing suffix /32. For example, 172.31.10.122/32.
-
-
Click Create security group.
3. Associate the VPC Security Group with the Database
To allow traffic from the SSH server to access your database, you must associate the VPC security group created in the previous step with the database.
To associate the security group with the database, log in to your AWS account and follow the steps mentioned below for your database type:
Connecting to an RDS database
-
Open the Amazon RDS console in your AWS account.
-
In the left navigation pane, click Databases.
-
In the Databases section on the right, click the DB identifier of the database you are connecting to Hevo.
-
Click Modify to open the Modify DB Instance page.

-
In the Connectivity panel, in the Security group drop-down, select the VPC security group created in the previous step.

-
Click Continue to review the changes and schedule the modifications.
-
Select the schedule in the Scheduling of modifications panel.
-
Click Modify DB Instance.
Connecting to a Redshift database
-
Log in to the Amazon Redshift dashboard.
-
Click the hamburger menu at the top left corner of the dashboard.
-
In the left navigation pane, click Clusters.
-
In the In my account tab, Clusters section, click the cluster you want to connect to Hevo.
-
Under the Properties tab, in the Network and security settings panel, click Edit.
-
On the Edit network and security page, in the VPC security groups drop-down, select the VPC security group created in the previous step.
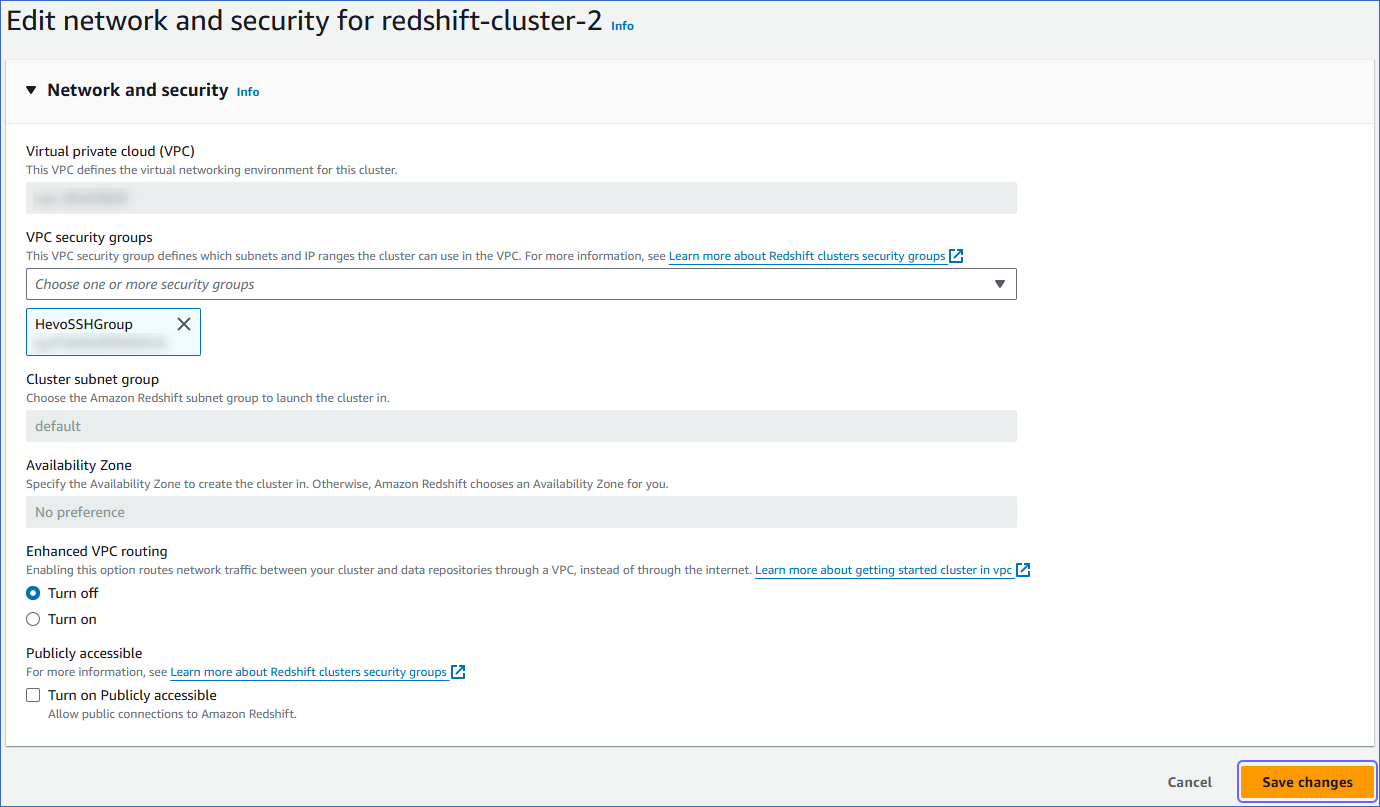
-
Click Save changes.
Your SSH server is now configured successfully. Refer to Connecting Through SSH to connect your Source database through SSH in Hevo.
Revision History
Refer to the following table for the list of key updates made to this page:
| Date | Release | Description of Change |
|---|---|---|
| May-19-2025 | NA | New document. |