Setting up Pricing Plans, Billing, and Payments
On This Page
Starting Release 2.17, Hevo has stopped supporting the purchase of On-Demand Events. However, you can continue to use any On-Demand Events already bought until they are exhausted.
Once you select the subscription or pricing plan that best meets your requirements, you can configure it in Hevo and set up your billing details.
If you have subscribed to Hevo from AWS Marketplace, you can view your subscription details in Hevo. For example, the following image shows a Business plan that offers 10 Million Events per month and bills any subsequent Events as per consumption.

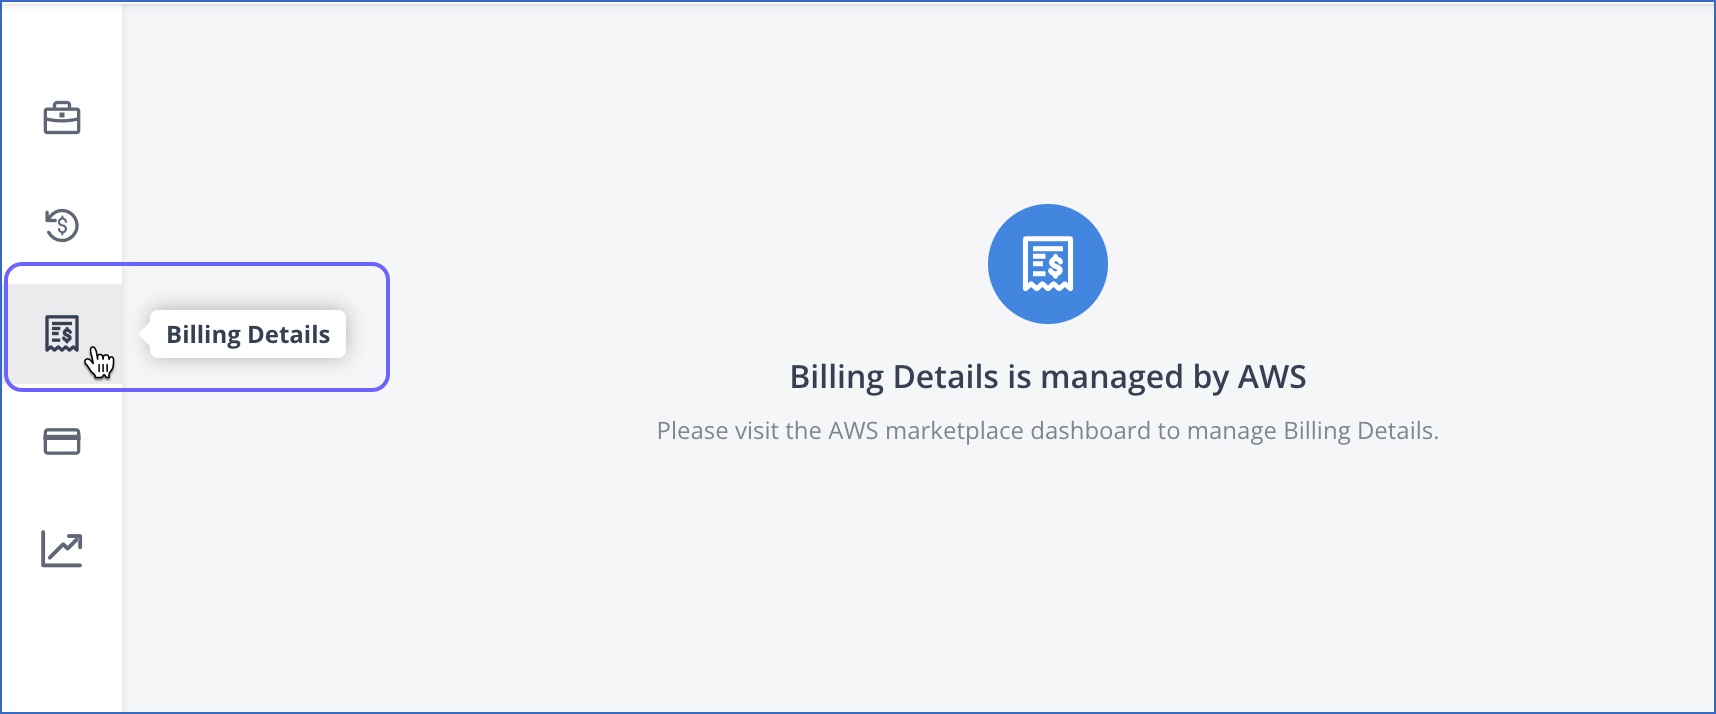
All your other billing-related details are managed by AWS. A message similar to the following is displayed when you try to access, for example, your payment methods and billing details on the Hevo platform:
For customers who signed up via the Hevo website, payments are processed through the Stripe payment gateway. At the start date of the billing period, any charges that are due are auto-debited from the card account you provide. For example, in the case of a monthly pricing plan, this would be the start of the billing month. Charges for On-Demand Credits are applied at the end of the monthly cycle for monthly plans, and at the end of the month for annual plans.
The pricing plans, billing, and payment details are separate for each workspace created in Hevo. For example, let us suppose you have two workspaces, WS1 and WS2. Then, both workspaces must set up their pricing plan and payment details separately. Also, billing is done separately for both workspaces.
Prerequisites
- You are assigned the Team Administrator or Billing Administrator role in Hevo, to access the Billing section.
Selecting a Pricing Plan
Plan selection is the first step to setting up your billing and Stripe payment details in the Hevo platform.
Note: Each workspace in Hevo must select a pricing plan according to its requirements.
To select the pricing plan:
-
Click the drop-down next to your profile name in the top right corner of the Hevo user interface.
-
Click Billing.
-
In the Select Plan section, select the required plan by doing one of the following.

-
To select the Free plan:
-
Click Select Free Plan.
-
Click Confirm in the dialog that appears.
-
-
To select a Starter plan:
-
Optionally, use the slider to select the number of Events you need. The plan cost is updated to reflect the changed count.By default, 5 Million Events are included.
-
Click Select STARTER Plan.
-
Next, provide the billing and payment details.
-
-
To select a Professional plan:
-
Optionally, use the slider to select the number of Events you need. The plan cost is updated to reflect the changed count.By default, 5 Million Events are included.
-
Click Select PROFESSIONAL Plan.
-
Next, provide the billing and payment details.
-
-
To create a customized Business plan:
-
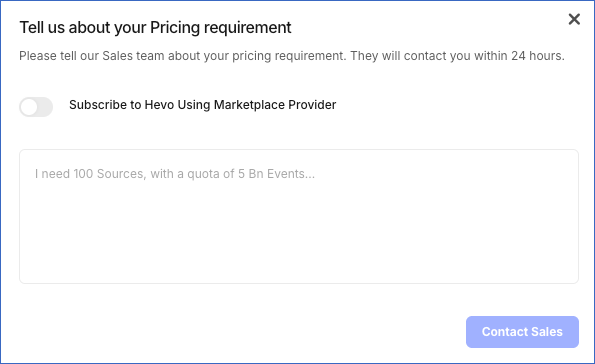
Click Contact Sales.
-
In the dialog box that appears, specify your requirements including the number of Sources, Events, and Models.
-
Note: You can change your selection any number of times while setting up the pricing plan for the first time.
-
Configuring Billing and Payment Details
Hevo offers the following payment methods, based on the pricing plan:
-
Credit and Debit Cards: Hevo supports all major credit and debit cards, such as Visa, Mastercard, American Express, Discover, JCB, and Diners Club for all the pricing plans. Refer to section, Set up the Payment Method for the steps to configure a payment method.
-
Wire Transfer: Hevo supports this method only for annual plans. If you need to set up a wire transfer for your account, contact Hevo Sales or Support.
Note:
-
You can skip this section if you have selected the Free or Business plan. You do not need to provide payment details for Free plans. For the Business Custom Pricing plan, a payment link is shared by the Hevo sales team.
-
Each workspace created in Hevo must set up its billing, and payment details separately.
-
All payments are made in USD.
-
You cannot pause billing for a plan that you have purchased.
Set up the Billing Details
You need to provide your billing and communication details to make a payment on Hevo.
To set up the billing details for the first time:
-
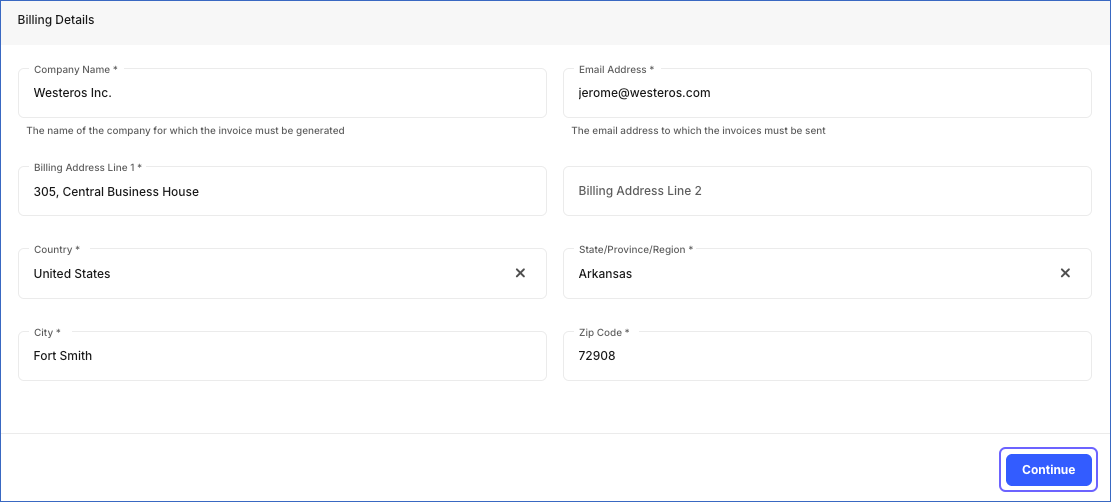
Once you select the Starter Plan, the Billing Details section is displayed. In the Billing Details section, provide details such as the Billing Name, Email Address, Billing Address, Country, City and Zip Code.
Note: Invoices are sent to the email ID you provide here.
-
Click Continue to save the billing details.
To edit the saved billing details:
-
On the top right, click the drop-down next to your username, and then click Billing.
-
In the left navigation bar, click Billing Details.
-
Click Edit Info.

-
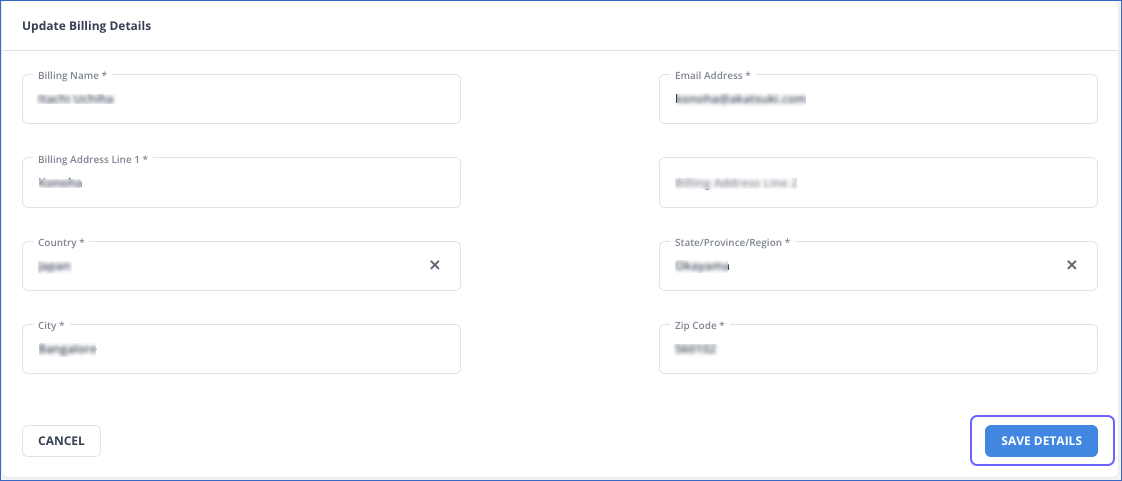
In the Update Billing Details section, provide the details to update the exiting information.
-
Click SAVE DETAILS.
Set up the Payment Method
Perform the following steps to configure your payment method:
1. Add a Card
Once you save your billing details, the Payment Methods section appears.
To add a card for the first time:
-
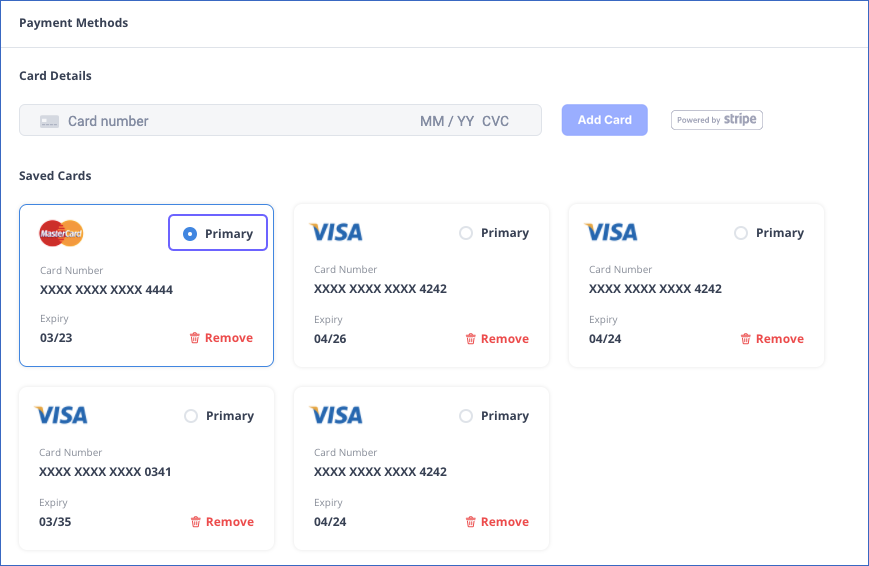
In the Payment Methods section, add your credit or debit card number, date of expiry, and CVC code. Hevo makes a nominal debit on the card to verify the details. This charge is later reversed.
-
Click Add Card. By default, the newly added card is made the primary card and charges are incurred on this card. You can change the primary card at any time.

To view the existing card or add new card details:
-
In the drop-down next to your username on the top right, click Billing.
-
In the Billing page, click Payment Methods in the left navigation bar.
Note: You can view the previously saved cards, if any.
-
Add your credit/debit card number, date of expiry, and CVC code. Hevo makes a nominal debit on the card to verify the details. This charge is later reversed.
-
Click Add Card. By default, the newly added card is made the primary card and charges are made on this card by default. You can change the primary card at any time.

2. Specify the Primary Card
If you have added multiple cards in Hevo, you can select any of these as the primary card. To do this:
- Go to the Payment Methods section and hover the cursor on the desired card.
-
Click Primary to make the card your primary card.
Delete a Card
To delete a card:
- Go to the Payment Methods section and hover the cursor on the card you want to delete.
- Click Remove to delete it. If you delete the primary card, the card added last is made the primary card.
Note:
- Contact Hevo Support if you need to delete all your cards.
- Your card details are automatically deleted if you delete your Hevo account.
Modifying a Pricing Plan
You can change your pricing plan if your requirements and usage change. The plan you select must offer as many or more resources as you are currently using. Accordingly, only eligible plans are available for selection. Any modifications in the pricing plan of one workspace do not affect the plans of other workspaces.
When you upgrade your plan, Hevo charges you for the new plan on a pro-rata basis. Read Prorations.
Note: You must have the Billing Administrator role to update the pricing plan.
-
Click the drop-down next to your profile name in the top right corner of the Hevo user interface.
-
Select Billing. You can view the details of your current pricing plan in the Plan Details page.
-
Click Change Plan.

-
On the Select Plan page, do one or more of the following:

-
Select a different plan if you are on a Free plan.
-
To modify the Starter plan:
-
Optionally, move the cursor to adjust the number of Events in the plan.
-
Optionally, shift from monthly to yearly billing.
Note: You cannot return to monthly billing once you switch to yearly billing.
-
Click Update STARTER Plan.
-
-
To modify the Professional plan:
-
Optionally, move the cursor to adjust the number of Events in the plan.
-
Optionally, shift from monthly to yearly billing.
Note: You cannot return to monthly billing once you switch to yearly billing.
-
Click Update PROFESSIONAL Plan.
-
-
To upgrade to a Business Plan:
-
Click Contact Sales.
-
Provide your requirements in the dialog box that appears and again, click Contact Sales.
The Hevo Sales team will contact you within 24 hours.

-
-
See Also
Revision History
Refer to the following table for the list of key updates made to this page:
| Date | Release | Description of Change |
|---|---|---|
| Dec-03-2025 | NA | Updated the document as per the latest Hevo UI. |
| Feb-05-2022 | 2.20 | Added information about the Professional pricing plan. |
| Jan-10-2024 | 2.19 | Updated the page overview to include information about AWS Marketplace-based contracts. |
| Dec-29-2023 | NA | Merged FAQ, Can I pause billing for some time if there are no active Pipelines in my account? to this document. |
| Mar-09-2023 | NA | Merged FAQs, When will I be charged for my subscription? and What are the payment methods available in Hevo? into this document. |
| Aug-02-2022 | NA | Updated the page to include information about allowing multiple accounts to sign up using the same domain name. |
| Aug-01-2022 | NA | Updated the page contents to reflect the new pricing plans effective from Aug 1, 2022. |
| Mar-21-2022 | NA | Updated the section, Configure Billing and Payment Details as per the latest UI. |
| Dec-20-2021 | 1.78 | Added a note in the Delete a Card section to inform that the card details are deleted automatically on deletion of Hevo account. |
| Nov-09-2021 | NA | Added a See Also link to the Pipeline Frequency and Events Quota Consumption page. |
| Jun-28-2021 | NA | Updated the Modifying a Pricing Plan section to mention proration-based charge upon plan change. |
| May-05-2021 | 1.62 | Updated the sections Selecting a Pricing Plan and Modifying a Pricing Plan as per the latest UI. |
| Mar-09-2021 | 1.58 | - Updated the content to reflect the latest Hevo pricing plans. - Updated the Configuring Billing and Payment Details section to mention that billing details are not required for Free plans. |