Modifying Schema Mapping for Event Types
On This Page
You can modify the schema mapping between a Source Event Type and a Destination table post-Pipeline creation to do the following:
-
Change the Destination fields to which you want to map the Source schema.
-
Remove the mapping for a field.
-
De-select fields of an Event Type so that they are not loaded to the Destination.
-
Change the Destination table the Event Type is mapped to.
-
Create a new Destination table and mappings.
-
Delete an existing Destination table.
-
Delete the mapping for an Event Type.
Refer to the sections in this page for steps to perform these actions.
If you disable Auto-Mapping that you had previously enabled, the existing mapping for each Event Type remains unchanged, and its status remains as MAPPED. However, you must specifically edit the mapping to apply future changes.
If a Source Event Type field has a null value, it is not displayed in the Schema Mapper. To display it, at least one of the following must occur:
-
An Event containing a non-null value is generated for it in the Source.
-
You insert a default value in the field by writing a Transformation.
Prerequisites
- You must be assigned the Team Administrator, Team Collaborator, Pipeline Administrator, or Pipeline Collaborator role in Hevo, to modify the schema.
Modifying Existing Field Mappings
You can manually modify the mapping for the Source Event Types to map them to a different Destination field, ignore some fields so that they are not loaded, or include previously skipped fields.
Note: Ignoring frequently updated fields for a Source Event Type does not lower the number of Events consumed. If the method used to capture changes in the Source data marks the Event Type for ingestion, all changed Events will be processed.
To modify the schema mapping for an Event Type:
Note: The following steps are applicable for both Auto Mapped and manually mapped Event Types.
-
In the Schema Mapper page, click on the required Event Type.

-
In the Mapping Summary section, click EDIT MAPPING.

-
Modify the mapping as required, and click APPLY CHANGES.

-
In the confirmation dialog, do the following:
-
(Optional) De-select the mapping changes that you do not want to apply.
-
Click EDIT MAPPING.

You can also click the Query drop-down to view the query that Hevo executes at the Destination side to edit the mapping.
-
Changing the Destination Table
You can select a different Destination table to map the Source Event to and edit the mapping of the fields.
Prerequisite: Auto-mapping is disabled for the Event Type to be mapped.
To change the Destination table:
-
Do one of the following:
-
In the MAPPING SUMMARY pane, click the arrow next to the Destination Table name. Click Change Destination Table.

-
Click EDIT MAPPING in the Mapping Summary page. Then, click the Destination Table drop-down.

-
-
Select the new table from the Destination Table drop-down.
-
Map the Source Fields to the Destination Fields. Any items needing your attention are highlighted on screen.
-
Take the appropriate actions, as required, and click APPLY CHANGES.

Note: You can only map fields with compatible data types. Else, a warning icon is displayed. Further, only data types that can best accommodate the Source and Destination field types are available for selection.
Mapping an Event Type to a New Destination Table
You can create a new table in the Mapping Summary page if you want to:
-
Map previously skipped Event Type to a Destination table.
-
Change the existing Destination tables that do not meet your requirements.
-
Define the cluster keys in case of Google BigQuery Destination.
Prerequisite: Auto-mapping is disabled for the Event Type to be mapped.
To map an Event Type to a new Destination table:
-
Click Create Table & Map in the Destination table drop-down.

Hevo creates a table with fields that match the Source fields. It then creates the default mapping and assigns names to the Destination fields based on any previous mappings that existed or the Source field names, in that order.

You can choose to retain the default settings or change them.
-
Specify a unique Destination Table Name.
Note: Hevo validates the length of the table and column names that you create in the Destination to ensure these are within the character limits set by the Destination.
-
For Google BigQuery tables:

-
Select the Partition Style. This can be:
-
No Partition: Tables are not partitioned.
-
Ingestion Time Based: Tables are partitioned based on the data ingestion (load) date or when these are written to Google BigQuery. Read Introduction to partitioned tables.
-
Field Based: Tables that are partitioned based on a TIMESTAMP or DATE column.
-
-
Select the Partition Type. This can be Hour, Day, Month, or Year. Default value: Day.
-
-
For each Source field, specify the corresponding Destination Field Name.
-
In the Data Type drop-down, select the data type for the Destination field. Only the data types compatible with the Source field are available for selection.
Note: You cannot define fields with Array and Struct data types as cluster keys in BigQuery Destination tables.
-
Optionally, use the Up/Down arrow next to a Source Field name to move it up or down in the list.
-
Optionally, select the check box next to a field to include it in the mapping and load data for it to the Destination, if it was previously ignored.
-
Optionally, in the Primary Key column, select the check box for the field you want to mark as a primary key.
-
Optionally, in the Partition Key column, select the field you want to mark as a partition key. This partitions the data of the selected field. Partitioned tables help you run more efficient queries by reducing the amount of data read in each query. Read Partitioning in BigQuery.
-
Optionally, in the Cluster Key column, select the fields you want to mark as cluster keys. This is applicable only for the Google BigQuery data warehouse Destinations. Read Clustering in BigQuery.
Note: You can select a maximum of four fields as cluster keys.
-
Optionally, click the DELETE icon for a row if you do not want to add that field to the Destination table.
-
Click CREATE TABLE & MAP.
-
Click CONFIRM in the dialog box that appears. The new table is created and mapped to the Source Event Type.

Read about Mapping a Source Event Type Field with a Destination Table Column.
Deleting a Destination Table
Deleting a Destination table is not specifically required for modifying the schema mapping of an Event Type. However, you can use Schema Mapper to view the Destination tables and perform any cleanup, such as deleting a table. When you delete a table, the associated mappings are also discarded.
Prerequisite: Auto-mapping is disabled for the Event Type to be mapped.
To delete a table:
-
Do one of the following in the Mapping Summary page:
-
Click Drop Table in the Destination table drop-down.

-
Click EDIT MAPPING. Search for the table you want to delete and click the Delete icon next to it.

-
-
Click YES, I AM SURE in the confirmation dialog that is displayed, to delete the table.
Note: Deleting a table is a permanent action and cannot be undone. All the data loaded to the table from any Source is also deleted and cannot be restored. Therefore, you must carefully consider your decision to delete a table.

Deleting the Mapping for an Event Type
You can remove the schema mapping of the complete Event Type directly from the Schema Mapper page. While the data is still ingested for that Event Type, it remains unmapped to the Destination till you enable Auto Mapping again or map the Event Type manually.
To delete the mapping for an Event Type:
-
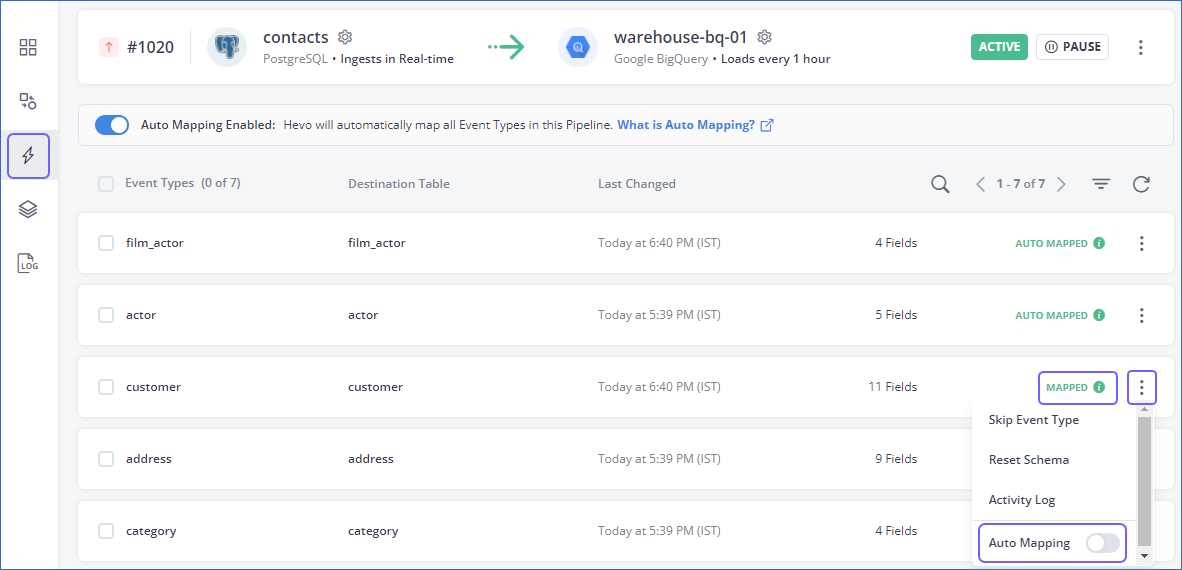
In the Schema Mapper page, click the More (
 ) icon corresponding to the respective Event type, and disable the Auto Mapping option.
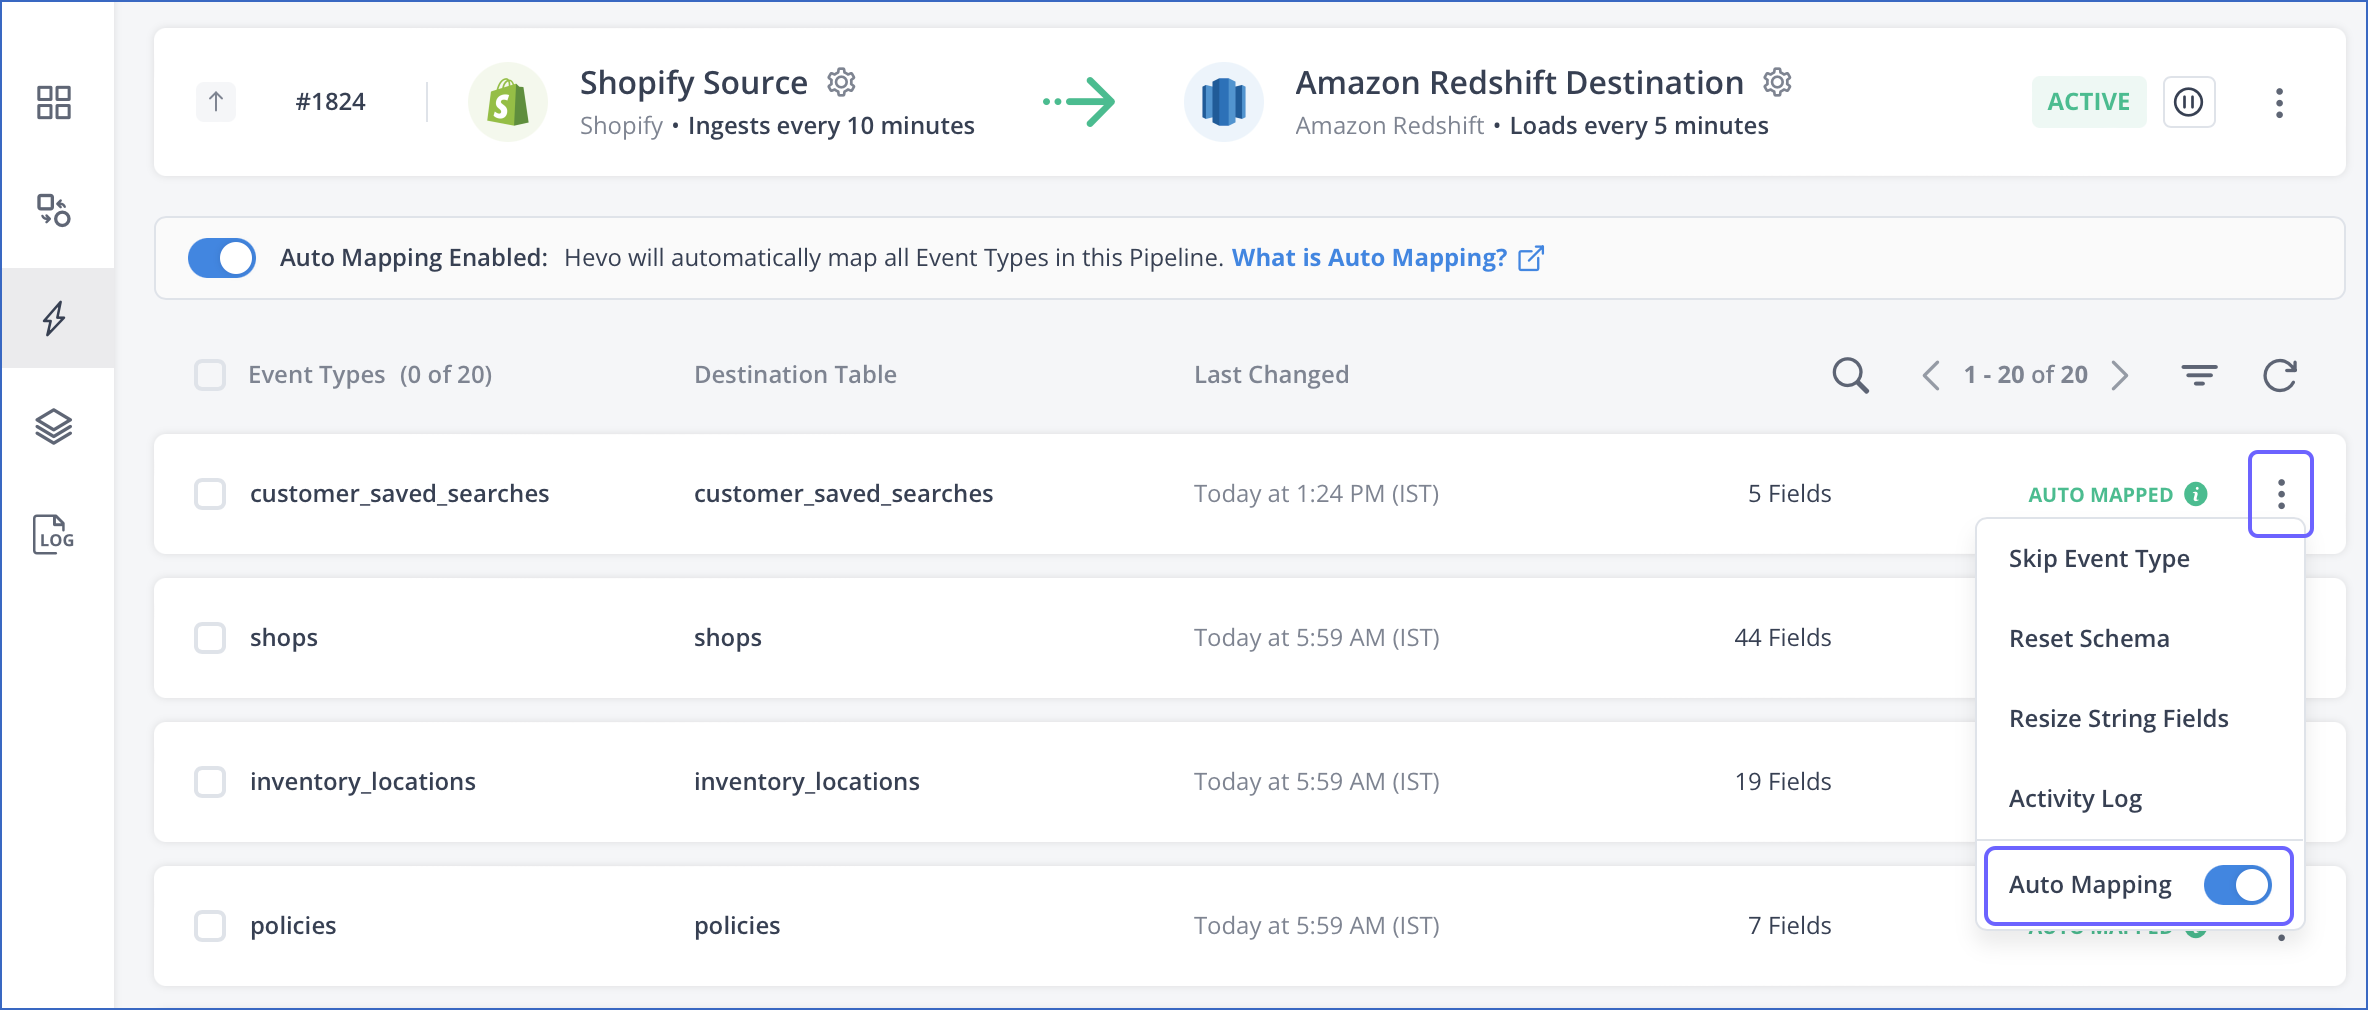
-
Click the Event Type for which you disabled Auto Mapping.
-
In the Mapping Summary section of the page that appears, click DELETE MAPPING.

-
In the confirmation dialog, click CONFIRM.

See Also
Revision History
Refer to the following table for the list of key updates made to this page:
| Date | Release | Description of Change |
|---|---|---|
| Apr-19-2025 | NA | Updated the Modifying Existing Field Mappings section to add clarification about ignored fields not affecting Events consumption. |
| Mar-09-2023 | NA | Updated the page overview to add information about an Event Type not being displayed when it has a field with a null value. |
| Jan-10-2023 | 2.05 | - Added section, Modifying existing field mappings and Deleting the Mapping for an Event Type. - Removed section, Prerequisites and added the content to respective sections. Also, removed section, Accessing the Mapping Summary Page. |
| Apr-11-2022 | 1.86 | Organized the content for better understanding and coherence. |
| Dec-10-2021 | NA | Updated the screenshots to reflect the latest UI. |
| Aug-09-2021 | 1.67 | Updated Step 3 of the section, Mapping an Event Type to a new Destination table. |
| Apr-06-2021 | 1.60 | Updated the section Mapping an Event Type to a new Destination table to include steps to enable clustering and partitioning for Google BigQuery Destinations. |
| Mar-23-2021 | 1.59 | - Added the section Deleting a Destination table. - Added the section Mapping an Event Type with a new Destination table. - Updated the sections to reflect the detailed steps and latest UI. |