MongoDB Atlas
On This Page
After you have selected MongoDB Atlas as the Source for creating the Pipeline, provide the connection settings and data replication details listed here on the Configure your MongoDB Atlas Source page. You can fetch the database settings from your MongoDB Atlas account.
You can connect to the MongoDB database in one of the following ways:
-
By specifying the individual connection fields such as database host, database port, username, and password.
-
By entering the connection URI to connect to your MongoDB replica set or sharded cluster.
Connection URIs are of two types:
-
DNS Seedlist: This type of connection URI has the prefix
mongodb+srv://.For example,
mongodb+srv://Jerome:Hevo123@cluster0.t7l5k.mongodb.net/test.The
+srvpart indicates that the hostname corresponds to a DNS SRV record. The hostnames and port values for your MongoDB database are fetched from the DNS SRV record. -
Standard Connection String: This type of connection URI has the prefix
mongodb://. This contains a comma-separated list of host:port combinations.For example,
mongodb://Jerome:Hevo123@cluster0-shard-00-00.t7l5k.mongodb.net:27017,cluster0-shard-00-01.t7l5k.mongodb.net:27017,cluster0-shard-00-02.t7l5k.mongodb.net:27017/test?replicaSet=atlas-uax6f3-shard-0&ssl=true&authSource=admin.In the above example,
Jeromeis the database user andHevo123is the password for the database user.
-
Prerequisites
-
The MongoDB version is 3.6 or higher, up to 8.1.
-
Database settings of your MongoDB Atlas account are available.
-
You are assigned the Team Administrator, Team Collaborator, or Pipeline Administrator role in Hevo, to create the Pipeline.
Perform the following steps to configure your MongoDB Atlas Source:
Set up Permissions to Read MongoDB Atlas Databases (Optional)
You need to assign the required permissions to the database user to access the different MongoDB Atlas databases.
To do this, you can create a custom role and assign it to the database user. Or, you can provide pre-defined MongoDB roles to the database user.
1. Create a custom role
To create a custom role:
-
Log in to the MongoDB Atlas console.
-
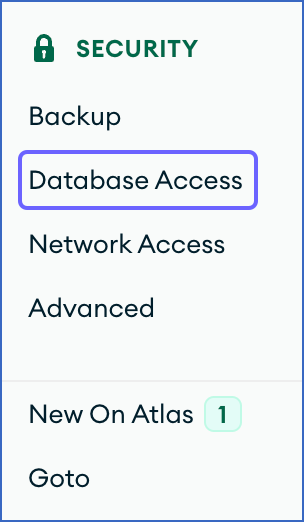
In the left navigation pane, under Security, click Database Access.

-
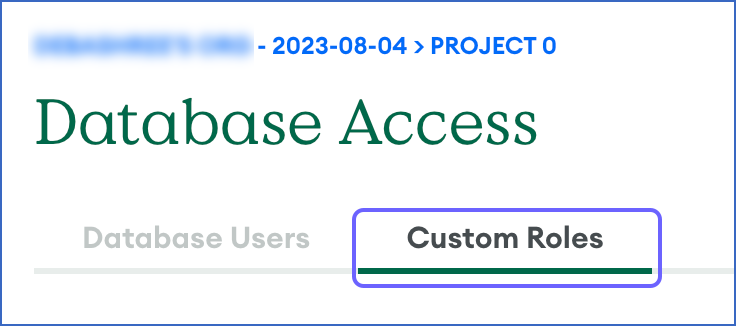
On the Database Access page, click the Custom Roles tab.
-
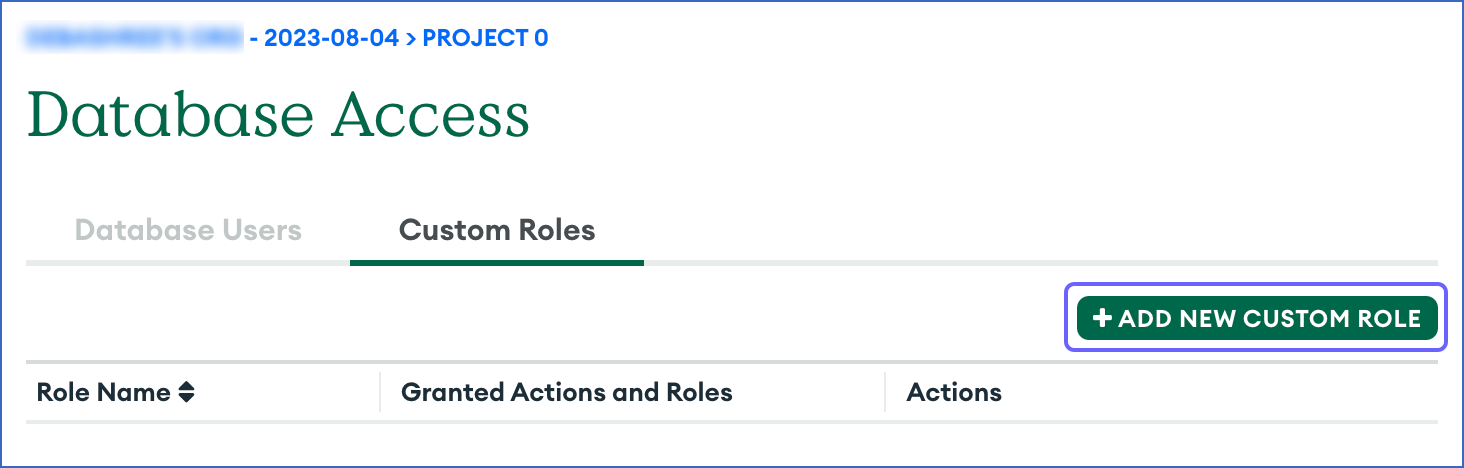
Click +ADD NEW CUSTOM ROLE.
-
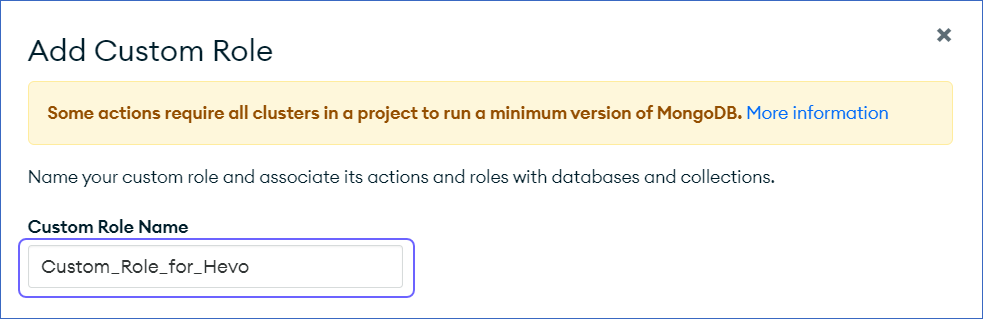
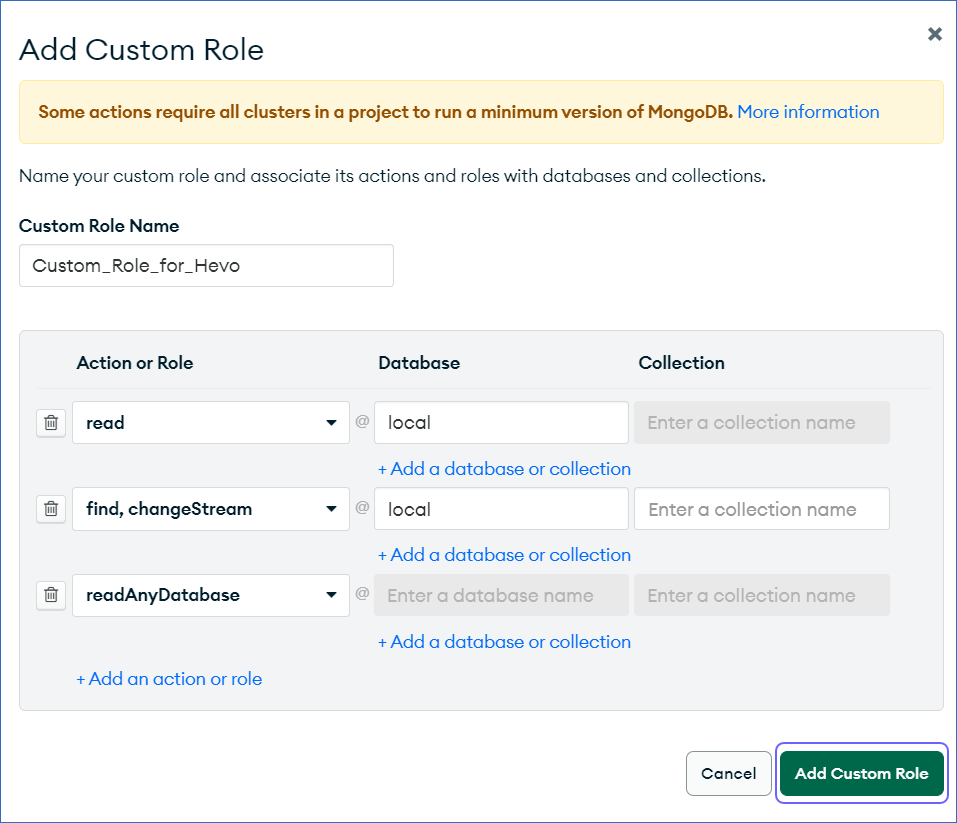
In the Add Custom Role pop-up window, specify the Custom Role Name.
-
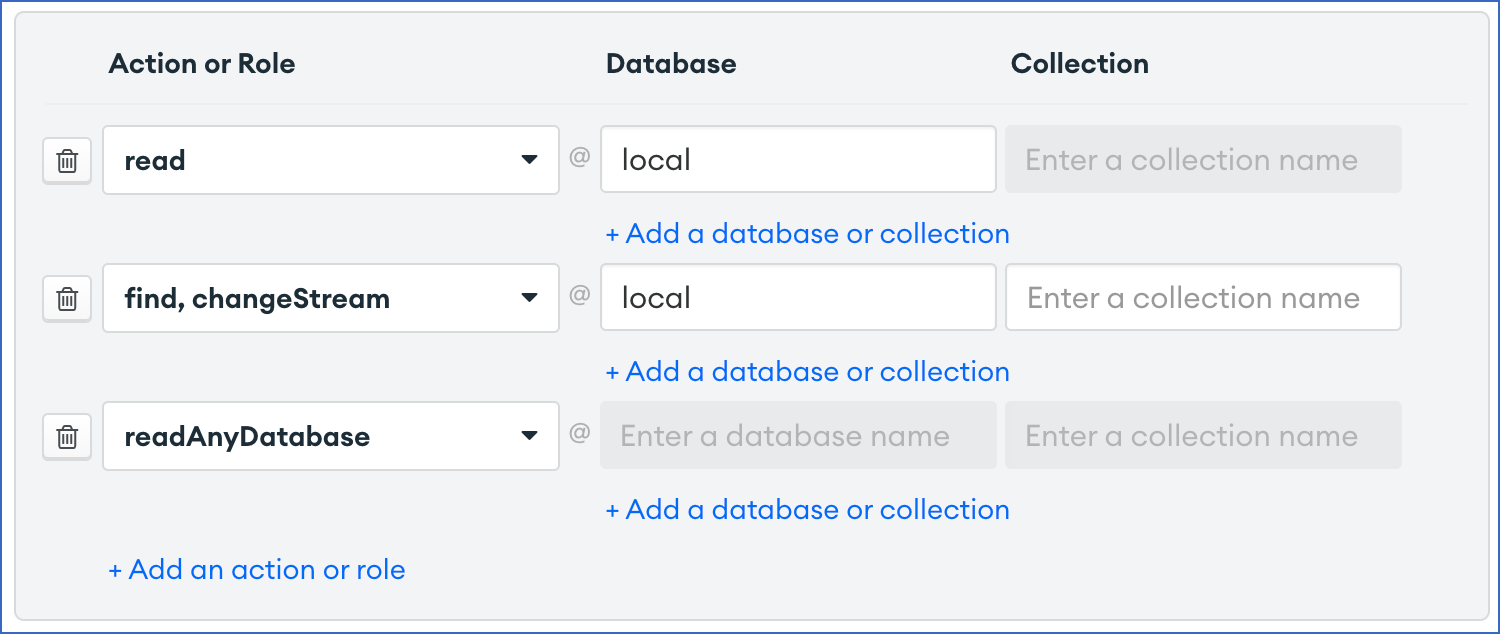
Assign the required action or role:
-
If want to use the Change Streams ingestion mode for your Pipeline:
-
Assign either the
readrole or thelistCollectionsaction on thelocaldatabase. -
Assign either the
readrole or thefindandchangeStreamactions on the database(s) you want to ingest. -
Assign either the
readAnyDatabaserole or thelistDatabasesaction on theadmindatabase. This is mandatory if you want to load data from all the databases, which is indicated by selecting the Load All Databases option during MongoDB Atlas Source configuration.
-
-
If want to use the OpLog ingestion mode for your Pipeline:
-
Assign either the
readrole or thefind,listCollections, andlistIndexesactions on the database(s) you want to ingest. -
Assign the
readrole on thelocaldatabase.
-
-
-
Click Add Custom Role.
2. Create a database user
To create a database user:
-
Log in to the MongoDB Atlas console.
-
In the left navigation pane, under Security, click Database Access.
-
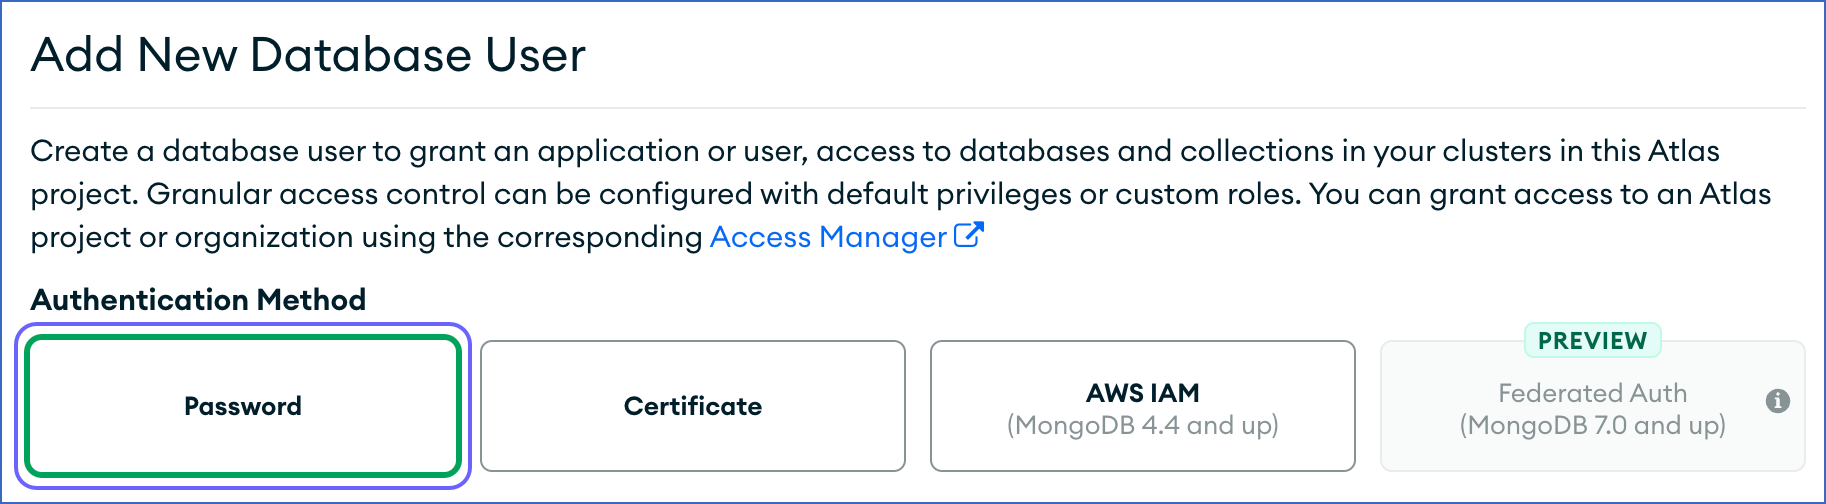
Click + ADD NEW DATABASE USER.

-
Select Password as the Authentication Method.
-
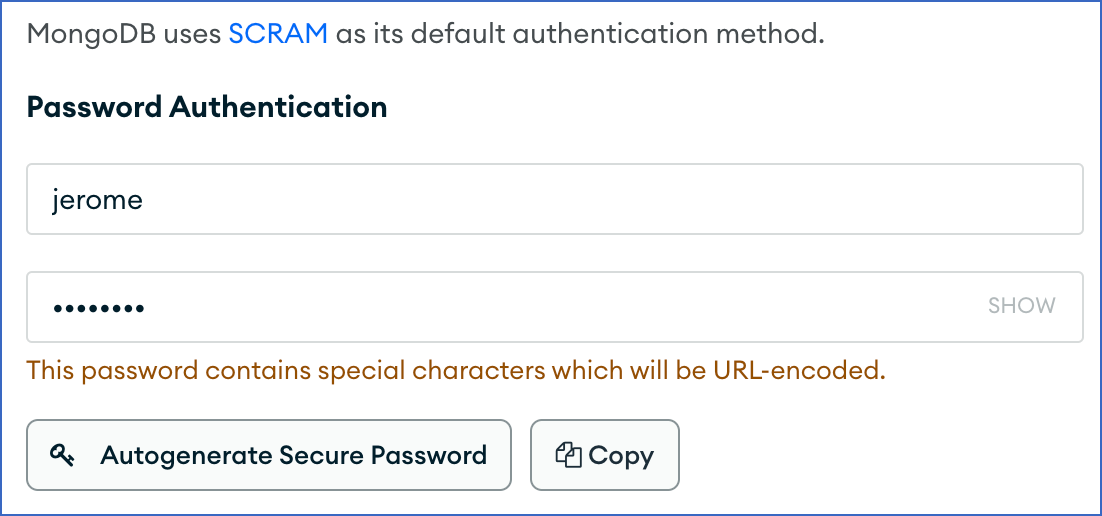
Under Password Authentication, specify the new username and password.
-
In the Database User Privileges section, do the following:
-
For custom roles created in the previous step:
-
Click Custom Roles.

-
Click Add Custom Role and select the role that you created above.

-
-
For specific MongoDB privileges:

-
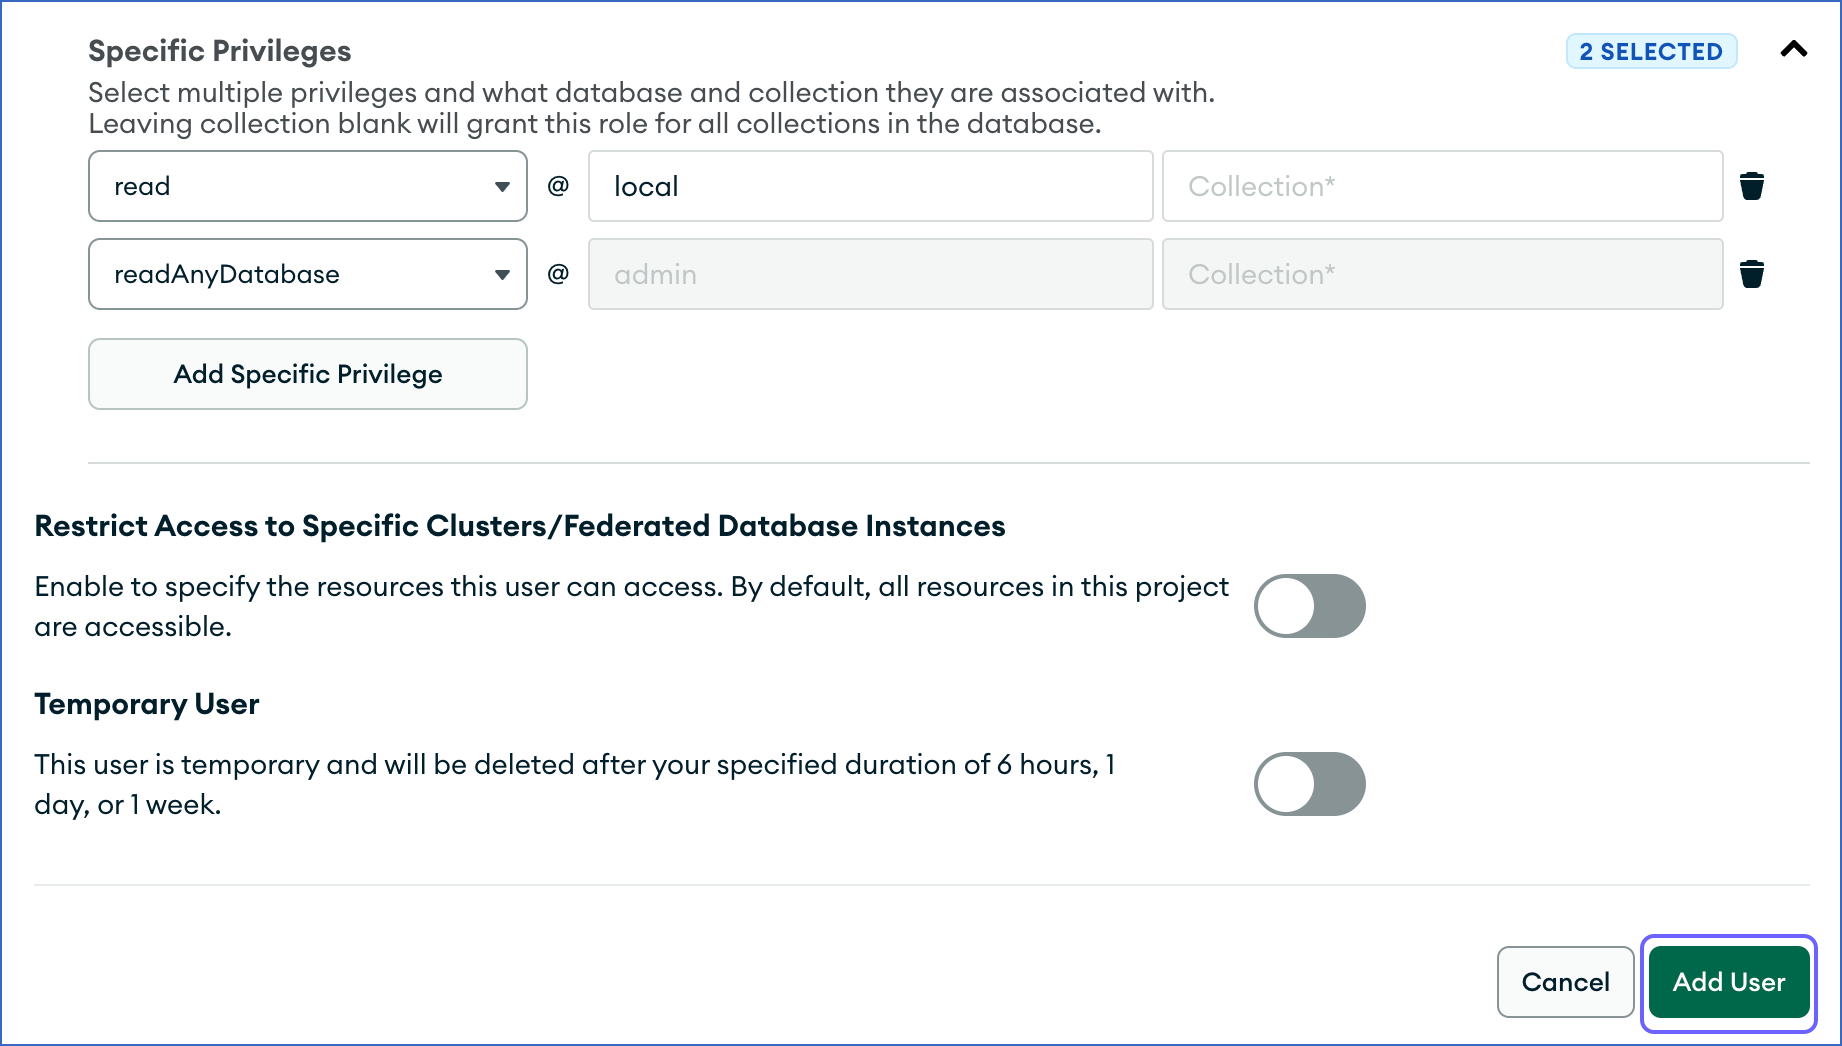
Select Specific Privileges.
-
In the Select Role drop-down, assign the read role to the local Database.
-
Click Add Specific Privilege, and do one of the following:
-
Assign readAnyDatabase to the admin database. This is mandatory if you want to load data from all the databases; as indicated by selecting the Load All Databases option during MongoDB Atlas Source configuration.
-
Assign read privileges to the database(s) you want to ingest and listDatabases privileges on the admin database.
-
-
-
-
Click Add User.
Note: After you create or modify a user in the MongoDB Atlas console, you must wait five minutes for the changes to take effect.
Whitelist Hevo’s IP Addresses
To whitelist Hevo’s IP address:
-
Log in to the MongoDB Atlas console.
-
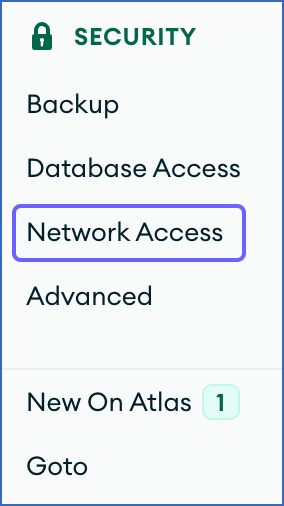
In the left navigation pane, under Security, click Network Access.
-
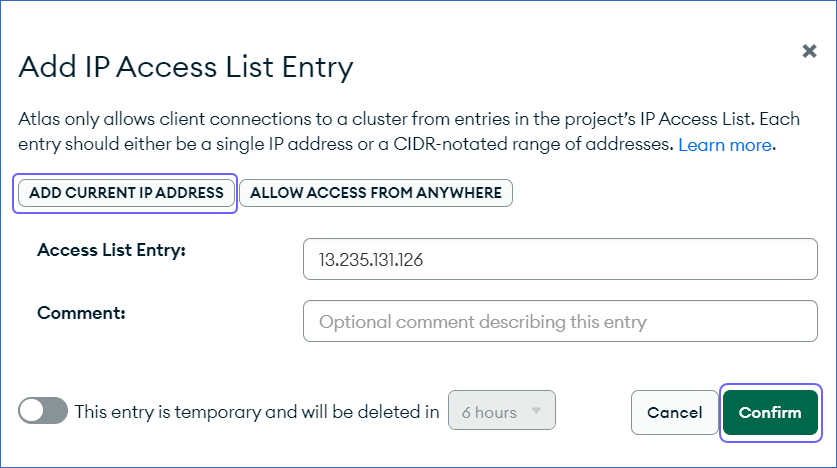
In the IP Access List tab, click + ADD IP ADDRESS.

-
In the Add IP Access List Entry pop-up window, under the ADD CURRENT IP ADDRESS tab, enter the Hevo IP address you want to whitelist in the Access List Entry field.
Note: To provide access to all IPs, specify 0.0.0.0.
-
Click Confirm.
Retrieve Database Settings
Perform the following steps to retrieve your MongoDB Atlas database settings:
-
Log in to the MongoDB Atlas console.
-
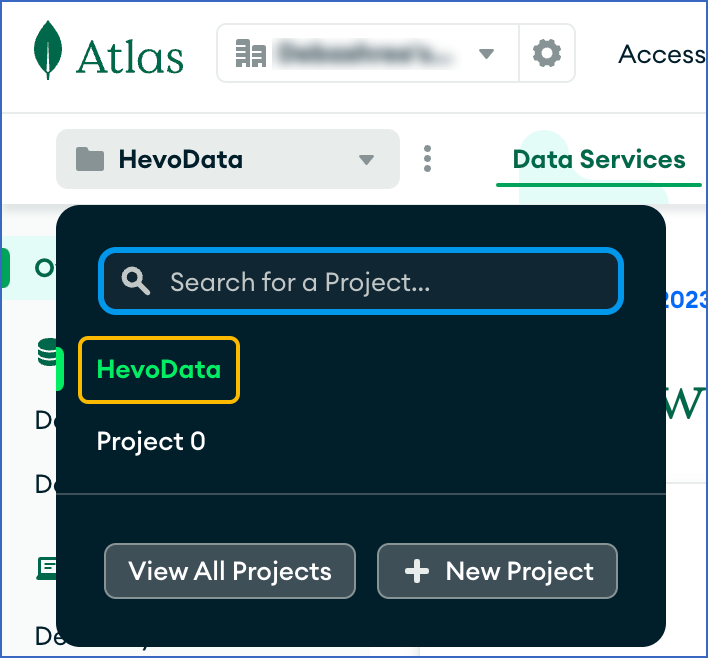
In the drop-down on the top left corner of the page, select the project for which you want to replicate the data.
-
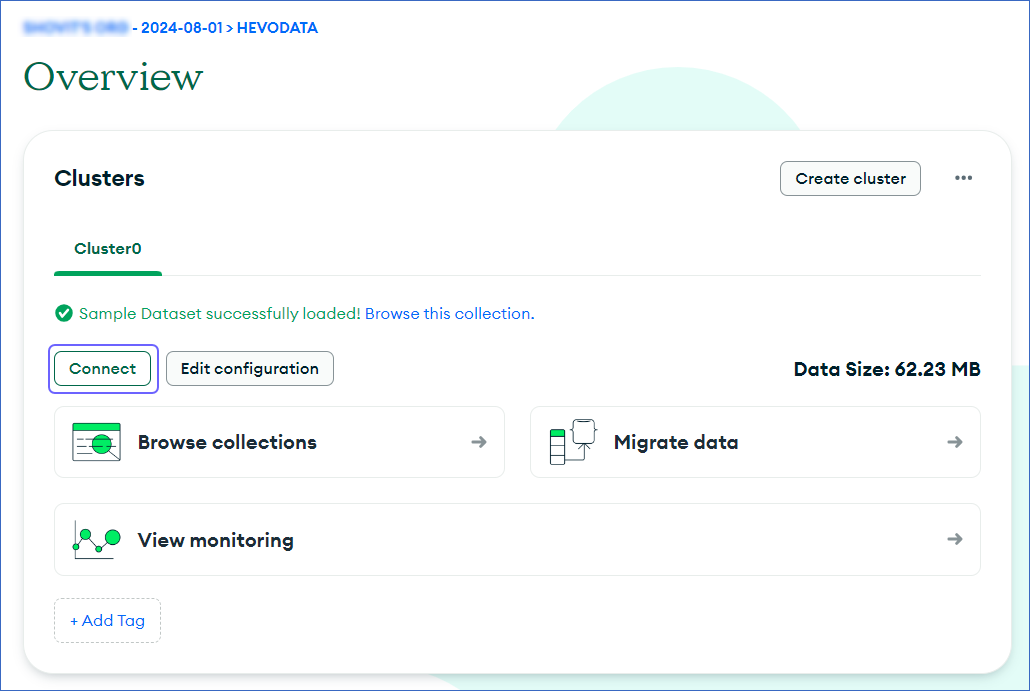
On the Overview page, Clusters section, click CONNECT.
-
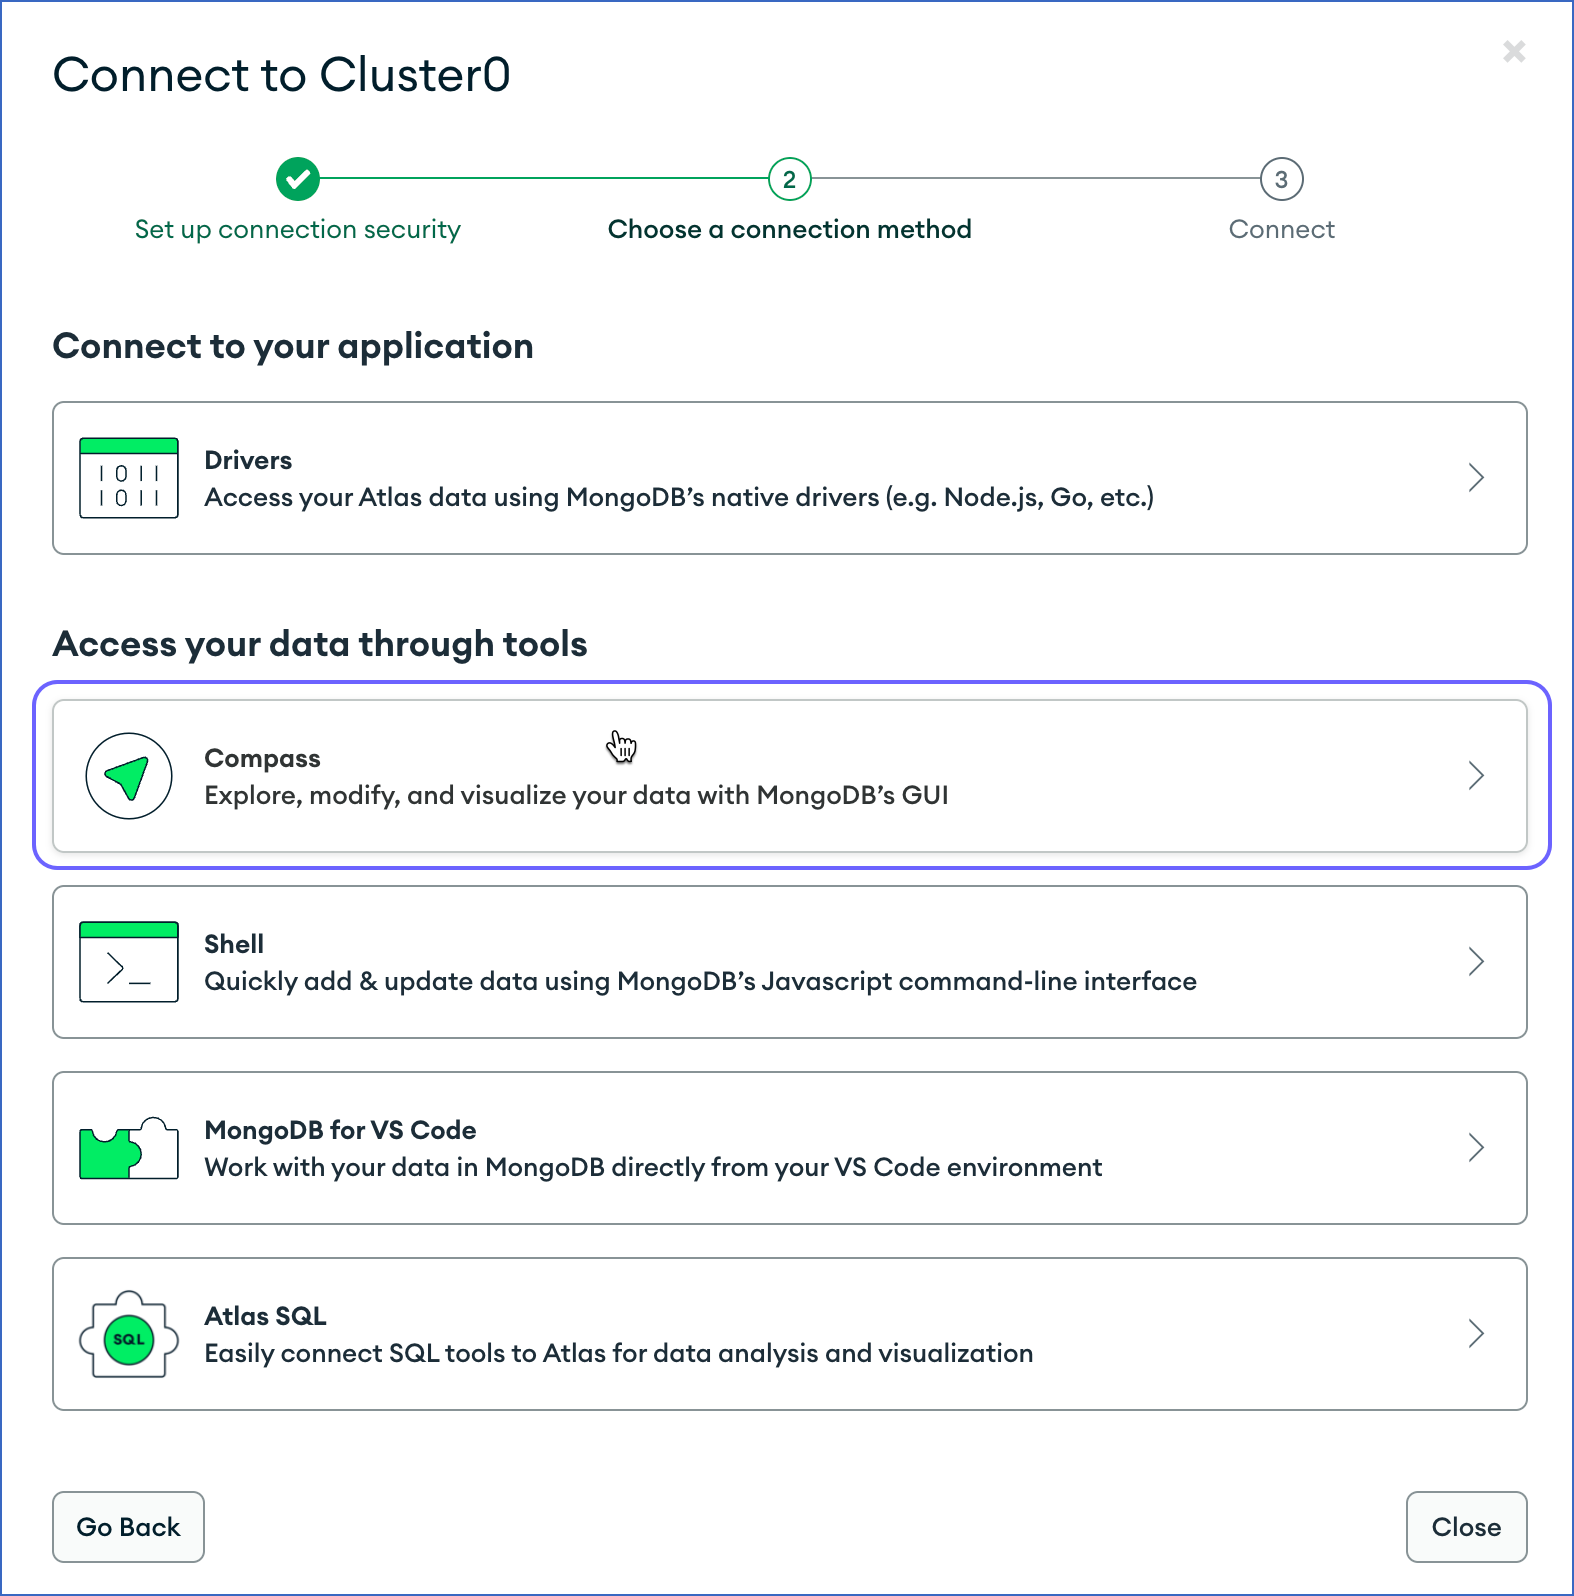
In the Connect to <Cluster Name> pop-up window, under Access your data through tools, click Compass.
-
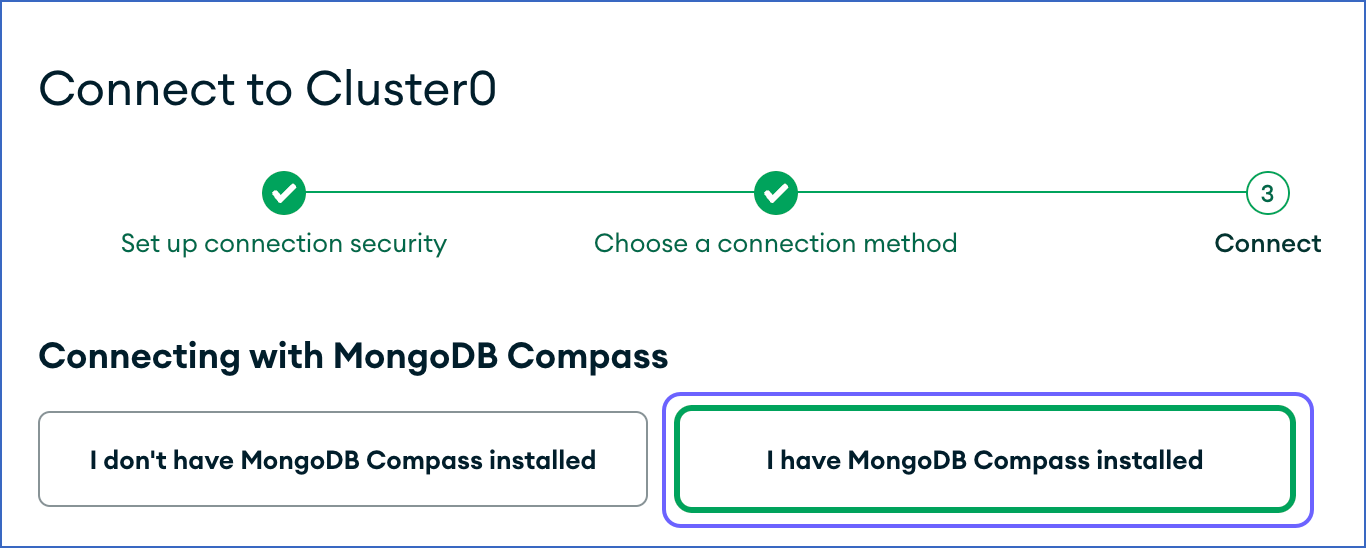
In the Connecting with MongoDB Compass section, do the following:
-
Click I have MongoDB Compass Installed. Note: Select this option even if you do not have MongoDB Compass. You do not need MongoDB Compass to configure MongoDB Atlas as a Source in Hevo.
-
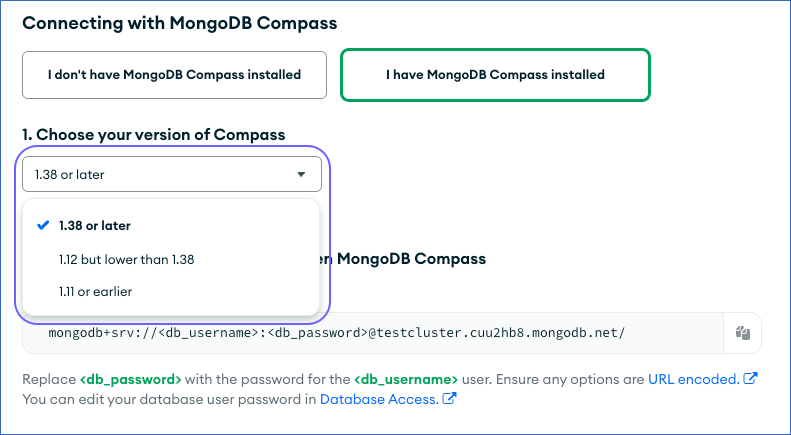
Select the Compass version corresponding to your MongoDB version.
-
-
Copy the connection string that appears in the code block. The connection string varies as per the Compass version you select.
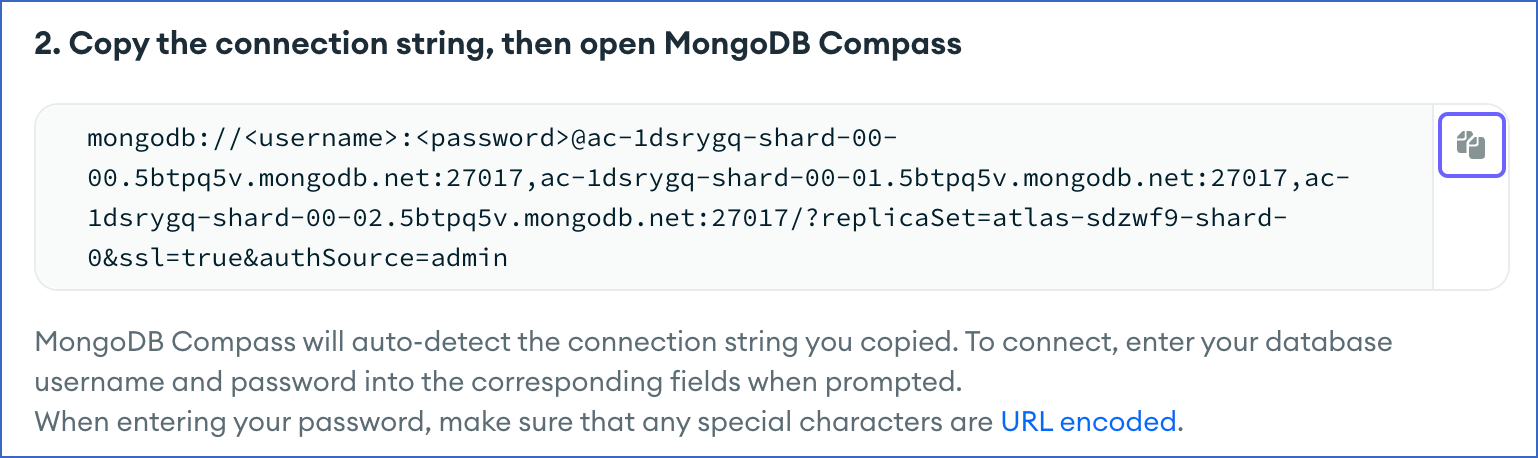
Note: Replace the
<username>and<password>in the connection string above with your database username and password. For example, in the following connection string for MongoDB Compass version 1.11 or earlier, theusernameis replaced with jerome and thepasswordwith Hevo123:mongodb://jerome:Hevo123@cluster0-shard-00-00.t7l5k.mongodb.net:27017,cluster0-shard-00-01.t7l5k.mongodb.net:27017,cluster0-shard-00-02.t7l5k.mongodb.net:27017/test?replicaSet=atlas-uax6f3-shard-0&ssl=true&authSource=admin -
Refer to section, Configure MongoDB Atlas Connection Settings for the steps to configure the Source in Hevo.
Configure MongoDB Atlas Connection Settings
Perform the following steps to configure MongoDB Atlas as a Source in Hevo:
-
Click PIPELINES in the Navigation Bar.
-
Click + Create Pipeline in the Pipelines List View.
-
On the Select Source Type page, select MongoDB Atlas.
-
On the Select Destination Type page, select the type of Destination you want to use.
-
On the Select Pipeline Mode page, choose the mode for ingesting data from the Source. Default value: OpLog.

The following Pipeline modes are applicable to MongoDB Source:
Note: If you are connecting to a sharded cluster, select Change Streams as the Pipeline mode.
-
OpLog: Data is ingested using MongoDB’s OpLog. The OpLog contains individual, transaction-level details which helps replicas sync data from the primary instance.
Note:
-
OpLogs are present in data or standalone primary instances and replicas.
-
OpLog mode is not supported for creating Pipelines with sharded clusters. To ingest data from such clusters, use Change Streams.
-
-
Change Streams: MongoDB’s Change Streams enables applications to stream real-time data changes without the complexity and risk of tailing the OpLog, for a single collection, a database, or an entire deployment. Change Streams are supported for all MongoDB configurations. However, for the clustered configuration, Change Streams works only if set up against a shard router (mongos).
By default, in both Change Streams and OpLog modes, the data is read at the mongo instance level. To read data at the database level in Change Streams mode, disable the Load All Databases option while creating the Pipeline.
-
-
Click Continue.
-
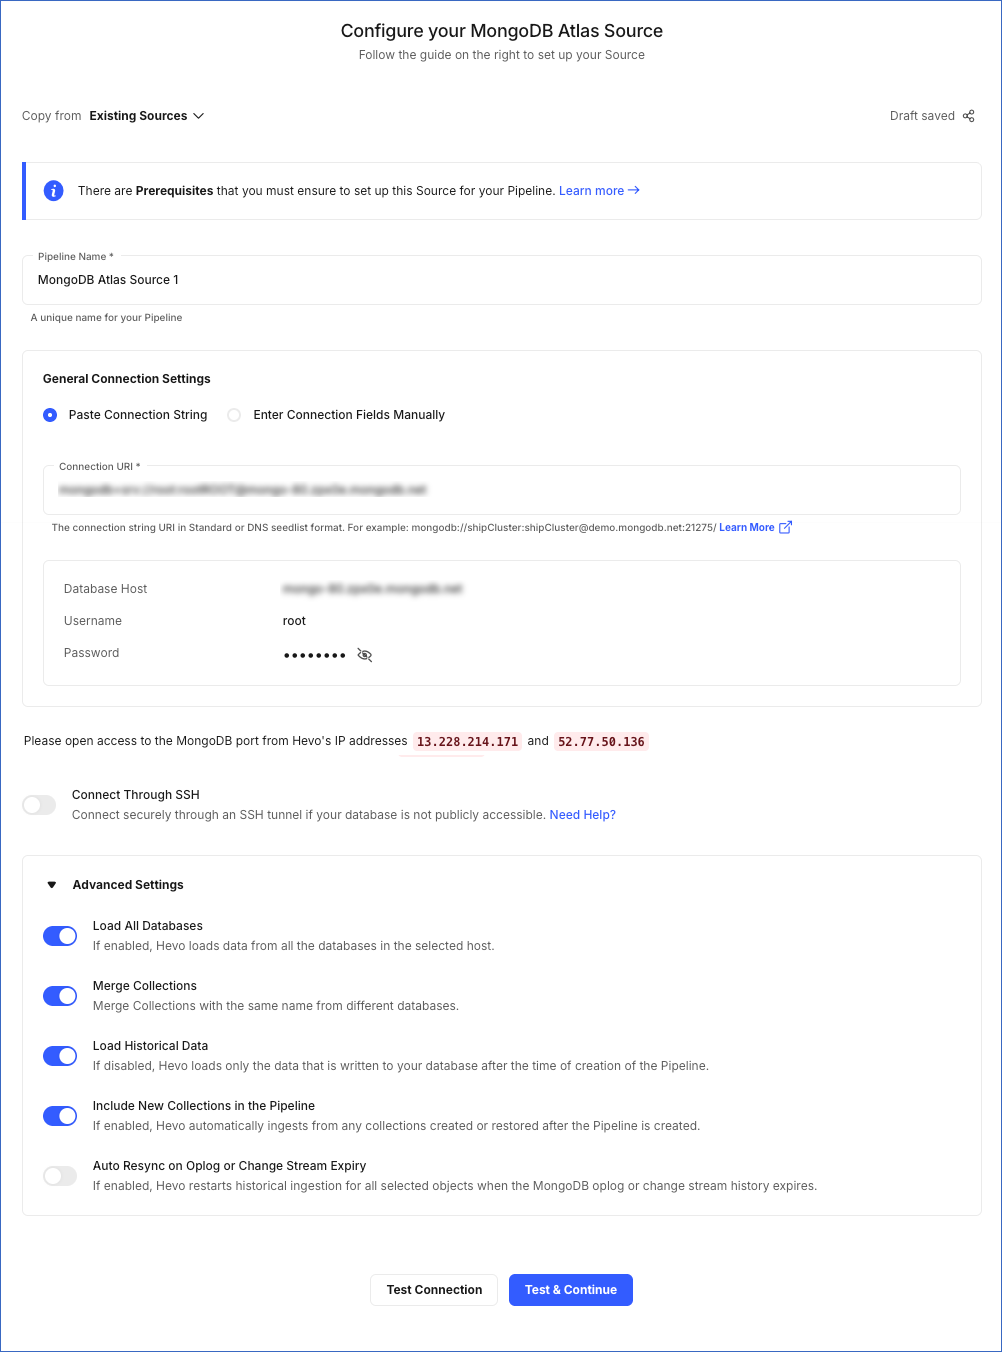
On the Configure your MongoDB Atlas Source page, specify the following:
-
Pipeline Name: A unique name for the Pipeline, not exceeding 255 characters.
-
General Connection Settings:
-
Paste Connection String:
-
Connection URI: The unique identifier for connecting to a MongoDB replica set or a sharded cluster.
Note: If you are connecting to a sharded cluster, Hevo automatically extracts all the shards of the cluster.
-
-
Enter Connection Fields Manually:
-
Database Host: The MongoDB DNS name fetched from your MongoDB Atlas account.
Note: To connect to a sharded cluster, specify only the parent cluster name. For example, if your host is the sharded cluster, cluster0-shard-00-00.t7l5k.mongodb.net, cluster0-shard-00-01.t7l5k.mongodb.net, cluster0-shard-00-02.t7l5k.mongodb.net, the parent hostname would be cluster0.t7l5k.mongodb.net. Hevo automatically extracts all the shards of the cluster.
-
Database User: The authenticated user who has permission to read collections in your database. Read Setting up Permissions to Read MongoDB Atlas Databases
Note: It is recommended that only the
read-onlypermission be provided to the user. -
Database Password: The password for the database user.
-
-
-
Connection Settings:
-
Connect through SSH: Enable this option to connect to Hevo using an SSH tunnel, instead of directly connecting your MongoDB Atlas database host to Hevo. This provides an additional level of security by not exposing your MongoDB setup to the public. Read Connecting Through SSH.
If this option is disabled, you must whitelist Hevo’s IP addresses to allow Hevo to connect to your MongoDB host.
-
-
Advanced Settings:
-
Load All Databases: If enabled, Hevo fetches data from all the databases you have access to on the specified database host(s). Ensure that you have assigned the
readAnyDatabaserole or thelistDatabasesaction on theadmindatabase. Refer to Step 5 of section, Create a custom role above.If disabled, Hevo fetches the list of all the databases you have access to on the specified database host(s). From this list, you must select the databases you want to fetch data from.

Warning! Once the Pipeline is created, if you drop any of these databases from your MongoDB Source, the Pipeline will fail.
-
Merge Collections: If enabled, collections with the same name across different databases are merged into a single Destination table. If disabled, separate tables are created and prefixed with the respective database name. Read Example - Merge Collections Feature.
-
Load Historical Data: If disabled, Hevo loads data written in your database after the time of creation of the Pipeline. If enabled, the entire table data is fetched during the first run of the Pipeline.
-
Include New Tables in the Pipeline: Applicable for all ingestion modes except Custom SQL.
If enabled, Hevo automatically ingests data from tables created in the Source after the Pipeline has been built. These may include completely new tables or previously deleted tables that have been re-created in the Source. All data for these tables is ingested using database logs, making it incremental.
If disabled, new and re-created tables are not ingested automatically. They are added in SKIPPED state in the objects list, on the Pipeline Overview page. You can update their status to INCLUDED to ingest data.
You can change this setting later.
-
Auto Resync on Oplog or Change Stream Expiry: If enabled, Hevo automatically restarts the historical load for all active objects when the Oplog or Change Stream expires. If disabled, Hevo displays an alert and requires manual intervention to resume. For more information on the OpLog expiry, read OpLog Alerts.
-
-
-
Click Test Connection. This button is enabled once you specify all the mandatory fields. Hevo’s underlying connectivity checker validates the connection settings you provide.
-
Click Test & Continue to proceed for setting up the Destination. This button is enabled once you specify all the mandatory fields.
Data Replication
| For Teams Created | Default Ingestion Frequency | Minimum Ingestion Frequency | Maximum Ingestion Frequency | Custom Frequency Range (in Hrs) |
|---|---|---|---|---|
| Before Release 2.21 | 5 Mins | 5 Mins | 1 Hr | NA |
| After Release 2.21 | 30 Mins | 30 Mins | 12 Hrs | 1-24 |
Note: The custom frequency must be set in hours as an integer value. For example, 1, 2, or 3 but not 1.5 or 1.75.
-
Historical Data: In the first run of the Pipeline, Hevo ingests all available data for the selected objects from your Source database.
-
Incremental Data: Once the historical load is complete, data is ingested as per the ingestion frequency.
Additional Information
Read the detailed Hevo documentation for the following related topics:
Source Considerations
- MongoDB does not allow data ingestion from the OpLog in sharded clusters. As a result, Hevo cannot support OpLog as the ingestion mode when connecting to such clusters. Hence, you must select the Change Streams mode while configuring your Pipeline.
Limitations
-
Hevo does not support configuring a standalone instance of MongoDB without a replica.
-
Hevo does not load data from a column into the Destination table if its size exceeds 16 MB, and skips the Event if it exceeds 40 MB. If the Event contains a column larger than 16 MB, Hevo attempts to load the Event after dropping that column’s data. However, if the Event size still exceeds 40 MB, then the Event is also dropped. As a result, you may see discrepancies between your Source and Destination data. To avoid such a scenario, ensure that each Event contains less than 40 MB of data.
See Also
Revision History
Refer to the following table for the list of key updates made to this page:
| Date | Release | Description of Change |
|---|---|---|
| Feb-23-2026 | 2.46 | Updated section, Configure MongoDB Atlas Connection Settings to add information about the option to automatically restart historical load after oplog expiry. |
| Feb-16-2026 | 2.46 | Updated section, Configure MongoDB Atlas Connection Settings to add a note about using change streams for sharded clusters. |
| Nov-06-2025 | NA | Updated the document as per the latest Hevo UI. |
| Sep-18-2025 | NA | Updated section, Configure MongoDB Atlas Connection Settings as per the latest UI. |
| Aug-13-2025 | NA | - Updated the Prerequisites section to add information about the minimum and maximum supported versions of MongoDB. - Updated section, Retrieve Database Settings as per the latest MongoDB Atlas UI. |
| Aug-1-2025 | NA | Added clarification that data ingested from new and re-created tables is billable. |
| Jul-10-2025 | NA | Updated the Prerequisites section to add information about the maximum supported version of MongoDB. |
| Jul-07-2025 | NA | Updated the Limitations section to inform about the max record and column size in an Event. |
| Jan-07-2025 | NA | Updated the Limitations section to add information on Event size. |
| Oct-22-2024 | NA | Updated sections, Set up Permissions to Read MongoDB Atlas Databases (Optional), Whitelist Hevo’s IP Addresses and Retrieve Database Settings as per the latest MongoDB Atlas UI. |
| Oct-09-2024 | NA | Updated the Prerequisites section to reflect that Hevo only supports MongoDB version 3.4 and higher. |
| Apr-29-2024 | NA | Updated section, Configure MongoDB Atlas Connection Settings to include more detailed steps. |
| Mar-05-2024 | 2.21 | - Added the Data Replication and Source Considerations sections. - Updated the Configure MongoDB Atlas Connection Settings section to add information about selecting Change Streams as the ingestion mode for sharded clusters. |
| Sep-04-2023 | NA | Updated the page as per the latest MongoDB UI. |
| Mar-16-2023 | NA | Added a warning in the Advance Settings in section, Configure MongoDB Atlas Connection Settings about dropping databases from the Source after the Pipeline is created. |
| Mar-09-2023 | 2.09 | Updated section, Configure MongoDB Atlas Connection Settings to mention about SEE MORE in the Select an Ingestion Mode section. |
| Dec-19-2022 | 2.04 | Updated section, Configure MongoDB Atlas Connection Settings to add information that you must specify all fields to create a Pipeline. |
| Dec-07-2022 | 2.03 | Updated section, Configure MongoDB Atlas Connection Settings to mention about the connectivity checker. |
| Jul-12-2022 | 1.92 | Updated section, Configure MongoDB Atlas Connection Settings to include information about the drop-down to select databases in the Load All Databases option. |
| Apr-21-2022 | 1.86 | Updated section, Configure MongoDB Atlas Connection Settings. |
| Jan-03-2022 | 1.79 | Updated the description of the Include New Tables in the Pipeline advance setting in the Configure MongoDB Atlas Connection Settings section. |
| Jul-12-2021 | 1.67 | Added the field Include New Tables in the Pipeline under Source configuration settings. |
| Jun-28-2021 | 1.66 | - Updated the page overview section. - Updated the section Retrieve Database Settings to include latest steps. - Updated the section Set up Permissions to Read MongoDB Atlas Databases to include latest steps. - Updated the section Configure MongoDB Atlas Connection Settings to include the option to connect to the MongoDB Atlas database using connection string. - Added section, Limitations. |