Working with Workflows
On This Page
Starting Release 2.17, the Workflows feature is available only for existing users. Users signing up from Release 2.17 onwards cannot create Workflows. For more information, please contact Hevo Support or your account executive.
You can create a Workflow by linking multiple Models together. You can add conditions on the data in the Destination tables to define how the Models are run and transform your data according to your requirements. You can schedule a Workflow to run at a pre-defined frequency. However, you can also use the Run Now option available under the More ( ![]() ) icon, to run the Workflow on-demand.
) icon, to run the Workflow on-demand.
Prerequisites
-
At least one SQL or dbt™ Model is created in your account.
-
You are assigned the Team Administrator, Team Collaborator, Models and Workflows Administrator, or Models and Workflows Collaborator role in Hevo, to edit Workflows in Hevo.
Example
Let us suppose, you have created three Models as follows:
-
An SQL Model named CreatingCountries.
-
Two dbt™ Models named CountriesByRegion and Film Rentals.
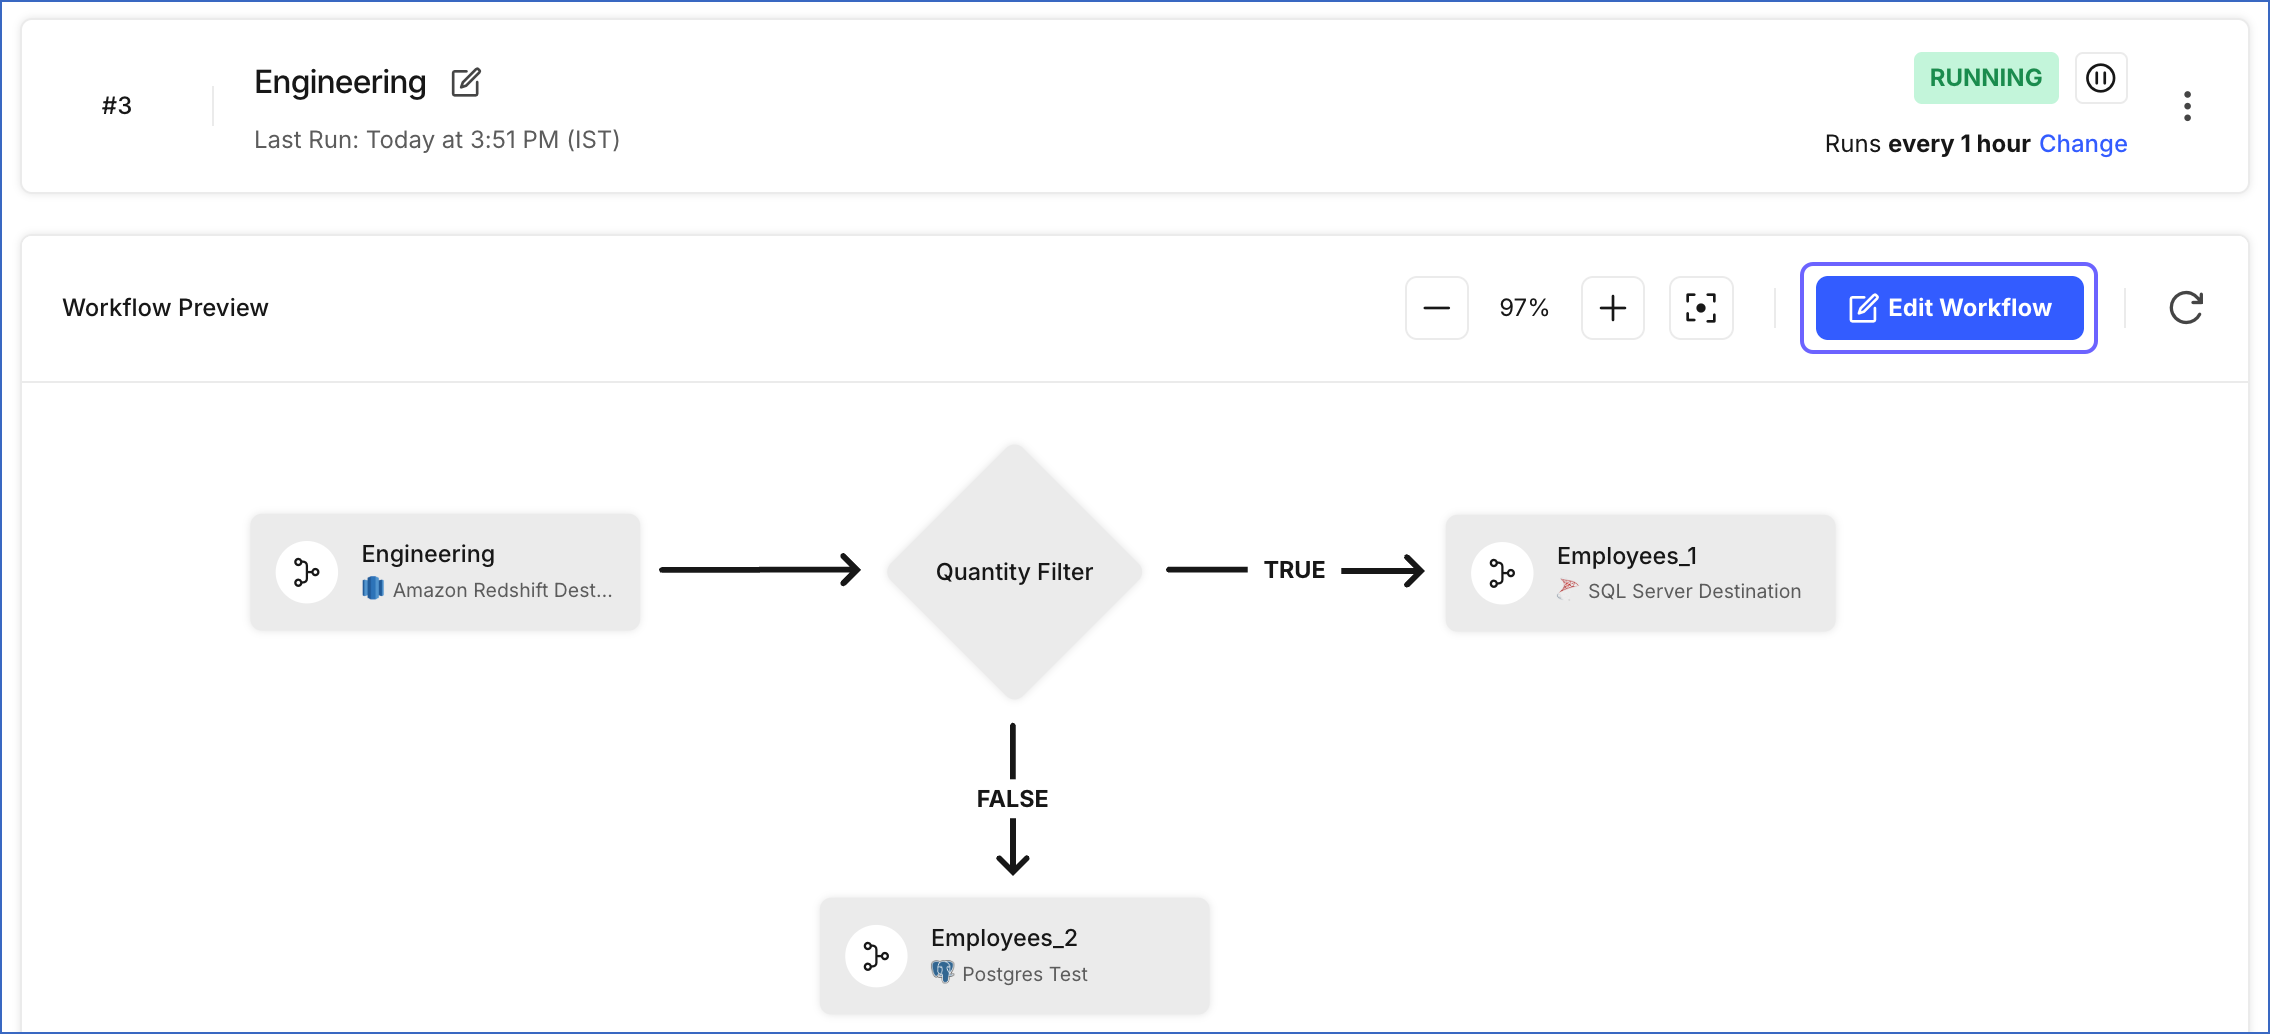
Then, the following image illustrates a sample Workflow created with these Models and a data load condition:
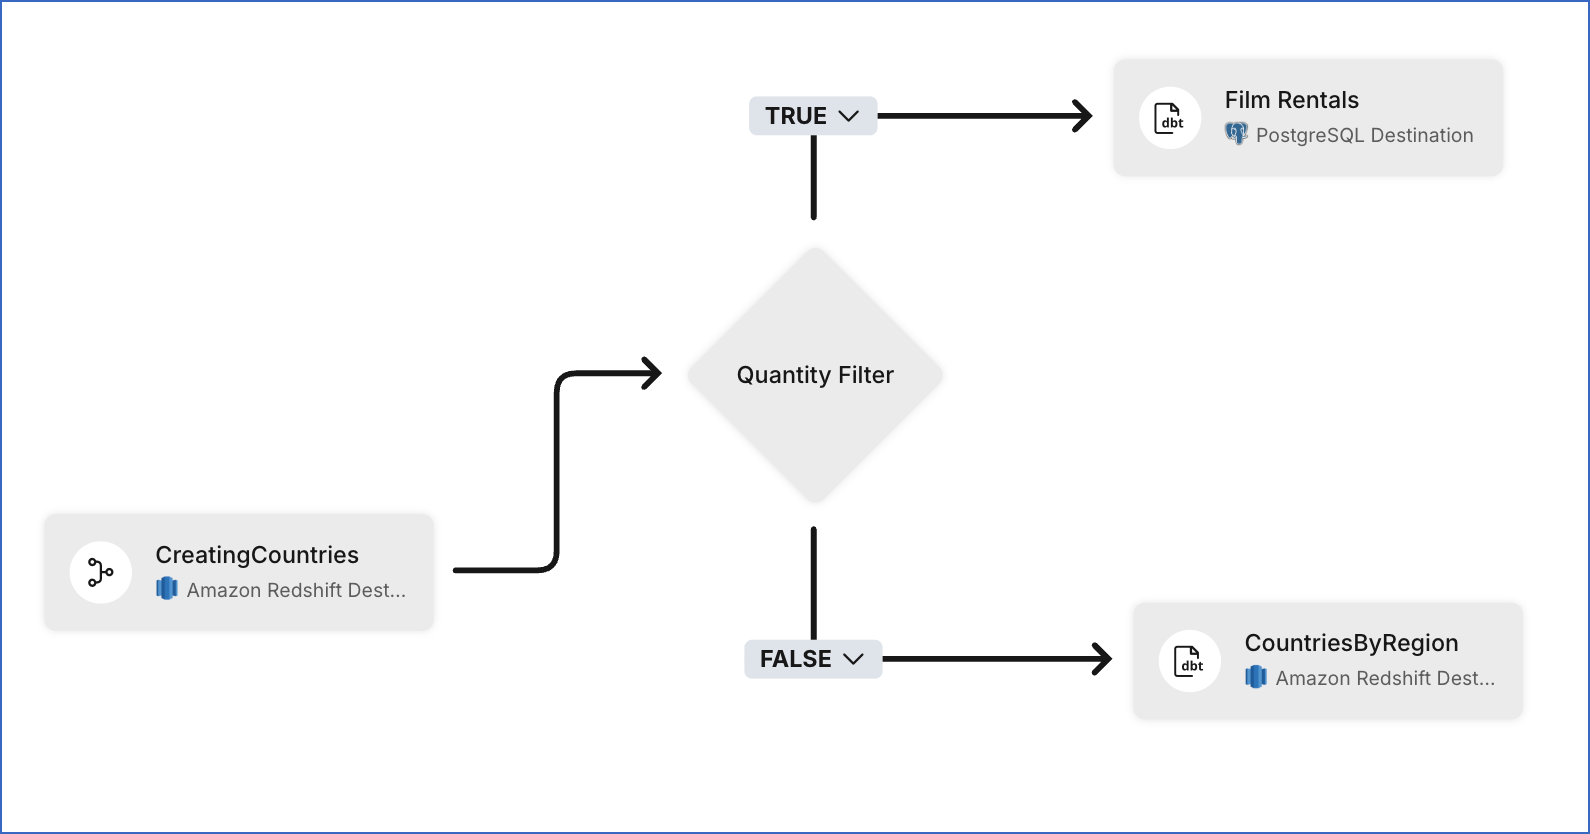
The Workflow execution takes place as follows:
-
The SQL Model CreatingCountries is run first.
-
The data load condition Quantity is evaluated.
-
One of the following happens depending on the outcome of the condition:
-
TRUE: All models in the Film Rentals dbt project are executed.
-
FALSE: All models in the CountriesByRegion dbt project are executed.
-
-
The transformed data is loaded to the Destination tables by the dbt project that was run.
Creating a Workflow
Perform the following steps to create a Workflow:
-
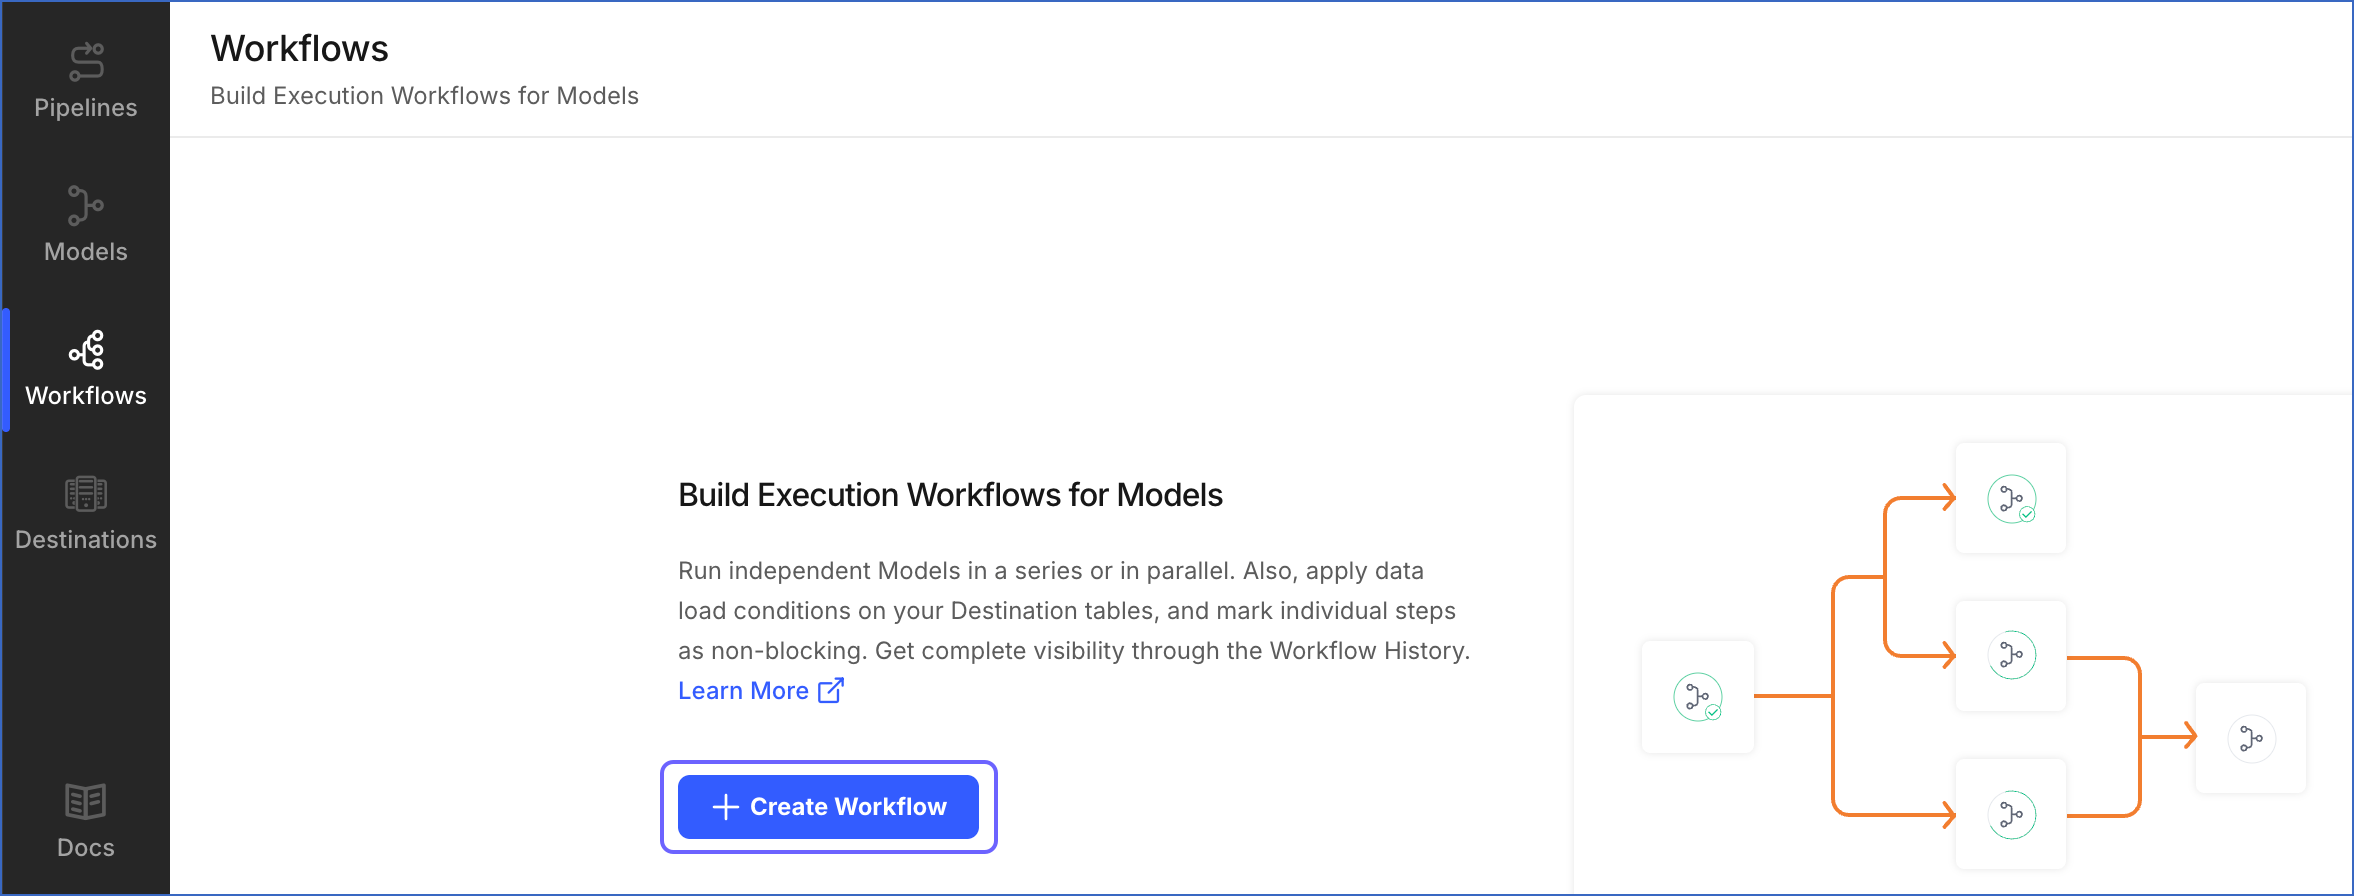
In the Navigation Bar, click Workflows.
-
If this is the first Workflow that you are creating, click + Create Workflow on the Workflows page, else, click + Create Workflow in the Workflows List View.
A Workflow is created in the DRAFT state.
-
Replace Untitled Workflow 1 with a meaningful name for the Workflow, and click Save. The Workflows Detailed View is displayed.
-
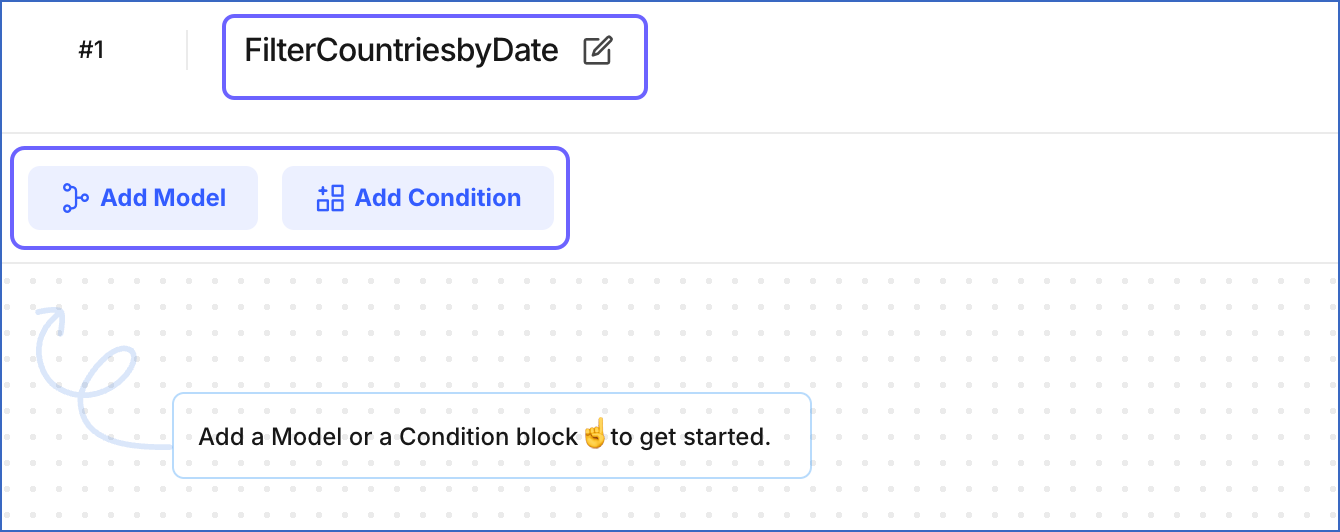
In your Workflow canvas, click:
-
Add Model to add an SQL Model or a dbt project
-
Add Condition to add data load conditions
-
-
Click on a Model block and perform the following steps:
-
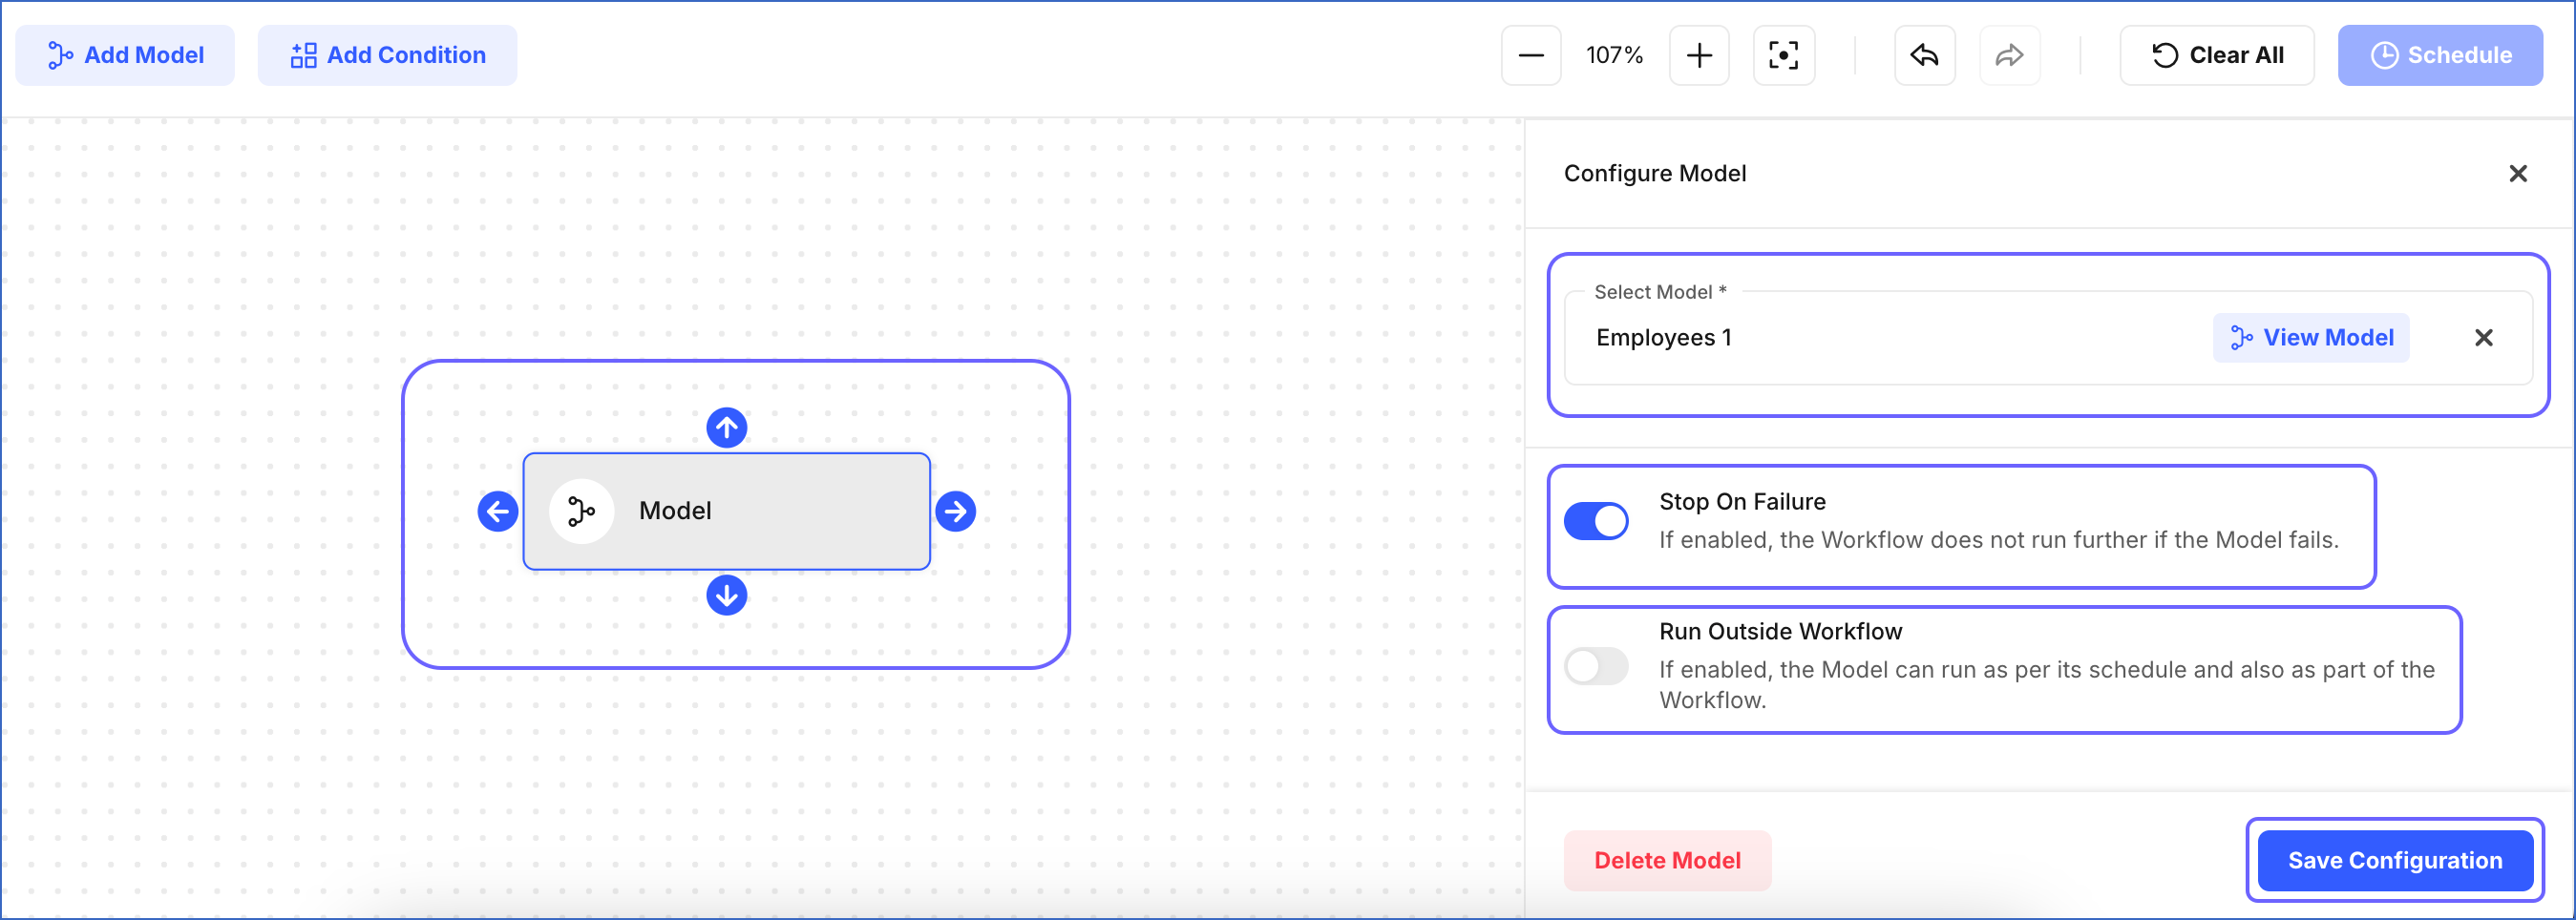
Specify the following settings:
-
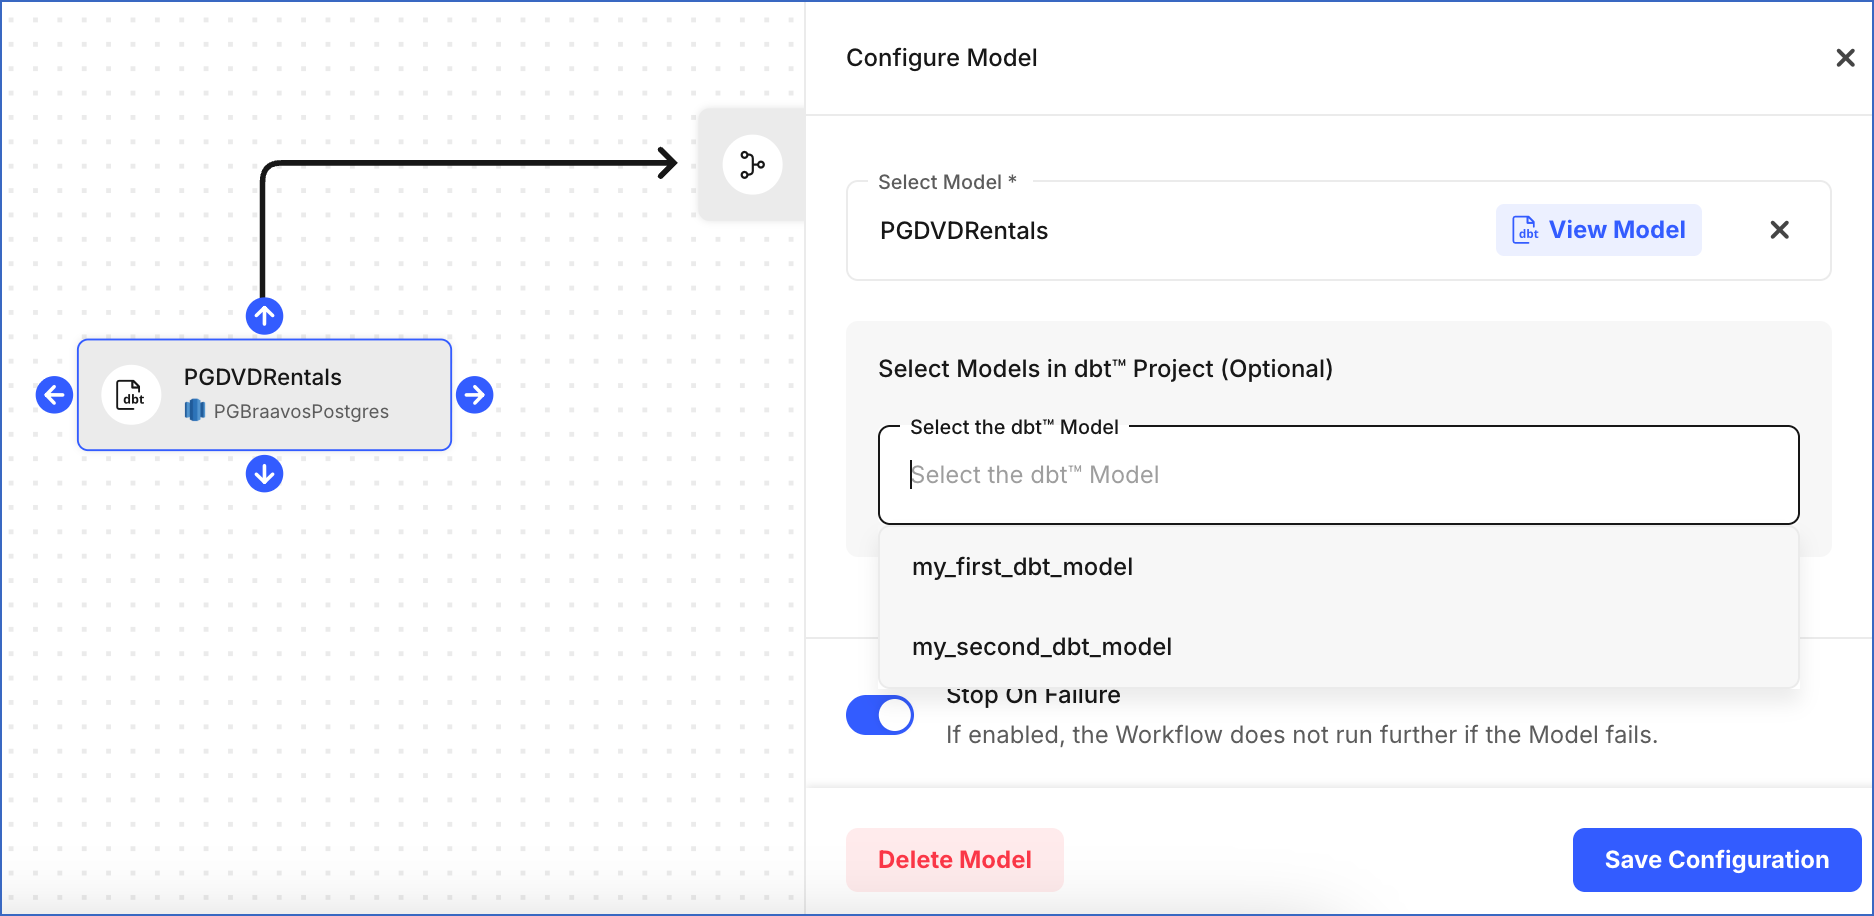
Select Model: Select an SQL Model or a dbt project from the drop-down list that is displayed. When you select a dbt project, all the models within it are added to the Workflow. Optionally, you can add an individual model from the dbt project.
For example, the image below displays the models in the PGDVDRentals dbt project. You can add one of these models, say my_first_dbt_model instead of the entire dbt project to your Workflow.
-
Stop on Failure: Enable this option to stop the Workflow in case the Model fails due to some reason.
-
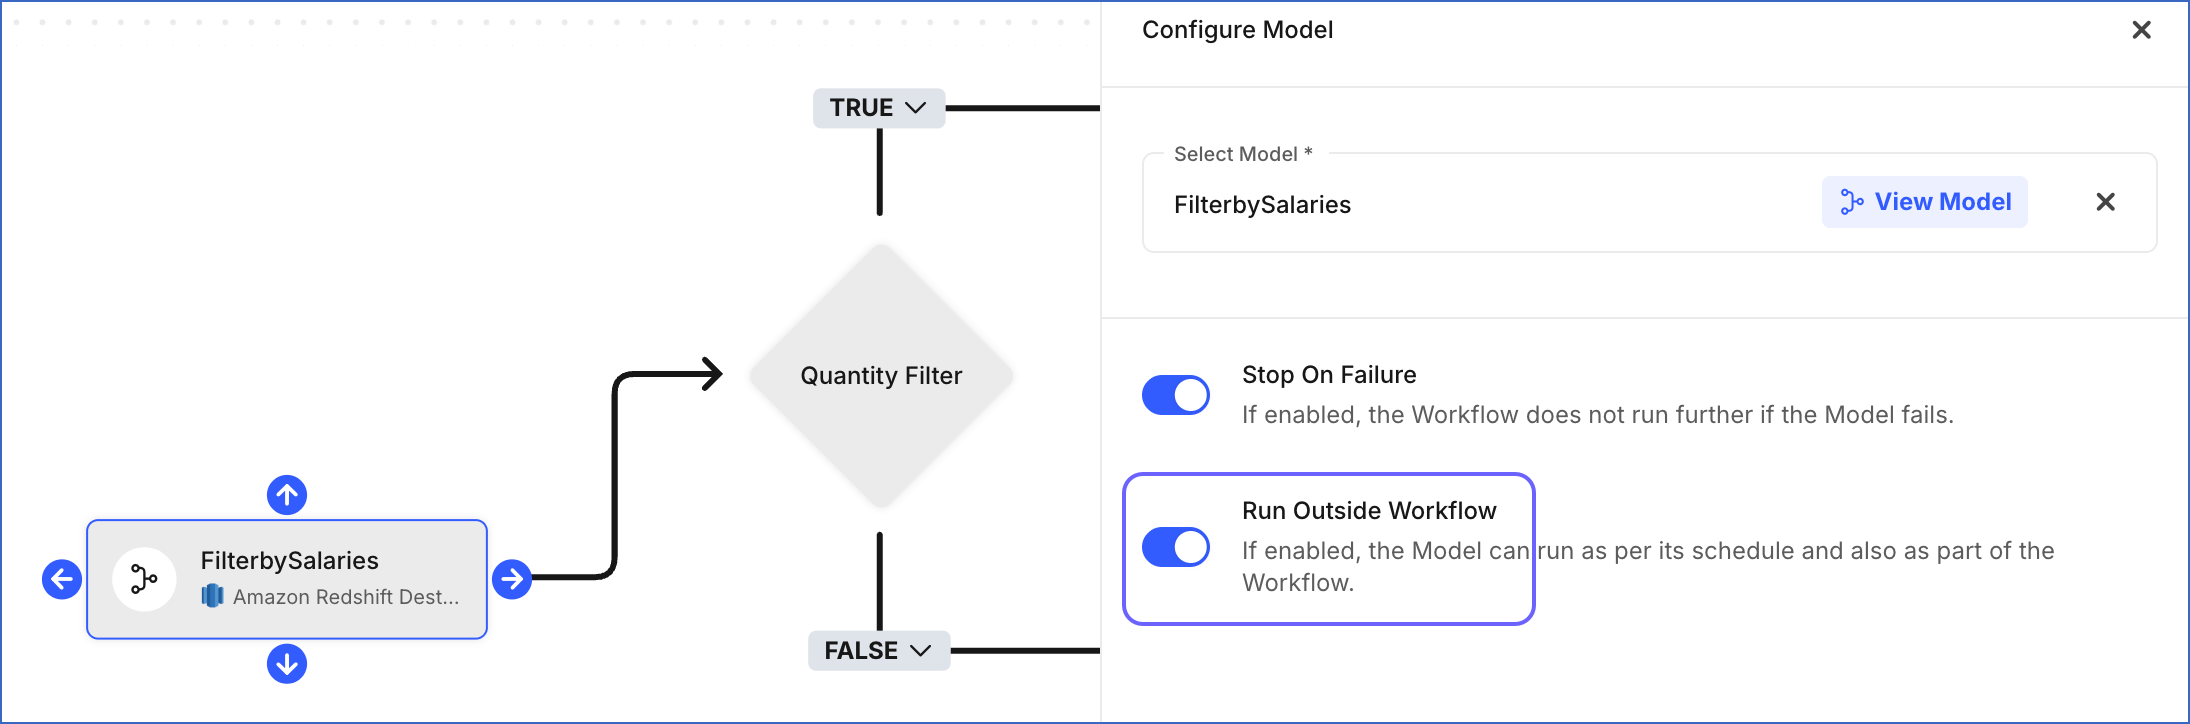
Run Outside Workflow: Enable this option to allow the selected Model or dbt project to also run independent of the Workflow, based on the schedule configured by you.
Note: When this option is disabled, the Model or dbt project only runs as part of the Workflow.
For example, in the image below, the SQL Model, FilterbySalaries is configured to run on an independent schedule as well.
-
-
Click Save Configuration. Repeat Step 5 for each Model that you want to add.
-
-
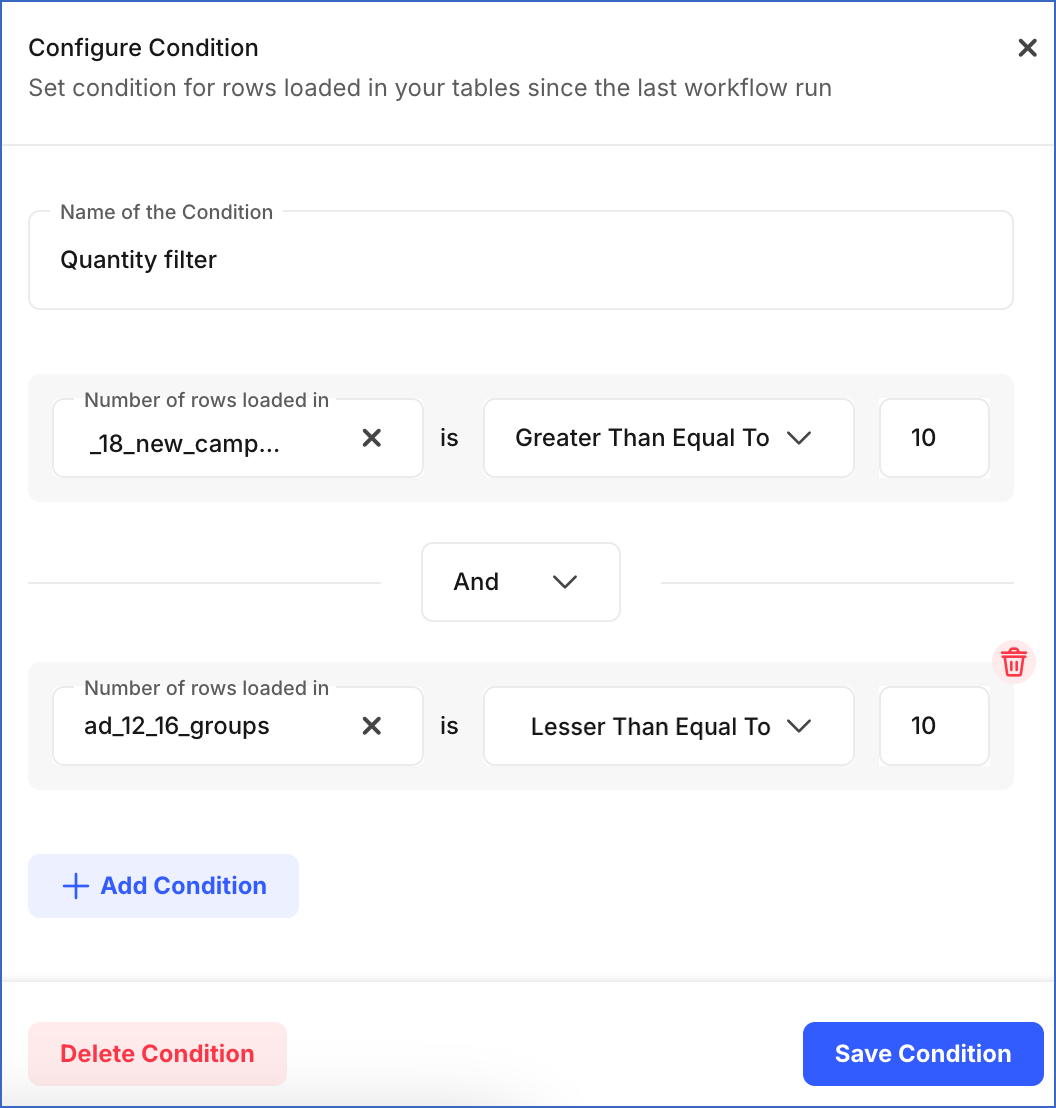
(Optional) Click Add Condition to specify a condition for linking the Models and specify the following settings:
-
Name of the Condition: A unique name for the data load condition.
-
Conditions: The condition(s) that you want to apply to the data loaded into the Destination table(s) since the last run of the Workflow. You can add multiple conditions and combine them with the And or Or operators.
-
Number of rows loaded in: Select one of the Destination tables that your team has access to, on which you want to apply the condition.
-
Select one of the Greater Than Equal To, Lesser Than Equal To, and Greater than Zero conditions. These are used to compare the number of rows loaded in the table since the last run of the Workflow and the value that you provide for comparison.
-
Value: The number to be used for comparison in the condition selected above. For example, 10.
-
-
-
Hover the mouse over a block to display arrows on its four sides. These arrows enable you to add other blocks, as required, to create the Workflow.
-
Click the arrow symbol of the first block in your Workflow, hover over the second block, and click on one of the hollow dots displayed on the four sides of the second block to connect the two blocks.
-
Optionally, use the Undo, Redo, and Reset options to modify your Workflow.
Note: The Reset action cannot be undone.

Note: You can only use Models that are in Active state to create a Workflow.
Scheduling a Workflow
After successfully creating a Workflow, you are required to set a schedule as per which the Workflow must run.
There are two ways in which you can do this:
-
Runs Every: Schedule the Workflow to run at a fixed frequency. The highest frequency is 1 Hour.
-
Custom: Choose Custom in Runs Every option to define a specific time for the Workflow run. The Run On drop-down provides you three options in this:
-
Fixed Interval of: Provide a time interval in hours, at which the Workflow must run. Let us suppose you specify the interval as 4 hours, and as per that, the Workflow is scheduled to run at noon, 4 PM (UTC), 8 PM (UTC), and so on. If you manually run the Workflow between these times, say at 5 PM (UTC), then the next run happens 4 hours after that, at 9 PM (UTC) and not 8 PM (UTC).
-
Daily: Schedule the Workflow to run daily at the specified time.
-
Weekly: Select the days of the week, and the time when you want the Workflow to run.
-
Click Schedule to set up the schedule. In the Summary Bar, click Change to change the schedule for an existing Workflow.
Modifying a Workflow
You can modify a Workflow after creating it. To do so:
-
Select your respective Workflow from the Workflow List View.
-
Click Edit Workflow.
-
Make your changes, and once you are done, click Update Workflow.

Revision History
Refer to the following table for the list of key updates made to this page:
| Date | Release | Description of Change |
|---|---|---|
| Nov-21-2025 | NA | Updated the document as per the latest Hevo UI. |
| Aug-26-2024 | NA | Updated section, Modifying a Workflow to reflect the latest Hevo UI. |
| Dec-29-2023 | NA | Merged FAQ, If I change the schedule of a Workflow, will it impact the schedule of each Model? to this document. |
| Jul-18-2023 | NA | Updated the content to reflect supported functionality. |
| Jan-02-2023 | NA | Added information for dbt integration with Workflows. |
| Dec-08-2022 | NA | Updated section, Scheduling a Workflow to mention about latest functionality. |
| Sep-07-2022 | 1.97 | Updated the page to add information regarding the latest funtionalities offered by Workflows. |
| Mar-11-2022 | NA | - Added sections, Modifying a Workflow and Scheduling a Workflow. - Updated section, Creating a Workflow. |
| Dec-10-2021 | NA | Updated the screenshots to reflect the latest UI. |