Creating an Activation (Edge)
On This Page
An Activation connects a dataset to a Target object and defines how the dataset’s rows are applied to records in that object and how often the sync runs. The Source, dataset, and Target must already exist before you create an Activation.
The following sections describe the four steps to create an Activation:
-
Select the Source and Dataset: Choose the Source to read from and the dataset that defines the data to send.
-
Select the Target: Choose the Target application and the Target object that receives the data, and select the sync behavior.
-
Map Fields: Identify matching records and choose the columns to send.
-
Configure the Schedule: Set how often the Activation runs and give it a name.
Prerequisites
-
A Source with the Active status is available. If you do not have one, refer to the documentation for your respective Source type to create one.
-
A dataset built on that Source is available. The dataset must include a column that uniquely identifies each row, such as an email address or a customer ID. Read Creating a Dataset for the steps.
-
A Target with the Active status is available. If you do not have one, refer to the documentation for your respective Target type to create one.
Select the Source and Dataset
A Source determines the datasets available to an Activation. To create an Activation, you must first select the Source and then select the dataset you want to use.
Perform the following steps to select the Source and dataset:
-
In the Navigation Bar, click Activate.
-
In the Activations tab, click + Create Activation.

-
On the Select Existing Source page, click the Source that contains the dataset you want to send. Use the Search Sources field to find a Source by its name.
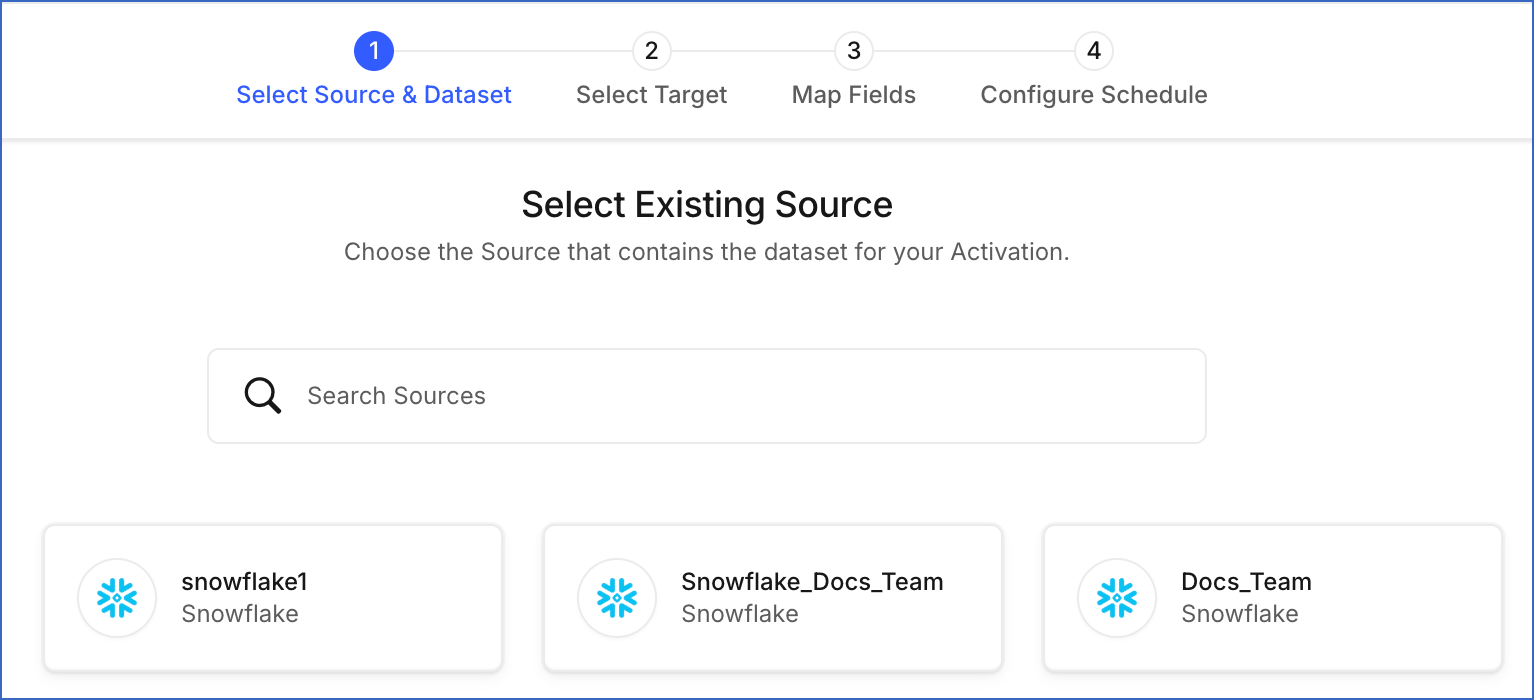
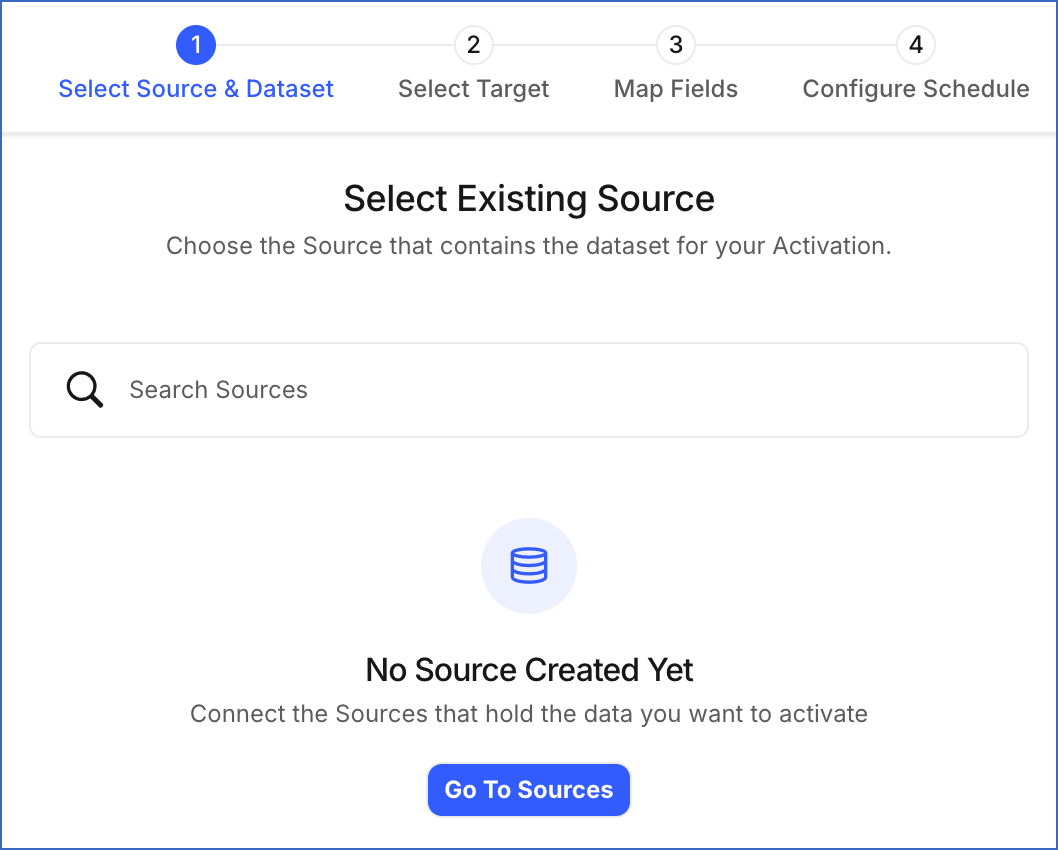
If you have not created a Source yet, the No Source Created Yet message is displayed. Click Go To Sources to open the Sources tab. Refer to the documentation for your respective Source type for the steps to create a Source. Once the Source is created, create a dataset on it before you create the Activation.
-
On the Select Existing Dataset page, click the dataset that contains the records you want to sync. Use the Search Datasets field to find a dataset by its name.
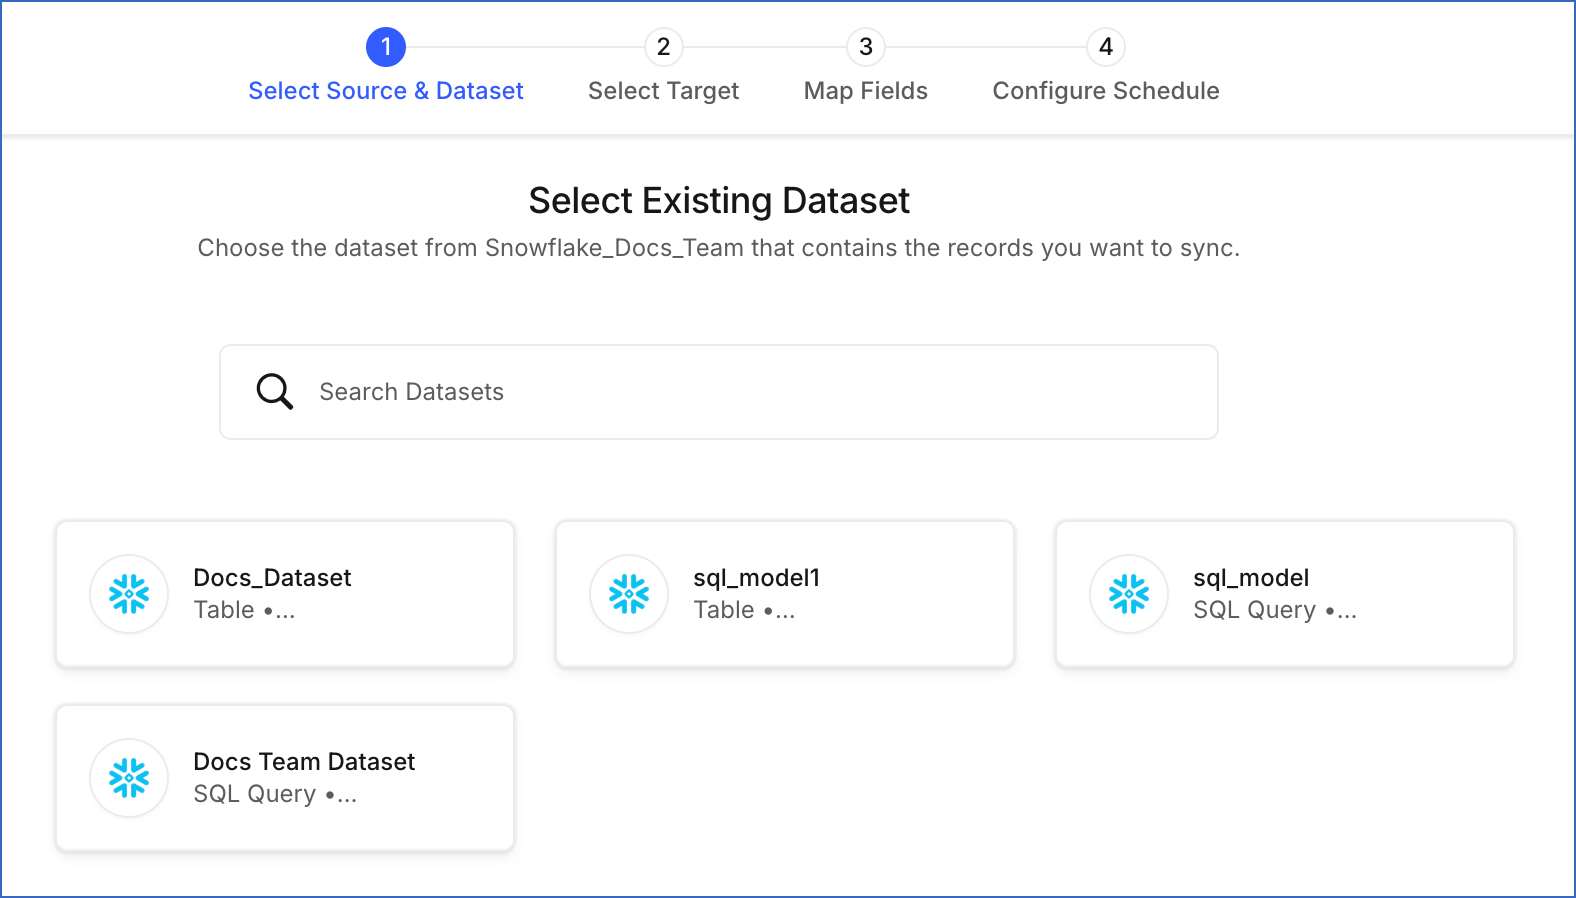
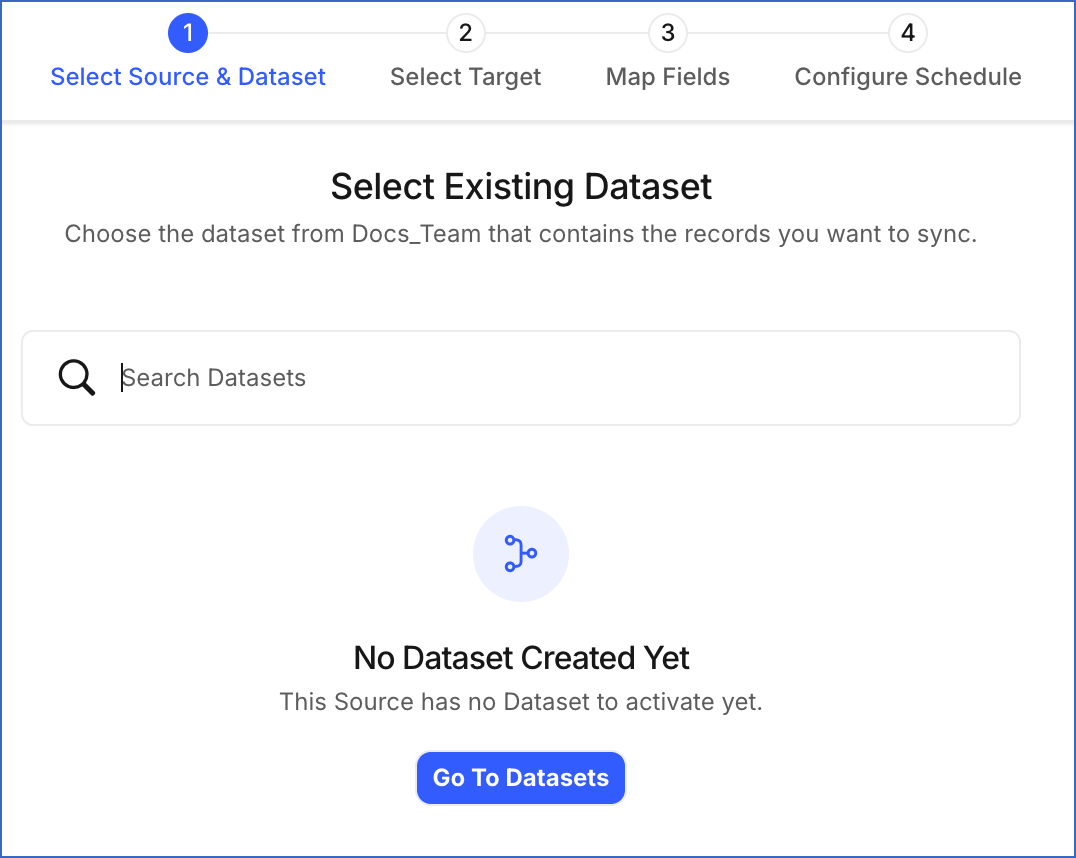
If the selected Source has no dataset yet, the No Dataset Created Yet message is displayed. Click Go To Datasets to open the Datasets tab. Read Creating a Dataset for the steps. Once the dataset is created, you can create the Activation with it.
After you select the dataset, proceed to select the Target that receives the records.
Select the Target
A Target determines the application that receives the data. The Target object determines the fields available for mapping and the sync behaviors you can use.
Perform the following steps to select the Target and the sync behavior:
-
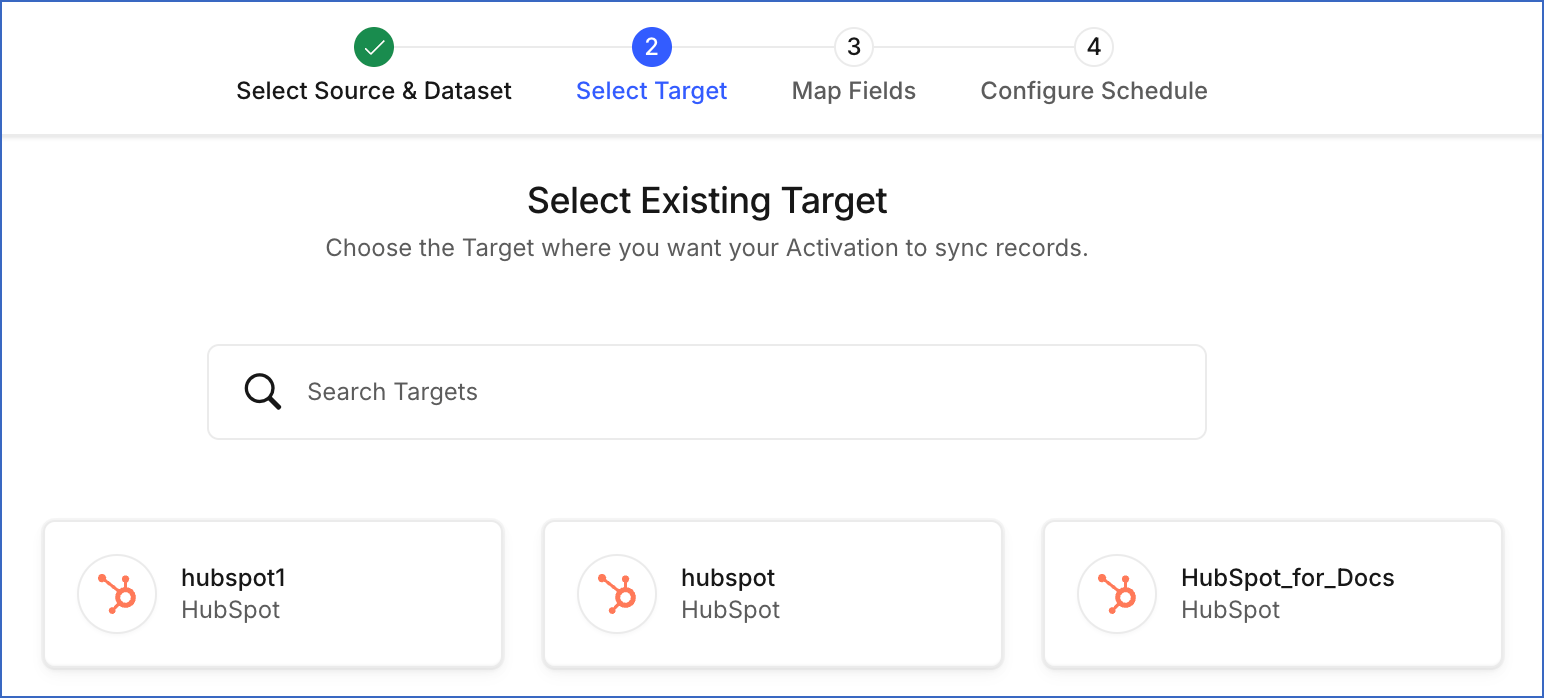
On the Select Existing Target page, click the Target where you want the Activation to sync records. Use the Search Targets field to find a Target by its name.
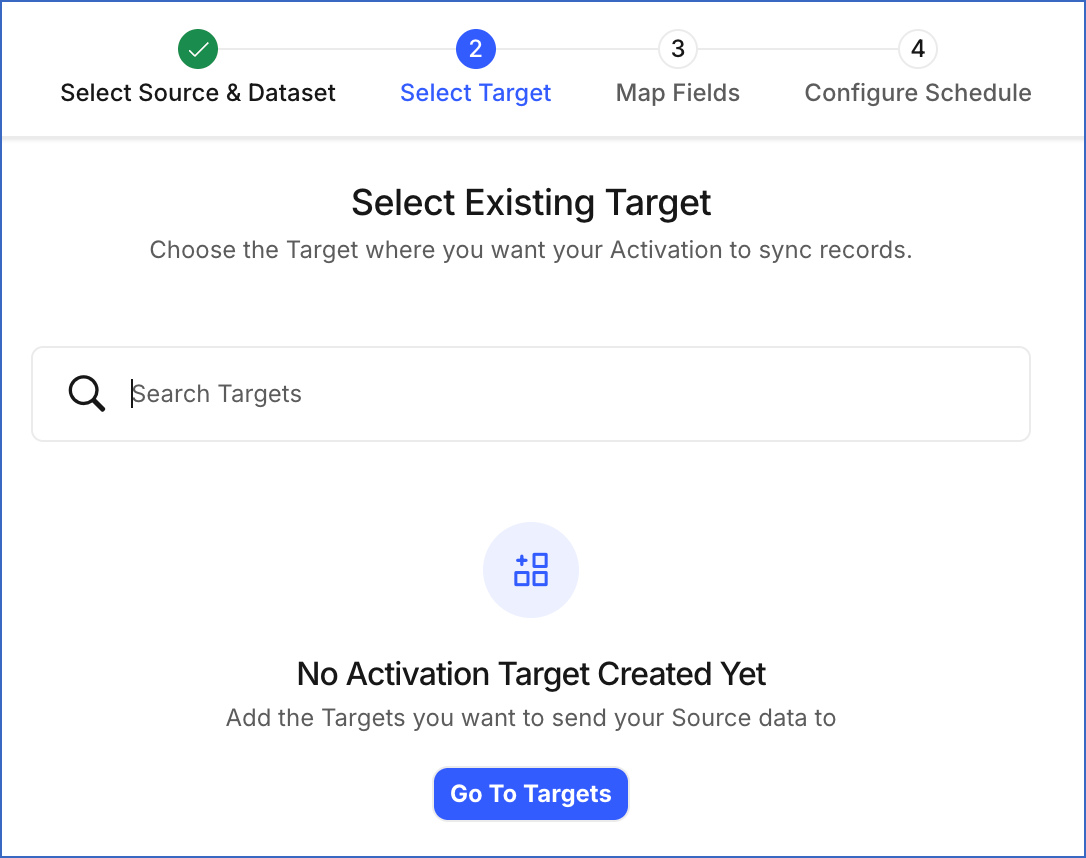
If you have not created a Target yet, the No Activation Target Created Yet message is displayed. Click Go To Targets to open the Targets tab. Refer to the documentation for your respective Target type for the steps to create a Target.
-
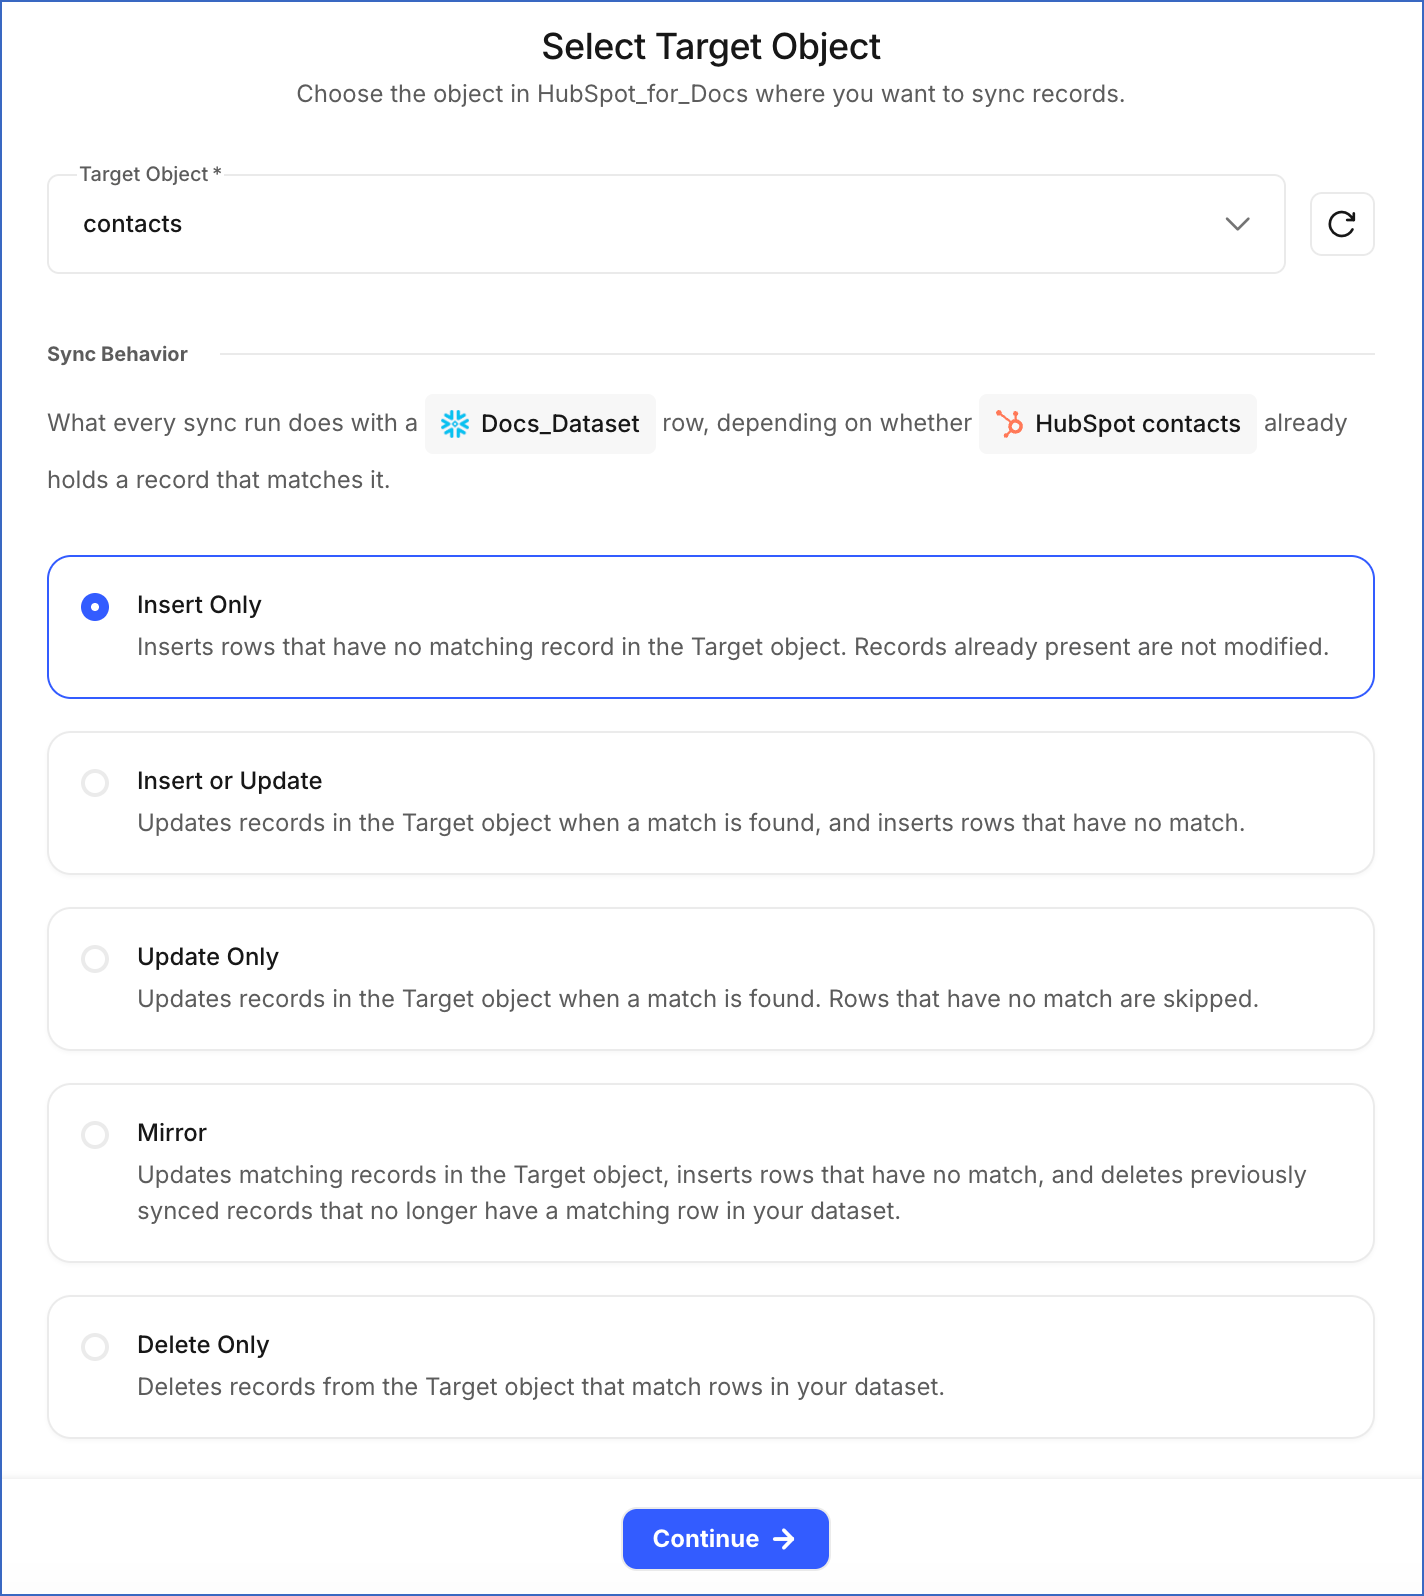
On the Select Target Object page, do the following:
-
Select the Target Object that receives the records. The drop-down lists the objects available in your Target application, including custom objects.
Note: If you add an object in your Target application after opening this page, click the Refresh icon next to the drop-down to read the list again.
-
In the Sync Behavior section, click the behavior you want each sync to apply. The behavior determines whether existing records in the Target object are left unchanged, overwritten, or removed. Activate finds the match using the sync key you set in the next step.
-
Insert Only: Inserts rows that have no matching record in the Target object. Records already present are not modified.
-
Insert or Update: Updates matching records and inserts rows that have no match.
-
Update Only: Updates matching records. Rows with no match are skipped.
-
Mirror: Updates matching records in the Target object, inserts rows that have no match, and deletes previously synced records that no longer have a matching row in your dataset. The Target object is therefore kept aligned with the dataset.
Activate deletes only records that this Activation previously synced and that the dataset no longer returns, so records created by your team or another Activation are not deleted. Confirm that your dataset returns every record you want to keep before using Mirror. A dataset that returns fewer rows than expected, for example when a filter excludes rows you meant to keep, causes the missing records to be deleted. On the first run, an Activation using Mirror inserts and updates records but does not delete any records because there is no previous result to compare against.
-
Delete Only: Deletes records from the Target object that match rows in your dataset. Nothing is inserted or updated. Preview your dataset and confirm it returns only the records you intend to delete before you run the Activation.
The behaviors available depend on the Target object you selected, because each object supports its own set of operations.
Suppose your Source is a Snowflake warehouse, your Target is a HubSpot account, and the Target object is Contacts. Your dataset returns the following two rows, and the Target object already contains a record for the first of them:
Dataset Row Already in the Target Object? abc@example.com Yes xyz@example.com No -
Insert Only: xyz@example.com is created, and the existing record for abc@example.com is untouched even if the values in your Source have changed. Use this when the Target application already has the correct values for existing customers, and you only want to add the ones it does not know about yet.
-
Insert or Update: xyz@example.com is created, and the record for abc@example.com is updated with the current values from your Source. Use this when your Source has the correct values and you want the Target application to reflect them.
-
Update Only: The record for abc@example.com is updated, nothing is created for xyz@example.com, and it is counted in the Skipped column of the run. Use this when you want to enrich the records already in the Target object without adding anyone new to it.
-
Mirror: The record for abc@example.com is updated, xyz@example.com is created, and any record that this Activation previously synced but your dataset no longer returns is deleted. Use this when the Target object must match your dataset exactly.
-
Delete Only: The record for abc@example.com is deleted, and nothing happens for xyz@example.com because the Target object has no matching record. Use this when your dataset lists the records to remove, such as customers who have asked to be deleted.
-
-
-
Click Continue.
After you select the Target, proceed to map the columns that the Activation sends.
Map Fields
An Activation must recognize the records that already exist in the Target object before it can update or delete them. It does this using a sync key, a pair consisting of one dataset column and one Target field that contain the same value. After you set the sync key, you map the remaining dataset columns to Target fields.
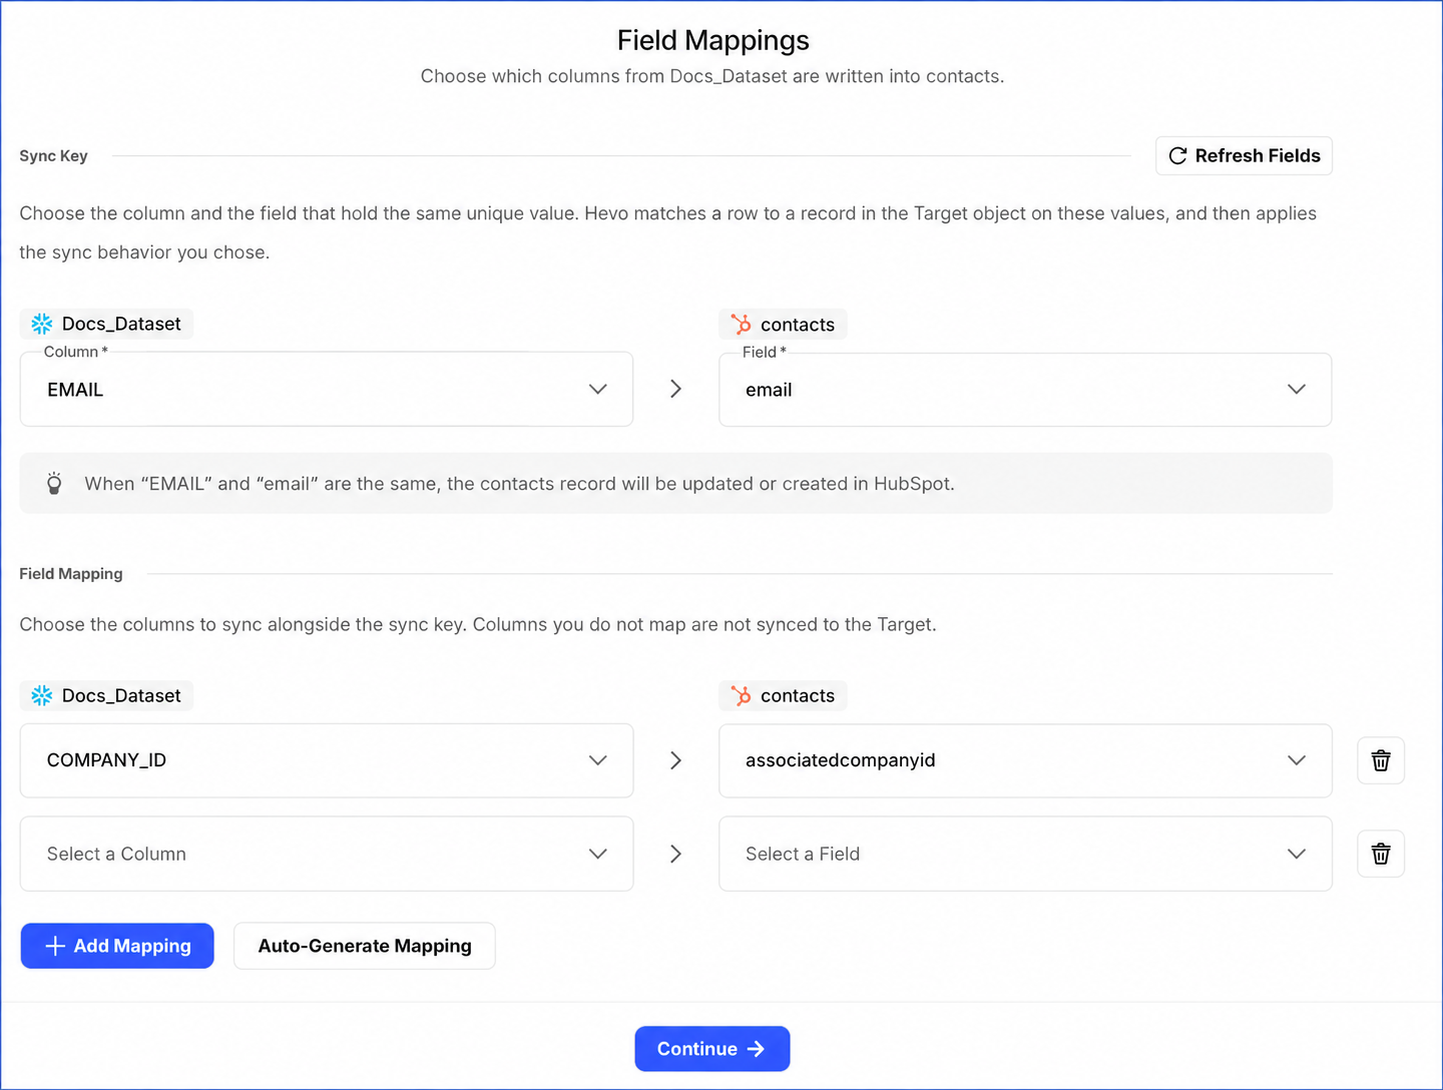
Perform the following steps on the Field Mappings page to set the sync key and the field mapping:
-
In the Sync Key section, specify the following:
-
Column: The column in your dataset that identifies each row, such as an email address or a customer ID.
-
Field: The field in the Target object that contains the same value as the dataset column. Activate uses this value to find the matching record and apply the selected sync behavior. The drop-down shows only fields that the Target application treats as unique, so some fields may not be available. Refer to the documentation for your respective Target type for the fields you can use as the sync key.
For example, you can select the EMAIL column and the email field. For every sync behavior except Insert Only, a row whose sync key has no value is counted as skipped, and rows that share the same sync key value are counted as failed when the behavior inserts or updates records. Such rows are identified before anything is sent to the Target application.
Note: If you add a field in your Target application after opening this page, click Refresh Fields at the top of the Sync Key section to read the field list again.
-
-
In the Field Mapping section, you can do the following:
-
Auto-Generate Mapping: Click to match your dataset columns to the fields with the same names and fill in the mapping. Review every row before you continue.
-
+ Add Mapping: Click to add a mapping yourself, select the Column, and then select the Field.
-
Remove icon: Click to remove a mapping from that row.
Columns you do not map are not synced. For example, you can map FIRST_NAME to first_name and LAST_NAME to last_name, and leave an internal CUSTOMER_ID column unmapped because the Target application does not need it.
A column that you map but that has no value in your dataset is sent as an empty value, which clears that field in the Target application instead of leaving its current value unchanged.
-
-
Click Continue.
After you save the mapping, proceed to set the frequency at which the Activation syncs.
Configure the Schedule
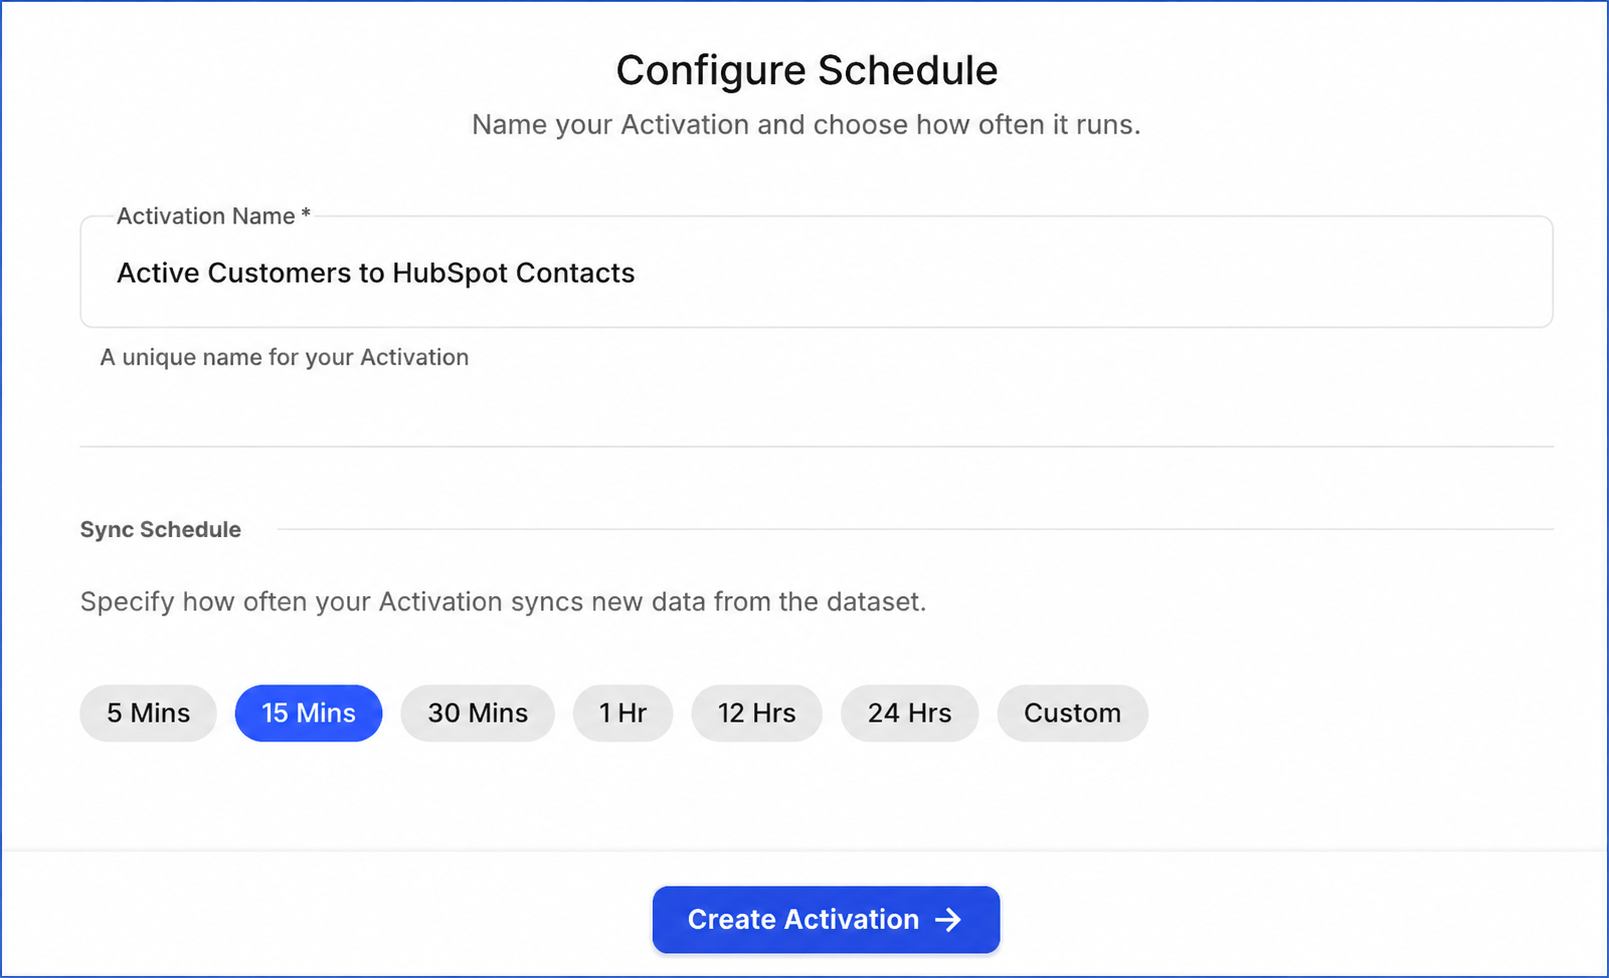
The sync schedule determines the interval at which your Target application receives new data. A frequent schedule keeps the records close to your Source, and a longer interval is enough when your data changes only once a day. This step also names the Activation, and that name identifies it in the Activations List View and in your run history.
Perform the following steps on the Configure Schedule page to set the sync frequency and to name the Activation:
-
Specify the following:
-
Activation Name: A unique name for the Activation. Choose a name that identifies the data being sent and the Target object receiving it, such as Active Customers to HubSpot Contacts.
-
Sync Schedule: The frequency at which the Activation syncs. The available options are 5 Mins, 15 Mins, 30 Mins, 1 Hr, 12 Hrs, 24 Hrs, and Custom. A frequent schedule on a large dataset sends more API requests to your Target application, and every application limits the number of API requests it accepts.
The predefined intervals are aligned to fixed clock times and not to the time at which you create the Activation. For example, a 24 Hrs schedule runs at midnight and a 1 Hr schedule runs at the start of every hour.
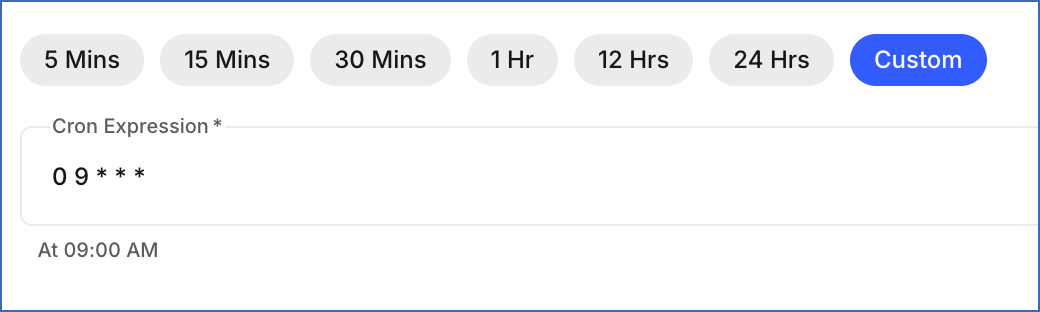
If you select Custom, specify the Cron Expression. The cron expression must contain five fields, with each separated by a space to indicate the minute, hour, day of the month, month, and day of the week, respectively. The expression is evaluated to the minute, so you cannot schedule a run at a specific second. Read Understanding Cron Schedules to learn to write one.
Note: Activate evaluates the predefined intervals and the cron expressions in UTC.
Hevo displays a plain-language description of the schedule you specify, so you can confirm the expression is correct before saving.
-
-
Click Create Activation.
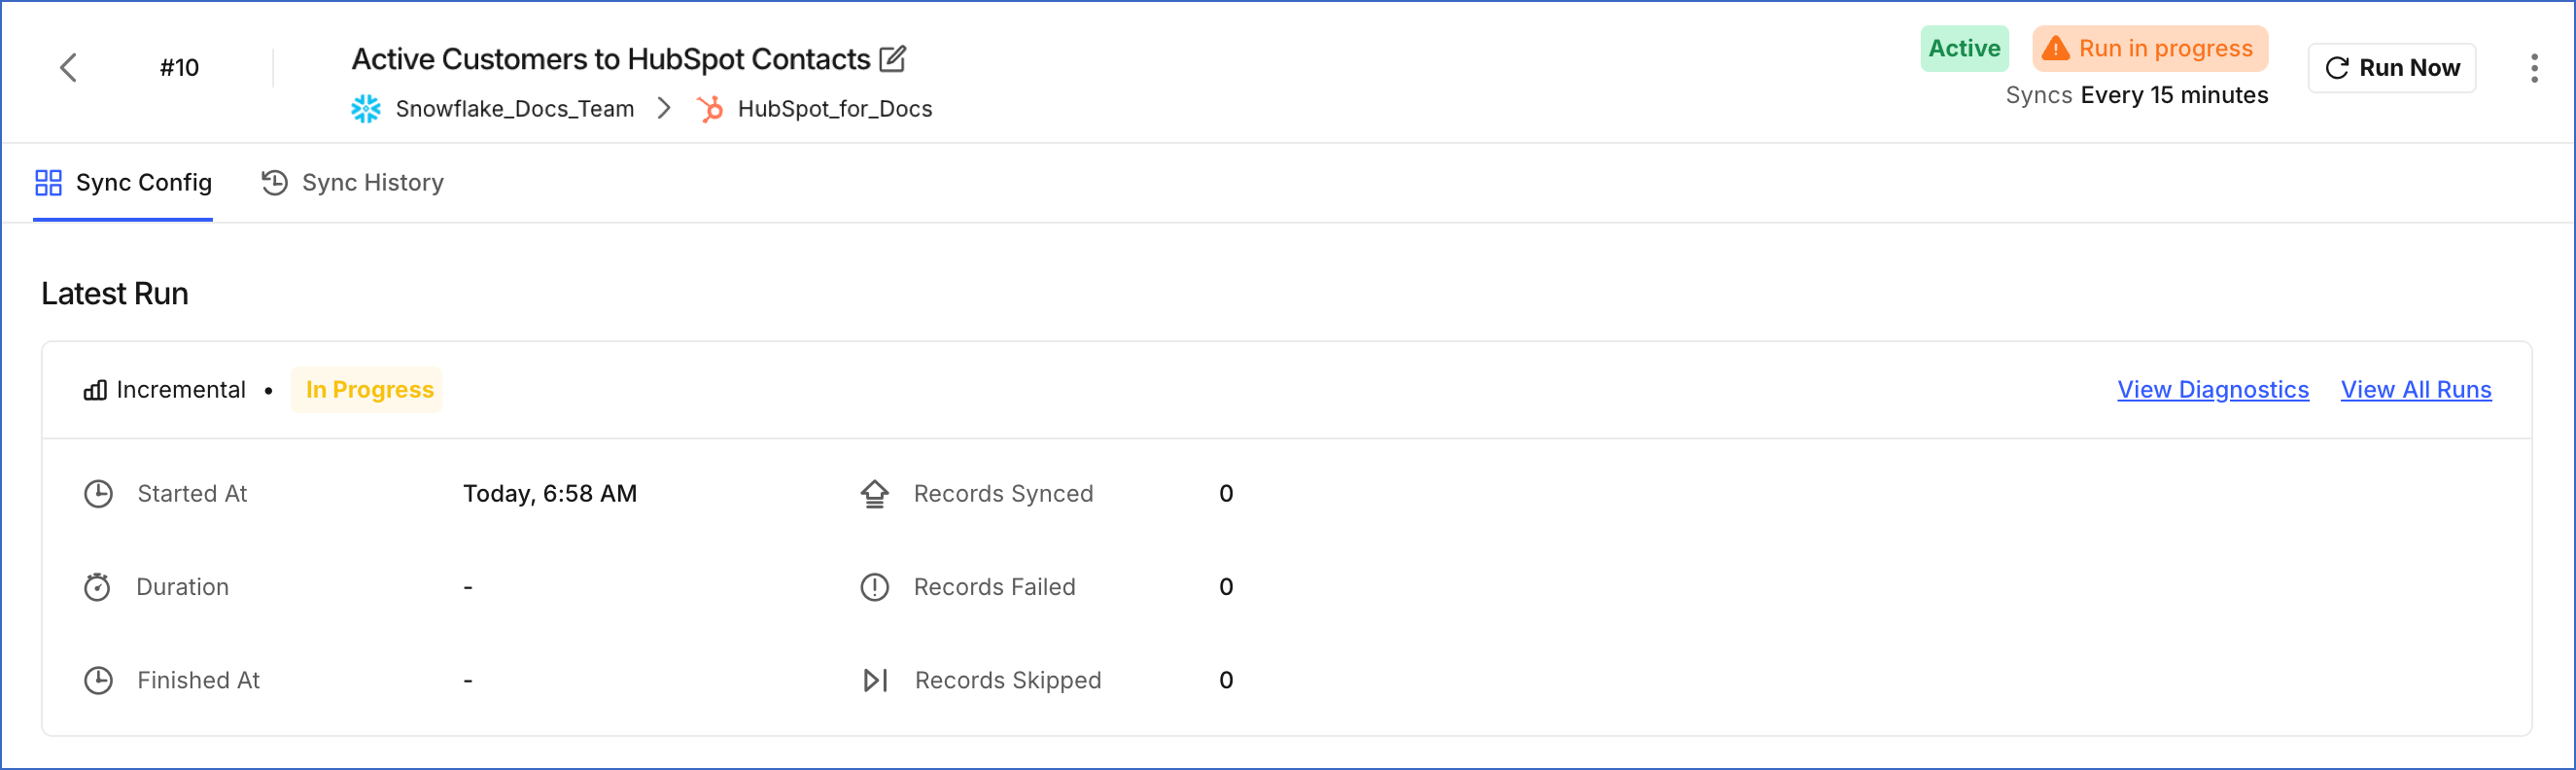
The Activation is created and opens in the Activations Detailed View with the Active status. The first sync starts immediately and does not wait for the first scheduled interval. The Latest Run panel displays the progress of this run. Subsequent runs follow the schedule you configured.
Revision History
Refer to the following table for the list of key updates made to this page:
| Date | Release | Description of Change |
|---|---|---|
| Sep-22-2026 | NA | New document. |